Page is loading ...

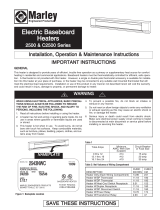
MODEL NO.
PH4AB
Portable Unit Heater
WARNING
Installation & Maintenance Instructions
Dear Owner,
Congratulations! Thank you for purchasing this new heater manufactured by Marley Engineered
Products. You have made a wise investment selecting the highest quality product in the heating indus-
try. Please carefully read the installation and maintenance directions shown in this manual. You should
enjoy years of efficient heating comfort with this product from Marley Engineered Products... the indus-
try’s leader in design, manufacturing, quality and service.
... The Employees of
Marley Engineered Products
Read Carefully - These instructions contain vital infor-
mation for the proper installation, use and efficient opera-
tion of the heater. Carefully read these instructions before
installation, operation, or cleaning of the heater. Failure to
adhere to the instructions could result in fire, electric
shock, serious personal injury, death or property damage.
Save these instructions and review frequently for continu-
ing safe operation and instruction future users.
1. Connect to properly grounded outlets only.
2. Check heater voltage and amperage on back of heater to
make sure it agrees with the electric service supplied.
3. Ground fault circuit protection is required if heater is used in
damp areas such as basements or garages.
This is not suit- able for use in wet or very humid
locations.
4. Do not use outdoors.
5. Never locate heater where it may fall into a bathtub or other
water container.
6. Do not insert or allow foreign objects to enter any ventilation
or exhaust opening as this may cause an electric shock, fire,
or damage the heater.
7. To prevent a possible fire, do not block air intakes or exhaust
in any manner. Do not use soft surfaces, like a bed, where
openings may become blocked. Clean as often as neces-
sary to prevent dust from clogging the grilles or element fins.
Keep all electrical cords, drapes, paper, plastics and other
combustibles away from heater.
8. Do not run cord under carpeting. Do not cover cord with
throw rugs, runners, etc. To prevent entanglement or damage,
route cord away from high traffic areas.
9. A heater has hot and arcing or sparking parts inside. Do not
use it in areas where gasoline, paint, or flammable liquids are
repaired by a reputable repair service.
10. If this heater or its power cord become damaged or malfunc-
tion in any way, unplug heater, discontinue use, and have
unit repaired by a reputable repair service.
11. Do not operate heater without stand.
12. Do not use an extension cord with this heater. Do not cut off
plug and wire heater directly.
13. When heater is to be wall or ceiling mounted, the anchoring
provisions must be of sufficient strength to support the total
weight of the heater plus the weight of the mounting provi-
sions. Failure to properly secure the supporting members of
the building structure could allow the heater to fall.
!
SAVE THESE INSTRUCTIONS
1
FILE #E21609

GENERAL
Prior to operating heating, make sure the electrical outlet is of the configu-
ration and capacity appropriate for the heater.
When heater is wall or ceiling mounting, provisions must be made to bun-
dle or otherwise prevent excess power cord from draping loose.
In workshops, locate heater away from sources of wood dust.
FLOOR APPLICATION
The heater, as received, is set up for floor mounting. Place the heater on
floor or other flat surface and insert the plug into the proper wall outlet.
The heater can be adjusted to redirect the airstream. To do this, simply
loosen the knob on either side of the heater, then pivot heater to desired
position and re-tighten both knobs.
WALL MOUNT
SEE WARNING NO. 13.
This heater may be mounted on any wall that will support the weight of the
heater. First remove the mounting stand from the heater, then remove four
rubber grommets from stand. Secure stand to structural members of wall
with four 1/4” dia. X 1-1/2” long lag bolts (not provided). In masonry walls
use metal expansion shields or toggle bolts. Never use bolts smaller 1/4”
diameter.
Replace the heater in the stand and tighten knobs to lock in place. Two
large rubber washers go between heater and stand, one on either side.
REMEMBER: The electrical outlet must be within reach of the six foot
cord. Be sure to provide enough clearance to pivot heater and reach
adjustment knobs.
CEILING MOUNT
This heater may be mounted to any ceiling that will support the weight of
the heater.
First remove the mounting stand from the heater, then remove four rubber
grommets from stand. Secure stand to structural members of ceiling with
four 1/4” diameter bolts (not provided). In wood joist use 1-1/2” long lag
bolts. In steel beams use machine bolts secured with nuts and lockwash-
ers. Never use bolts smaller than 1/4” diameter.
Replace the heater in the stand and tighten knobs to lock in place. Two
large rubberwashers go between heater and stand, one on either side.
REMEMBER: The electrical outlet must be within reach of the six foot
cord. Be sure to provide enough clearance to pivot heater and reach
adjustment knobs.
HEATER OPERATION
To operate the heater, first select either high or low position on the heat
selector switch, then turn the thermostat knob as far as it will go in the
clockwise direction. The indicator light will come on and remain on as long
as the heater is in the operating mode. when the room temperature reach-
es the desired level, slowly turn the thermostat knob counterclockwise until
the thermostat clicks. The heater off, turn thermostat knob as far as it will
go in the counterclockwise direction until the indicator light is off.
The fan selector switch allows continuous or cycling fan operation by
selecting either the “ON” or “Auto” position, respectively.
CLEANING AND STORAGE
Turn thermostat off, then remove plug from electrical outlet before cleaning
heater. Use a soft cloth for dusting. For cleaning use only a damp rag and
nonabrasive dish detergent. Do not use abrasive or chemical cleaners as
these may harm the finish.
If heater is used in a very dusty location, use a vacuum cleaner dust brush
to remove dust and other foreign material from the grilles.
Always unplug cord and wrap around heater when not in use. Move floor
mounted heaters to a safe location for storage.
SERVICE
This heater does not require any routine maintenance other than occa-
sional cleaning to prevent clogging of intake grille opening. To clean air
intake grille, use vacuum with brush attachment or high pressure air. The
motor is permanently lubricated.
Do not operate the heater with a damaged cord or plug or if the heater mal-
functions or has been damaged in any manner. Return heater to autho-
rized service facility for examination, electrical, or mechanical adjustment,
or repair.
Call the toll-free number listed for assistance in locating the Marley autho-
rized service center in your area.
2
TO PREVENT HEATER FROM POSSIBLY FALLING, DO NOT USE
KEYHOLE SLOTS FOR CEILING MOUNT APPLICATION. SEE ALSO
WARNING NO. 13.
WARNING
!
BE CAREFUL NOT TO DIRECT THE AIRSTREAM AT DRAPERIES,
FURNITURE, OR OTHER OBJECTS THAT COULD BE DAMAGED BY
HEAT. DO NOT USE HEATER ON FLOOR WITHOUT STAND IN
PLACE. DO NOT SUE THE HEATER WHERE A SMALL CHILD MAY
FALL OVER THE HEATER. DO NOT PLACE THE HEATER WHERE
THE POWER CORD MAY BE WALKED ON, TRIPPED OVER, OR OTH-
ERWISE SUBJECTED TO HARD USAGE.
WARNING
!
ELEMENTS FRONT
MIDDLE
R
EAR
H
EAT SW.
H
I
L
OW
1
2
3
2
3
1
AUTO
FAN SW.
T
ERMINAL BLOCK
6
4
I
NDICATOR LIGHT
L1
OFF
CYL
L2
THERMOSTAT
MANUAL RESET
THERMAL UNIT
M
OTOR
ON
KEYHOLE
SLOT
MOUNTING
HOLES
ARE 16” O.C.
USE
KEYHOLES
FOR WALL
MOUNTING
C
IRCULAR
HOLE
USE CIRCULAR
HOLES FOR
CEILING
MOUNTING.
DO NOT USE
KEYHOLES.

TO RESET SAFETY THERMAL LIMIT CONTROL
Your heater is equipped with a manual reset safety thermal limit control
that will automatically turn the heater off to prevent a fire if the heater over-
heats. This control is located on front of the heater just above the thermo-
stat and is marked “PUSH TO RESET”. To reset, allow the heater to cool
then simply push the red button in until it snaps. The heater should imme-
diately return to normal operation.
OPERATION OF THE SAFETY THERMAL LIMIT CONTROL INDI-
CATES THE HEATER HAS BEEN SUBJECTED TO SOME ABNORMAL
CONDITION. IT IS RECOMMENDED THAT THE HEATER BE
CHECKED BY A REPUTABLE ELECTRICIAN OR REPAIR SERVICE
TO INSURE THE HEATER HAS NOT BEN DAMAGED.
CAUTION
!
LIMITED WARRANTY
All products manufactured by Marley Engineered Products are warranted against defects in workmanship and materials for one year
from date of installation, except heating elements which are warranted against defects in workmanship and materials for five years
from date of installation. This warranty does not apply to damage from accident, misuse, or alteration; nor where the connected volt-
age is more than 5% above the nameplate voltage; nor to equipment improperly installed or wired or maintained in violation of the prod-
uct’s installation instructions. All claims for warranty work must be accompanied by proof of the date of installation.
The customer shall be responsible for all costs incurred in the removal or reinstallation of products, including labor costs, and shipping
costs incurred to return products to Marley Engineered Products Service Center.Within the limitations of this warranty, inoperative units
should be returned to the nearest Marley authorized service center or the Marley Engineered Products Service Center, and we will
repair or replace, at our option, at no charge to you with return freight paid by Marley. It is agreed that such repair or replacement is
the exclusive remedy available from Marley Engineered Products.
THE ABOVE WARRANTIES ARE IN LIEU OF ALL OTHER WARRANTIES EXPRESSED OR IMPLIED. AND ALL IMPLIED WAR-
RANTIES OF MERCHANTABILITY AND FITNESS FOR A PARTICULAR PURPOSE WHICH EXCEED THE AFORESAID
EXPRESSED WARRANTIES ARE HEREBY DISCLAIMED AND EXCLUDED FROM THIS AGREEMENT. MARLEY ENGINEERED
PRODUCTS SHALL NOT BE LIABLE FOR CONSEQUENTIAL DAMAGES ARISING WITH RESPECT TO THE PRODUCT,
WHETHER BASED UPON NEGLIGENCE, TORT, STRICT LIABILITY, OR CONTRACT.
Some states do not allow the exclusion or limitation of incidental or consequential damages, so the above exclusion or limitation may
not apply to you. This warranty gives you specific legal rights, and you may also have other rights which vary from state to state.
For the address of your nearest authorized service center, contact Marley Engineered Products in Bennettsville, SC, at 1-800-642-
4328. Merchandise returned to the factory must be accompanied by a return authorization and service identification tag, both available
from Marley Engineered Products. When requesting return authorization, include all catalog numbers shown on the products.
ECR 38011
5200-2195-004 10/08
3
MODEL NO.
PH4AB D
ATE CODE
0207
PORTABLE HEATER
VOLTS AC WATTS AMPS
60 HZ HI LO HI LO
2
40 4000 2660 16.7 11.1
2
20 3360 2240 15.3 10.2
2
08 3000 2000 14.4 9.6
CAUTION: UNPLUG BEFORE SERVICING.
CAUTION: DO NOT OPERATE WITHOUT STAND.
ATTENTION: NE FAITES PAS FONCTIONNER
ATTENTION: LE RADIATEUR SANS SOCLE.
MARLEY ENGINEERED PRODUCTS
BENNETTSVILLE, SC 29512 4104-2099-002
2
F68 LISTED
M
OVABLE HEATER
NAMEPLATE
HOW TO OBTAIN WARRANTY SERVICE AND
WARRANTY PARTS PLUS GENERAL INFORMATION
1. Warranty Service or Parts 1-800-642-4328
2. Purchase Replacement Parts 1-800-654-3545
3. General Product Information www.marleymep.com
Note: When obtaining service always have the following:
1. Model number of the product
2. Date of manufacture
3. Part number or description
470 Beauty Spot Rd. East
Bennettsville, SC 29512 USA
/