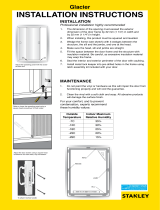
INSTALLATION INSTRUCTIONS
for Vinyl Windows with Integral Nailing Fin (JII001)
Newer construction methods have led to an increase in air and water
tightness in buildings. This frequently leads to negative air pressure
inside the home, which can draw water through very small openings.
Our installation method integrates the window with the weather
barrier of the structure (typically building wrap).
Thank you for selecting JELD-WEN products. Attached are JELD-WEN’s
recommended installation instructions for Vinyl windows with an integral
nailing n. While the use of these installation instructions is recommended,
installation in strict compliance with AAMA specications (2400-02) is an
alternate method of window installation. Use of the AAMA specications
(2400-02) will not affect application of the JELD-WEN limited warranty.
Not all window types may be installed into every wall condition in all
areas. Consult your local building code official for applicable building
codes and regulations. Local building code requirements supersede
recommended installation instructions.
Please Note! Installations where the sill is higher than 35 feet above
ground level, or any product installation into a wall condition not
specifically addressed in these instructions, must be designed by an
architect or structural engineer. Failure to install windows into square,
level, and plumb openings could result in denial of warranty claims for
operational or performance problems.
Note to Installer: Provide a copy of these instructions to the building
owner. By installing this product, you acknowledge the terms and
conditions of the limited product warranty as part of the terms of the
sale.
IMPORTANT INFORMATION & GLOSSARY
ROUGH OPENINGS
GLOSSARY
Buck
A wood framework attached to the masonry inside a window or patio
door rough opening.
Mull Joint
The joint where two or more window units are structurally joined
together.
Mulled Unit
Two or more window units structurally joined together.
Precast Sill
A pre-formed concrete block placed in the sill of a masonry/block wall to
support a window.
Shiplap
The layering method in which each layer overlaps the layer below it so
that water runs down the outside.
Weep Hole (weep channel)
The visible exit or entry part of a water drainage system used to drain
water out of a window.
This installation guide specically addresses masonry/block wall,
sheathed wall and open-stud construction.
MASONRY/BLOCK WALL CONSTRUCTION
This installation assumes that
a framework of studs (often
called a buck) has already been
properly fastened and sealed to
the concrete/masonry wall by a
building professional.
FULLY SHEATHED WALL CONSTRUCTION
The wall framing is covered by sheathing. Windows will be mounted
ush against the sheathing. This installation assumes building wrap is
properly installed prior to installation.
Estimated Install
Time for New
Construction
First Time: 4.0 hr.
Experienced: 2.5 hr.
Professional: 1.5 hr.
Buck
Sheathed Wall
OPEN-STUD CONSTRUCTION
The wall framing must be
covered by backing support
before the window can be
installed. The window will be
mounted with the nailing n/
exterior trim ush against the
applied backing support.
This backing support should be a
non water-degradable, thin (max.
1/8" thick) sheet material such
as vinyl sheeting. Completely
surround the rough opening with
the backing support. Backing support must be applied before building
wrap.
Trimmer
studs
Header
Sheathing
King
stud