KiSS KiSS DP-558 User manual

Category
DVD players
Type
User manual

This manual is also suitable for

www.kiss-technology.com
italiano español nederlands dansk deutsch français english
KiSS DP-558 Digital Video Recorder
Online Electronic Program Guide, Remote EPG, TimeShift, Network,
Online Services, Hard Disk, DVD/DivX/Nero Digital Player
Contents
1 What's in the box 7
2 Overview 8
3 How to connect my player 9
4 PC to DVD connection 10
5 Quick setup 12
6 Television function 13
7 Advanced setup 14
8 Video Recorder Functions 16
9 Hard Disk and FTP 18
10 Playing Media 19
11 KiSS PC-Link 20
12 KiSS Online 21
13 KiSS Remote EPG 24
14 Advanced Functions 26
15 Updating the player 27
16 Support 28
17 Contacting KiSS 29
18 General Public License GNU 174
To enjoy all the new features of your new player, always make sure it has the latest firmware
installed. By updating your player, new features not described in this manual can be added
and some features described in this manual can be altered or removed. The number of the
current firmware can be obtained by pressing the setup button on the remote. It is located
on the top left corner of the screen. The latest firmware is available from our website: www.
kiss-technology.com/software. Refer to the "Updating the player" section of this manual or the
website's online guide for in-depth guidance.
THE LATEST VERSION OF THIS MANUAL IS AVAILABLE FROM WWW.KISS-
TECHNOLOGY.COM IN THE SUPPORT SECTION AT THE FOLLOWING ADDRESS:
WWW.KISS-TECHNOLOGY.COM/MANUALS
Congratulations on your KiSS DP-558
english
7
KiSS DP-558
KiSS PC-Link Software CD
Power cable
SCART Cable Provided in Europe only
Batteries for the remote
Composite Video
S-Video Not provided in Europe
Remote Control
Antenna Cable
Audio cable
1
What's in the box
The following elements are included in the box.
8
4
3
2
1
Display
1 Ethernet
2 TV Antenna in/out
3 SCART in/out
4 Video Output
5 S-Video Output
6 Component Video Output
7 Analog Audio Output
8 Coaxial Audio Output
9 Optical Audio Output
10 Video Input
11 S-Video Input
12 Component Video Input
13 Analog Audio Input
14 AC Input
Back panel
1
2
3
11
4
13
7
15
9
12
6
14
8
16
10
5
1
2
3 4
5
6
9
7
11
12
13
14
15
16
18
17
19
20
21
22
10
8
23
24
25
26 27
28
9
8
7
6
4
3
2
1
12
13
14
5
11
10
1 Indicates the selection of the disc being played
2 Indicates the number or chapter being shown/played
3 Indicates the current function, such as play or stop
4 Indicates the type of media being played
1 On/Off
2 CD Tray
3 Open/Close
4 Play/Pause
5 Stop
6 Previous Chapter
7 Next Chapter
8 Rewind
9 Fast Forward
10 Menu
Option on the Setup Menu
11 Enter
12 Navigate Left
13 Navigate Right
14 Navigate Up
15 Navigate Down
16 Close
Front panel
Remote control
1 Standby
2 Open/Close
3 Record
4 Delete
5 Back
6 Up Arrow
7 Left Arrow
8 Play/Pause/Enter
9 Right Arrow
10 Down Arrow
11 Previous Chapter
12 Stop
13 Next Chapter
14 Menu
15 List
16 Setup
17 Mark
18 Audio
19 Title Menu
20 Subtitle
21 Input
22 TV
23 HDD
24 Online
25 Zoom
26 Decrease Volume
27 Increase Volume
28 Store
2
Overview
9
How to connect my player
3
- Extra information is also available from www.kiss-technology.com
KiSS DP-558 Amplifier
3
2
1
Connecting your KiSS DP-558 DVD player to your amplifier can be done using any of the cables below.
(Only one cable can be connected at a time)
Audio connection
1 Analog Stereo
2 Coaxial Output (the cable is an extra accessory)
3 Optical Output (the cable is an extra accessory)
KiSS DP-558 TV
1
2
3
45
Connecting your KiSS DP-558 DVD player to your TV can be done using any of the cables below.
(Only one cable can be connected at a time)
Video connection
1 RGB via SCART
2 S-Video (the cable is an extra accessory)
3 Composite via SCART
4 Composite Video
5 Component SCART (the cable is an extra accessory)
Connecting your KiSS DP-558 DVD player to your TV Antenna
Antenna connection
TV
1
2
KiSS DP-558
1 Antenna In (Going to the roof Antenna)
2 Antenna Out (Going to the player, use provided cable)
We recommend connecting your player to your television using the SCART cable that comes with your player. The SCART cable is the biggest cable with the large connectors in the ends.
Connect one end of the SCART cable to “SCART OUT” on your player. Connect the other end to the SCART input on your television. Then connect the antenna cable coming from your roof
or the wall with “TV IN” on the player. Connect “TV OUT” with the antenna input on your television using the provided cable. Connect the power cable to the power connector.
If your television does not have a SCART connector, you will have to connect both audio and video with separate cables.
For connecting video, you have the following options:
• VIDEO (composite video)
• S-VIDEO (or “super-VHS”, provides a better quality than VIDEO)
• COMPONENT VIDEO (provides an even better quality than the above)
After connecting the video, you will have to connect the audio. You can connect the audio to either the television or your HiFi set. The DP-558 outputs both analog and digital audio. Analog
audio is the most common format, and is supported by most devices. Digital audio is more common on high-end equipment and surround amplifiers.
For connecting the audio, you have the following options:
• Connect ANALOG AUDIO OUT to your television using phono (RCA) jacks
• Connect ANALOG AUDIO OUT to your HiFi stereo using phono (RCA) jacks
• Connect COAXIAL or OPTICAL digital audio to your HiFi stereo
10
KiSS DP-558
PC
Crossed cable
Internet
KiSS DP-558
Switch
PC
Internet
KiSS DP-558
PC
Router
KiSS DP-558
Switch
Router
PC
Connection using a router
Equipment required
A router, with a built-in switch or a separate switch/hub.
2 or 3 straight Ethernet cables.
A Windows PC with an Ethernet connection.
The KiSS PC-link program.
Step-by-Step Guide
1 Connect the player to the router’s built-in switch or an external switch/hub which is connected to the router.
2 Connect the PC to the router’s built-in switch or an external switch which is connected to the router.
3 Check that your Internet connection is working. If any problems occur, contact your ISP (Internet Service provider).
4 Install KiSS PC-Link on the PC and select the content to be shared with your player.
5 Start the player, select SETUP and then select ETHERNET - TCP/IP. Check that DHCP Client is ENABLED. Press SETUP to exit this menu.
6 Press MENU and go to PC-LINK.
7 Press SEARCH FOR PC-LINK HOST, the name of the server should appear on your screen, press ENTER to select it.
8 Choose between Audio, Video or Picture. The player will display the list of fi les available from your PC.
9 If you have any problems please check the FAQ on our web site for any questions If that doesn’t help then contact the KiSS Hotline
Your player should now be connected
4
PC to DVD connection
Internet
Internet
Network with a PC using Internet connection sharing
Equipment required
Switch/hub and 2 straight cables or a crossed cable.
A windows PC with an Ethernet connection.
The KiSS PC-link program.
Step-by-Step Guide
1 Connect the player to the PC with a crossed cable or to a switch/hub connected to the PC.
2 Connect the PC to the Internet (LAN/Modem/ADSL).
3 Check that your Internet connection is working. If any problems occur, contact your ISP (Internet Service provider)
4 On the PC select Network Connection in the Control Panel. Open Properties for the network connection that is connected to the Internet.
5 Select Advanced where you enable Internet connection sharing.
6 Install KiSS PC-Link on the PC and select the content to be shared with your player.
7 Start the player, select SETUP and then select ETHERNET - TCP/IP. Check that DHCP Client is ENABLED. Press SETUP to exit this menu.
8 Press MENU and go to PC-LINK.
9 Press SEARCH FOR PC-LINK HOST, the name of the server should appear on your screen, press ENTER to select it.
10 Choose between Audio, Video or Picture. The player will display the list of fi les available from your PC.
11 If you have any problems, please check the FAQ on our web site for any questions. And if that doesn’t help then contact the KiSS Hotline
Your player should now be connected
11
Possible errors.
- Cable problem, check that there is light in all the ports of the switch/hub
- There is a fi rewall installed on the PC which blocks the ports used by KiSS PC-link (port 8000 must be open)
- The player and the PC are not on the same Subnet (problem with playing video)
- Your PC has been assigned a new IP address from the DHCP server. It may differ from the one entered in the player. (Using a static IP on the PC will counter this)
- KiSS PC-Link has to be running for the player to access the data
KiSS DP-558
PC
Switch
Network using a direct Internet connection
Equipment required
Switch/hub and 2 straight cables or a crossed cable.
A windows PC with an Ethernet connection.
The KiSS PC-link program.
Step-by-Step Guide
1 With a direct Internet connection, you can only access the online features such as WebRadio. KiSS PC-Link can NOT be enabled.
2 Start the player, select SETUP and then select ETHERNET - TCP/IP, check that DHCP Client is ENABLED.
3 Press SETUP to exit this menu.
4 Press ONLINE on your remote to select the service you wish to use.
5 If you have any problems please check the FAQ on our web site for any questions, and if that doesn’t help then contact the KiSS Hotline.
Your player should now be connected
KiSS DP-558
PC
Switch
KiSS DP-558
Crossed cable
PC
Network using a direct connection to the PC
Equipment required
Switch/hub and 2 straight cables or a crossed cable.
A windows PC with an Ethernet connection.
The KiSS PC-link program.
Step-by-Step Guide
1 Connect the player to the PC with a crossed cable or to a switch connected to the PC.
2 On the PC select Network Connection in the Control Panel.
Open Properties for the network connection that is connected to the Player.
3 Select Properties for the Internet Protocol (TCP/IP).
4 Select “Use the following IP address” and enter the IP address below:
IP address 192.168.0.1
Subnet mask 255.255.255.0
5 Select SETUP on the player, then ETHERNET - TCP/IP and set the DHCP client to DISABLED
6 Select “ENTER THE TCP/IP SETTINGS MANUALLY”
7 Then enter the following addresses:
IP ADDRESS: 192.168.000.002
NETWORK MASK: 255.255.255.000
DEFAULT GATEWAY: 192.168.000.001
DNS SERVER: 192.168.000.001
8 Press SETUP to exit this menu Then MENU and go to PC-LINK.
9 Press SEARCH FOR PC-LINK HOST, the name of the server should appear on your screen, press ENTER to select it.
10 Choose between Audio, Video or Picture. The player will display the list of fi les available from your PC.
11 If you have any problems, please check the FAQ on our web site for any questions. If that doesn’t help then contact the KiSS Hotline.
Your player should now be connected.
Internet
Internet
KiSS DP-558
Crossed cable
12
If your DVD Player is correctly connected, the language selection menu will appear.
Select your preferred language
1. Select Language
5
Quick setup
- If this menu does not appear when you start the DVD Player, re-check the cable connections.
- You can always go back and start again if you happen to do something wrong, Just press on the SETUP button of your remote, go to MISC. SETTINGS and select QUICK SETUP.
From a list, choose the part of the world you live in. Then select your country.
2. Select Region
3. Video Setup
4. Display Format
Select between standard TV type (4:3) or wide screen TV type (16:9).
Specify how your DVD Player is connected to your TV or monitor.
Deutsch
English
Français
Dansk
Svenska
Suomi
Norsk
Nederlands
Español
Italiano
Mon 01 Nov 2004 12:00
Quick Set-Up
Select Language
Please select your preferred language
Western Europe
Northern Europe
Southern Europe
Eastern Europe
Middle East
Southern Asia
Central Asia
Central America and Caribbean
Oceania
North America
Mon 01 Nov 2004 12:00
Quick Set-Up
Select Region
Please select your region
Mon 01 Nov 2004 12:00
Quick Set-Up
Video Setup
How is your player connected to your display?
Composite
RGB SCART
S-Video
Component SCART
Mon 01 Nov 2004 12:00
Quick Set-Up
Display Format
What is the format of your TV screen?
16:9 (widescreen) 4:3 (conventional)
13
- None of the recording functions will work if the Player is not correctly tuned
6. Format Hard Disk
This last screen will ask you to choose if you wish to tune your TV Channels automatically. Pressing OK will start autoscan,
DONE will exit the Quick Setup.
7. Tuning TV Channels
You will be asked to format (erase) your Hard Disc. KiSS advise you to do this the first time you connect your player. Remember
that formatting the Hard Disk will delete all content held on it. Formatting takes a few minutes, when it is finished, press
DONE.
5. Audio Setup
Select which audio output is used on your DVD Player. The default Audio selection should be stereo unless your player is
connected to a digital amplifi er.
Mon 01 Nov 2004 12:00
Quick Set-Up
Audio Setup
Please select your audio configuration.
Analogue/PCM Stereo Digital Surround
Mon 01 Nov 2004 12:00
Quick Set-Up
Format Hard Disk
Format and prepare the hard disk
The hard disk will now be formatted and prepared for use.
This will take approximately 2-3 minutes.
OK
Cancel
Format Hard Disk
Caution: You are about to
permanently erase your
hard disk. Are you sure?
!
Mon 01 Nov 2004 12:00
Stop
Searching for TV Channels...
65% Done
Channel 85
Found 14 channel(s), 14 new
6
Television Function
To use plainly the DP-558 is is important that you watch television through your DP-558
Press TV on your remote to make sure that you are watching television through the DP-558. You can scroll the Channels by
pressing the TOP and BOTTOM ARROWS of your remote. If you are connected to Broadband Internet, you can "map" (register) the
channels. Press LIST to view the on-screen options, when you see CONFIGURE EPG ID, select by pressing ENTER. Choose your
country, and the channel you are mapping. Repeat this operation for all your channels. Now the channel name appear on the top
left corner of your screen. By doing this, you also have added your channels to the TV Guide's (EPG) favorites. This will be helpful
for future scheduled recording via EPG. See KiSS Online chapter for more information.
Watching Television
Match channel - Select Country
Australia
New Zealand
Luxembourg
Latvia
Ireland
Hungary
Germany
Finland
Estonia
Czech Republic
Belgium
Austria
Norway
Netherlands
Lithuania
Italy
Iceland
Greenland
France
Faroe Island
Denmark
Croatia
Enter name manually
d c Prev/Next page
h g W Select item
f e Move item
Page 1/2
Back
14
7
Advanced setup
Accessing the advanced setup menu by pressing SETUP on the remote control will enable the user to edit and modify the settings of the DVD Player as follows:
This menu enables you to specify the country in which this player is being used. You can also edit the time zone where you are
situated. This will help the DVD Player select the correct TV system and language. The Player's menu language as well as the
different default DVD languages can be set in this section.
Regional settings
TV tuner
Scan and store all TV Channels automatically, select TV system, manage TV channels and erase all TV channels. See next
chapter to learn how to manage your television channels.
Audio output
This menu enables you to specify the audio connection used.
Video output
This section enables you to configure video output. Your Television display type can be modified as well as the TV system or
the choice of video output.
Regional Settings
Select the country in which you are using this DP-558
Denmark
Time zone
CET (GMT+1)
113 Hrs free
Mon 01 Nov 2004 12:00
Firmware version 1.1.0
Set-up Menu
Video Output
How is your DP-558 connected to your display device?
113 Hrs free
Mon 01 Nov 2004 12:00
Firmware version 1.1.0
Set-up Menu
Connection
Component mode
Display Format
TV System
RGB SCART
Interlaced
4:3 (Letterbox)
PA L
Audio Output
Options related to analogue and digital sound output connections
113 Hrs free
Mon 01 Nov 2004 12:00
Firmware version 1.1.0
Set-up Menu
Mode Analogue
TV Tuner
Most of Europe uses PAL B/G except for France and UK/Ireland
113 Hrs free
Mon 01 Nov 2004 12:00
Firmware version 1.1.0
Set-up Menu
TV Colour System
Manage TV channels
Automatic search
Erase all TV channels
PAL B/G
15
- For more information about setting up a network, please refer to the PC TO DVD CONNECTION section of this manual, or the connecting guide available at www.kiss-technology.com, in the
“support” section under “online guides”: www.kiss-technology.com/support
TV channels manager
Select TV TUNER and choose MANAGE TV CHANNELS. A list of the available channels will appear. Select the channel you want
to move by pressing ENTER. The selected line will become yellow. Select now the other channel to be moved by pressing ENTER.
The two channels will be swapped. Press the left arrow to exit the TV Channel Manager.
To find out how to rename TV Channel, please look under the Electronic Program Guide Section.
Choose the Ethernet Configuration menu to setup a network connection between a PC and your DVD Player. Connecting your DVD
player to a network enables you to use the online services and play audio/video/ pictures files from your connected PC with KiSS
PC-Link. Depending how your DP-558 and your PC are connected together, you will require to ENABLE or DISABLE DHCP Client.
To know if you need either or, please refer to the PC TO DVD CONNECTION section. If you decide to DISBALE DHCP Client, a
new section will appear: ENTER THE TCP/IP SETTINGS MANUALLY. Read the section below to see how to set this up. Read also
below how to set up NTP Client. Choose SHOW CURRENT TCP/IP SETTINGS to view your DP-558's current network settings and
connect to your Hard Disk via FTP. Refer to the MANAGING YOUR HARD DISK chapter to learn how to set up the FTP.
Ethernet configuration
DHCP Client holds the parameters of your Player's Network settings (IP address, Subnet mask, DNS...). Leave this menu ENABLED
if you have connected your player to a network that involves Internet. This way the player will set the parameters automatically.
DISABLED should only be selected if you have a connection that doesn't involve Internet. If you just connect your player to your
PC by a straight cable for example. By selecting DISABLED, you will be asked to ENTER THE TCP/IP SETTINGS MANUALLY. The
numbers should be different than the ones on your PC. We recommend to use the following numbers:
IP Address: 192.168.000.002; Network Mask: 255.255.255.000; Default Gateway: 192.168.000.001; DNS Sever: 192.168.000.001.
You will now be able to establish a connection between your PC and Player. See PC TO DVD CONNECTION, NETWORK USING
A DIRECT CONNECTION TO THE PC for more details.
Setting DHCP Client
The misc. settings available in the advanced setup will enable you to set many different options, such as PARENTAL CONTROL, or
FRONT PANEL BRIGHTNESS. To set PARENTAL CONTROL for the first time, select first PARENTAL CONTROL PASSWORD, enter
a 4 digit number, then repeat it to confirm it. Then, select PARENTAL CONTROL LEVEL, enter your 4 digit password. You can now
choose between: OFF (No control), G (Suitable for general audiences), PG (Parental guidance suggested), PG13 (Parental guidance
suggested, unsuitable for children under 13), R (Restricted, unsuitable for young viewers), NC17 (Adult content, unsuitable for
children under 17). You can also RESTORE DEFAULT SETTINGS of your player or choose to go back to the QUICK SETUP menu.
Misc. settings
If your DP-558 is on a network connected to the Internet, you can choose to get the displayed time automatically from the
Internet. To do so, turn on Network Timing (NTP Client) by selecting ENABLED. If you decide to DISABLE this function, you will
need to enter the time and date information yourself by going to REGIONAL SETTINGS and TIME or DATE.
NTP Client (Network Timing) and FTP Access
Mon 01 Nov 2004 12:00
Manage TV channels
P00 BBC Prime
P01 BBC World
P04 Eurosport
P05 Hallmark
P03 Discovery
P06 MTV
P07 TV5 Europe
P02 CNN
Ethernet - TCP/IP
Configuration of Ethernet TCP/IP options and services
113 Hrs free
Mon 01 Nov 2004 12:00
Firmware version 1.1.0
Set-up Menu
DHCP Client
NTP Client
FTP Server
Show current TCP/IP Settings
Enabled
Enabled
Read/Write
Enter the TCP/IP settings manually
Ethernet - TCP/IP
If DHCP service is unavailable, you can enter your TCP/IP settings here.
113 Hrs free
Mon 01 Nov 2004 12:00
Firmware version 1.1.0
Set-up Menu
DHCP Client
NTP Client
FTP Server
Show current TCP/IP Settings
Disabled
Enabled
Read/Write
Enter the TCP/IP settings manually
OK
Cancel
IP Settings
IP Address
Network Mask
Default Gateway
DNS Server
192.168.0.2
255.255.255.0
192.168.0.1
192.168.0.1
Ethernet - TCP/IP
Configuration of Ethernet TCP/IP options and services
113 Hrs free
Mon 01 Nov 2004 12:00
Firmware version 1.1.0
Set-up Menu
DHCP Client
NTP Client
FTP Server
Show current TCP/IP Settings
Enabled
Disabled
Read/Write
Enter the TCP/IP settings manually
Miscellaneous Settings
Change the brightness of the front panel display
113 Hrs free
Mon 01 Nov 2004 12:00
Firmware version 1.1.0
Set-up Menu
Front panel brightness
Parental Control level
Parental Control password
Quick Set-Up
Bright
Restore default settings
16
8
Video Recorder Functions
We advise you to watch the television through the DP-558. Just use your TV as a picture display while the KiSS DP-558 will be at the center and host all the commands you need to change
channels. It will make it easier and quicker to use the recording functions.
- The Quality Chart figures are based on recording on an empty 80GB and 200GB Hard Disk.
- These figures will change if content is already present on the player’s built-in Hard Disk
- The KiSS DP-558 encodes movies in MPEG-2 format. (.vob files)
- Before recording, check the status of the Hard Disk and scheduled recording by pressing SETUP or MENU. The status appears on the top right hand corner of your screen.
Time Shifting makes it possible to pause live TV if you need to go away from it for any reason. It allows you to pause the running
program and start it again at any given moment. It works by saving the watched TV program on the DP-558's Hard Disk while the
television screen is on pause mode. For that you need to watch a TV program through the DP-558. Just press PLAY/PAUSE. The
TV will freeze, recording will start in the pre-set quality. Press the PLAY/PAUSE button again to resume watching. You will be
able to carry on watching your program while the DP-558 carries on recording. You can navigate through this on-going recording
by pressing the FAST FORWARD and REWIND buttons.
Time Shifting
Turn on the Player and select the desired channel with the Up/Down buttons on the remote. Once the desired channel appears
on the TV screen, press RECORD on the remote. The content from the TV channel is recorded onto the Hard Disk at the quality
previously chosen. When recording is finished, press the STOP button.
Easy recording
Quality Settings Chart
Quality Bit Rate Approx. Recording Time - 80GB / 200GB Hard Disk
SHQ (Super High Quality) 8 Mbits/sec 21 hours (80GB) / 52 hours (200GB)
HQ (High Quality) 6 Mbits/sec 28 hours (80GB) / 70 hours (200GB)
SQ (Standard Quality) 4 Mbits/sec 42 hours (80GB) / 105 hours (200GB)
EP (Extended Play) 3 Mbits/sec 56 hours (80GB) / 140 hours (200GB)
LP (Long Play) 2 Mbits/sec 85 hours (80GB) / 212 hours (200GB)
SLP (Super Long Play) 1.5 Mbits/sec 114 hours (80GB) / 285 hours (200GB)
Setting quality
Before starting recording we advise you to take a look at our quality settings. To specify the recording quality you will need to
choose between:
-Long Play: Records with a medium quality, but doesn't take up so much space on the hard disk.
-High Quality: Records at the highest quality, but takes up more hard disk space.
To set aquality, press MENU on your remote, then go to VIDEO RECORDER FUNCTIONS, then RECORDING QUALITY. You will be
asked to choose a quality. Please refer to the chart below for quality settings. Press the LEFT ARROW to exit the list.
Video Recorder Functions
SHQ (Super High Quality) looks best. SLP (Super Long Play) gives you
the most recording time.
113 Hrs free
Mon 01 Nov 2004 12:00
0 Scheduled Recordings
Main Menu
Recorded Videos
Recording schedule
KiSS TV Guide (EPG)
Schedule new recording
Super Long Play (1.5Mbit)Recording quality
Recording Quality
Super High Quality (8Mbit)
High Quality (6Mbit)
Standard Quality (4Mbit)
Extended Play (3Mbit)
Long Play (2Mbit)
Super Long Play (1.5Mbit)
17
- To have their own names, TV Channels need to be mapped. Go to TELEVISION FUNCTION to learn how to map your channels.
Accessing recording
Turn the player on, then press MENU. Go to VIDEO RECORDER FUNCTIONS ans select RECORDED VIDEOS. The list of your videos
will be shown and named as follow:
P01 BBC - MON 01-01-2004 12:00:00.vob (Channel number, Channel name, date of recording, hour of recording)
Select the recording you wish to see and press ENTER to start it.
If you want to rename your recordings, you will need to establish and FTP connection between your DP-558 and your PC and
change the file recording's file name. See the HARD DISK chapter to learn how to establish an FTP connection.
Video Recorder Functions
View videos recorded from TV or video inputs.
113 Hrs free
Mon 01 Nov 2004 12:00
0 Scheduled Recordings
Main Menu
Recorded Videos
Recording schedule
KiSS TV Guide (EPG)
Schedule new recording
Super Long Play (1.5Mbit)Recording quality
Scheduling recording
The KiSS DP-558 will let you schedule a recording. Turn the Player ON and press MENU from your remote, then select VIDEO
RECORDER FUNCTIONS followed by SCHEDULE NEW RECORDING. Press ENTER and use the UP and DOWN arrows from the
remote to set the recording date, its starting time, ending time, the channel you want recorded and the quality you want it to be
recorded at. Check the quality settings chart below if you are unsure of the quality to set. Select OK to save the recording. You
can now see that on the Player's status on the top right corner is written: 1 scheduled recording. Press MENU to get out of the
main menu, and STANDBY to turn the DP-558 off. Your recording will start at the scheduled moment.
IMPORTANT: THE PLAYER MUST BE IN STANDBY MODE TO RECORD.
Video Recorder Functions
Manually set timer to record at a specified time and date
113 Hrs free
Mon 01 Nov 2004 12:00
0 Scheduled Recordings
Main Menu
Recorded Videos
Recording schedule
KiSS TV Guide (EPG)
Schedule new recording
Super Long Play (1.5Mbit)Recording quality
Modify scheduled recordings
If you have set one or many recordings, this menu item brings up a calendar list of scheduled recordings. It enables you to edit or
erase a scheduled program. To edit a scheduled recording press MENU and go to RECORDING SCHEDULE. Select the schedule
you want to modify and press ENTER. You can now choose the item to change with the UP and DOWN arrows and by pressing
ENTER to select. Select OK to save the modify recording. To delete a scheduled recording, press MENU and go to RECORDING
SCHEDULE. Select the schedule to remove and press DELETE on your remote. The planned recording is now gone.
Access to KiSS TV Guide (EPG)
An access to KiSS TV Guide is provided under the VIDEO RECORDER FUNCTIONS menu. It is a straight access to the recording
functions through the EPG. Refer to our section about the EPG (KiSS ONLINE CHAPTER) to learn more about its recording
functions.
Modify Scheduled Recording
Date:
Stop:
Start:
Selected source:
Manage Recording Schedule
OK
Recording quality:
Cancel
Select programme source
Nov 23, 2004
22:35
20:30
P00 BBC Prime
ELP
Modify Scheduled Recording
Date:
Stop:
Start:
Selected source:
Manage Recording Schedule
OK
Recording quality:
Cancel
Select programme source
Nov 23, 2004
22:35
20:30
P00 BBC Prime
ELP
Removing recordings
Once you have seen a recording, and you would like it to be deleted, go to MENU, then RECORDED VIDEO to display the list of
items saved on your Hard Disk. Go the video to be deleted with the UP and DOWN arrows. Select it with the MARK button of the
remote. Its icon will become yellow. Press DELETE to remove it permanantly.
Recorded videos
P06 MTV - Sat 13-11-2004 15:45:43.vob
P07 TV5 Europe - Mon 22-11-2004 22:45:00.vob
P04 Eurosport - Sun 14-11-2004 12:15:00.vob
P00 BBC Prime - Tue 23-11-2004 20:35:00.vob
18
9
Hard Disk
The DP-558 has a built-in Hard Disk. This storage place enable it to store your recordings as we have seen it in the previous chapters, but it also enable you to save audio, video and
picture files.
- Only computer generated files can be copied onto the hard disk. DVDs, audio CDs, VCDs and SVCDs can not be copied
- The FTP access only works if the KiSS Player and the PC are connected on the same network via the Ethernet Port. Check the PC TO DVD CONNECTION chapter of this manual if you are unsure.
Copying and deleting files to the Hard Disk
Copying from KiSS PC-Link: Start KiSS PC-Link and make sure your player and your PC are connected together (See PC TO
DVD CONNECTION chapter). Press MENU on your player's remote, then go to the PC-Link section. Go to SEARCH FOR PC-LINK
HOST, your server name should appear, select it. Choose either AUDIO/VIDEO or PICTURE FILE to view the list of item from your
PC. Select the file(s) to be copies by pressing MARK on your remote. When you have finished selecting the file(s), press ENTER.
Copy will start immediately. Go to the HARD DISK section, select either AUDIO/VIDEO or PICTURE FILES to view the list of copied
items. Select the file and press ENTER to play/view it.
Copying from a CD: Insert a CD in the drive, the player will automatically open the DISC section of the MAIN MENU. Open
AUDIO/VIDEO or PICTURE FILE to view the list of item to copy. Select the file(s) to be copies by pressing MARK on your remote.
When you have finished selecting the file(s), press ENTER. Copy will start immediately. Go to the HARD DISK section, select
either AUDIO/VIDEO or PICTURE FILES to view the list of copied items. Select the file and press ENTER to play/view it.
Deleting: Press MENU on your remote, go to HARD DISK and select either AUDIO/VIDEO or PICTURE FILES. Pick the file(s) to
delete by pressing MARK, then press DELETE. The selected file(s) will be immediately deleted. To delete the entire Hard Disk, go
to HARD DISK OPTIONS and select FORMAT HARD DISK.
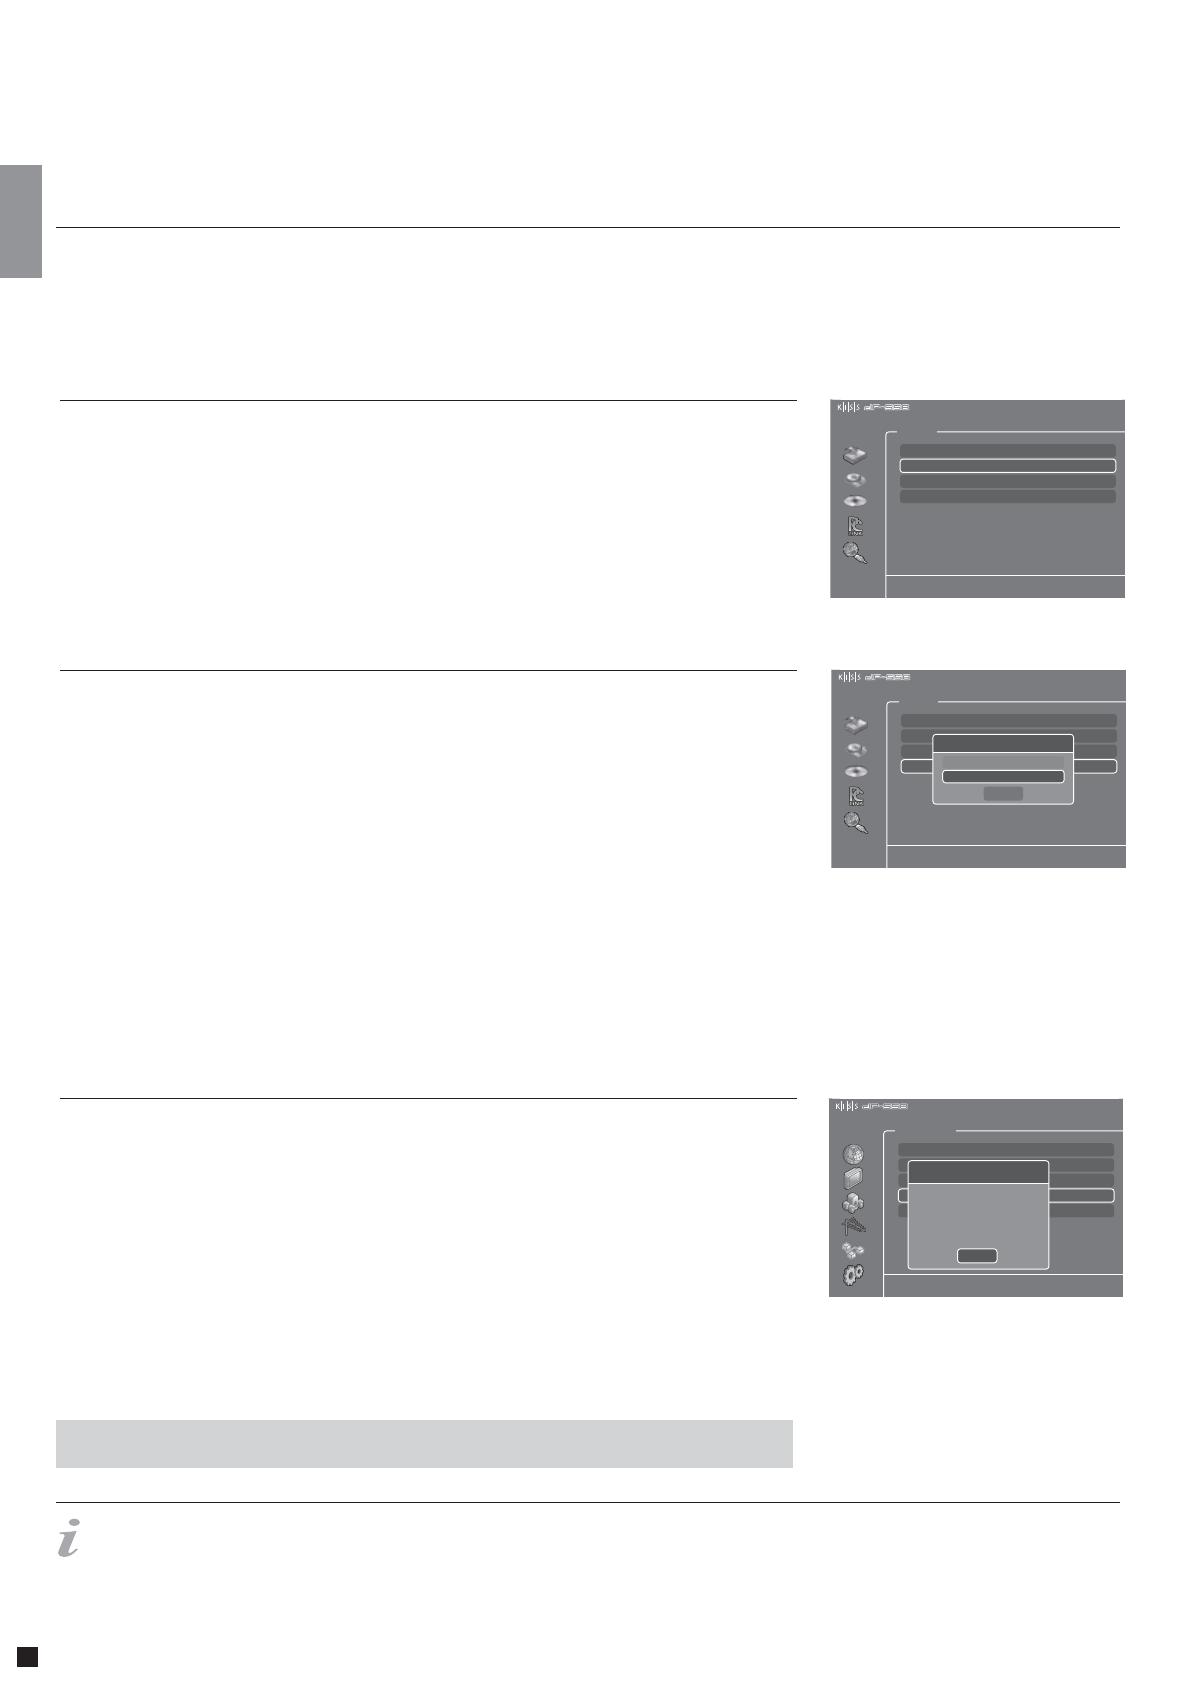
Press MENU from your remote, and go to the HARD DISK section. Choose between Audio Files, Video Files or Picture Files, if you
have copied anything on your Hard Disk, you will be able to view the list of its content. Recordings are not available from this
menu, only elements that have been copies from your PC or from a CD. Once you get to the list of copied elements, select the
file to be played and press ENTER to start it. A fourth section named HARD DISK OPTIONS is also available from this menu. It
enables you to format (erase) your Hard Disk completely. Just select HARD DISK OPTIONS and choose FORMAT HARD DISK.
Accessing the Hard Disk
Press SETUP on your remote and go to ETHERNET - TCP/IP. Select FTP-Sever. You have three options: DISABLED (Not available),
READ ONLY (You can copy files from the DP-558 to your PC, but cannot copy files from your PC to the DP-558), READ/WRITE
(You can copy files from the DP-558 to your PC and from your PC to the DP-558). Pick the one that suits you best. Go to SHOW
CURRENT TCP/IP SETTINGS. Write down the IP ADDRESS shown on the screen below for future use. It is 4 sets of characters
separated by a point. (ex: 192.168.6.25). On your computer open your Internet Browser Program, in the address field write: ftp://
followed by the IP ADDRESS (ex: ftp://192.168.6.25). The Internet Browser window will display the content of your DP-558's Hard
Disk. If you already have copied some files on your Hard Disk, you will find three folders named: AUDIO, VIDEO and PICTURES.
They contain your Hard Disk's files, you can drag and drop them on your PC. The PVR folder contain your recordings. If you haven't
used your Hard Disk yet, the AUDIO, VIDEO and PICTURES folders haven't been created yet. You can create them yourself, but
make sure that you have previously selected READ/WRITE on your player, and for your player to see them these folders should be
named exactly audio, video and pictures (in low case letters). You also must copy your audio files into the AUDIO folder and so on.
The DP-558 will not be able to recognise them otherwise. Now that the FTP is set, you can manage all the files from the DP-558
easily and directly from your PC, you can rename your recordings, copy them to your PC's Hard Disk and burn them onto CD.
Setting up the FTP on the player
Your KiSS DP-558 IP Address:
Hard Disk
Explore hard disk: View video files only
113 Hrs free
Mon 01 Nov 2004 12:00
0 Scheduled Recordings
Main Menu
Audio files
Video files
Picture files
Hard Disk options
Hard Disk
Hard Disk tools and properties
113 Hrs free
Mon 01 Nov 2004 12:00
0 Scheduled Recordings
Main Menu
Audio files
Video files
Picture files
Hard Disk options
Hard Disk options
Hard Disk Properties
Format Hard Disk
OK
Ethernet - TCP/IP
Display your current TCP/IP configuration
113 Hrs free
Mon 01 Nov 2004 12:00
Firmware version 1.1.0
Set-up Menu
DHCP Client
NTP Client
FTP Server
Show current TCP/IP Settings
Enabled
Enabled
Read/Write
Enter the TCP/IP settings manually
OK
Show current TCP/IP Settings
IP Address:
Network Mask:
172.168.45.56
255.255.0.0
19
10
Playing media
This product supports the following media: DVD, MPEG-4, DivX, Nero Digital, XviD, Audio CDs, MP3, Ogg Vorbis and Jpeg file formats.
Playing Audio CDs, MP3, Ogg Vorbis
Viewing Jpeg pictures
Playing MPEG-4, DivX, Nero Digital, XviD
To play and MP3 CD, press EJECT to open the drawer and place a CD with the music content in. Press EJECT again to close the
drawer. After a few seconds, the menu DISC will appear on your screen. Select AUDIO FILES to view the list of audio files or
folders available from the CD, choose the one you want to listen to and press ENTER. You can, at anytime during playback, choose
to REPEAT the file or SHUFFLE the CD content by pressing LIST on your remote and ENTER to select the chosen option. To eject
the CD, press STOP to go out of the menu and come back to the DISC section. Choose EJECT.
Audio CDs start to play automatically when loaded. If the player is connected to the Internet, the DP-558 will search for the CD
track names and will display them. When you are done, just press EJECT on the remote to remove the CD from the drive.
Press EJECT to open the drawer and place a CD with picture content in. Press EJECT again to close the drawer. After a few
seconds, the menu DISC will appear on your screen. Select PICTURE FILES to view the list of images on the CD, choose the one
you want to watch and press ENTER. Use the NEXT/PREVIOUS arrow to view other pictures from the CD. You can enlarge the
picture by pressing ZOOM on your remote. To eject the CD, press STOP to go out of the menu and come back to the DISC section.
Choose EJECT.
Press EJECT to open the drawer and place a CD with video content in. Press EJECT again to close the drawer. After a few
seconds, the menu DISC will appear on your screen. Select VIDEO FILES to view the list of video content from the CD, choose
the one you want to watch and press ENTER. You can, at anytime during playback, choose to REPEAT the file, SHUFFLE the CD
content or do a TIME SEARCH on the video currently watched by pressing LIST on your remote and ENTER to select the chosen
option. To eject the CD, press STOP to go out of the menu and come back to the DISC section. Choose EJECT.
Press the EJECT button on the front of the player or on the remote to open the drawer. Place the DVD in it to start it automatically.
After a few seconds the DVD menu will appear. You can naviguate it using the arrows, then press ENTER to access the selected
menu. When a DVD is already in place in the DP-558, you can start it by pressing MENU on your remote, then go to DISC and
select PLAY DISC. EJECT is also available from this section. Another way of starting a DVD when there is already one in the tray
is to press LIST to get all the options available. Just select PLAY DISC.
Playing DVDs
Disc
Explore CD-ROM/DVD-ROM content: View audio files only.
113 Hrs free
Mon 01 Nov 2004 12:00
0 Scheduled Recordings
Main Menu
Play Disc
Audio Files
Video Files
Picture Files
Eject
20
11
KiSS PC-Link
KiSS PC-Link is the software provided with your DP-558. Once the connection established between your DP-558 and your PC, load your Audio, Video and Picture content located on your
PC to KiSS PC-Link to play/see them on your television.
- KiSS PC-Link can only be used on a Windows PC running at least Windows XP.
- If you are a Mac user and running at least Mac OS X 10.2, you can download KiSS MacLink from our website as an alternative to KiSS PC-Link.
- If you have a network of PCs running KiSS PC-Link, they can be selected from your player by selecting SEARCH FOR PC-LINK HOST
Network settings
Once the connection has been validated, start KiSS PC-Link. The program is divided into Video, Audio and Picture files. Load the
files to be shared by clicking ADD or SEARCH if you want the software to look for the files itself. Do not quit KiSS PC-Link, it
must stay on on your PC for sharing to happen. Once this is done, press MENU on your remote, go to PC-LINK and choose AUDIO,
VIDEO or PICTURE FILES. The files shared on your PC are now available to be played or copied on your Player. You can copy a
whole folder to KiSS PC-Link by dragging it on the software's window on your PC.
The DP-558 can access any KiSS enabled web page (web pages that uses KML) on the entire internet. This way it is possible to
go to 3rd party webpages not created by KiSS. This could be news services, games, radio stations or other. To do so, you have
to know the so-called IP address of the page you want to visit (4 numbers separated by dots). These IP Addresses can be found
on the Internet. When you have an IP Address of a KML page press MENU on your remote, go to PC-LINK and select ENTER IP
ADDRESS FOR PC-LINK HOST. Enter the IP Address and press OK. Then go to PC-LINK KML START PAGE to view the web page.If
you get an error message while going to PC-LINK KML START PAGE, that means that the IP Adress you provided does not contain
anything a KiSS Player can display. This feature is for future use.
Accessing your files
KiSS KML Start Page
KiSS PC-Link is a software to be installed on a Windows PC enabling you to view and play audio, video and picture files from a
connected PC on the DVD Player. KiSS PC-Link can only be installed on a Windows PC running Windows XP or later.
Installing KiSS PC-Link: Insert the KiSS PC-Link CD in your PC. The installation software will start automatically. Follow
the on-screen instructions until installation is complete. A shortcut will be created on your desktop. Double click it to start the
program.
KiSS PC-Link
PC-Link
Set up PC-Link host IP address manually
113 Hrs free
Mon 01 Nov 2004 12:00
0 Scheduled Recordings
Main Menu
Audio Files
Video Files
Picture Files
PC-Link KML Start Page
Search for PC-Link host
Enter IP address of PC-Link host
0
OK
Enter IP address of PC-Link host
Cancel
000
PC-Link
Custom local KML start page: Opens http://(PC-Link):8888/index.kml
113 Hrs free
Mon 01 Nov 2004 12:00
0 Scheduled Recordings
Main Menu
Audio Files
Video Files
Picture Files
PC-Link KML Start Page
Search for PC-Link host
Enter IP address of PC-Link host
In order for PC-Link to work, your PC must be connected to your DVD Player by the ethernet connection found at the back of
the player. Please refer to the PC TO DVD CONNECTION chapter of this manual for extra help. To valid the connection, you can
either press MENU on your remote, go to PC-LINK, select ENTER IP ADDRESS OF PC-LINK HOST and enter the IP address found
in the info tab of KiSS PC-Link, or you can press MENU on your remote, go to PC-LINK, select SEARCH FOR PC-LINK HOSTS and
pick your server from the list of available servers.
21
12
KiSS Online
If you are connected to Broadband Internet (see PC TO DVD CONNECTION), you will be able to access KiSS Online Services. Just press ONLINE on your remote or go to MENU, then select
ONLINE KML SERVICES and choose among the list which service you would like to use.
KiSS TV Guide (EPG)
- To use any of these features, you need to be connected to a Broadband Internet Connection.
Playing Internet Radio with WebRadio 3
KiSS TV Guide or EPG (Electronic Program Guide) is one of KiSS' Online Services enabling you to view what program is coming
to your television. For this service to run, you need to be connected to a Broadband Internet Connection. You can then view all
the program available to you in your country, you can register your favorites channels, view film information and set them to
record from the TV Guide. This service can be accessed by pressing MENU on your remote, then go to ONLINE KML SERVICES
and select KISS TV GUIDE (EPG). You can also access it by pressing ONLINE on your remote and choosing TV GUIDE. Press STOP
twice to exit.
Managing your Channels
If you are using the TV Guide for the first time, you need to set the channels available from your television as Favorites. To do so
you need to "map" (register) your TV Channels. Mapping adds automatically your channels to the favorites. Go to the TELEVISION
FUNCTION Chapter to learn how to do it. If you want to add them manually, go to KiSS TV GUIDE, and select ADD A FAVORITE in
the FAVORITE STATIONS section. Select your country to view the list of available channels, pick the ones you receive on your TV
and press ADD FAVORITE. Repeat this operation for all your channels. Remember that your channels need to be mapped before
scheduling a recording through the EPG. Press STOP twice to exit.
Starting WebRadio 3, you can choose between listening to MUSIC BY GENRE or by country with WORLD RADIO. Press ENTER
to choose MUSIC BY GENRE and view the list of categories on your left hand side. You can see the number of radio stations
available per genre on the right hand side. Scroll down and select one to view a more narrow category, you can then view the
radio available. Scroll down and choose one to listen to. The connection start and the music plays. If you choose WORLD RADIO,
you will go to the list of continents, choose one to go to the list of countries/list of all radios. You can now either start listening
to a radio station or select COUNTRIES to view a choice of specific countries or cities.
This service provide you with a wide range of Internet Radio Stations. Just press ONLINE on your remote and choose WEBRADIO
3 to access the portal. You can also access by pressing MENU on your remote, then go to ONLINE KML SERVICES and go to KiSS
WEBRADIO 3. Press STOP twice to exit.
WebRadio 3
22
- To use any of these features, you need to be connected to a Broadband Internet Connection.
What's on TV?
Now that your favorites have been added, select WHAT'S ON NOW in the FAVORITE STATIONS section to view a timeline
selection of your favorite channels for the next two hours. You can navigate through the channels with the ARROWS and
press ENTER to get more information about the program. If you select WHAT'S ON, you have access to timed selections of the
Channel's program. Just choose what part of the day you are interrested in to view the what is coming up. You also have the
choice to view the program for tomorrow and the next 5 days.
TV Shows can also be set as Favorites, go to ADD A FAVORITE in the FAVORITE SHOWS section and type the name of the show
using your remote's keypad. A list of the show appears on your screen. Select ADD FAVORITE at the bottom of your screen and
this show will be marked in red when you view TV programs. Go to WHAT'S ON in this section if you need to see when your
favorite show is coming next. You can also check the upcoming movies and sport events for my favorite channels by going in the
relating sections and selecting WHAT'S ON. If you need extra film info, just go to the movie section and select IMBD (Internet
Movie DataBase). It will enable you to enter a film name with the keypad and view its details.
Favorites Shows, Movies and Sport
Before starting, select CONFIGURATION and make sure the timezone entered by default is the correct one. You can also set
how many minutes you want to be recorded before and after the program's time. Sometimes TV Channels are not so precise
with program times. Go to WHAT'S ON in the FAVORITE STATIONS section and select the time section then the program to
record by choosing it with the ARROWS and selecting it with the ENTER button. You can now see some short details about the
program. If the program is a movie, you can get some more details by selecting IMDB (Internet Movie DataBase) at the bottom
of your screen. To set the schedule, select RECORD at the bottom of your screen. You will be asked to confirm the recording.
The schedule is set. If you need to verify, edit or delete the schedule, go to MENU, then VIDEO RECORDER FUNCTIONS and
RECORDING SCHEDULE. Remember that the channel needs to be mapped to record through the EPG and that the player must
be on standby mode.
Recording through KiSS TV Guide
To get started you need to register some favorites. These will be shortcuts to the places you will check often. Choose a continent
with the ARROWS, then select it by pressing ENTER on your remote. Choose a city from the list and select it. You can now see its
weather details and 5 days forcast. Select SATELLITE to view a satellite picture of the area or FORCAST to view detailed weather
graphic of the area. Select ADD FAVORITE, and this city will be in FAVORITE when Weather Online starts.
Configuring and checking the weather
Check the weather in your area as well as anywhere in the world. Weather Online gives you a 5 days weather forcast with
temperatures in Degree Celcius and Degree Fahrenheit as well as satellite photos and detailed weather graphics.
To access this service, go to MENU, the go to ONLINE KML SERVICES, select KiSS ONLINE and choose WEATHER. You can also
access it by pressing ONLINE on your remote and choosing WEATHER. Press STOP twice to exit.
Weather Online
23
- To use any of these features, you need to be connected to a Broadband Internet Connection.
Game of cards. You need to have all your cards in order from 1 to King and by sign. Use the ARROWS from the remote to choose
the card you want to move. Press ENTER to validate it. The card to be moved is marked by a yellow square while searching for the
place to move it to is marked by a red cursor. Just press ENTER to select the place to move it to. Go to the bottom of the screen
and select NEW to start a new game. Select SCORES to view the scores of other online players.
Klondike
Find the hidden mines without hitting them. Start a game by selecting NEW at the bottom of your screen. Choose the level of
game you wish to play. Use the numbers from the keypad to select first a row, then a column. If the number 1 appears in the
square you have selected, it means there is 1 mine in the surrounding squares, if the number 2 appears, there are 2 mines and
so on. If no number appear, there are no mines all the surrounding empty squares will be discovered. When you think you know
where a mine is hidden, press 0, then select the row and the column. This square is now marked. Proceed the same way to
unmark a square. Your score is displayed on the right side of the screen along with the details of the current game: total number
of squares, number of mines to discover and time spent.
Minesweeper
The game is won when you have taken all the opponent's pieces. To start a game, select NEW at the bottom of your screen.
Enter your name and choose the kind of game to play: BRITISH, SINGLE INTERNATIONAL or MULTI INTERNATIONAL. Multi user's
games only work if there are other players online. Select RULES to view the details. To move a piece, select its source's row
and column with the numbers of the remote's keypad, then select its destination's row and column. The name of the players is
displayed on the right side of the screen as well as your score and the rule of the current game.
Checkers
You must own more pieces than your opponent at the end of the game. The game is over when neither player has a move, this
usually happens when the bord is full. Start a new game by selecting NEW. Write a name and choose if you want to play as a
SINGLE USER's game or a MULTI USER's game. Multi user's game only work if there are other players online. To play, select a
row then a column where you wish to place your piece. The selection of the row and the column is done with the numbers from
your remote's keypad. The name of the players is displayed on the right side of the screen as well as your score and the total
number of games played.
Reversi
KiSS Online Games
Games can be played from the Online Portal. To access this service, go to MENU, the go to ONLINE KML SERVICES, select KiSS
ONLINE and choose GAMES. You can also access it by pressing ONLINE on your remote and choosing GAMES. To get started,
set yourself a player's name. Select SET NICKNAME and enter a name with the keypad. Then choose the game you want to play
with the ARROWS and select it with the ENTER button of your remote.
24
13
KiSS Remote EPG
Introduction to the KiSS Web Services: KiSS Remote EPG: http://epg.kml.kiss-technology.com
Our new web-based TV Guide is a companion service to our existing TV Guide currently running on the DP-558. Its main purpose
is to act as a means to remotely schedule recordings from any location with a browser and an Internet connection. Over are the
days where you had to sit in front of your digital recorder to schedule recordings of your favorite shows. Sitting in the office and
realize that you can’t make it home in time to catch the news or your favorite show? Log on to the TV Guide from your computer,
WiFi-enabled PDA or GPRS and browser-enabled phone, and schedule it for recording in seconds.
What is KiSS Web Services: TV Guide?
What is needed to take advantage of the web-based TV Guide?
If you’ve familiarized yourself with the TV Guide on the recorder, you’ll find that the web-based TV Guide works in almost exactly the same way with a few minor changes and additions
to make better use of the web medium.
The first thing you’ll notice is that the login screen has three buttons to accommodate different devices and browser qualifications. Desktop mode is what you should use on your PC and
MAC. The Mobile version of the site is specially designed for small, but advanced devices like smartphones and PDAs with advanced web browsers built in. The Text version is for devices
offering very basic web browsing functionality.
Since the web-based TV Guide is meant to be a companion service to the TV Guide on the recorder, it’s set up to mirror all your settings. You will notice that all your favorite channels and
shows set up using your DP-558 are already available to you on the web-based version. There’s no need to configure it again.
Entering the grid view of the TV Guide (“What’s on now”) in Desktop mode, the biggest change you will notice is that the axis has shifted. Since the desktop has a lot more space to offer,
we’ve sought to provide more space for time on the vertical axis.
The interface has buttons for the functions you would normally use your remote control for.
Click the left/right arrows at the top of the page to move between additional pages of channels.
Click the up/down arrows in the bottom/top left hand side of the grid to see programs running earlier or later in the day.
The “Favorites” button takes you to the list of your favorite channels.
The “What’s On” button allows you to see what’s on during specific times of the current day or the next 6 days.
The tabs at the top of each page allow quicker navigation of the site without returning to the main menu (though it can always be reached from the bottom of each page).
Using KiSS Web Services: TV Guide
Provided that your DP-558 is already on a permanent connection to the Internet (dial-up connections are not guaranteed to work
with this service), all you need is to install the latest firmware on your DP-558. Once done, follow these three procedures and
you’re ready to schedule recordings via the Internet.
1. Enter the Main Menu of the DP-558, go to the Online Services menu and press “Reveal Player ID.” Write this down exactly
as you see it.
2. Enter the Setup Menu on the DP-558, and enable the Web Schedule option in Network Options.
3. Log on to the TV Guide on the DP-558, enter the Configure page at the bottom of the TV Guide main page and select Set
Password. Enter the password you want to use when you log on to the web-based TV Guide.
4. Open your web browser on your computer or mobile phone, and enter the following URL: http://epg.kml.kiss-technology.com.
Enter your unique Player ID and the password you just entered on your DP-558.
If the above instructions have been followed correctly, you should now see the main menu.
For safety and convenience, we recommend that you press [Link email] at top of the main menu. This will enable you to pair an
email address with your Player ID, so you don’t have to memorize it or keep it with you. After all, an email address is far easier
to remember. Once you’ve done this, you can just enter your email address in the login field every time you need to log on to
the service. You still need to remember your password, though.
  • Page 1 1
  • Page 2 2
  • Page 3 3
  • Page 4 4
  • Page 5 5
  • Page 6 6
  • Page 7 7
  • Page 8 8
  • Page 9 9
  • Page 10 10
  • Page 11 11
  • Page 12 12
  • Page 13 13
  • Page 14 14
  • Page 15 15
  • Page 16 16
  • Page 17 17
  • Page 18 18
  • Page 19 19
  • Page 20 20
  • Page 21 21
  • Page 22 22
  • Page 23 23
  • Page 24 24
  • Page 25 25
  • Page 26 26
  • Page 27 27
  • Page 28 28
  • Page 29 29
  • Page 30 30

KiSS KiSS DP-558 User manual

Category
DVD players
Type
User manual
This manual is also suitable for

Ask a question and I''ll find the answer in the document

Finding information in a document is now easier with AI