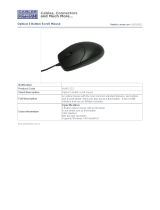
HP X7000 Wi-Fi Touch Mouse User guide

Type
User guide

HP X7000 Wi-Fi Touch Mouse: Experience wireless freedom and enhanced control with our cutting-edge mouse. Featuring 802.11 wireless technology, it eliminates the need for a separate USB receiver. Customize your experience with the HP Mouse Control Center, adjusting scroll speed, assigning button functions, and more. The capacitive touch scroll wheel provides smooth, intuitive scrolling.

HP X7000 Wi-Fi Touch Mouse: Experience wireless freedom and enhanced control with our cutting-edge mouse. Featuring 802.11 wireless technology, it eliminates the need for a separate USB receiver. Customize your experience with the HP Mouse Control Center, adjusting scroll speed, assigning button functions, and more. The capacitive touch scroll wheel provides smooth, intuitive scrolling.

Pa
g
e 1
Introduction
Congratulations on your purchase of an HP mouse.
This mouse is the latest in a wide range of computer peripherals manufactured by HP. It is designed to
provide you with the highest level of comfort available, while also allowing for maximum functionality. Click
the following links to learn more about:
Configuring Your HP Mouse
Capacitive Touch Scrolling
Uploading to Facebook
The HP Mouse Control Center is a simple yet innovative package that allows you to configure your mouse
to best meet your needs. Click the following link to learn more about:
Navigating the HP Mouse Control Center
Pa
g
e 2
Welcome
Welcome to the HP Mouse Control Center Help.
This guide describes the functions of the mouse and explains how to configure them using the HP Mouse
Control Center software.
Introduction
Safety Guidelines
Installing and Uninstalling the HP Mouse Control Center
Navigating the HP Mouse Control Center
Configuring Your HP Mouse
Batteries
Uploading Pictures to Facebook
Troubleshooting
http://www.hp.com
© Copyright 2011 HP Corporation. All Rights Reserved. All contents in this manual are property of HP and may not be reproduced in
either paper or any electronic form. All names and trademarks are owned by HP and may be registered.
Pa
g
e
3
Installing and Uninstalling the HP Mouse
Control Center
This section explains how to install and uninstall the HP Mouse Control Center software. Click the links
below for more information:
Installing the HP Mouse Control Center
Uninstalling the HP Mouse Control Center
Pa
g
e 4
Installing the HP Mouse Control Center
To install the HP Mouse Control Center on your PC:
Insert the supplied HP Mouse Control Center CD in your CD or DVD drive. The Installation Wizard loads.
The Welcome screen appears. Click Next to continue.
Read the End User License Agreement. If you accept, choose I accept the terms in the license
agreement, and then click Next to continue.
Pa
g
e
5
You may specify the location of the software installation or click Next to install the software in the
suggested folder.
Click Install to begin installation.
Pa
g
e
6
Installation begins.
After installation is complete, a confirmation dialog appears. Click Finish.
Pa
g
e 7
The Pairing Wizard automatically starts. Before pairing your mouse to the computer, pull or remove the
battery tab from the mouse and select OK. Once the tab is removed, you have 10 minutes to complete the
installation.
Make sure that the power switch on the bottom of the mouse is set to the "on" position. Move the mouse to
within 1 foot (30 centimeters) of the computer to begin pairing it.
Pa
g
e
8
If the computer finds only one mouse, it automatically begins pairing with it. If it finds more than one mouse,
select the correct mouse using the "Mouse ID" (which is printed on a label on the bottom of the mouse).
Select Next to continue
The computer pairs itself with the mouse.
Pa
g
e
9
Click Finish after pairing the mouse and computer. Windows 7
®
will detect the mouse, automatically find
the drivers, and your mouse will be ready to use.
Pa
g
e 1
0
Uninstalling the HP Mouse Control Center
To uninstall the HP Mouse Control Center:
Open the Start menu > All Programs > Hewlett Packard > HP Mouse Suite. Select Uninstall
from the submenu.
A confirmation dialog appears. Click Yes and uninstallation begins.
Your HP mouse is now uninstalled.
Pa
g
e 11
Navigating the HP Mouse Control Center
The HP Mouse Control Center interface is simple and straightforward, making it easy for you to find
information and customize each function of your mouse.
Click the Discover icon to access the User Guide, Online Support, Product Registration and the HP
Home and Home Office Store.
Click the Configure icon to access the Mouse Settings.
Click the Enjoy icon to find offers from HP.
Pa
g
e 12
Configuring Your HP Mouse
Different mouse settings are indicated by the tabs on the top of the screen. Click a tab to enter the settings
screen.
When you change a setting, you may click Apply to save the changes, OK to save the changes and exit
the program, or Cancel to exit without saving. To launch the Pairing Wizard, select Pairing Wizard.
For More Information:
Buttons
Wheel
Mouse
About
Pa
g
e 1
3
Buttons
You can configure each of the mouse buttons on the Buttons tab.
The Select Button list displays the list of buttons available. When available, radio buttons will display a list
of actions you can use to configure the button highlighted in the Select Button list.
Click a button name from the Select Button list to view the functions that can be assigned to that button.
Restore Default Settings
Click the button to restore the buttons to the original default settings.
For More Information:
The Left and Right Buttons
Wheel Button
Left Side Buttons
Pa
g
e 14
The Left and Right Buttons
By default, the left mouse button is set to perform the left-click function. The right mouse button is set to
perform the right-click function.
If you want to swap these two button functions, check the Swap Buttons check box.
Click to save all changes.
For More Information:
The Left and Right Buttons
Wheel Button
Left Side Buttons
Pa
g
e 1
5
Backward
Press the Backward button to display in your browser the last page you visited.
Click to save all changes.
Forward
Press the Forward button to display in your browser the page you visited before you pressed the Backward
button.
Click to save all changes.
Other
Select Other to set a button to execute one of a set of other predefined functions when you press that
button.
A drop-down menu appears. Select an application from the list.
Click to save all changes.
Pa
g
e 1
6
Wheel Button
By default, the scroll area is set to operate as the middle mouse button when pressed.
Select the function you want to assign to the middle mouse button.
Click to save all changes.
For More Information:
The Left and Right Buttons
Wheel Button
Left Side Buttons
Pa
g
e 17
Left Side Buttons
The HP mouse has two buttons on the left side of the mouse. By default, the buttons are set to operate as
Backward and Forward when pressed. Press the Backward button to display in your browser the last page
you visited. Press the Forward button to display in your browser the page you visited before you pressed the
Backward button. These buttons can be programmed to other functions..
Select the function you want to assign to the button from the list.
Click to save all changes.
For More Information:
The Left and Right Buttons
Wheel Button
Left Side Buttons
Pa
g
e 1
8
Wheel
You can configure the scroll area settings on the Wheel tab.
The Scrolling Speed section allows you to adjust how fast the window scrolls when you scroll vertically.
Pa
g
e 1
9
Scrolling Speed
Select the scrolling speed you want by using the Scrolling Speed options:
Scroll: Select this option and use the drop-down list to select the speed.
Scroll one screen per notch: Select this option to scroll up or down a whole screen each time you
move the scroll area up or down one notch.
Click to save all changes.
Pa
g
e 2
0
Capacitive Touch Scrolling
Your HP mouse includes a capacitive sense scroll wheel instead of a mechanical scroll wheel. With
capacitive sense technology, there are no moving parts. To scroll up, just slide your fingertip in an upward
direction on the touch area, and to scroll down, slide your fingertip in a downward direction on the touch
area.
If you are scrolling through a long document or Web page, you can easily navigate a large number of lines
by quickly moving your fingertip up or down on the touch area, and then lifting your fingertip off the touch
area. The mouse will continue to scroll by itself for a short time, and then automatically slow down and
stop.
  • Page 1 1
  • Page 2 2
  • Page 3 3
  • Page 4 4
  • Page 5 5
  • Page 6 6
  • Page 7 7
  • Page 8 8
  • Page 9 9
  • Page 10 10
  • Page 11 11
  • Page 12 12
  • Page 13 13
  • Page 14 14
  • Page 15 15
  • Page 16 16
  • Page 17 17
  • Page 18 18
  • Page 19 19
  • Page 20 20
  • Page 21 21
  • Page 22 22
  • Page 23 23
  • Page 24 24
  • Page 25 25
  • Page 26 26
  • Page 27 27
  • Page 28 28
  • Page 29 29
  • Page 30 30
  • Page 31 31
  • Page 32 32

HP X7000 Wi-Fi Touch Mouse User guide

Type
User guide

HP X7000 Wi-Fi Touch Mouse: Experience wireless freedom and enhanced control with our cutting-edge mouse. Featuring 802.11 wireless technology, it eliminates the need for a separate USB receiver. Customize your experience with the HP Mouse Control Center, adjusting scroll speed, assigning button functions, and more. The capacitive touch scroll wheel provides smooth, intuitive scrolling.

Ask a question and I''ll find the answer in the document

Finding information in a document is now easier with AI