Meteor GG501701 Assembly, Use And Instruction Manual

Category
Barbecues & grills
Type
Assembly, Use And Instruction Manual

The Meteor GG501701 is a versatile gas grill designed for outdoor use only, featuring a 4-burner system with a total effect of 12.96 kW. It offers ample cooking space with two cooking grills, a warming rack, and side shelves for convenient food preparation and storage. The grill's easy ignition system and adjustable control knobs provide precise temperature control for a variety of grilling needs. Its sturdy construction and durable materials ensure longevity and resistance to outdoor elements.

The Meteor GG501701 is a versatile gas grill designed for outdoor use only, featuring a 4-burner system with a total effect of 12.96 kW. It offers ample cooking space with two cooking grills, a warming rack, and side shelves for convenient food preparation and storage. The grill's easy ignition system and adjustable control knobs provide precise temperature control for a variety of grilling needs. Its sturdy construction and durable materials ensure longevity and resistance to outdoor elements.

ASSEMBLY, USE
AND INSTRUCTION MANUAL
Meteor
EN
READ THE OPERATING INSTRUCTIONS
BEFORE USING THE APPLIANCE.
FOR OUTDOOR USE ONLY.
!
GG501701
EDITION
Black
4B
Warnings..................................................... ............3
Technical data .........................................................4
Gas category ............................................................4
Explotion drawing .................................................... 5
Parts list ................................................................ 6
Hardware ................................................................7
Assembly instructions ................................................8
Gas leak test ......................................................... 16
Connecting gas .......................................................17
Before using the grill................................................ 18
Grilling tips ............................................................19
Lighting instructions ................................................20
Warnings ...............................................................21
Maintenance ..........................................................22
Cleaning ...............................................................22
Troubleshooting ....................................................23
Consumer Contact .................................................24
Contents
2
WARNINGS
!
Failure to follow the instructions provided can imply a risk of
serious injury to personnel and xed installations.
!
Some grill parts can be sharp, we recommend wearing gloves
when assembling and lifting. Sharp edges can cause injury.
!
The grill is intended for outdoor use only in well-ventilated areas.
Never grill in enclosed spaces or under a roof, due to the danger of the
lack of oxygen.
!
Accessible parts of the grill become very hot during use.
Keep children and others who need supervision at a safe distance.
!
Do not move the grill while in use or connected to the gas bottle.
Shut off the gas on the regulator after use and disconnect from the
gas bottle.
!
Modication of the grill can cause danger and will invalidate
the warranty.
!
Never keep the gas bottle under the grill when in use. Gas leaks
can cause serious damage. Place the gas bottle by the side of the grill
during use.
!
Do not place the grill cover or other ammable material in the
compartment under the grill when it is in use or hot.
!
Do not use lava stones, charcoal or briquettes.
!
Clean the grill regularly and thoroughly.
!
3
Technical data — Meteor 4B
Total effect: 12,96 kW
Total gas consumption: 943 g/h.
Hose and regulator (not included):
Must be approved according to
EN standard.
Gas bottle (not included): Use standard
bottle approved for use in the Nordic
Region, 10/11 kg recommended. Even
though butane and propane gas can be
used, we recommend propane for use in
the Nordic Region. Approved hoses and
regulators are available from most outlets
selling gas equipment.
NB!
Gas hoses used for this product must
not exceed 150 cm in length.
Gas information
0359-16
This product is produced according to EUROPEAN GAS APPLIANCE
STANDARD EN498 AND EN484 and is CE certied.
COUNTRIES
OF USE
VALVE SIZE GAS TYPE GAS CATEGORY
BE, CY, CZ, DK,
EE, FI, FR, HU, IT,
LT, NL, NO, SE, SI,
SK, RO, HR, TR,
BG, IS, LU, MT
0.89 mm
G30 (butan), G31
(propan) and mixture
of these,
LPG 28~30 mbar
I3B/P(30)
H: 125 cm
L: 130 cm
D: 56 cm
4
Exploded drawing
A3
B1
B7
B8
B9
C8
C11
C3
C2
C9
C6
C7
C5 C4
B3
A2
A1
C1
D9
B6
B5
C10
B11
B2
B10
B4
5
Parts list
When ordering spare parts, please use
the code from parts list found here.
CODE PART QTY Meteor 4 Burner Gas BBQ
HOOD
A1
Hood (Pre-Assembled to Body)
1
A2 Hood Handle 1
A3 Warming Rack 1
BODY
B1 Barbecue Body 1
B2 Burner 4
B3 Control Panel 1
B4 Knob 4
B5 Flame Tamer 4
B6 Cooking Grill 2
B7 Drip Tray Left Bracket 1
B8 Drip Tray Right Bracket 1
B9 Drip Tray 1
B10 Drip Tray Handle 1
B11 Ignition Button 1
TROLLEY
C1 Side Shelf 2
C2 Left Side Shelf Panel 1
C3 Right Side Shelf Panel 1
C4 Left Leg 2
C5 Right Leg 2
C6 Front Upper Panel 1
C7 Front Lower Panel 1
C8 Wire Base 1
C9 Wheel 2
C10 Wheel Hubcap 2
C11 Axle 1
HARDWARE
D1 ST4.0x10 Screw 10
D2 M5x15 Bolt 4
D3 Ø5 W asher 4
D4 M5 Nut 4
D5 M6x15 Bolt 12
D6 M6x65 Bolt 12
D7 Ø6 W asher 4
D8 M6 Nut 8
D9 Locknut 2
Pre-Assembled Component
6
Hardware
The following screws and nuts are
supplied with the grill and must be tted.
D6
D7 D8
D5
D1
D5
D6
D8
D3 D4 D2
7
TOOLS FOR ASSEMBLING (NOT INCLUDED)
Assembly instructions
0102030405060708090 100 11 0 120 130 140 150
0123456
0102030405060708090 100 11 0 120 130 140 150
0123456
Medium size at blade or
Philips/cross-point screwdriver
Adjustable spanner or
metric spanner set
Ruler
01 02 03 04 05 06 07 08 09 0 100 110 120 130 140 150
01 23 45 6
NB!
Exercise caution when using electric tools –
their strength can damage the screws.
Please follow these instructions step by step.
We recommend two people to assemble the
grill to avoid heavy lifting.
8
1
Attach the Legs (C4,C5) to the Panels (C6,C7) using ST4.0x10 Screws (D1x8pcs) as shown.
Rear view
Front view
C5 C4
C6
C7
D1
1
2
Attach the front panel assembly and the Legs (C4,C5) to t he Wire Base ( C8) by inserting the
M6x65 Bolts (D6x4pcs) through the legs, wire base, Ø6 Washers (D7x4pcs) and secure with M6
Nuts (D8x4pcs). Ensure that the holes in the top of each leg which to fix barbecue body are in the
front of the side.
C8
D8
D7
D6
C4 C5
Assembly instructions
9
C9
D9
C10
C11
Lay the assembled trolley on its side. Lay t he Barbecue Body (B1) on its back and slide into
position between the trolley legs.
CAUTION! Care must be taken to ensure the hood or lid does not fall open unexpectedly
or becomes damaged when it is set on the ground.
Insert the M6x65 Bolts (D6x8pcs) through the guide holes of each leg and screw into barbecue
body tightly.
D6
B1
4
WARNING!
Two persons should
perform this step, due
to heavy lifting.
!
3
Unscrew the Locknuts (D9) from both ends of the Axle (C11).
Slide the axle through the corresponding holes in the left legs. Slide the Wheels (C9) over each
end of t he axle. S ecure the wheels i nto place with the l ocknuts. Place the Wheel Hubcaps
(C10) onto the outside of the wheels.
10
C2
D5
D8
Attach the left side shelf assembly to the barbecue body using a ST4.0x10 Screw (D1) and
M6x15 Bolts (D5x4pcs) as shown.
D5
D1
6
Attach the Left Side Shelf Panel (C2) onto one Side Shelf (C1) using M6x15 Bolts (D5x2pcs) and
M6 Nuts (D8x2pcs).
C1
5
11
Attach the Right Side Shelf Panel (C3) onto the other Side Shelf ( C1) using M6x15 Bolts
(D5x2pcs) and M6 Nuts (D8x2pcs).
C3
C1
D5
D8
Attach the right side shelf assembly to the barbecue body using a ST4.0x10 Screw (D1) and
M6x15 Bolts (D5x4pcs) as shown.
D5
D1
7
8
12
Attach the Drip Tray Right B racket (B8) to t he barbecue body using M5x15 Bolts (D2x2pcs),
Ø5 Washers (D3x2pcs) and M5 Nuts (D4x2pcs) as shown. Repeat the above process for the
Drip Tray Left Bracket (B7).
NOTE: Ensure t hat the big tabs of the brackets which stop the drip tray are located at
the front of the barbecue.
B8
D3
D2
Unscrew retaining bolts from Drip Tray Handle (B10) ,and fix the drip tray handle onto Drip Tray
(B9) using the retaining bolts.
Insert the Drip Tray (B9) by sliding it underneath the barbecue body.
9
10
B9
B10 B9
13
Carefully lay the Flame Tamer (B5) into the barbecue body ensuring it lies level within the
body. Lay the Cooking Grill (B6) into place.
Attach the Warming Rack (A3) to barbecue body as shown.
B6
B5
A3
11
12
14
13
ASSEMBLY IS NOW COMPLETE.
ALL JOINTS AND CONNECTIONS MUST NOW BE LEAK TESTED BEFORE USING
THE GRILL. READ CAREFULLY LEAK TESTING ON PAGE 16.
15
8
If there are still gas leaks after repeated attempts, contact your dealer.
7
IF BUBBLES APPEAR, SWITCH OFF THE GAS SUPPLY AND REPAIR THE
PROBLEM. PERFORM A NEW LEAK TEST. DO NOT USE THE GRILL BEFORE YOU
ARE SURE THAT THERE ARE NO LEAKS.
6
Open the gas tap on the regulator and carefully check for bubbles
appearing anywherethe liquid has been applied.
1
Make a mixed solution
(½ water and ½ liquid detergent / soap).
2
Ensure that there are no naked ames,
heat sources and cigarettes in the vicinity
when performing a leak test.
3
Check that all controls on the grill are in the
”OFF” position.
4
Set the regulator to the ”OFF” position and connect it
to the gas bottle.
5
Apply the liquid to all joints and connections on the gas bottle,
regulator, the entire hose and all valves on the grill.
ALL JOINTS AND CONNECTIONS MUST NOW BE
LEAK TESTED BEFORE USING THE GRILL.
Leak test annually, and whenever the gas bottle is removed or replaced.
Always perform a leak test in a well-ventilated area.
!
NB!
NEVER USE AN OPEN
FLAME TO PERFORM
A GAS LEAK TEST
IMPORTANT! GAS LEAK TEST
!
16
ALWAYS perform a gas leak test before using the grill.
Connect the gas hose to the gas
rail inlet on the left hand side of the
barbecue. Do not overtighten.
Do not use any sealing tape, paste
or liquid on the connection.
Connect the regulator to the gas
bottle according to your regulator and
bottle dealer’s instructions.
Gas hoses used for this product must
not exceed 150 cm in length
 Conrm all barbecue control knobs
are in the OFF position.
 We recommend propane gas for
use in the Nordic Region, but butane
can also be used.Butane is not very
suitable for low temperatures.
 Fit the regulator and the hose.
Follow the assembly instructions
supplied with the regulator set.
Check the gas hose regularly
for cracks, damage and decay.
Never use a damaged gas hose.
Check that the movable
plastic collar on the regulator
is intact and that it has not
been damaged by hot grill
parts.
Check that the gas bottle
stands on a rm, at surface
and is lower than the
connector.
Use an approved gas bottle
that ts the regulator supplied.
Bottles of 10 kg or above are
recommended.
I3B/P(30): G30(Butane), G31(propane)
and mixture of these, LPG 28-30 mbar
The following gas types can be used
Hose
Gas bottle
Regulator
Connecting the gas
WARNING
!
Never store the gas bottle
under the grill when in use. If the
gas bottle is being stored under the
grill when not in use, disconnect
the regulator.
!
Never move the grill while
it is in use, or connected
to the gas bottle.
17
Ensure that the grill is placed at least
150cm in all directions from
house walls, trees, plants and other flammable
materials or liquids when in use.
Do not place the grill under a roof or
overhang.
Ensure the grill is placed where there is
plenty of ventilation.
Do not grill below normal ground level.
Always lock the wheels, whenever
using the grill.
LOCATION
FINAL CHECK
Check that all controls knobs
work normally.
Check that the gas hose is free of cracks
and damage (this should be done
everytime the grill is used).
Check that the gas bottle and hose do
not come into contact with hot objects.
Before using the grill
18
Grilling tips
A CLEAN GRILL WORKS BETTER, causes less smoke and
prevents fat catching re. Burn off the grill after use by
opening the lid and burning all the burners at full power
for 10 minutes. Allow the grill to cool, and then brush off
ash from ame guards and grates.
BRUSH THE GRATES WITH AN OIL that can tolerate
high temperatures. This prevents food from burning onto
the grates.
PREHEAT THE GRILL for around 10 minutes at full
power before placing food on the grates. This gives a
better result, and cuts grilling time.
DO NOT GRILL FROZEN OR HALF-THAWED FOOD. The
cold will extend grilling time and give apoorer result.
DIVIDE THE GRILL INTO HOT AND COLD ZONES. When
the food is half-ready, move it to the coldzone to nish
grilling. This gives a better result and cooks the food
through without itbeing burnt.
ASSESS COOKING TIME FOR EACH PRODUCT to be
grilled and put them on the grill in the orderwhich will
mean they are ready at the same time.
BRUSH THE FOOD REGULARLY WHILE GRILLING with
oil or other marinade. It makes the food stays juicy for
longer.
DO NOT OPEN THE LID IF NOT NECESSARY. When the
lid is opened, a lot of the heat escapes.
NB!
YOUR BARBECUE IS NOT DESIGNED TO BE USED
WITH MORE THAN 50% OF THE COOKING AREA AS
A SOLID PLATE — THIS INCLUDES BAKING DISHES.
FULL COVERAGE WILL CAUSE EXCESSIVE BUILD-UP
OF HEAT AND DAMAGE THE BARBECUE. THIS IS
NOT COVERED BY WARRANTY.
19
Lighting instructions Meteor 4B
MANUAL IGNITION
TURNING OFF THE GRILL
Turn all control valves to the
“Off” position, then switch off the gas
supply at the bottle.
Wait until the barbecue is sufciently cool
before closing the hood.
NEVER DOUSE THE GRILL
WITH WATER WHEN THE
SURFACES ARE HOT.
If the grill will not light using the
normal lighter, use the following
procedure for manual lighting.
Use a long match or lighter.
1. Follow step 1-3
(Lighting instruction).
2. Insert lit match through the
lighting hole on the right side
of the barbecue body and place
near rightmost burner porthole.
3. Push and turn the rightmost
control knob anti-clockwise to
the high position, taking care to
protect yourself from the ames.
4. When the right burner is lit,
turn the remaining burners on
from right to left. Conrm that
each burner is alight before
turning on the next burner.
5. If a burner fails to ignite,
contact your local dealer for
assistance.
6. Follow step 6-7.
IF THE GRILL WILL NOT LIGHT USING
NORMAL OR MANUAL LIGHTING,
REFER TO THE TIPS SECTION IN THE
TROUBLESHOOTING MANUAL, OR
CONTACT YOUR DEALER.
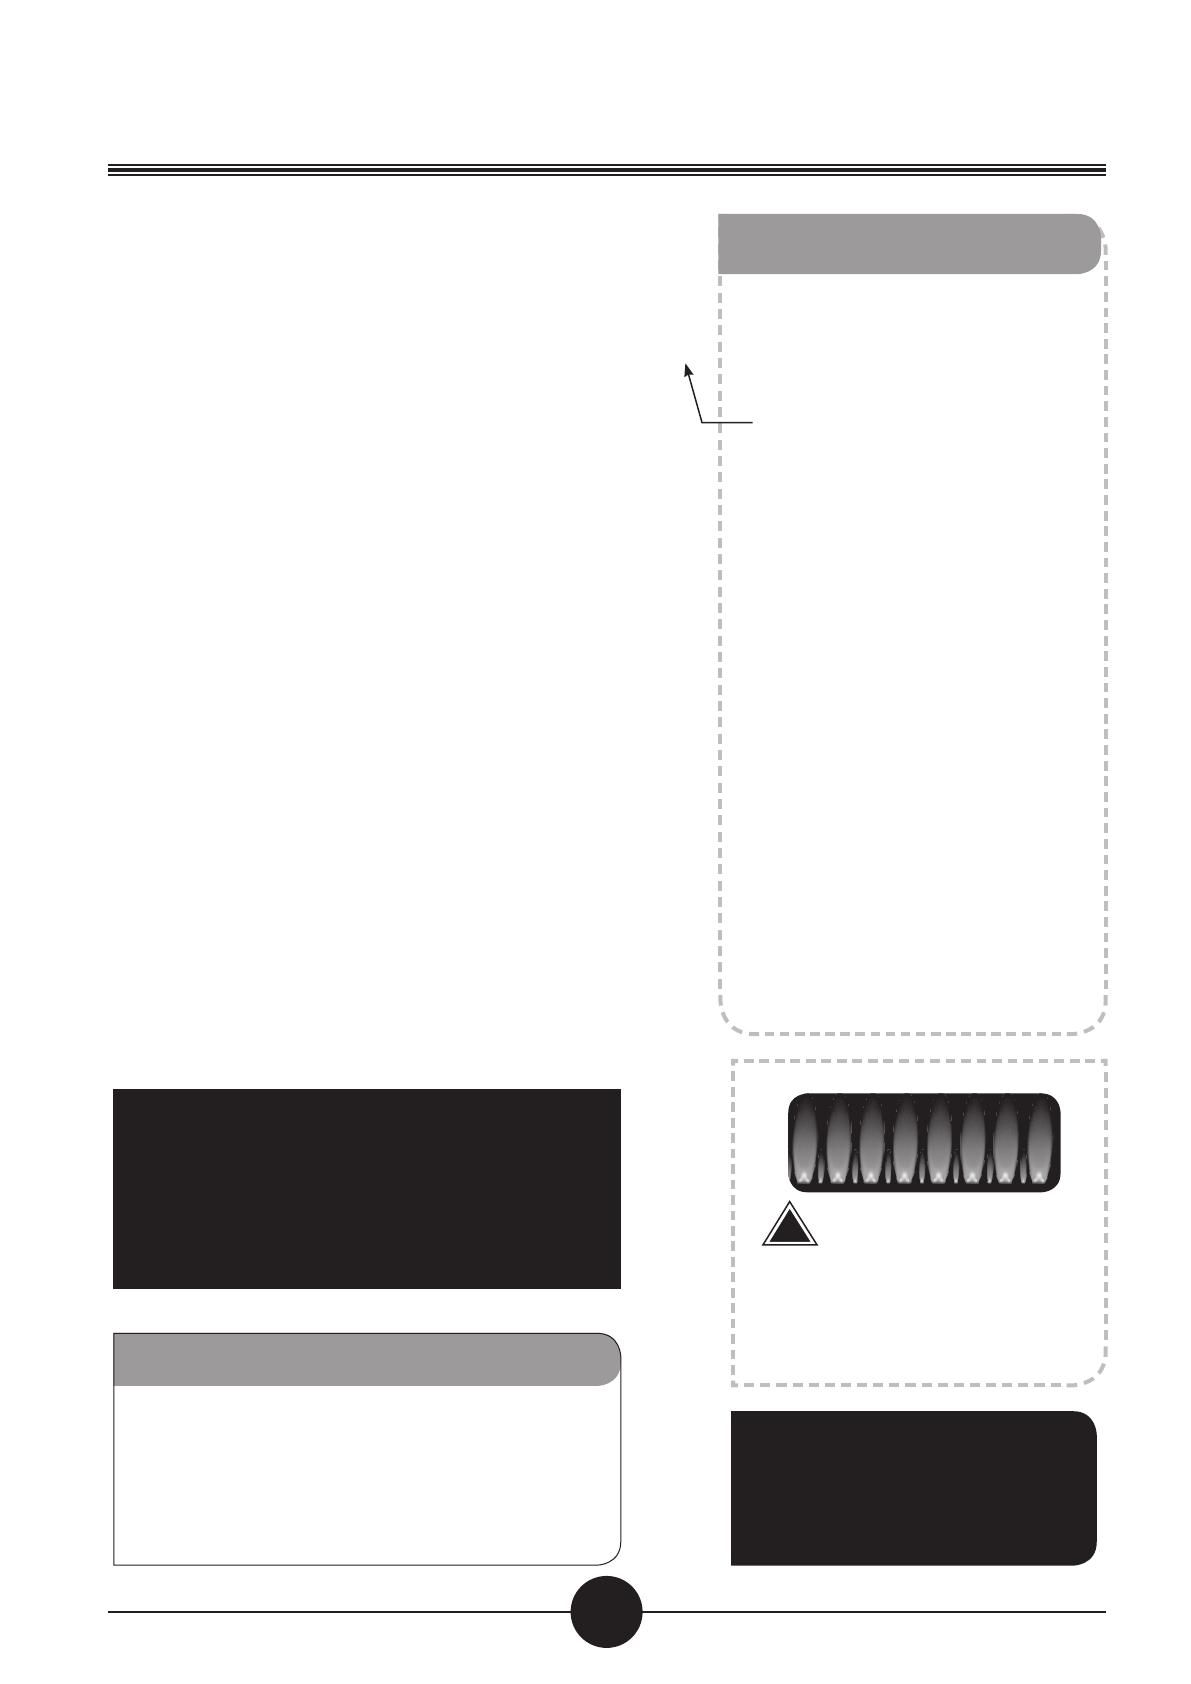
!
Flames should be blue
and stable. If the ames are
large and yellow, aring or
’broken’, check the
troubleshooting manual.
1
Open the barbecue hood or lid before lighting. Never
light your barbecue with the hood or lid closed.
2
Ensure all knobs are in the OFF position. Open the
gas control valve on the gas bottle or regulator.
3
Push and turn the control knob of the leftmost
burner to the high position. Press the ignition button
repeatedly until the grill is lit.
4
If burner fails to ignite after following above
procedure, turn all the knobs to the off position.
Close the gas valve on the gas bottle. Wait 5 minutes.
Reattempt all of the above steps. If the barbecue still
fails to light, please refer to the manual ignition
instructions.
5
After successful lighting of the leftmost burner,
ignite the remaining burners in sequence from left
to right. Conrm each burner is alight before igniting
another burner.
6
After ignition, turn the burners to the high position
for 3-5 minutes in order to pre-heat the barbecue.
This should be done before each cooking session. The
hood or lid should be open during preheating.
7
After completion of preheating, turn all burners to
the low position for best cooking results.
20
  • Page 1 1
  • Page 2 2
  • Page 3 3
  • Page 4 4
  • Page 5 5
  • Page 6 6
  • Page 7 7
  • Page 8 8
  • Page 9 9
  • Page 10 10
  • Page 11 11
  • Page 12 12
  • Page 13 13
  • Page 14 14
  • Page 15 15
  • Page 16 16
  • Page 17 17
  • Page 18 18
  • Page 19 19
  • Page 20 20
  • Page 21 21
  • Page 22 22
  • Page 23 23
  • Page 24 24

Meteor GG501701 Assembly, Use And Instruction Manual

Category
Barbecues & grills
Type
Assembly, Use And Instruction Manual

The Meteor GG501701 is a versatile gas grill designed for outdoor use only, featuring a 4-burner system with a total effect of 12.96 kW. It offers ample cooking space with two cooking grills, a warming rack, and side shelves for convenient food preparation and storage. The grill's easy ignition system and adjustable control knobs provide precise temperature control for a variety of grilling needs. Its sturdy construction and durable materials ensure longevity and resistance to outdoor elements.

Ask a question and I''ll find the answer in the document

Finding information in a document is now easier with AI