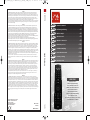
One For All URC 7556 Owner's manual
- Category
- Remote controls
- Type
- Owner's manual

URC-7556
706153
RDN-1051207
Universal Electronics BV
Europe & International
P.O. Box 3332
7500 DH, Enschede
The Netherlands
URC-7556
ONE FOR ALL
706153
E
nglish
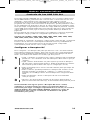
UNIVERSAL ELECTRONICS INC./ONE FOR ALL warrants to the original purchaser that this product will be free from
defects in materials and workmanship under normal and correct use for a period of one (1) year from the date of
o
riginal purchase. This product will be replaced free of charge if it has been proven to be defective within the one (1)
year warranty period. This warranty does not cover cartons, carrying cases, batteries, broken or marred cabinets or any
other item used in connection with the product. Any further obligation than listed above is excluded. To obtain
w
arranty service during the warranty period, please call us at the number mentioned on the Customer Service page.
Please notice that we need your purchase receipt so that we may establish your eligibility for service.
If you have bought this product for purposes which are not related to your trade, business or profession, please remind
t
hat you may have legal rights under your national legislation governing the sale of consumer goods. This guarantee
does not affect those rights.
D
eutsch
UNIVERSAL ELECTRONICS INC./ONE FOR ALL garantiert dem Kunden, dass dieses Produkt bei sachgemässem und
ordentlichem Gebrauch für die dauer eines Jahres volkommen frei von Defekten materieller oder technischer Art
b
leiben wird, gerechnet ab Kaufdatum. Falls erwiesen werden kann, dass innerhalb der Garantiezeit eines Jahres ein
Defekt entstanden ist, wird dieses Produkt gebührenfrei ersetzt, falls besagtes Produkt innerhalb der Garantiezeit auf
Kosten des Kunden zurückgeschickt wird. Diese Garantie erstreckt sich nicht auf Verpackungen, Transportbehältnisse,
B
atterien, zerbrochene oder beschädigte Gehäuse oder ander Objekte, die in Verbindung mit dem Produkt verwendet
werden. Jegliche weitere Verpflichtung als die oben aufgeführte wird ausgeschlossen. Um unseren Garantiesevice
innerhalb der Garantiezeit in Anspruch nehmen zu können, wählen Sie bitte die Nummer die Sie auf der
K
undendienstseite finden um weitere Instruktionen zu erhalten. Bitte beachten Sie, dass wir Ihren Kaufbeleg brauchen
um fest zu stellen ob Sie Anspruch auf unseren Garantieservice erheben können.
Wenn Sie dieses Produkt nicht für den Zweck gekauft haben, die mit Ihrem Handel, Geschäft oder Beruf
z
usammenhängen, beachten Sie bitte, dass es verbriefte Rechte unter Ihrer staatlichen Gesetzgebung geben kann, die
den Verkauf der Verbrauchsgüter regelt. Diese Garantie beeinflusst nicht jene Rechte.
Français
UNIVERSAL ELECTRONICS INC./ONE FOR ALL garantit à l’acheteur d’origine que ce produit est certifié franc de défauts
m
atériels et de main d’œuvre durant une période d’un (1) an à partir de la date d’achat original à la condition exclusive
que ce produit ait été utilisé de manière normale et correcte. Ce produit sera remplacé gratuitement s’il s’est révélé
défectueux pendant ladite période d’un (1) an, produit devant être retourné à la charge du client durant la période de
g
arantie. Cette garantie ne saurait couvrir d’aucune manière que ce soit emballages en carton, coffrets portables
quelconques, piles, corps d`appareil cassé ou endommagé ou tout autre article utilisé en combinaison avec ce produit.
Nous nous réservons le droit de rejeter tout autre engagement que ceux cités plus haut. Pour pouvoir obtenir le service
d
e garantie durant la période de garantie, veuillez nous contacter au numèro mentionné sur la page ”Service
Consommateurs” pour les instructions nécessaires. Veuillez noter que la preuve d’achat est obligatoire afin de pouvoir
déterminer votre droit à ce service.
Si vous avez acheté ce produit sans raison commerciale ni professionnelle, veuillez noter qu’il est possible que la
législation de protection des consommateurs de votre pays vous donne certains droits. Cette garantie n’affectera pas
ces droits.
Español
UNIVERSAL ELECTRONICS/ONE FOR ALL garantiza al comprador que este producto estará libre de defectos materiales o
de fabrcación, al menos durate 1 año desde la fecha actual de su adquisición ,y en caso de que se utilice de un modo
normal y correcto. Este producto será sustituido de forma gratuita siempre y cuando se pueda demostrar que es
defectuoso y que esto haya sucedido dentro del año de garantía, corriendo a cuenta del comprador los gastos de su
devolución. Esta garantia no cubre embalajes, maletines, envoltorios, pilas, armarios u otros objetos utilizados en
conexión con este producto. Se excluyen otras obligciones, cualesquiera que sean, además de las mencionadas más
arriba. Para obtener servicio de garantía dentro del período correspondiente a ésta, por favor, llámenos al número de
teléfono que se menciona en la página de Servicio de Atención al Cliente. Por favor, asegúrese de tener su recibo o
ticket de compra para que podamos establecer su legitimidad a este servicio.
Si ha adquirido este producto con propósitos que no estén relacionados con su comercio, negocio o profesión, por
favor recuerde que es posible que según la legislación de su país tenga derechos legales en cuanto a la venta de
productos para el consumidor. Esta garantía no afecta a esos derechos.
Português
A UNIVERSAL ELECTRONICS INC>/ONE FOR ALL garante ao cliente a a protecção deste produto no que respeita a
defeitos de fabrico de material, dentro de um período de uso correcto e normal de 1 ano a partir da data da compra do
mesmo produto. Este produto será substituido sem qualquer encargo no caso de ter sido comprovada qualquer avaria
dentro do período de 1 ano e após o seu retorno ( custos de envio da responsabilidade do consumidor ) dentro deste
mesmo prazo. Esta garantia não cobre embalagens de cartão , caixas , pilhas, ou outros items usados em conjunto com
este produto. Qualquer outra obrigação para além daquela acima descrita não será tida em consideração. Para obter o
serviço de garantia durante o período a este destinado, para mais informações contacte-nos no número mencionado
na página do Serviço de Apoio ao Cliente. Por favor tome nota que ser-lhe á pedido o comprovativo de compra, de
forma a que possamos confirmar a sua legitimidade para este serviço. Se você comprou este produto para propósitos
que não estejam relacionados ao seu negócio ou profissão, por favor tenha em conta que você pode ter direitos legais
baixo a sua legislação nacional que governa a venda de produtos de consumidores. Esta garantia não afecta esses
direitos.
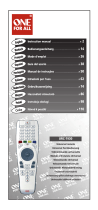
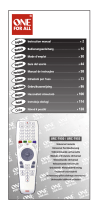
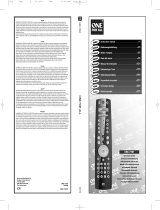
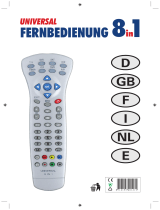
Universal remote
Universal Fernbedienung
Télécommande universelle
Mando a Distancia Universal
Telecomando Universal
Telecomando Universale
Universele Afstandsbediening
Univerzális távvezérlő
Uniwersalny pilot zdalnego sterowania
Univerzální dálkové ovládání
URC-7556
Instruction manual . . . . . . . . . . . . . . . . . . . . . . . . . . . . . . . . . . . . . . .P. 1
Bedienungsanleitung .
. . . . . . . . . . . . . . . . . . . . . . . . . . . . . . . . .S.
21
Mode d’emploi . . . . . . . . . . . . . . . . . . . . . . . . . . . . . . . . . . . . . . . . . .P. 41
Guía del usario . . . . . . . . . . . . . . . . . . . . . . . . . . . . . . . . . . . . . . . . . .P. 61
Manual de instruções .
. . . . . . . . . . . . . . . . . . . . . . . . . . . . . . . . .P.
81
Istruzioni per l’uso . . . . . . . . . . . . . . . . . . . . . . . . . . . . . . . . . . .P. 101
Gebruiksaanwijzing .
. . . . . . . . . . . . . . . . . . . . . . . . . . . . . . . . .P.
121
Használati útmutató
. . . . . . . . . . . . . . . . . . . . . . . . . . . . . . .P. 141
Instrukcja obsługi
. . . . . . . . . . . . . . . . . . . . . . . . . . . . . . . . . . . . .P. 161
Návod k použití
. . . . . . . . . . . . . . . . . . . . . . . . . . . . . . . . . . . . . . . .P. 181
En
g
l
i
s
h
D
e
u
ts
c
h
F
ran
ç
ai
s
Esp
añ
ol
Portu
g
u
ê
s
I
tal
i
an
o
Nederlands
M
ag
yar
Pol
s
k
i
Č
es
k
y
7556_omslag_E_10t:Kameleon_5_omslag_11mm_rug 05-12-2007 10:26 Pagina 1

WWW.ONEFORALL.COM 1
P
ICTURE OF ONE FOR ALL 5 REMOTE
2
INSTALLING THE BATTERIES
3
THE KEYPAD
3
S
ETTING UP THE ONE FOR ALL 5
6
(How to set up the ONE FOR ALL 5 to control your devices)
SEARCH METHOD
7
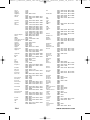
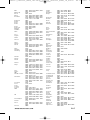
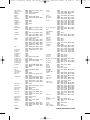
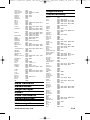
C
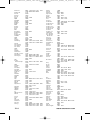
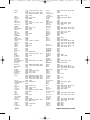
ODES
•
Televisions 201
•
Video Recorders 209
• Satellite Receivers 211
• Cable Converters 215
• Video Accessory 215
• Miscellaneous Audio 215
•
Amplifier 215
•
Amp. / Tuner 216
•
DVD 217
CODE BLINK OUT
(To find out which code is currently programmed)
8
QUICK CODE REFERENCE
8
THE LEARNING FEATURE
9
(How to copy functions from your original working
remote onto the ONE FOR ALL 5)
OPERATIONAL RESET
11
EXTRA FEATURES
•
Mode re-assignment (Changing a device mode) 12
•
Volume Punch-Through 13
•
Macros (Sequence of commands) 14
•
Key Magic (How to program missing functions) 16
•
Colour and Brightness 17
•
ONE FOR ALL Light Control 19
TROUBLE-SHOOTING
17
CUSTOMER SERVICE
18
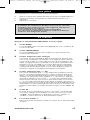
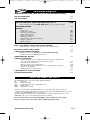
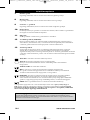
Table of Contents
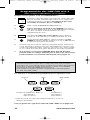
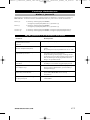
Your ONE FOR ALL 5 can operate five devices:
TV : Television
VCR : Video Recorder
SAT : Satellite Receiver or Cable Converter
DVD : DVD Player
AMP : Amplifier / Tuner
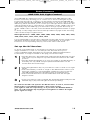
Also, what makes the ONE FOR ALL 5 even more unique is the
"Learning" feature, which allows you to customise any of the special
functions of your original remote control onto the keypad of your
new ONE FOR ALL 5.
The following pages explain in simple steps how to customise
the ONE FOR ALL 5 to your devices.
You may need this guide again in the future, so please be sure
to keep it.
About Your ONE FOR ALL 5
Englis
h
706153_URC7556_EURO_10t:Ofa5_Digital_URC7555_EURO_10_Talen 04-12-2007 17:02 Pagina 1

2 WWW.ONEFORALL.COM
9
10
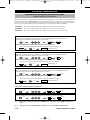
3
4
6
8
11
12/13
7
2
1
14
5
706153_URC7556_EURO_10t:Ofa5_Digital_URC7555_EURO_10_Talen 04-12-2007 17:03 Pagina 2

WWW.ONEFORALL.COM 3
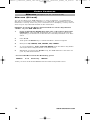
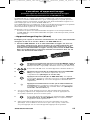
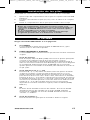
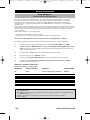
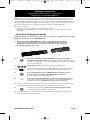
Installing the Batteries
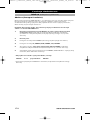
Your ONE FOR ALL 5 requires 4 new “AAA/LR03” alkaline batteries.
1
Push the battery door upwards and lift it up to remove it.
2
Match the batteries to the (+) and (–) marks inside the battery case,
then insert the batteries.
3 Replace the battery cover by pushing downwards and allowing
it to click back into position.
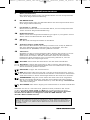
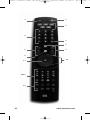
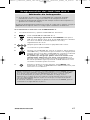
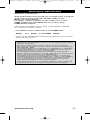
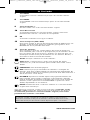
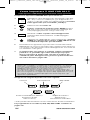
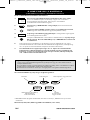
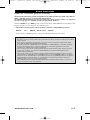
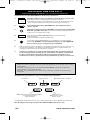
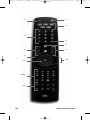
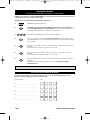
See picture of ONE FOR ALL 5 remote on page 2.
1 Magic Key
The MAGIC key is used to set up your ONE FOR ALL 5.
2 Power
The POWER key operates the same function it did on your original
remote control.
3 Backlight Device Keys
The TV, VCR, SAT, DVD, and AMP keys select the home entertainment
device to be controlled. For example pressing the TV key allows
the remote to control the functions of your Television, after pressing
VCR you can operate your Video Cassette Recorder etc.
For more detailed information, please refer to the chart on page 6.
During operation of the ONE FOR ALL the red light (LED - Light Emitting
Diode) underneath a device key will light up (every time a key is pressed)
to indicate the device mode you are using.
4 Number Keys (0-9, -/- -, AV)
The Number keys (0-9, -/--, AV) provide functions just like your
original remote, such as direct access channel selection. If your
original remote uses one/two digit input switching (-/-- symbol),
this function can be obtained by pressing the -/-- key. If your original
remote has an 10 key, this function can also be found under
the -/-- key. If your original remote has an 20 key, this function can also be
found under the AV key. In AMP mode the Number keys may provide
source (input) selection.
5 AV Key
In TV mode you will obtain the AV / Input function. In VCR mode you will
obtain the “TV/VCR” function, if available on your original remote. In
DVD mode you will obtain the “TV/DVD” function, if available on your
original remote. In DVD mode you will obtain the “TV/SAT” or “TV/DTV”
function, if available on your original remote.
6 Volume +/- Keys
These keys operate in the same way as the keys on your original remote.
The Keypad
Important notes:
-
On the inside of the battery compartment door you will find
a label on which to write your Set-Up codes after your ONE FOR ALL 5
i
s set up for your device. Please write down your codes
for easy, future reference.
-
Do not use rechargeable batteries.
- Upon changing the batteries, your set-up codes and advanced pro-
gramming will be retained.
706153_URC7556_EURO_10t:Ofa5_Digital_URC7555_EURO_10_Talen 04-12-2007 17:03 Pagina 3

4 WWW.ONEFORALL.COM
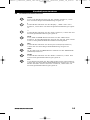
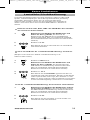
7 Mute Key
The Mute key operates the same function it did on your original remote
control.
8 Menu Key
T
he MENU key controls the same function as it did on your original
remote.
9 Channel +/- Keys
T
hese keys operate in the same way as the keys on your original remote.
10 D
irectional Keys
If available on your original remote, these keys will allow you to navigate
t
hrough the menu mode of your device.
11 OK
T
he OK key will confirm your choice in menu operation.
12 T
ransport Keys (VCR / DVD)
These keys operate the transport functions (PLAY, FF, REW etc.) of your
device. To prevent accidental recording, the RECORD key mustbe pressed
twice to start recording.
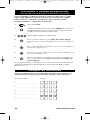
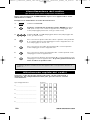
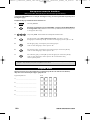
13 Teletext Keys
After pressing the TV key, the transport keys (REW, PLAY, PAUSE, FF) are
used to operate the main Teletext functions. The symbols below the keys
are for Teletext. The text keys are used to access the Teletext functions of
your television. Of course, your television must have Teletext capability.
TEXT ON: Puts the television in the Teletext mode.
TEXT OFF: Switches the television back to regular viewing mode.
On some televisions, this may be done by pressing the TEXT ON key
several times.
HOLD/STOP: Stops changing pages.
MIX: Shows teletext and regular television simultaneously.
You may also use this key for subtitling. On some televisions
this function is accessed by pressing the text key twice.
EXPAND: Shows the top half of the Teletext page in larger letters. By
pressing again, you can see the bottom half of the Teletext page enlar-
ged. To return to regular Teletext viewing, press the EXPAND key again,
or press the TEXT ON key, depending on your television.
INDEX: This key will give you access to the index function within the
text mode.
After pressing the TV key and accessing the text mode, the keys marked
red, green, yellow and blue, allow you to access the Fastext functions
of your television. If on your original remote control these keys are
used for Menu navigation, the ONE FOR ALL Fastext keys may
operate in the same way.
i
The Keypad
Important note: For a more detailed explanation of Teletext and Fastext, please
refer to the manual of your television. Remember, different televisions control
Teletext and Fastext features in different ways. Not all of the Teletext functions may
be available for your particular model.
706153_URC7556_EURO_10t:Ofa5_Digital_URC7555_EURO_10_Talen 04-12-2007 17:03 Pagina 4

WW W.ONEFORA LL.COM 5
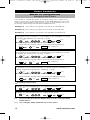
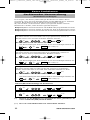
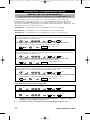
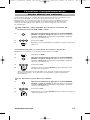
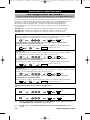
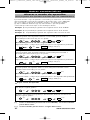
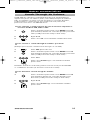
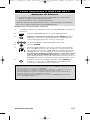
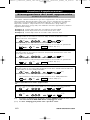
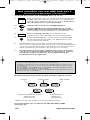
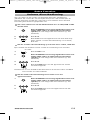
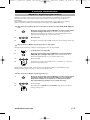
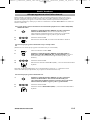
14 Additional Function Keys
Guide
In TV and/or SAT mode you will obtain the “Guide”
function, if available on your original remote.
I
In TV and/or SAT mode you may obtain the ‘Display”, “OSD” or
“info” function, if available on your original remote.
?
In SAT mode you will obtain the “help” function, if
available on your original remote.
Back
In TV, VCR and DVD mode you will obtain the “Menu Exit”
function, if available on your original remote. In SAT menu
mode you may use the “back” key to go to the previous menu
screen.
PPV
In SAT mode you will obtain the Pay Per View (PPV)
function, if available on your original remote.
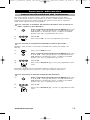
Subt.
In TV, VCR, SAT and DVD mode you will obtain the “Subtitle”
function, if available on your original remote.
Radio
In SAT mode you will obtain the “Radio” function, if
available on your original remote.
Fav
In TV mode this key provides you the (16:9) wide screen view
function, if available on your original remote). In SAT mode
you will obtain the “Favorite” function, if available on your
original remote.
The Keypad
706153_URC7556_EURO_10t:Ofa5_Digital_URC7555_EURO_10_Talen 04-12-2007 17:03 Pagina 5

6 WWW.ONEFORALL.COM
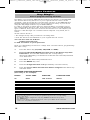
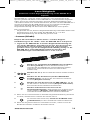
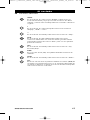
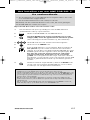
Example: To set up the ONE FOR ALL 5 for your Television:
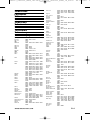
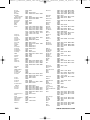
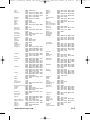
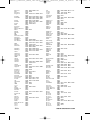
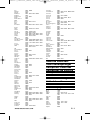
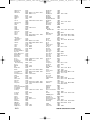
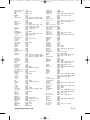
1 Find the code for your device in the Code list (page 201 –
221). Codes are listed by device type and brand name.
The most popular code is listed first. Make sure your
device is switched on (not on standby).
2 Press the TV key on the ONE FOR ALL 5 for the device you
wish to Set-Up.
3 Press and hold down MAGIC until the ONE FOR ALL 5’s TV
key blinks twice (the red LED underneath the TV key will
blink once and then twice).
4 Enter your four-digit device code using the number keys.
The device key will blink twice.
5 Now, aim the ONE FOR ALL 5 at your device and press
POWER. If your device switches off, the ONE FOR ALL 5
is ready to operate your device.
6 Turn your device back on and try all the remote’s functions to ensure they
are working properly. If the functions do not work properly, repeat steps
1-5 using another code listed under your brand.
7 If your device does not respond, follow steps 1 to 5 with each
code listed for your brand. If none of the codes listed for your
brand operate your device, or if your brand is not listed at all, try
the Search Method described on page 7.
Setting up the ONE FOR ALL 5
(How to set up the ONE FOR ALL 5 to control your devices)
- Some codes are quite similar. If your device does not respond or is not
functioning properly with one of the codes, try another code listed under your
brand.
- If your device’s original remote control does not have a POWER key, press PLAY
instead of POWER when setting up your device.
- Remember to press the corresponding device key before operating your device.
ONE FOR A
Acura
Admiral
Adyson
Agazi
AGB
Agef
Aiko
0009
0087, 0093, 0363, 04
0217, 0216
0264
0516
0087
0216, 0009, 0037,
0037, 0274
0361, 0208, 0371
_ ___
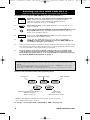
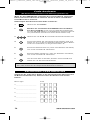
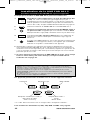
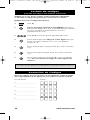
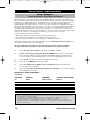
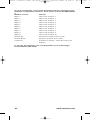
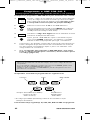
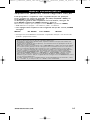
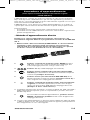
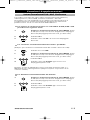
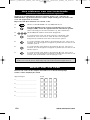
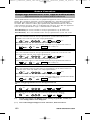
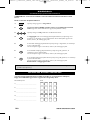
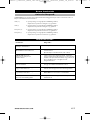
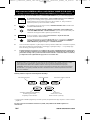
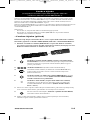
Devices can be found under the following keys:
To set up a second TV, VCR, SAT, DVD or AMP see page 12.
* DVBT codes (Digital Terrestrial / Free View) can be found in
the ”Satellite Receiver” section.
Video Recorder
Television
Satellite Receiver (also DVBT*) /
Cable Converter
Video Accessory
Amplifier
Amp. / Tuner
Miscellaneous Audio
DVD / DVD-R
706153_URC7556_EURO_10t:Ofa5_Digital_URC7555_EURO_10_Talen 04-12-2007 17:03 Pagina 6

WW W.ONEFORA LL.COM 7
- Most TV’s do not switch on pressing the POWER key. Please try pressing a
“number” key or the “TV-text off” key to switch your TV back on.
- If you cannot control your Television properly, please continue the Search
Method, you may be using the wrong Code.
- To search for the code for another device follow the instructions above only
press the appropriate device key instead of TV during step 2.
- If the original remote control of your Video recorder or DVD player does not
have a POWER key, press PLAY instead of POWER during step 5.
Setting up the ONE FOR ALL 5
Search Method
--> If your device does not respond to the ONE FOR ALL 5 after you
have tried all the codes listed for your brand.
--> If your brand is not listed at all.
The Search Method allows you to scan through all the codes contained
in the memory of the ONE FOR ALL 5.
Example: To search for your TV code:
1 Switch your television on (not on standby) and aim your ONE FOR ALL
at your TV.
2 Press the TV key on your ONE FOR ALL 5.
3 Press and hold down MAGIC until the ONE FOR ALL 5’s TV
key blinks twice (the red LED underneath the TV key
will blink once and then twice).
4 Press 9 9 1. The TV key will blink twice.
5 Next, press POWER.
6 Aim the ONE FOR ALL 5 at your Television. Now press CH+ over
and over, until your Television turns off (every time you press
the CH+ key the ONE FOR ALL 5 will send out a POWER signal
from the next code contained in the memory). You may have
to press this key many times (up to 150 times) so please
be patient. If you skip past a code, you can go to the previous
code(s) by pressing the CH- key. Remember to keep pointing
the ONE FOR ALL 5 at your Television while pressing this key.
7 As soon as your television turns off, press MAGIC to store the
code.
706153_URC7556_EURO_10t:Ofa5_Digital_URC7555_EURO_10_Talen 04-12-2007 17:03 Pagina 7

8 WWW.ONEFORALL.COM
Once you have Set-Up your ONE FOR ALL 5, you can blink back your
SET-UP CODE for future reference.
Example: To blink out your Television code:
1 Press TV once.
2 Press and hold down MAGIC until the ONE FOR ALL 5’s TV
key blinks twice (the red LED underneath the TV key will
blink once and then twice).
3 Press 9 9 0. The TV key will blink twice.
4 For the first digit of your four-digit code, press 1 and count
all the red blinks. If there are no blinks, the digit is "0".
5 For the second digit, press 2 and count all the red blinks.
If there are no blinks, the digit is "0".
6 For the third digit, press 3 and count all the red blinks.
If there are no blinks, the digit is "0".
7 For the fourth digit, press 4 and count all the red blinks.
If there are no blinks, the digit is "0". Now you have your
four-digit code.
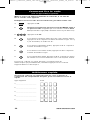
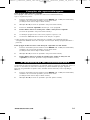
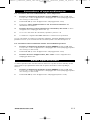
Quick Code Reference
Write down the codes for your devices in the boxes below and in
the battery compartment for quick and easy reference.
Device Type Code
1._________________________
2._________________________
3._________________________
4._________________________
5._________________________
■
■
■
■
■
■
■
■
■
■
■
■
■
■
■
■
■
■
■
■
■
■
■
■
■
■
■
■
■
■
■
■
■
■
■
■
■
■
■
■
Code Blink out
(To find out which code is currently programmed)
- To blink back the code for your other devices press the appropriat device key
during step 1.
706153_URC7556_EURO_10t:Ofa5_Digital_URC7555_EURO_10_Talen 04-12-2007 17:03 Pagina 8

WW W.ONEFORA LL.COM 9
The ONE FOR ALL 5 comes with a complete library of pre-programmed
codes. After you have set up the ONE FOR ALL 5 for your device, you may
find that there are one or more keys that you had on your original remote,
which do not have a place on the ONE FOR ALL keypad.
As a convenience, the ONE FOR ALL 5 offers a special Learning feature that
allows you to copy any function from your original remote control onto the
keypad of the ONE FOR ALL 5.
Before you start:
- Make sure your original remote control is working correctly.
- Make sure neither your ONE FOR ALL, nor your original remote control is
pointing at your device.
• Learning (Direct)
Example: To copy the “mono/stereo” function from your original TV
remote onto the ”Radio”key of your ONE FOR ALL 5.
1 Place both remote controls (the ONE FOR ALL 5 and your original) on
a flat surface. Make sure the ends which you normally point at your
device are facing each other. Keep the remotes at a distance of
2 to 5 cm.
2 Press and hold the MAGIC key until one of the device
keys will blink twice. The red LED underneath the
corresponding device key (depending on the device mode
that was selected) will blink once then twice.
3 Press 9 7 5 (the device key will blink twice).
4 Press the device key (on the ONE FOR ALL remote) to select
the mode to which you want to copy the learned function
(Example: TV key).
5 Press the key (on the ONE FOR ALL remote) where you
want to place the learned function (Example: ”Radio” key).
The device key will flash rapidly.
6 Press and hold the key (on your original remote) that you
want to copy until the device key on the ONE FOR ALL blinks
twice (Example: “mono/stereo” key).
7 If you want to copy other functions within the same mode, simply repeat
steps 5 and 6 pressing the next key you want to copy by learning.
8 To exit the learning mode, press and hold MAGIC until
the device key blinks twice.
9 Learning is mode specific. To access your learned function,
press the appropriate device key first.
The Learning Feature
(How to copy functions from your original working remote
onto the ONE FOR ALL5)
706153_URC7556_EURO_10t:Ofa5_Digital_URC7555_EURO_10_Talen 04-12-2007 17:03 Pagina 9

10 WWW.ONEFORALL.COM
The Learning Feature
• Shifted Learning
Y
ou can also learn a function on a key of the ONE FOR ALL without
sacrificing the original ONE FOR ALL function. A Shifted Learning function can
also be put on any key EXCEPT for the following: Device keys, MAGIC key,
N
umber keys. To install a Shifted Learning function, simply follow steps 1-8 on
the previous page. During step 5, press MAGIC once before you press the key
where you are placing the learned function.
To access the shifted function, press MAGIC and then the key you have
learned on.
I
mportant notes:
-
During steps 2 - 7 (page 9), you have approximately 10 seconds to conduct each
step. If there is a gap of more than 10 seconds between two steps, you will have
to start again from step number 2.
- If you learn a function on a key, the original ONE FOR ALL feature automatically
b
ecomes shifted. You can press MAGIC then the key to access it (this excludes the
C
hannel and Volume keys).
- The Learning feature is mode specific. Therefore you can place one learned fea-
t
ure per mode on the same key.
- If a Shifted Learned function is placed on the Channel and Volume keys then
Colour/Brightness will be sacrificed.
-
The ONE FOR ALL 5 can learn approximately 25 – 40 functions.
-
You can replace a learned function by placing another learned function on top.
-
Learning should not be done in direct sunlight or under incandescent lights.
- Make sure you are using new batteries before following the instructions above.
- Upon changing the batteries, your learned functions will be retained.
706153_URC7556_EURO_10t:Ofa5_Digital_URC7555_EURO_10_Talen 04-12-2007 17:03 Pagina 10

WWW.ONEFORALL.COM 11
T
o delete a learned function:
1 Press and hold the MAGIC key until one of the device keys will
b
link twice. The red LED underneath the corresponding device key
(
depending on the device mode that was selected) will blink once then
t
wice.
2 Press 9 7 6 (the device key will blink twice).
3
Press the device key in which the function will be deleted.
4 Press twice on the learned key which will be deleted
(
the device key will blink twice).*
5 If there is another key which you wish to delete, repeat steps 1-4.
6
The original functions of the ONE FOR ALL 5 will now be present.
* To delete a Shifted Learned feature, press MAGIC before you press
t
he learned key to be deleted (during step 4).
To delete all learned functions within a specific mode:
1 Press and hold the MAGIC key until one of the device keys will
blink twice. The red LED underneath the corresponding device key
(depending on the device mode that was selected) will blink once then
twice.
2 Press 9 7 6 (the device key will blink twice).
3 Press the appropriate device (mode).
Operational Reset
The Operational Reset will erase all learned functions across all modes and
some other programmed functions like Key Magic and Macros.
1 Press and hold the MAGIC key until one of the device keys will
blink twice. The red LED underneath the corresponding
device key (depending on the device mode that was selected)
will blink once then twice.
2 Press 9 8 0 (the device key will blink four times).
The Learning Feature
706153_URC7556_EURO_10t:Ofa5_Digital_URC7555_EURO_10_Talen 04-12-2007 17:03 Pagina 11

12 WW W.ONEFORALL.COM
It is possible to change the mode of any device key. This is useful if you
want to set up two of the same devices on the ONE FOR ALL 5. The code
can be set up using “Direct code set up” (p. 6) or “Search method” (p. 7).
To change a device key, see the three examples below.
Example 1) if you want to program a second TV on the VCR key.
Example 2) if you want to program a second TV on the SAT key.
Example 3) if you want to program a second VCR on the SAT key.
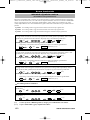
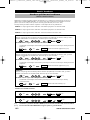
Example 1:
To program a second Television on the VCR key (for example), you need
to change the VCR key into a TV key, so press:
(*) (**)
The VCR key has now become a second TV key.
Now enter the Set-Up code for your second TV by pressing:
(*) (TV code) (**)
Example 2:
To program a second Television on the SAT key (for example), you need
to change the SAT key into a TV key, so press:
(*) (**)
The SAT key has now become a second TV key.
Now enter the Set-Up code for your second TV by pressing:
(*) (TV code) (**)
Example 3:
To program a second Video Recorder on the SAT key (for example), you
need to change the SAT key into a VCR key, so press:
(*) (**)
The SAT key has now become a second VCR key.
Now enter the Set-Up code for your second VCR by pressing:
(*) (VCR code) (**)
Resetting a Device key
Example: To reset the VCR key to its original mode, press:
(*) (**)
Example: To reset the SAT key to its original mode, press:
(*) (**)
(*) Press and hold down the MAGIC key until the red light (LED)
blinks twice.
(**) The red light (LED) will blink once then twice.
Extra Features
Mode re-assignment
(Changing a device mode)
__ __
__ __
_ _ __
706153_URC7556_EURO_10t:Ofa5_Digital_URC7555_EURO_10_Talen 04-12-2007 17:03 Pagina 12

WW W.ONEFORA LL.COM 13
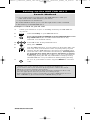
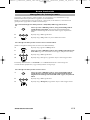
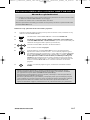
Volume Punch Through
You may be able to use some functions of your Television, Video recorder,
DVD player, Amp./Tuner, Satellite receiver or Cable converter at the same time.
For example: if you are watching a program on your video recorder, you can
adjust the volume (a TV function) without pressing the TV mode key on your
ONE FOR ALL 5.
To punch through to TV volume while in the VCR, DVD, AMP or SAT
mode:
1. Press and hold the MAGIC key until one of the
device keys will blink twice. The red LED underneath
the corresponding device key (depending on the device
mode that was selected) will blink once then twice.
2. Press 9 9 3.
3. Then press the TV key and the red light will
blinktwice.
To cancel the “Volume Punch Through” per mode:
(Example: to cancel the “Volume Punch Through” for the VCR mode)
1. Press VCR once.
2 Press and hold down MAGIC until the ONE FOR ALL
5’s VCR key blinks twice (the red LED underneath the
VCR key will blink once and then twice).
3. Press 9 9 3.
4. Then press the Volume (-) key and the red light
will blink four times.
Result: being in VCR mode, you will be able to control VOL+/- or MUTE
functions of your VCR (provided it has volume control).
To cancel the „Volume Punch Through“:
1 Press and hold the MAGIC key until one of
the device keys will blink twice. The red LED
underneath the corresponding device key
(depending on the device mode that was
selected) will blink once then twice.
2. Press 9 9 3.
3. Press the Volume (+) key and the red light will blink
four times.
Extra Features
706153_URC7556_EURO_10t:Ofa5_Digital_URC7555_EURO_10_Talen 04-12-2007 17:03 Pagina 13

14 WWW.ONEFORALL.COM
M
acros
(Sequence of commands)
Extra Features
Macros (Direct)
You can program your ONE FOR ALL 5 to issue a sequence of commands at
the press of one button. Any sequence of commands you regularly use can be
r
educed to one key stroke for your convenience. For example, you may want to
turn off your TV, VCR and Satellite at the same time.
Example: To set up the Macro mentioned above on the key labeled
”
Radio” on your ONE FOR ALL 5:
1 Press and hold the MAGIC key until one of the device keys will
blink twice. The red LED underneath the corresponding device key
(
depending on the device mode that was selected) will blink once then
t
wice.
2 Press 9 9 5.
3
Then press the Radio key to which the Macro will be assigned.
4 Next press TV, POWER, VCR, POWER, SAT, POWER.
5 To store the Macro, press and hold MAGIC until the device key blinks
twice (the device key will blink once then twice).
6 Whenever you press the ”Radio” key, the ONE FOR ALL 5 will turn off
your TV, VCR and Satellite.
• To erase the Macro from the Radio key, press:
MAGIC* 9 9 5 Radio key MAGIC*
*Here you must hold down MAGIC until the device key blinks twice.
706153_URC7556_EURO_10t:Ofa5_Digital_URC7555_EURO_10_Talen 04-12-2007 17:03 Pagina 14

WWW.ONEFORALL.COM 15
Shifted Macros
You can install a Shifted Macro on any key, except for the device
k
eys (TV, VCR, SAT, DVD and AMP), the MAGIC key, and the
N
UMBER keys.
I
f for example, you want to program a shifted Macro on the POWER key,
simply press MAGIC once then the POWER key during step 3.
N
ow everytime you press MAGIC, then the POWER key, the ONE FOR ALL
w
ill turn off your TV, VCR and Satellite.
• To erase the Shifted Macro from the POWER key press:
M
AGIC* 9 9 5 MAGIC POWER key MAGIC*
* Here you must hold down MAGIC until the device key blinks twice.
- Each MACRO can consist of a maximum of 15 key strokes.
-
Make sure that you program a Macro on a spare key that you don’t use
in any mode.
-
Once you program a Macro on a specific key, the sequence will work regardless
of the mode (TV, VCR, SAT, DVD and AMP) you are using.
-
To avoid accidental recordings with the ONE FOR ALL 5, you must press
the Record key twice to begin recording. Because of this, you cannot assign a
M
acro or Shifted Macro to the Record key.
- If you had to hold down a key for a few seconds on the original remote control
to get a function, this function may not work in a macro on your ONE FOR ALL
remote.
- If you program a Macro on a key, the original function will become shifted
(excluding CH+/- and VOL+/- keys). Press MAGIC then the key to access it. If you
place a Macro shifted on a digit key, access the original function by pressing
MAGIC twice and then the digit key.
- If a Shifted Macro is placed on the Channel and Volume keys then the Colour
and Brightness feature will be sacrificed.
Extra Features
706153_URC7556_EURO_10t:Ofa5_Digital_URC7555_EURO_10_Talen 04-12-2007 17:03 Pagina 15

16 WWW.ONEFORALL.COM
Key Magic
®
h
ow to program missing functions
Key Magic is an exclusive ONE FOR ALL feature. The design of the ONE FOR
A
LL ensures that many functions of your original remote control can be
operated - even those that do not have their own key on the ONE FOR ALL
keypad. Frequently used functions can be assigned to a key of your choice
using the Key Magic feature of your ONE FOR ALL.
I
n order to program a certain function with Key Magic you need to know
the corresponding function code. As the function codes vary with different
types of devices, they cannot be found in the manual. You can request your
function codes through our consumer service help-line or by letter, fax or
e
-mail.
A
ll we need to know is:
• The 5-digit set-up code your device is working with.
•
How the function was labelled on your original remote control.
Y
ou can also visit our website
(www.oneforall.com)
to find an answer to your questions.
Once you obtain(ed) your function code(s) from customer service, programming
the code is easy:
1 Press the device key (TV, VCR, SAT, DVD and AMP).
2 Press and hold the MAGIC key until one of the device keys will
blink twice. The red LED underneath the corresponding
device key (depending on the device mode that was selected) will blink
once then twice.
3 Press 9 9 4. The device key will blink twice.
4 Press the MAGIC key once.
5 Enter the 5-digit function code (provided by customer service).
6 Press the key to which the function will be assigned. The device key
will blink twice.
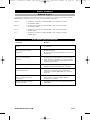
EXTENDED FUNCTION REFERENCE
(first entry is an example):
DEVICE SET-UP CODE FUNCTION FUNCTION CODE
TV 0556 16/9 format 00234
- To access the function you have programmed, press the corresponding
device key first.
- Key Magic can be assigned to any key EXCEPT the Device keys and
the MAGIC key.
- Please note all the extended function codes you obtain from customer
service for easy future reference.
Extra Features
706153_URC7556_EURO_10t:Ofa5_Digital_URC7555_EURO_10_Talen 04-12-2007 17:03 Pagina 16

WWW.ONEFORALL.COM 17
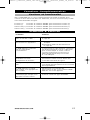
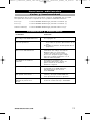
Trouble-Shooting
Problem:
Y
our brand is not listed
i
n the code section?
T
he ONE FOR ALL does
not operate your
d
evice(s)?
The ONE FOR ALL is not
performing commands
properly?
Problems changing
channels?
Video not recording?
The ONE FOR ALL does
not respond after
pressing a key?
The device key does not
blink when you press
a key?
Solution:
T
ry the search method on page 7.
A
) Try all the codes listed for your brand.
B) Try the search method on page 7.
You may be using the wrong
code. Try repeating the Direct
Set-Up using another code listed
under your brand or start the
search method over again to
locate the proper code.
Enter the channel number
exactly as you would on your
original remote.
As a safety feature on your
ONE FOR ALL, you must press
the Record key twice.
Make sure you are using new
batteries and are aiming the
ONE FOR ALL at your device.
Replace batteries with 4 fresh,
new AAA/LR03” alkaline batteries.
D
epending on the functions of your original remote control, the ONE FOR ALL
m
ay operate the colour and brightness settings of your television.
Colour (+) = Press and release MAGIC then hold Volume (+)
C
olour (-) = Press and release MAGIC then hold Volume (-)
B
rightness (+) = Press and release MAGIC then hold Channel (+)
B
rightness (-) = Press and release MAGIC then hold Channel (-)
Colour and Brightness
Extra Features
706153_URC7556_EURO_10t:Ofa5_Digital_URC7555_EURO_10_Talen 04-12-2007 17:03 Pagina 17

18 WWW.ONEFORALL.COM
In the UK In Ireland
E-mail : ofahelp@uebv.com (*) E-mail : ofahelp@uebv.com (*)
F
ax : +31 53 432 9816 Fax : +31 53 432 9816
T
el. : 0901-5510010
(
£ 0,50 per minute)
T
el. : 016015986
In Australia In South Africa
F
ax : 03 9672 2479 Fax : 011 298 2302
Tel. : 1 300 888 298 Tel. : 0860 100551
Tel. : 011 4173000
I
n New Zealand Ukraine
E
Fax : (06) 878 2760 Fax : +38 044 4890187
T
el. : 0508 ONE 4 ALL (663 4 255) Tel. : +38 044 4890188
W
eb. : www.oneforall.com.ua
Slovakia Croatia
E
F
ax : +421 55 611 8111 Fax : +385 1 48 16 807
Tel. : +421 55 611 8131 Fax : +385 1 48 16 806
Web. : www.dsi.sk Web. : www.tehnocentar.hr
(*) Just send a blank message, you’ll get auto-reply.
Customer Service
706153_URC7556_EURO_10t:Ofa5_Digital_URC7555_EURO_10_Talen 04-12-2007 17:03 Pagina 18

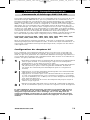
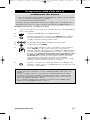
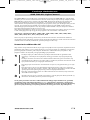
WWW.ONEFORALL.COM 19
Your ONE FOR ALL 5 Remote Control is compatible with ONE FOR ALL Light
C
ontrol accessories, allowing you to control one or more of the lights in your
h
ouse using the remote. To begin, you will need to purchase the ONE FOR ALL
Light Control Starters Kit (HC-8300). The next step is to set up a code on a spare
device key, which will allow you to control up to 10 Light Control Receivers. The
code should be set up on a key which is configured to accept a AMP code. If you
a
re already using the AMP key, you will need to change a spare device key to
accept a AMP code. To do this, follow the Mode Re-Assignment feature on page
12.
T
o set-up a code, simply follow the normal procedure on page 6. The following
codes can be set up for Light Control:
OFA Light Control – 1000, 1001, 1002, 1003, 1004, 1005, 1006, 1007, 1008,
1
009, 1010, 1011, 1012, 1013, 1014, 1015
I
t is recommended to use the first code listed. As the Light Control system works
with Radio Frequency there is the possibility of interference. If your Light
Control kit is not responding well, try one of the other codes listed.
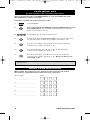
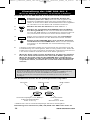
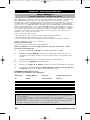
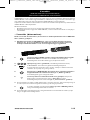
Set up the HC Receiver
To set up your HC Receiver to work with your remote, you will need to
assign a number to it. This is a one-time process that will allow you to
control individual lights separately if you purchase additional HC Receivers
in the future. To assign a number to the plug, follow these steps:
• Plug the lamp into the HC Receiver, and plug the HC Receiver into the
wall outlet. If your lamp has a power switch it should be in the “ON”
position.
• Plug the Command Centre in as close as possible to the HC Receiver, so
that they are only 10-20 cm apart (the Command Centre can be
moved after the initial setup).
• Press the Light Device key on your remote control so that it is in Light
Mode.
• Press the number you wish to assign to the HC Receiver. If this is your
first Plug, number 1 is recommended, number 2 for the second etc.
The LED (underneath the Light Device key) should blink twice.
• Press and hold the button on the HC Receiver until the red light
begins to blink.
• Point your remote control towards the Command Centre and press the
Channel Up (+) key. The red light should stop flashing.
The remote should now operate the HC Receiver. To test it, check if the
Channel Up (+) and Channel Down (-) keys work to turn
your light on and off respectively, or if you have the HC8010 Dimmer
unit, see if the Volume up key begins to brighten or darken the light
(press again to stop).
Extra Features
ONE FOR ALL Light Control
1
2
3
706153_URC7556_EURO_10t:Ofa5_Digital_URC7555_EURO_10_Talen 04-12-2007 17:03 Pagina 19
Page is loading ...
Page is loading ...
Page is loading ...
Page is loading ...
Page is loading ...
Page is loading ...
Page is loading ...
Page is loading ...
Page is loading ...
Page is loading ...
Page is loading ...
Page is loading ...
Page is loading ...
Page is loading ...
Page is loading ...
Page is loading ...
Page is loading ...
Page is loading ...
Page is loading ...
Page is loading ...
Page is loading ...
Page is loading ...
Page is loading ...
Page is loading ...
Page is loading ...
Page is loading ...
Page is loading ...
Page is loading ...
Page is loading ...
Page is loading ...
Page is loading ...
Page is loading ...
Page is loading ...
Page is loading ...
Page is loading ...
Page is loading ...
Page is loading ...
Page is loading ...
Page is loading ...
Page is loading ...
Page is loading ...
Page is loading ...
Page is loading ...
Page is loading ...
Page is loading ...
Page is loading ...
Page is loading ...
Page is loading ...
Page is loading ...
Page is loading ...
Page is loading ...
Page is loading ...
Page is loading ...
Page is loading ...
Page is loading ...
Page is loading ...
Page is loading ...
Page is loading ...
Page is loading ...
Page is loading ...
Page is loading ...
Page is loading ...
Page is loading ...
Page is loading ...
Page is loading ...
Page is loading ...
Page is loading ...
Page is loading ...
Page is loading ...
Page is loading ...
Page is loading ...
Page is loading ...
Page is loading ...
Page is loading ...
Page is loading ...
Page is loading ...
Page is loading ...
Page is loading ...
Page is loading ...
Page is loading ...
Page is loading ...
Page is loading ...
Page is loading ...
Page is loading ...
Page is loading ...
Page is loading ...
Page is loading ...
Page is loading ...
Page is loading ...
Page is loading ...
Page is loading ...
Page is loading ...
Page is loading ...
Page is loading ...
Page is loading ...
Page is loading ...
Page is loading ...
Page is loading ...
Page is loading ...
Page is loading ...
Page is loading ...
Page is loading ...
Page is loading ...
Page is loading ...
Page is loading ...
Page is loading ...
Page is loading ...
Page is loading ...
Page is loading ...
Page is loading ...
Page is loading ...
Page is loading ...
Page is loading ...
Page is loading ...
Page is loading ...
Page is loading ...
Page is loading ...
Page is loading ...
Page is loading ...
Page is loading ...
Page is loading ...
Page is loading ...
Page is loading ...
Page is loading ...
Page is loading ...
Page is loading ...
Page is loading ...
Page is loading ...
Page is loading ...
Page is loading ...
Page is loading ...
Page is loading ...
Page is loading ...
Page is loading ...
Page is loading ...
Page is loading ...
Page is loading ...
Page is loading ...
Page is loading ...
Page is loading ...
Page is loading ...
Page is loading ...
Page is loading ...
Page is loading ...
Page is loading ...
Page is loading ...
Page is loading ...
Page is loading ...
Page is loading ...
Page is loading ...
Page is loading ...
Page is loading ...
Page is loading ...
Page is loading ...
Page is loading ...
Page is loading ...
Page is loading ...
Page is loading ...
Page is loading ...
Page is loading ...
Page is loading ...
Page is loading ...
Page is loading ...
Page is loading ...
Page is loading ...
Page is loading ...
Page is loading ...
Page is loading ...
Page is loading ...
Page is loading ...
Page is loading ...
Page is loading ...
Page is loading ...
Page is loading ...
Page is loading ...
Page is loading ...
Page is loading ...
Page is loading ...
Page is loading ...
Page is loading ...
Page is loading ...
Page is loading ...
Page is loading ...
Page is loading ...
Page is loading ...
Page is loading ...
Page is loading ...
Page is loading ...
Page is loading ...
Page is loading ...
Page is loading ...
Page is loading ...
Page is loading ...
Page is loading ...
Page is loading ...
Page is loading ...
Page is loading ...
Page is loading ...
Page is loading ...
Page is loading ...
Page is loading ...
Page is loading ...
Page is loading ...
Page is loading ...
-
 1
1
-
 2
2
-
 3
3
-
 4
4
-
 5
5
-
 6
6
-
 7
7
-
 8
8
-
 9
9
-
 10
10
-
 11
11
-
 12
12
-
 13
13
-
 14
14
-
 15
15
-
 16
16
-
 17
17
-
 18
18
-
 19
19
-
 20
20
-
 21
21
-
 22
22
-
 23
23
-
 24
24
-
 25
25
-
 26
26
-
 27
27
-
 28
28
-
 29
29
-
 30
30
-
 31
31
-
 32
32
-
 33
33
-
 34
34
-
 35
35
-
 36
36
-
 37
37
-
 38
38
-
 39
39
-
 40
40
-
 41
41
-
 42
42
-
 43
43
-
 44
44
-
 45
45
-
 46
46
-
 47
47
-
 48
48
-
 49
49
-
 50
50
-
 51
51
-
 52
52
-
 53
53
-
 54
54
-
 55
55
-
 56
56
-
 57
57
-
 58
58
-
 59
59
-
 60
60
-
 61
61
-
 62
62
-
 63
63
-
 64
64
-
 65
65
-
 66
66
-
 67
67
-
 68
68
-
 69
69
-
 70
70
-
 71
71
-
 72
72
-
 73
73
-
 74
74
-
 75
75
-
 76
76
-
 77
77
-
 78
78
-
 79
79
-
 80
80
-
 81
81
-
 82
82
-
 83
83
-
 84
84
-
 85
85
-
 86
86
-
 87
87
-
 88
88
-
 89
89
-
 90
90
-
 91
91
-
 92
92
-
 93
93
-
 94
94
-
 95
95
-
 96
96
-
 97
97
-
 98
98
-
 99
99
-
 100
100
-
 101
101
-
 102
102
-
 103
103
-
 104
104
-
 105
105
-
 106
106
-
 107
107
-
 108
108
-
 109
109
-
 110
110
-
 111
111
-
 112
112
-
 113
113
-
 114
114
-
 115
115
-
 116
116
-
 117
117
-
 118
118
-
 119
119
-
 120
120
-
 121
121
-
 122
122
-
 123
123
-
 124
124
-
 125
125
-
 126
126
-
 127
127
-
 128
128
-
 129
129
-
 130
130
-
 131
131
-
 132
132
-
 133
133
-
 134
134
-
 135
135
-
 136
136
-
 137
137
-
 138
138
-
 139
139
-
 140
140
-
 141
141
-
 142
142
-
 143
143
-
 144
144
-
 145
145
-
 146
146
-
 147
147
-
 148
148
-
 149
149
-
 150
150
-
 151
151
-
 152
152
-
 153
153
-
 154
154
-
 155
155
-
 156
156
-
 157
157
-
 158
158
-
 159
159
-
 160
160
-
 161
161
-
 162
162
-
 163
163
-
 164
164
-
 165
165
-
 166
166
-
 167
167
-
 168
168
-
 169
169
-
 170
170
-
 171
171
-
 172
172
-
 173
173
-
 174
174
-
 175
175
-
 176
176
-
 177
177
-
 178
178
-
 179
179
-
 180
180
-
 181
181
-
 182
182
-
 183
183
-
 184
184
-
 185
185
-
 186
186
-
 187
187
-
 188
188
-
 189
189
-
 190
190
-
 191
191
-
 192
192
-
 193
193
-
 194
194
-
 195
195
-
 196
196
-
 197
197
-
 198
198
-
 199
199
-
 200
200
-
 201
201
-
 202
202
-
 203
203
-
 204
204
-
 205
205
-
 206
206
-
 207
207
-
 208
208
-
 209
209
-
 210
210
-
 211
211
-
 212
212
-
 213
213
-
 214
214
-
 215
215
-
 216
216
-
 217
217
-
 218
218
-
 219
219
-
 220
220
-
 221
221
-
 222
222
-
 223
223
-
 224
224


One For All URC 7556 Owner's manual
- Category
- Remote controls
- Type
- Owner's manual
Ask a question and I''ll find the answer in the document
Finding information in a document is now easier with AI
in other languages
- italiano: One For All URC 7556 Manuale del proprietario
- français: One For All URC 7556 Le manuel du propriétaire
- español: One For All URC 7556 El manual del propietario
- Deutsch: One For All URC 7556 Bedienungsanleitung
- Nederlands: One For All URC 7556 de handleiding
- português: One For All URC 7556 Manual do proprietário
- polski: One For All URC 7556 Instrukcja obsługi
- čeština: One For All URC 7556 Návod k obsluze
Related papers
-
 One For All URC-7955 User manual
-
 One For All URC-7930 User manual
-
 One For All URC 7950 Owner's manual
-
 One For All URC-7730 User manual
-
 One For All URC 7940 User manual
-
One For All URC 3740 Owner's manual
-
 One For All urc 3720 protecto 2 User manual
-
 One For All URC-7781 User manual
-
 One For All URC-3740 User manual
-
 One For All URC-7560 User manual


Other documents
-
Universal Remote Control SP-URC-81-L User manual
-
Bush PVRRCU User manual
-
M3 Mobile M3 Black Quick start guide
-
Ricoh FOCUS 3-MODE User manual
-
Binatone CI-580 User manual
-
Iberna LSI 47 User manual
-
Crosley KAMELEON Owner's manual
-
-
 SUPPORTPLUS 8 IN 1 Owner's manual
-
