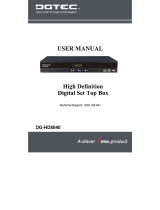
Page is loading ...

42
PID(Packet Identifier)
A set of numbers that identifies transport stream packets containing data
from a single data stream.
Polarization
Polarizations allows several programmers to be fit into the same frequency
band. The signals from a satellite are transmitted either with linear (vertical or horizontal)
polarizations or circular (right or left) polarizations.
QPSK(Quaternary Phase Shift Keying)
Phase-shift keying in which four different phase angles are used.
Transponder
An automatic device that receives, amplifies and retransmits a signal on a
different frequency.
Symbol rate
Speed of the digital transmission
RGB
Red, Green, Blue. Color signals are routed in separate cables in order to provide a high
quality TV picture.
Scrambled TV programmer
Some TV programmers are transmitted in scrambled form.
SCART
A 21-pin connector used for connection of the receiver, VCR and TV. Also named Euro
connector or Parietal connector.
S/PDIF
Sony/Philips Digital Interface Format. Digital audio output.
RCA
Coaxial connector used to connect the receiver to an external amplifier.

41
5.3 Glossary
Antenna
A device collects and radiates electromagnetic waves. Includes a satellite dish and
broadband antenna.
DiSEqC
DiSEqC(Digital Satellite Equipment Control)system, it is a communication
bus between satellite receivers and peripheral equipment using the only
existing coaxial cable.
DVB
The Digital Video Broadcast group was created to establish a technical
framework for the introduction of digital video broadcasting systems.
LNB (low-noise block converter) or LNBF
An electronic unit mounted on the satellite dish. It receives signals reflected by the dish
and converts them to signals that can be used by the
digital satellite receiver.
GHz
The prefix Giga means milliard, and Hertz means cycles per second. Signals in the GHz
range are often called microwaves.
MHz
The prefix mega means million, and Hertz means cycles per second.
MPEG
Moving Picture Experts Group. Established by the International Standards
Organization to provide the basis for a picture coding and compression
system.
Forward Error Correction (FEC)
A system of error control for data transmission.
40
5.2 Technical Specification
Tuner & Demodulator
Frequency Range 950 MHz to 2150 MHz
Input Connector F-type, IEC 169-24, Female
Signal Level -25 to -65 dBm
RF Impedance 75Ω¸unbalanced
IF Band width 55 MHz/8Hz(Per 5Msps)
LNB Power & Vertical : +13 V, 14V +/-5%
Polarization
Horizontal : +18 V, 19V+/-5% Current : 500 mA Max. Overload
Protection
LNB Tone Switch 22KHz+/-2KHz, 0.6Vpp+/-0.2V
DiSEqC Control
Version 1.0/1.2 Compatible, Tone burst A/B
Demodulation QPSK/8PSK
Symbol Rate 1~45Ms/s/SCPC,MCPC
FEC Decode Convolution Code Rate 1/2, 2/3, 3/4, 5/6 and 7/8 with Constraint
Length K=7
MPEG
Transport Stream
MPEG-4/H.264, MPEG-2 ISO/IEC 13818
Profile Level MPEG-4/AVC, MPEG-2 MP@ML, MP@HL
Input Rate 15 Mbit/s Max
Aspect Ratio 4:3, 16:9
Video Resolution 720 x 576, 720 x 480, 1280 x 720, 1920 x 1080
Audio Decoding MPEG / MusiCam Layer I & II
Audio Mode Single channel/Dual channel/Joint stereo/Stereo
Sampling 32, 44.1 and 48 KHz
A/V and Data In/Out Connector
TV SCART RGB, CVBS, L, R out
LNB IF Input F type, IEC 169-24 Female
LNB IF Output F type, IEC 169-24 Female
Power Supply
Input Voltage
100 - 240V AC, 50/60Hz,
Power Consumption Max. 18 W
Standby Power C 3W
Protection Separate internal fuse. Input shall have lightening Protection
Physical Specification
Weight (Net) Around 2.0 kg
Operating Temp 0ºC + 40ºC
Storage Temp -40ºC to + 65ºC

39
5. Additional Information
5.1 Trouble Shooting
You might meet abnormal working of this STB with various reasons. Check the
following which may help you.
Problem Possible causes What to do
LED on the front panel fail
to light up/is not lit.
Main supply cable is not
connected.
Check if the main supply cable is plugged into the
power socket.
No picture or sound. Satellite dish is not aiming to
satellite accurately. No signal or
weak signal. The LNB is faulty. The
cable is faulty.
Adjust the dish. Check the signal strength indicator
in one of the channels search submenus. Check
the cable connections, LNB and other equipment
connected to LNB & receiver, or adjust dish.
Replace the LNB. Replace the cable.
Bad picture/blocking error. Satellite dish is not aiming to the
satellite accurately. Signal too
strong. Satellite dish is too small.
LNB noise factor too high. The LNB
is faulty.
Adjust the dish. Connect an attenuator to LNB
input. Change to a larger dish. Change LNB with
lower noise factor. Replace the LNB.
No startup menu on screen
after turning on STB for the
first time.
The system is connected by
SCART cable and the TV is not in
AV/ EXT mode.
Switch the TV to the appropriate AV input.
The remote control is not
working.
Battery exhausted. Remote control
is not aimed correctly STB is in
standby mode.
Change the batteries (both). Aim the remote
control at the STB. Check that nothing blocks the
front panel. Check if LED indicator on the front
panel is showing the time, press the power button
to switch off standby mode.
You have forgotten your
password.
Contact the dealer or Service Provider. They will
help you set it up again.
Poor picture quality or
Less channels in scanning.
Low LNB power or signal loss in
cable.
Change the LNB power to 14V/19V in Antenna
setup menu.
38
Channel List-OK
In viewing mode press OK button and you will
get this window. Press
/
to view channel in
different types, ALL, FTA, Scrambled and
MPEG4/H264.Press SAT button, select one
satellite and press OK, all channels will be listed
under that satellite you selected.
TXT:
Show the teletext content if teletext is
transmitted
Subtitle
Press SUB button to show subtitle.

1
Anschluss LNB Sat-Spiegel
Receiver mit der Außeneinheit (LNB) verbinden.
(1) Verbinden Sie die Koaxialleitung über die F-Anschlüssen mit dem Receiver und dem
LNB. (Receiver LNB IN).
(2) Sie können feststehende Antennen oder auch Motor gesteuerte Antennen an den
Receiver anschließen.(Bitte beachten Sie die DiSEqC Einstellungen zu Ihrem LNB).
37
4.6 Other Useful Information
This will guide you on how to use general info while watching TV program or listening
Radio program with some buttons on your RCU.
FAV
In viewing mode, you can get the favorite
channel group by pressing FAV, press FAV
button to change category. If you did not set
favorite channel in advance, it will show with no
FAV program.
EPG
In this view, you can get the electronic program guide if applicable. You can get the
detailed information about that program by pressing OK button
Book
You can Switch Pre/Next Day EPG by Pressing
Red/Yellow Key. In this menu, Press Blue key
go to Book. Here you can set your favorite
channels to begin broadcasting at future time
you set, including both TV and Radio, press
green button you can get the schedule directly,
Here you can Add, Edit and Delete the event
which you set.
Note: You can add multi- groups event timer.
SAT
Press SAT button on the remote control, you will
get this menu which contains the satellites you
searched and stored, select one satellite and
press OK, all channels will be listed under that
satellite you selected.

36
4.5 EXPANSION
Games
Some classic games which will give your some
happy times to play with !!
Multi Pictures
In this menu, user can watch 9 different small
TV in one windows, we called it MULTI PICS
USB ( Worked with a USB Device )
USB menu only working when a USB device is
connected with your STB !!
A. Tool
Press RED button, you will have tool function,
and you can Rename Delete, Move, and Create
new Folder, Sort, and Format disk in this menu
to the USB device connected to your STB
B. Play Mode
Press GREEN button, you will have Loop, and
Slideshow Interval, and Photo view mode, to
gain the viewing experience of your multimedia
pleasure
C. Upload
Press YELLOW button, you will have upload function, and you can upload data to your
USB or to your ftp.
Note: USB support FAT & FAT32, NTFS
9
Hauptmenü
Schalten Sie den Megasat am Netzschalter an und drücken Sie die Menü Taste. Das
Hauptmenü erscheint und Sie können mit den Grundeinstellungen beginnen.
Das Haupmenü zeigt verschiedene Funktionen an,
die Sie mit den Steuerungstasten (links/rechts auf/ab)
auf der Fernbedienung auswählen und mit OK
bestätigen.
Hauptmenü
Das Hauptmenü besteht aus:
Installation, Programme verwalten, Einstellungen,
Zeiteinstellung, Erweitert, Über Receiver
1. INSTALLATION
Das Standard Passwort für gesperrte Menü Optionen ist “0000”
Wählen Sie das Menü Installation aus und drücken die OK Taste. Das Installation Menü
erscheint.
Das Installationsmenü besteht aus:
Antenneneinstellung - Werksreset - USALS Einstellung
Antenneneinstellung
In den Antenneneinstellungen wählen Sie Ihren Satelliten, LNB, DiSEqC, Unicable und
den gewünschten Suchmodus aus.
Satelliten Liste
Drücken Sie die OK Taste und Sie können den
gewählten Satelliten bearbeiten.
Mit den auf/ab Tasten können Sie den Satelliten
auswählen und mit >OK können Sie die weiteren
Parameter des Satelliten einstellen.

10
Installation
Hinzufügen
Wählen Sie mit den Curser Tasten „Hinzufügen“ um
einen neuen Satelliten hinzuzufügen. Geben Sie die
Daten des neuen Satelliten ein und bestätigen diese
mit OK. Der neue Satellit wird der Satellitenlist
hinzugefügt.
Satelliten Pos. verschieben
Wählen Sie mit den Curser Tasten „Bewegen“ um die
Position des gewählten Satelliten zu verschieben und
an die gewünschte Position einfügen.
Löschen
Wählen Sie mit den Curser Tasten „Löschen“ um den
gewählten Satelliten zu löschen drücken Sie die OK
Taste. Eine Warnmeldung erscheint. Wählen Sie die
gewünschte Option und bestätigen Sie mit OK oder
drücken Sie die Exit Taste um abzubrechen.
Satelliten umbenennen
Wählen Sie mit den Cursor Tasten
„Umbenennen“ und drücken Sie die OK Taste auf der
Fernbedienung um den Satellitennamen zu ändern.
Transponderliste
Um einen anderen Transponder zu wählen, drücken
Sie die Taste links/rechts. Drücken Sie die OK Taste
um die TP Liste zu öffnen. Wählen Sie mit den
Curser Tasten die gewünschte Option „Auswählen,
Hinzufügen, Löschen, Bearbeiten“ und drücken Sie
die OK Taste um die gewählte Option auszuführen.
LNB Frequenz , Unicable, LNB Power
Hier können Sie die LNB Frequenz ändern und die
Spannungsversorgung des LNB einstellen. Achtung:
Ändern Sie diese Einstellungen nur, wenn Sie kein
Standard LNB (Universal LNB) verwenden. Bei be-
nutzung eines Unicable System, beachten Sie bitte
die Angaben auf Ihrem System.
35
4.4 TIMES
Time Settings
In this MENU, you can change the TIME MODE and setting time manually, or adjust GMT
time.
The default time setup is auto, but you can select manual and input manually, select the
time zone of your country and you will get the correct current time which is based on TDT
(Time and Data Table) in the stream of the current channel service.
Event Timer
In this menu, you can set up the timer for event
you have selected, so the STB will change the
channel you already set up when the event time
is on due.
Sleep Timer
In this menu, you can set the sleep timer 15min, 30, 45, etc.. 120min, so that the STB will
power off automatically on time.
Standby Hour
In this menu, you can set the standby hours of your STB, so that your STB will power off
automatically on time.

34
Favorites
Press MENU button, here you can sort the
channels in different type, such as news,
movies, music, sports, Using the UP/DOWN
keys select any sort press OK, then you can set
the channels FAV type by pressing FAV key.
NOTE: Radio favors operation similar to the
above.
4.3 SETTINGS
Here you can setup TV output and Video output
according to the standard of your country.
System Settings
In this menu, you can choose MENU LANG, set
AUDIO LANG, setting Digital Audio, menu
transparency, TXT transparence, Display MODE,
TV Type, SCREEN MODE, SCART OUTPUT etc…
all in this menu
Parental Control
In this menu, you can set the password to
Installation, Edit Channel, System, and also you can
change the password, this is for the purpose of
children misplaying with your STB.
USALS Setup
In this menu, you can set up USALS setting, and
then you can use your DISH motor.
11
Installation
UniCable Systeme:
Unter dem Menüpunkt LNB Frequenz, können Sie die Einstellungen für
Einkabelsysteme (UniCable) vornehmen. Mit den Tasten können Sie
verschiedene Einstellungen für das LNB wählen. Der Receiver ist für
unterschiedliche UniCable Systeme programmierbar. Je nach System kann an
ein System bis zu 8 Receiver angeschlossen werden.
Achten Sie auf die UniCable Frequenzen. Baugleichen Systeme von Kathrein,
Technisat und Megasat verwenden folgende Frequenzen:
IF Channel/Center Freq.:1=1284; 2=1400; 3=1516; 4=1632;
5=1748; 6=1864; 7=1980; 8=2096
Inverto und baugleiche Systeme verwenden folgende.
IF Channel/Center Freq.: 1=1076; 2=1178; 3=1280; 4=1382;
5=1484; 6=1586; 7=1688; 8=1790:
Überprüfen Sie die für Ihre Anlage passenden Frequenzen.
Unter IF Channel können Sie bis zu 8 verschiedene Frequenzen Auswählen,
dabei wird jedem IF Channel automatisch eine Frequenz zugeordnet. Beachten
Sie dass jede Frequenz nur einmal in Ihrer Anlage vorhanden sein darf. Die
Frequenzen sind von Ihrem Einkabelsystem abhängig und dürfen nicht beliebig
geändert werden. Bei Systemen die nicht mit den vorprogrammierten Center
Frequenzen übereinstimmen, können Sie durch Eingabe der Frequenz
anpassen.
ACHTUNG: Die Center Frequenz muss immer mit der Center Nummer
übereinstimmen. Beispiel: Die Frequenz 1284 am Port1, darf nicht auf Port2
gelegt werden. Die passenden Frequenzen und Ports entnehmen Sie der
Beschreibung Ihres UniCable Systems.
Grundsätzlich verwendet man die niedrigste Frequenz für den längsten
Kabelweg zum Receiver.

12
22KHz
Hier können Sie die Standardeinstellung der 22KHz Schaltung ändern. Als Standard ist
die Option „Auto“ gewählt.
DiSEqC Type DiSEqC1.0 oder 1.1
Betreiben Sie den Receiver an einem DiSEqC Schalter oder an einem Multischalter mit
DiSEqC müssen Sie die DiSEqC Einstellung anpassen. Für den Standardbetrieb mit
einem Satelliten ist keine Einstellung notwendig.
USALS
Haben Sie eine Anlage mit Motorsteuerung, können
Sie hier die nötigen Einstellungen vornehmen.
Wählen Sie die gewünschte Steuerung USALS/
DiSEqC 1.2 und legen die gewünschten Positionen
fest.
Bevor Sie USALS verwenden, sollten Sie
im Hauptmenü Ihre Länder und Standort Position
festlegen!
Suche starten
Drücken Sie die OK Taste auf der Option Suchlauf
Starten um die Programmsuche zu starten. Um
Optionen des Suchmoduses zu ändern, wählen Sie
unter Sucjhmodus den gewünschten aus. Ein
Fenster mit der Auswahl „Programme
löschen“ erscheint. Wählen Sie nein wenn alle
Sender angehängt werden sollen oder Ja wenn die
vorhandenen Sender überschrieben werden sollen.
Werkseinstellung
Wenn Sie die Option Werkseinstellung wählen, werden alle Werkseinstellungen wieder
hergestellt. Wählen Sie die gewünschte Option „Alle, nur TV Sender, nur
Radiosender,……“ aus. Entsprechend der Auswahl werden die Einstellungen
wiederhergestellt. Eine Warnung erscheint. Wählen Sie „Ja“ um alle Einstellungen
zurückzusetzen oder „Nein“ um den Vorgang abzubrechen.
33
4.2 EDIT CHANNEL
In this menu you can set program edit like
delete, lock, rename, move and swap the
selected channel, set FAV and so on.
TV Channels
Here you can Select Channel, Delete Channel,
Skip Channel, Move Channel, Lock Channel. Select TV Channels, you will get this
window.
Move
Press OK to select the channel you want to
move, and move to the position you like, or just
input the numeric key, the channel you selected
will move to that position
Delete
Here you can delete the channel you choose,
and press OK to select and press again OK to confirm delete
Lock
Here you can lock one channel, press OK to input password, and you can have a channel
with locking.
Rename
Select channel that you want rename from channel list, press F1 button, then using the
UP/ DOWN /LEFT /RIGHT keys to select characters which you want to edit. Press OK to
confirm your selection. In this menu, you can set the word with the extend. Caps on or off.
Swap
You can select the channel that you want to swap from the channel list, press F2 button,
you will be asked to swap the channel to put where, input the destination number and
press OK. Then you can swap one channels from one position to another.
NOTE: Radio Channels operation similar to the above

32
F: Channel search
In this menu, you can select scan mode like
TP/blind/network scan, you also can select all
Channels & FTA Channels by setting the search
option
G: Start Search Channels
After set above step, press ok you will be asked
whether delete all exist channels if there are
existing channels on selected satellites or TPs,
you can choose yes or no, will start searching.
During searching the TV Channel and Radio
Channel will be listed separately.
Factory Default
You can erase all the channels and settings. If select All, press OK you will be asked to
select “start” or “quit”. If select “start” all data and setting will be lost. (as well as channel
list, radio list and scramble channel list). In the end, you also can save or load default
channel list.
Save User Data
Enter this menu, you can save the STB data to your STB when you press OK on RCU,
STB data will be saved automatically
Load User Data
In case you make a factory default, or you
delete the channel list by mistake, enter this
menu, you can load the STB data for which you
already saved from flash to your STB
Spectrum
A tool for expert to view the strength of signal in your STB
13
Programme verwalten
Programme verwalten
Hier können Sie die Senderlisten bearbeiten.
Wählen Sie zwischen folgenden Optionen: TV
Programme – Radio Programme – Favoriten
bearbeiten – Sender sortieren – Benutzer
Senderliste
TV Programme
Hier können Sie über die Auswahl: Bewegen –
Löschen – Sperren – Umbenennen – Tauschen
Ihre Senderliste entsprechend der Auswahl bearbeiten.
Bewegen (Programme verschieben)
Drücken Sie die OK Taste um die Option Bewegen zu aktivieren. Wählen Sie
den Sender zum verschieben aus und drücken Sie die OK Taste. Bewegen Sie
den Cursor zum gewünschten Programmplatz und drücken Sie erneut die OK
taste um den Sender an dieser Position einzufügen. Durch drücken der blauen
Tasten können Sie auch ganze Gruppen verschieben.
Löschen
Drücken Sie die OK Taste um die Option „Löschen“ zu aktivieren. Wählen Sie
den Sender zum löschen aus und drücken Sie OK. Wiederholen Sie den
Vorgang, bis alle Sender zum löschen markiert sind.. Drücken Sie die Exit Taste.
Eine Meldung erscheint. „Wollen Sie wirklich löschen?“ Bei „Ja“ werden alle
gewählten Sender gelöscht, bei „nein“ wird der Vorgang abgebrochen
Sperren
Drücken Sie die OK Taste um die Option „Sperren“ zu aktivieren. Die
Vorgehensweise ist die gleiche wie unter Löschen beschrieben.
Umbenennen
Drücken Sie die OK Taste um die Option „Umbenennen“ um den gewählten
Sendernamen zu ändern. Durch bewegen des Cursors können Sie die
benötigen Zeichen auswählen und mit OK bestätigen. Weitere Optionen
erhalten Sie über die Farbtasten (rot,grün,gelb,blau) entsprechend der Anzeige.
Tauschen
Drücken Sie die OK Taste um die Option „Tauschen“ zu aktivieren. Die
Vorgehensweise ist die gleiche wie unter Löschen beschrieben.

14
Favoriten
Wählen Sie Favoriten bearbeiten um Ihre
Favoriten Gruppen zu erstellen. Es sind 4
Gruppen voreingestellt, die Sie beliebig
umbenennen können. Wählen Sie die
gewünschte Gruppe und markieren Sie die
Sender zur Gruppe durch drücken der OK
Taste.
Hinweis: Das bearbeiten der Radiosender ist
identisch mit dem TV bearbeiten.
Sender sortieren
Wählen Sie Sender sortieren um die Senderliste entsprechend der Auswahl zu
sortieren. (Alphabet – Transponder – FAT/verschlüsselt – Favorit – Standard)
Benutzer Senderliste
Mit dieser Option können Sie Ihre Senderliste sichern und laden.
Einstellungen
Einstellungen
Hier können Sie die Grundeinstellungen Ihres Receivers ändern.
Systemeinstellung
Im Menü Systemeinstellungen können Sie mit Hilfe der Cursor Tasten die
gewünschten Optionen: Menüsprache – Audio – Untertitel – EPG – TXT- Digital
Audio – Scart Ausgang – Auto Programm wechseln – Auto Exit Pr. Liste ändern.
Systemeinstellung
Im Menü Systemeinstellungen können Sie mit
Hilfe der Cursor Tasten die gewünschten
Optionen: Menüsprache – Audio – Untertitel –
EPG – TXT- Digital Audio – Scart Ausgang –
Auto Programm wechseln – Auto Exit Pr. Liste
ändern.
31
B: LNB Type and LNB Power
Here you need to check the LNB frequency according to your antenna, set the correct
frequency or define yourself, and keep LNB power to be 13/18V.
C: 22KHz
In case you are using two antennas connected to a 22KHz tone switch box. You can
supply either 22KHz by setting “OFF” to select antenna.
D: DiSEqC1.0 DiSEqC1.1
If you connect antenna to DiSEqC Switch, you need
to specify the DiSEqC input to which your selected
satellite have been configured.
E: Motor
When you enable this option, and press OK, you
will get this window to show you how to adjust
position of the dish.
Move Auto [W/E]
Press RIGHT/LEFT button, the dish will be motorized to East/West
continuously, it will stop until it find the best signal.
Move Continue
Press RIGHT/LEFT button, the dish will be motorized to East/West
continuously until you press LEFT/RIGHT again.
Move Step
Press RIGHT/LEFT button, the dish will be motorized to East/West by step.
Store Position
Save the current position you searched for the selected satellite.
Go to Position
Press OK button to move the dish to the stored position.
Go to Reference
Press OK button to move the dish to 0 position.
Set West Limit / Enable West limit.
Set East Limit / Enable East limit.
Disable Limit / Disable West limit and East limit.

30
Add
Add satellite by using the Red key. Here you
can input new Satellite angle, Satellite Direction
(east, west), Band (ku,c). OK to confirm the
setting and this new satellite will be added to the
end of the Satellite list.
Edit
Select the satellite then press green button. You
can change the satellite’s name, angle, direction
and band. Input the characters which you want
to edit using the browser.
Delete
You can delete the user’s satellite. Select the
satellite that you want to delete from the satellite
list. You will be asked to confirm whether delete
the satellite or not. If you press ok key, all the
channels in the selected satellite and
transponder will be deleted, and the selected
satellite will disappear.
Transponder List
If you change the satellite, the transponder will
be changed automatically. You will find the
transponder list of selected satellite here. Press
the sat button can switch the TP and SAT list. In
this menu you can Add, Edit, Delete,
Transponder. The Operation similar to the
above, you can input the transponder frequency,
symbol rate, and choose polarization
(Ver, Hor)
15
OSD Einstellung
Im Menü OSD Einstellung können Sie mit Hilfe der Cursor Tasten die ge-
wünschten Optionen: Menü Transparenz – Videotext Transparenz – Bildschirm
Auflösung – TV Typ – TV Format – OSD Anzeigezeit ändern.
Kindersicherung
Im Menü Kindersicherung können Sie mit Hilfe
der Cursor Tasten die gewünschten Optionen:
Passwort Sperre – Installationssperre –
Senderbearbeitung – Systemsperre –
Altersbeschränkung – PIN ändern auswählen.
Zeiteinstellungen
Im Menü Zeiteinstellungen können Sie alle verfügbaren Zeitoptionen Einstellen.
Zeiteinstellungen
Einstellung von Zeit, Datum und Zeitzone.
Im Auto Modus werden Zeit und Datum automatisch
entsprechend der eingestellten Zeitzone aktualisiert.
Im manuellen Modus können Sie Zeit und Datum
selbst einstellen.
Timer
Hier können Sie über EPG programmierte Timer
bearbeiten oder neue Timer programmieren.
Über die Farbtasten (gelb - Löschen, rot -Hinzufügen,
grün Bearbeiten) wählen Sie die gewünschte
Funktion.
Ausschalttimer
Durch drücken der OK Taste und anschließend
der links/rechts Tasten, können Sie die ge-
wünschte Ausschaltzeit in 15min. Schritten
Einstellen.
Auto Standby
Mit der OK Taste aktivieren Sie die Option und Sie können zwischen Ein/Aus
wählen. Bei „Ja“ schaltet sich das Gerät automatisch nach ca. 3Std. aus.

16
Erweitert
Im Hauptmenü Erweitert haben Sie folgende Untermenüs.
Spiele – USB Explorer – Wirless Einstellung – IP Einstellung
– FTP Download - Wetter
Spiele
Im Menü Spiele haben Sie 8 Spiele zur
Auswahl.
USB Explorer
Im Menü USB Explorer können Sie Ihre
angeschlossenen USB Geräte verwalten.
Mit den links/rechts Tasten können Sie einzelne
Bereiche wie: Alle, Filme, Musik, Bilder und Software auswählen.
Mit der roten Taste können Sie Ihre Daten
Kopieren, Löschen, Sortieren oder den Daten
-träger formatieren.
Mit der grünen Taste können Sie Ihre Optionen
zum Abspielen von Dateien ändern.
Mit der gelben Taste können Sie Ihre Daten
vom Receiver auf einen USB Stick übertragen.
Wireless Einstellung
Unter Wirless Einstellung können Sie einen Wifi Stick einrichten.
Hinweis: Es können nur für das Gerät freigegebene Wifi Geräte verwendet
werden.
FTP Download
Unter FTP Download können Sie Daten aus Ihrem Netzwerk übermitteln.
(nur in Verbindung mit einem Wifi Stick)
Wetter
Drücken Sie OK Taste und Sie können Wetter Informationen verschiedener
Städte abrufen.
Weitere Optionen folgen!!!!!
Receiver Information
Mit der OK Taste können Sie Informationen über den Receiver abrufen.
29
4. Installation and Operation
After connecting the receiver to other required equipment, turn on the receiver, there
should be no channel information available at first. You need to follow the procedure to
setup your receiver to search the channel.
Main Menu
Press MENU button to activate main menu, main menu consists of Installation, Service
organization, Output, System, Timer, USB.
Use UP/DOWN button to select your subject and press OK to confirm your selection and
enter that sub menu, press EXIT button you can return to the previous menu
4.1 INSTALLATION
Select Installation, the picture will be displayed like this, here you can do Dish setup,
Restore Factory Default, Software Update,
Save or Load STB data
Antenna Settings
Press OK to Enter Dish setup, here you can
make Satellite Scan, Satellite Edit, TP Search,
TP Edit and other related Functions.
A: Satellite List
This window shows the pre-stored satellite list,
in this menu, you can Add, Edit, Delete,
Satellites.

18
OK/List
1. Drücken Sie die OK-Taste, während Sie fernsehen oder Radio anhören und
es wird die TV/Radio-Kanal Liste angezeigt.
2. Wählen Sie mit den Tasten PR+, PR- den Kanal aus und bestätigen Sie Ihre
Wahl mit der OK-Taste.
3. Drücken Sie die MENÜ-Taste oder EXIT-Taste, um das Fenster zu schließen.
Audio-Modus
1. Drücken Sie die rote Audio Taste, um das Fenster Audio-Modus aufzurufen.
2. Wählen Sie mit den Tasten zwischen Links, Rechts, Stereo oder Mono aus.
3. Der ausgewählte Audio-Modus wird in dem ausgewähltem Kanal aktiv, nicht
in allen Kanälen.
4. Drücken Sie die MENÜ-Taste oder EXIT-Taste, um das Fenster zu schließen.
Videotext
Drücken Sie die Taste Videotext, um die Option aufzurufen.
Wenn das Programm den Videotext nicht unterstützt, wird die Meldung „Keine
Videotext-Daten“ angezeigt. Drücken Sie die Exit-Taste.
FAV
Drücken Sie die FAV-Taste, um eine Liste mit Ihren Lieblingssendern aufzurufen.
Es stehen 4 Favoriten zur Auswahl.
Option
Die Option Taste funktioniert nur in Verbindung mit Sendern, die über
Unterkanäle verfügen. (z.B. Sport Info)
1 Konformitätserklärung
Hiermit wird die Übereinstimmung mit folgenden Richtlinien/Normen bestätigt:
• Richtlinie zur elektromagnetischen Verträglichkeit 2004/108/EG
− EN 55013: 2001 + A1: 2003 + A2: 2006
− EN 55020: 2007
− EN 61000-3-2:2006 + A1:2009 + A2:2009
− EN 61000-3-3:2008
• Niederspannungsrichtlinie 2006/95/EG
− EN 60065: 2002 + A1: 2006 + A11: 2008
27
Remote Control Unit
19. VOL
/
: Change volume in viewing mode.
20. OK: Confirm the highlighted menu item, Open the program list.
21. AUDIO : Select or change the Audio.
22. PAUSE: Pause and Freeze the picture.
23. ZOOM: Zoom in current TV channel
24. INFO: Show the information of the current channel.
25. VOL +/-: Change volume in viewing mode.
26. FIND: Quickly find channels
27. OPT: Option Function
28. PAGE+/-: Page up/down on menu.
29. F1: Function key.
30. USB : Enter into USB menu, USB Device must be connected
30.
: Fast forward.
31.
⊳⊳
: Fast backward.
32.
: Start playing / Release pause.
33.
■
: Stop recording.
34. I
⊳⊳
: Play previous item.
35.
I : Play next item.
36. I I : Pause/time shift.
37.
●
: Start recording.

26
2.3
Remote Control Unit
1.TV/R: Switch between TV and RADIO.
2. POWER: Switch the receiver on or off.
3. MUTE: Turn the sound On/Off.
4. HDMI: Switch the TV type.
5. FORMAT: Switch 4:3 & 16:9 Screen Formats.
6. TIME: Setup event timer.
7. SLEEP: Setting the time for turning the receiver off
8. NUMERIC KEY (0~9): Change program or input number.
9: SUB: Showing Subtitle information if the channels
contains.
10. EPG (Electronic Program Guide): Show the TV/Radio
electronic program guide, some channels may not available
due to no such service from TV provider.
12. FAV: Press to display favorite channel list you set
before.
13. TXT: Press to Display the current channel’s TELETEXT
information, TXT may not available to all TV channels, if no
such data inside live stream.
14. RECALL: Press to show the previous viewed channel.
15. SAT: Show the scanned satellite list.
16. MENU: Press to enter main menu or exit to live
channel.
17. EXIT: Exit current menu step by step.
18. CH
⊳
⊳⊳
⊳
/
: Change TV Channels.
19
Fehlersuche
Bei Problemen Prüfen Sie bitte folgende Fehlerhinweise.
Problem Mögliche Ursachen Maßnahmen
LED brennt nicht. Stromkabel nicht eingesteckt;
Netzschalter Aus;
Gerät ist ausgeschaltet
Stromkabel überprüfen
Netzschalter Ein
Gerät am Receiver Einschalten
Kein Bild kein Ton Satellit schlecht oder nicht
eingestellt;
Kein oder schlechtes Signal;
falscher Satellit eingestellt;
LNB ist defekt;
Kabel defekt oder nicht
angeschlossen;
Satellit genau justieren;
Richtigen Satelliten wählen oder einstellen
LNB wechseln
Kabel prüfen
Schlechtes Bild
Blockbildung im Bild
Satelliten Antenne nicht richtig
ausgerichtet;
Signal zu stark;
Spiegel zu klein;
LNB stärke zu hoch;
LNB defekt;
Antenne ausrichten;
Dämpfungsglied einsetzen;
Größeren Spiegel verwenden;
LNB wechseln mit anderer Empfangsleistung
LNB wechseln;
Kein Menü nach dem
Starten;
Kein Bootmenü und Bild
nach dem Einschalten
Das System ist mit Scartkabel
verbunden und der Fernseher
ist nicht im AV Modus.
Fernseher ist nicht auf dem
richtigen Eingang. (HDMI oder
Scart)
TV auf Scart Eingang umschalten;
TV auf HDMI Eingang umschalten
Die Fernbedienung
funktioniert nicht;
Batterie ausgelaufen oder leer;
Fernbedienung ist außer
Reichweite oder
Reichweitenwinkel;
Receiver ist Ausgeschaltet
(Power Taste lange gedrückt)
Batterie wechseln;
Fernbedienung auf das Gerät richten;
Freie Sicht von der FB zum Receiver prüfen
Receiver am Gerät einschalten;
Passwort vergessen; Service kontaktieren

20
Technische Spezifikation
Tuner & Demodulator
Demodulation QPSK, 8PSK
Frequenzbereich 950 MHz to 2150 MHz
Signal Level -25 to -65 dBm
RF Impedanz 75Ω Ohms unbalanced
LNB 13V/18V/OFF, max = 500mA
LNB Tone Switch 22KHz+/-2KHz, 0.6Vpp+/-0.2V
DiSEqC Kontrolle Version DiSEq C 1.0/1.1/1.2/1.3(USALS)Compatible, Tone burst A/B
Symbol Rate 2.0~45 MS/s/s/SCPC,MCPC
FEC Decode &
8PSK
Convolution Code Rate 1/2, 2/3, 3/4, 5/6, 7/8,3/5, 2/3, 3/4, 5/6, 7/8,
automatic
MPEG
Transport Stream MPEG-2 ISO/IEC 13818Transport stream specification
Profile Level MPEG1,MPEG-2 MP@ML,H.264, VC1, DV, DivX, and MPEG4
Input Rate 15 Mbps/Max
Aspect Ratio 4:3, 16:9
Video Resolution
720 x 576, 720 x 480, 1280 x 720, 1920 x 1080
Audio Decoding MPEG-2 layer I and II (Music cam),MPEG4 AAC and MPEG4
AAC-HE (AAC+),Dolby Digital (AC-3) with bit rates up to 640 K bits
/s, LPCM up to 48 KHz,MP3.
Audio Mode Single channel/Dual channel/Joint stereo/Stereo
Sampling 32, 44.1 and 48 KHz
A/V and Data In/Out Connector
TV SCART RGB, CVBS, L, R out
RCA AUDIO L, R. VIDEO out, Y, Pb, Pr output
RS-232C RS232C D-sub male type.
LNB IF Input F type, IEC 169-24 Female
LNB IF Output F type, IEC 169-24 Female
Stromversorgung
Input Voltage AC 100 ~240V, 50/60Hz
PowerConsumption Max. 12 W
Protection Separate internal fuse. Input shall have lightening Protection
Physische Spezifikation
Gewicht (Netto) Around 2.0kg
Operating Temp 0 to + 40
Storage Temp -40 to + 65
25
2.2 Rear Panel
1. LNB IN 13/18V 300mA Max
Connect the Satellite Dish LNB.
2. LNB OUT
Output the Dish LNB IN signal.
3. TV SCART
Connect to TV set player with Scart cables.
4. VIDEO/AUDIO
RCA output for CVBS format.
5.
DV-OUT
HDMI signal output
6. USB
USB 2.0 Host Port.
7. Power Switch
To Turn ON or OFF the main power of this STB.
8. S/PDIF
Digital Audio output

24
2. Basic Function
2.1 Front Panel
1. Power Button
The POWER button is used to turn the power on or to make it on Standby Mode.
2. CH Buttons
Change channels or items from top to bottom on the menus.
3. VOL Buttons
Change channel’s volume from high to low.
4. Menu Button
Press to pop up the MENU from OSD
5. OK Button
Press to choose wanted function in OSD
6. USB port
USB2.0 port for connect to any external USB devices such as USB Disk or
HDD.
21
Table of Contents
Safety Precaution ........................................................................................................2
1. Reference
1.1 General Features ...................................................................................................3
1.2 Accessories ............................................................................................................4
2. Basic Function
2.1 Front Panel .............................................................................................................5
2.2 Rear Panel .............................................................................................................6
2.3 Remote Control Unit ...............................................................................................7
3. Installation and Connection
3.1 Connecting to Dish LNB and TV .............................................................................9
4. Installation and Operation
4.1 Installation…………..............................................................................................11
4.2 Edit Channel………...............................................................................................16
4.3 Setting ……….......................................................................................................18
4.4 Times…………………….............................................................................………20
4.5 Expansion…..........................................................................................................21
4.6 Other Useful Information ......................................................................................22
5. Additional Information
5.1 Trouble Shooting..................................................................................................25
5.2 Technical Specifications………………….……………………………………………26
5.3 Glossary ..............................................................................................................27

22
Safety Precaution
This STB has been designed and manufactured to satisfy the international safety
standards. Please read the following safety precautions carefully before operating this
receiver.
Main Supply:
Before operating, please check the units operating voltage is 100~240V AC
50/60Hz.
Overload:
Do not overload a wall outlet, extension cord or adapter, neither use damaged power
cord or touch it with wet hand as this may result in electric shock.
Liquid:
The receiver shall not be exposed to dripping or splashing water, and that no objects
filled with liquids, such as base, shall be placed on the apparatus.
Ventilation:
Keep the slots on top of the receiver uncover to allow sufficient airflow to the unit. Do not
put the receiver on soft furnishings or carpets. Do not expose the receiver to direct light or
do not place it near a heater or in humid conditions. Do not stack other electronic
equipments on top of the receiver.
Cleaning:
Plug out the receiver from the wall outlet before cleaning. Clean the receiver by a soft
cloth or mild solution of washing-up liquid (no solvents).
Connection:
Disconnect the receiver from the mains when you connect it to satellite LNB or
disconnect it from LNB. Failure would possibly cause damage to the LNB.
Location:
Put the receiver indoor in order to avoid lightening, raining or sunlight.
Uncover:
Do not remove the cover, to reduce the risk of electric shock. Contact qualified and
licensed service personnel to repair the receiver, or contact your dealer.
23
1. Reference
1.1 General Features
DVB-S/DVB-S2 Satellite Compliant (MPEG-II/ MPEG-IV/ H.264).
DiSEqC 1.0, 1.1, 1.2 & 1.3 (USALS) Compatible.
SCPC & MCPC Receivable from C/Ku Band Satellites LNB Supported.
Universal, Single, Single S & C Band Wide band LNB.
Sensitive Tuner with Loop-Through.
PAL / NTSC Conversion.
Variable Aspect Ratio (4:3, 16:9) with Pan Vector or Letter Box.
Output Resolution: 576p & 576i, 720p & 1080i.
HDMI with Upscale to Improve Picture Quality.
4 Favorite Groups and Parental Lock Function.
5 Kinds of Sort Function for Channels.
On-screen Display with True Full Color Resolution.
Teletext and Subtitle Supported (OSD).
7 days EPG (Electronic Program Guide) for On-Screen Channel Information.
Multi Language Menu.
Capacity for Sorting Multi Channel.
1.2 Accessories
Unpack the unit and check to make sure that all of the following accessories are included
in the packaging.
1 x User manual
1 x Remote Control Unit (RCU)
2 x AAA Batteries
/