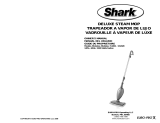
Page is loading ...

SAVE THESE INSTRUCTIONS
1
For Household Use Only
Rev. 03/07D
13. Do not put any objects into
openings. Do not use with any
opening blocked.
14. Do not put hands or feet under the
steam mop. Unit gets very hot.
15. Use ONLY on flat, horizontal
surfaces. Do not use on walls,
counters or windows.
16. Do not use on leather, wax polished
furniture or floors, synthetic fabrics,
velvet or other delicate, steam
sensitive materials.
17. Do not add cleaning solutions,
scented perfumes, oils or any other
chemicals to the water used in this
appliance as this may damage the
unit or make it unsafe for use. If you
live in a hard water area, we
recommend using distilled water in
your steam mop.
18. When in use, NEVER turn the
appliance over or on its side. NEVER
DIRECT STEAM TOWARDS
PEOPLE, ANIMALS OR PLANTS.
19. NEVER LEAVE THE STEAM MOP
IN ONE SPOT ON ANY SURFACE
FOR ANY PERIOD OF TIME WHEN
MICRO-FIBER PAD IS ATTACHED.
20. Carefully remove the micro-fiber
pad immediately after you have
finished using the steam mop.
21. When cleaning the steam mop,
unplug the power cord from the
electrical outlet and clean with a dry
or damp cloth. Do not pour water or
use alcohol, benzene or paint thinner
on the unit.
22. Extreme caution should be
exercised when using this appliance
to clean stairs.
23. Never use steam mop without
micro-fiber pad attached.
24. Keep your work area well lit.
25. Store steam mop indoors in a cool,
dry place.
When using your SHARK Steam Mop, basic safety precautions should always
be observed, including the following:
Warning: To reduce the risk of fire,
electrical shock, or injury:
1. Read all instructions before using your
steam mop.
2. Use the system only for its intended
use.
3. Do not use outdoors.
4. Do not leave the appliance unattended
when plugged in. Always unplug the
power cord from the electrical outlet
when not in use and before servicing.
5. Do not allow the appliance to be used
as a toy. Close attention is necessary
when used by or near children, pets or
plants. Do not leave appliance
unattended while connected.
6. Use only as described in this manual.
7. Use only manufacturer’s recommended
accessories.
8. Do not operate the appliance with a
damaged plug or cord, or if the unit has
been dropped or damaged. To avoid
the risk of electric shock, do not
disassemble or attempt to repair the
appliance on your own. Return the
appliance to EURO-PRO Operating
LLC (see warranty) for examination and
repair. Incorrect re-assembly or repair
can cause a risk of electrical shock or
injury to persons when the appliance
is used.
9. To protect against a risk of electric
shock, do not immerse the steam mop
into water or any other liquids.
10. Do not pull or carry by power cord, use
power cord as handle, close a door on
the power cord, or pull the power cord
around sharp edges or corners. Keep
power cord away from heated surfaces.
11. Do not unplug by pulling on power
cord. To unplug, grasp the plug not the
power cord. Do not use extension
cords or outlets with inadequate current
carrying capacity.
12. Do not handle plug or steam mop with
wet hands or operate appliance without
shoes.
IMPORTANT SAFETY INSTRUCTIONS
DÉPANNAGE
PROBLÈME CAUSE PROBABLE SOLUTION POSSIBLE
LA VADROUILLE À
VAPEUR NE
FONCTIONNE PAS
1. Le cordon n’est pas
branché dans la prise.
2. La prise ne fonctionne
pas.
3. Réparations requises.
1. Branchez bien l’appareil.
2. Vérifiez le fusible ou le
disjoncteur. Remplacez le
fusible ou réinitialisez le
disjoncteur.
3. Appelez le 1 (800) 798-7398.
LA VADROUILLE NE
PRODUIT AUCUNE
VAPEUR
1. Il n’y a pas d’eau dans
le réservoir.
1. Versez de l’eau dans le réservoir
selon les instructions.
LA VADROUILLE À
VAPEUR LAISSE DE
L’EAU SUR LE
PLANCHER
1. Le chiffon de microfibre
est trop mouillé.
1. Débranchez l’appareil et
remplacez le chiffon de
microfibre.
LA VADROUILLE À
VAPEUR LAISSE DES
TACHES BLANCHES
SUR LE PLANCHER
1. La vadrouille à vapeur a
été laissée trop
longtemps au même
endroit.
2. Eau dure.
1. Ne laissez jamais la vadrouille à
vapeur au même endroit avec un
chiffon de microfibre humide ou
mouillé.
2. Utilisez de l'eau distillée.
Pour commander des chiffons de microfibre de rechange
Modèles: S3101 - S3101A - S3101C - S3101W
Article XT3101
Appelez le 1 (866) 826-6941
Du lundi au vendredi, de 8 h 30 à 17 h 00 heure normale de l’Est
Ou visitez notre site Web: www.sharkcompany.com
26
SOUTIEN TECHNIQUE
Modèles: S3101 - S3101A - S3101C - S3101W
Appelez le 1 (866) 826-6941
Du lundi au vendredi, de 8 h 30 à 17 h 00 heure normale de l’Est

ADDITIONAL IMPORTANT SAFEGUARDS
1. To avoid circuit overload, do not operate another appliance on the same socket
(circuit) as the steam cleaner.
2. If an extension cord is absolutely necessary, an extension cord rated a minimum
of 15 ampere, 14 gage cord should be used. Cords rated for less amperage may
overheat. Care should be taken to arrange cord so that it cannot be pulled or
tripped over.
3. Do not leave unattended when the system is connected to a power
supply/electrical outlet.
2
FOR HOUSEHOLD USE ONLY
SAVE THESE INSTRUCTIONS
IMPORTANT: Do NOT add cleaning solutions, scented perfumes, oils or
any other chemicals to the water used in this appliance. If you live in a hard
water area, we recommend using distilled water in your steam mop.
WARNING: Danger of Scalding. Please use caution when using
the steam mop. The steam emitted from the openings is very hot.
WARNING: To reduce the risk of electric shock, this appliance has a polarized
plug (one blade is wider than the other). This plug will fit in a polarized outlet only
one way. If the plug does not fit fully in the outlet, reverse the plug. If it still does
not fit, contact a qualified electrician to install the proper outlet. Do NOT modify
the plug in any way.
WARNING: Your steam mop is designed to clean hard floor surfaces that will
withstand high heat. Do not use on unsealed wood or unglazed ceramic floors.
On surfaces that have been treated with wax or some no wax floors, the sheen
may be removed by the heat and steam action. It is always recommended to test
an isolated area of the surface to be cleaned before proceeding. We also
recommend that you check the use and care instructions from the floor
manufacturer.
IMPORTANT: Do not store unit with damp/wet micro-fiber cleaning pad
attached. Never leave the steam mop in one spot on any surface for any period of
time with a damp or wet micro-fiber cleaning pad attached as this will damage
your floors.
MODE D’EMPLOI
Eau
• Utilisez l’eau du robinet pour tous
les nettoyages.
• L'eau distillée est recommandée si
vous vivez dans une zone d'eau
dure.
IMPORTANT: N’AJOUTEZ PAS de
produit nettoyant, de parfum, huile ou
autre produit chimique à l’eau utilisée
avec cet appareil: cela pourrait
l’endommager et nuire à son utilisation
sécuritaire. Utilisez l’eau du robinet
ou de l’eau distillée si vous êtes
situé dans une zone d’eau dure.
25
Entretien
Si vous utilisez toujours de l’eau distillée,
le nettoyage du réservoir n’est pas
nécessaire.
MISE EN GARDE: Cet appareil doit
être débranché de la prise électrique
avant tout nettoyage ou entretien.
Rinçage de la vadrouille à vapeur
1. Laissez l'appareil refroidir
complètement avant de la nettoyer
ou de la ranger.
2. Videz toute l'eau du réservoir après
chaque utilisation.

Fig. 3
MAX
Your Shark Steam Mop utilizes steam to remove tough grease,dirt and grime. Steam is
nature’s purest and most powerful cleaner for safely cleaning all hard floor surfaces in
your home without harsh chemicals, thus being perfectly ecological. Cleans your tile,
hardwood, linoleum and vinyl floors.
FEATURES
1. Quick & Easy
Eliminates rinsing, wringing, carrying buckets of water and redistributing the dirt on
the floor.
2. Powerful
Powerful steam dries quickly unlike traditional mopping. Uses powerful steam for
superior cleaning and sanitizing.
3. No Harsh Chemicals
Use plain tap water or distilled water. Leaves no chemical residue behind.
4. Lightweight
No heavy buckets to carry. The Shark Steam Mop weighs only 3 lbs. Only one third
the weight of carrying a bucket of water and a mop.
5. Ergonomic Soft Grip Handle
Comfortable design makes it easy to maneuver without physical strain.
6. Quick Start-Up
Steam is ready in just 30 seconds.
7. Power “On” Light
The power “On” light will turn green when the unit is plugged in.
8. Reusable Cleaning pad
Durable triple layer micro-fiber cleaning pad loosens, lifts and locks in dirt. Just
toss in the washing machine when done.
4
Fig. 2
Tête de la
vadrouille
Rubans auto
agrippant
Assemblage de votre vadrouille à
vapeur
1. Retirez toutes les pièces
de l'emballage.
2. Poussez le tube de
rallonge supérieur
dans le tube de rallonge
inférieur jusqu'à ce
qu'il clique. (Fig. 1)
3. Insérez le jeu
de rallonge dans
l’activateur de
pompe. Assurez
-vous que l'onglet
de verrouillage
s'enclenche. (Fig. 1)
4. Placez le chiffon de
microfibre sous la
tête de la vadrouille.
Assurez-vous que
les rubans auto
agrippants font
face vers le haut. (Fig. 2)
CONSEIL: Les chiffons
de microfibre ont un
onglet coloré, ce qui
vous permet d'assigner
un chiffon différent à
différentes tâches
ou pièces de
la maison.
23
MODE D’EMPLOI
Utilisation de la vadrouille à vapeur
IMPORTANT: N'utilisez jamais la
vadrouille à vapeur sans chiffon de
microfibre sur la tête de la vadrouille ou
sans eau dans le réservoir.
Remarque: à la première utilisation,
l'appareil peut prendre plus de 30
secondes pour produire de la vapeur.
Vous devrez peut-être activer la poignée
quelques fois avant de produire de la
vapeur. Cela est causé par le fait que
l'eau passe du réservoir, par la pompe,
dans la bouilloire. Cela ne surviendra que
la première fois.
1. Passez l'aspirateur ou le balai avant
d'utiliser la vadrouille à vapeur.
2. Tournez le porte-cordon à
déroulement rapide pour dérouler le
cordon d'alimentation.
3. Branchez l’appareil dans une prise
de 120 volts.
4. Le témoin d'alimentation devient vert.
5. L'appareil prend environ 30 secondes
à chauffer et à préparer la vapeur.
6. Pompez la poignée à quelques
reprises pour humecter le chiffon de
microfibre. Commencez à passer la
vadrouille dans un mouvement
d'avant en arrière. Cette action
libérera la vapeur.
7. Lorsque le réservoir est vide, la
vadrouille cesse de produire de la
vapeur. Débranchez le cordon
d’alimentation de la prise murale.
Remplissez le réservoir selon les
instructions ci-dessus.
8. Lorsque vous avez terminé, retirez
l'appareil de la prise électrique et
retirer le chiffon de microfibre avec
soin de la tête de la vadrouille.
Remarque: le chiffon de microfibre
devient très chaud à la vapeur. Soyez
prudent lorsque vous le retirez.
9. Ne laissez jamais le chiffon de
microfibre sur la tête de la vadrouille
à vapeur lorsque vous en avez
terminé l'utilisation.
Activateur
de pompe
Fig. 1
Remplissage du réservoir
IMPORTANT: Assurez-vous toujours que
l'appareil est DÉBRANCHÉ avant le
remplissage et avant de fixer le chiffon de
microfibre à la tête de la vadrouille.
N'utilisez jamais la vadrouille à vapeur sans
chiffon de microfibre sur la tête de la
vadrouille.
Remarque: Durant l’utilisation initiale de
votre nouveau vadrouille à vapeur, vous
pourriez observer un résidu d’eau à
l’intérieur de l’unité. Des gouttes d’eau
peuvent aussi être trouvées dans
l’emballage. Ne soyez pas alarmé, ceci est
normal. Chaque vadrouille à vapeur est
soumis à un essai à 100% à l’usine, pour
assurer la performance du produit et la
sécurité. De l’eau résiduelle est quelquefois
laissée dans l’unité à la suite de ces
procédures d’essai.
1. Tournez le bouchon dans le sens
antihoraire et retirez-le du réservoir.
(Fig. 3)
2. À l’aide du gobelet
de remplissage et
l’entonnoir, versez
l’eau dans le
réservoir. Ne faites
pas déborder l’appareil
au-dessus de la ligne
«MAX». (Fig. 3)
3. Replacez le bouchon sur le réservoir.

Fig. 3
MAX
5
OPERATING INSTRUCTIONS
2. Using the filling flask and funnel, pour
one flask of water into the water tank.
Do not overfill the unit past the “MAX”
fill line on the water tank. (Fig. 3)
3. Replace the cap onto the water tank.
Using the Steam Mop
IMPORTANT: Never use the steam mop
without the micro-fiber cleaning pad
attached to the mop head or without water
in the water tank.
Please note that when using for the first
time, the appliance may take longer than
the normal 30 second startup time to
steam. You may need to pump the handle
a few times before the steam is released.
This is due to the water making its way
from the water tank through the pump and
into the heater. This will only occur during
the first use.
1. Sweep or vacuum floors before using
the steam mop.
2. Twist the quick release cord holder to
unwrap the power cord completely.
3. Plug into a 120-volt electrical outlet.
4. The power “On” light will turn green.
5. It takes approximately 30 seconds for
the unit to heat up and the steam to be
ready.
6. Pump the handle a few times to
dampen the micro-fiber cleaning pad.
Begin mopping with a forward and
backward motion, this pumping action
will release steam as you mop.
7. When the water tank is empty, the
steam mop will stop emitting steam.
Unplug the power cord from the
electrical outlet and refill the water tank
following the instructions above.
8. When you have finished using the
steam mop, unplug the unit from the
electrical outlet and carefully remove
the micro-fiber cleaning pad from the
mop head. Please note that the micro-
fiber cleaning pad gets very hot with
the steam. Always use caution when
removing.
9. Never leave the micro-fiber cleaning
pad on the steam mop head when
you have finished using the steam
mop.
Pump
actuator
Fig. 1
How To Assemble Your Steam Mop
1. Remove all the parts from the
packaging.
2. Insert the upper extension
tube into the lower
extension tube. (Fig. 1)
Push it in until you
hear it click into place.
3. Insert the extension
tube assembly into the
pump actuator. Make
sure that the locking
tab snaps into place.
(Fig. 1)
4. Place the micro-fiber
cleaning pad
underneath the
mop head. Make
sure that the hook
and latch strips are
facing up. (Fig. 2)
Press to secure.
TIP: The micro-fiber
cleaning pads have
a colored tab so that
a different pad can
be assigned to
different tasks or
rooms in the
house.
Votre vadrouille à vapeur Shark utilise la vapeur pour éliminer la graisse, la saleté et
les dépôts tenaces. La vapeur est le nettoyant naturel le plus pur et le plus puissant. Elle
permet de nettoyer les surfaces dures en sécurité à la maison, sans produit chimique
corrosif. Elle est entièrement écologique. Elle nettoie vos planchers de tuile, de bois, de
linoléum et de plastique vinylique.
CARACTÉRISTIQUES
1. Rapide et facile
Élimine le rinçage, le tordage, le transport de seaux d'eau et la redistribution de la
saleté sur les planchers.
2. Puissante
Séchage rapide contrairement aux vadrouilles conventionnelles. Utilise une vapeur
puissante pour un nettoyage et une hygiène supérieure.
3. Aucun produit chimique
Utilisez l'eau du robinet ou de l'eau distillée. Ne laisse aucun résidu chimique.
4. Légère
Aucun seau lourd à transporter. La vadrouille à vapeur Shark ne pèse que 1.5 kg.
Seulement le tiers du poids d’un seau d’eau et d’une vadrouille conventionnelle.
5. Ergonomique
Poignée ergonomique à prise facile. Sa conception confortable facilite la manœuvre
sans effort physique.
6. Démarrage rapide
La vapeur est prête en seulement 30 secondes.
7. Témoin d’alimentation
Le témoin d'alimentation s’illumine en vert une fois l'appareil branché.
8. Chiffon de nettoyage réutilisable
Le chiffon de microfibre à triple couche durable dégage, soulève et absorbe la saleté.
Vous n’avez ensuite qu’a mettre dans la laveuse.
22
Fig. 2
Mop
head
Hook & latch
strips
Filling the Water Tank
IMPORTANT: Always insure that the
unit is “UNPLUGGED” from the wall
receptacle prior to filling and before
attaching the micro-fiber cleaning pad to
the bottom of the mop head. Never use
the steam mop without the micro-fiber
cleaning pad attached to the mop head.
NOTE: When using your new steam mop
for the first time you may notice water
residue inside of the unit. Water drops
can also be found in the packaging. This
is normal and you should not be alarmed.
Each steam mop is 100% tested in the
factory to ensure product performance
and safety. Sometimes
water is left in the unit
from these test procedures.
1. Turn the cap
counter clockwise
and then lift up to
remove from the
water tank. (Fig. 3)

OPERATING INSTRUCTIONS
Always remove the micro-fiber cleaning
pad and wash in warm water with a
mild detergent. Never use bleach or
fabric softener when washing the
reusable micro-fiber cleaning pad.
The micro-fiber cleaning pad may be
washed in a washing machine and
dried in a clothes drier on low heat.
We recommend that you air dry.
IMPORTANT: Be careful when machine
washing or drying with mixed fabrics as
micro-fiber pads will pick up lint from other
fabrics and the hook and latch strips will
stick to other garments. We recommend
washing the micro-fiber cleaning pads
separately or placing them in a garment
bag first.
CAUTION: Never store the steam mop
with a wet or damp micro-fiber cleaning
pad still attached as this will damage
your floors.
Care & Maintenance of the Micro-
Fiber Cleaning Pad
Due to the unique cleaning ability of this
pad, proper care of your micro-fiber
cleaning pad is required to ensure long
life and continued cleaning ability.
• The first thing you should do when you
get a new micro-fiber cleaning pad is
to wash and dry it. During the
manufacturing process the fabric has
a tendency to become flat as it picks
up contaminants from the air and
machinery. There will also be a number
of loose threads that, while they cause
no harm, can be annoying the first time
you use the pad.
• To wash the micro-fiber cleaning pad,
simply put it in your washing machine
using the warm water setting.
• We recommend washing your micro-
fiber cleaning pads separately from
other fabrics or placing them in a
garment bag first. They have a
tendency to pick up lint and other
particles from other fabrics and the
next time you use your micro-fiber
cleaning pad, this lint will transfer to
the surface being cleaned.
• ONLY USE LIQUID DETERGENTS,
never use dry detergents as many
times the granules do not fully
dissolve and become trapped in the
cleaning pad. This can scratch the
surface that you are cleaning.
• NEVER USE BLEACH OR FABRIC
SOFTENERS! Bleach will damage the
micro-fiber fabric and fabric softeners
deposit a coating on the micro-fiber
fabric what will not allow the pad to
clean efficiently.
• We recommend that you air dry the
micro-fiber cleaning pad. If using a
clothes dryer, do not put on a high heat
setting as high heat will cause the
micro-fiber pad to shrink and the micro-
fibers to break down.
• Wash the micro-fiber cleaning pads
regularly and don’t allow them get too
dirty so that they will last much longer.
As with any fabric, dirt particles, grease
and other contaminants can cause the
fibers to break down, therefore regular
cleaning will help preserve your micro-
fiber cleaning pads.
• As you use the micro-fiber cleaning
pad, you will notice that sometimes a
thread will loosen or pull out. This is
normal and you should NEVER PULL
AT THE LOOSE THREAD! Pulling the
thread can cause the weave to come
undone. Instead, simply trim the thread
with a pair of sharp scissors.
Helpful Hints
1. Always vacuum or sweep before using
the steam mop.
2. The easiest way to use the steam mop
is to tilt the ergonomic handle to a 45°
angle and clean slowly.
3. Hand wash or machine wash the
micro-fiber cleaning pad in a delicate
cycle with a mild liquid detergent.
4. We recommend air drying the micro-
fiber cleaning pads for 24 hours, but
they could be dried in a dryer on a low
heat setting.
5. A good amount of steam passes
through the micro-fiber cleaning pad.
We recommend that the cleaning pad
be changed when it gets too wet. These
need to be replaced as necessary.
6. To remove stubborn stains from vinyl
or linoleum floors, pre-treat with a mild
detergent and some water before using
the steam mop.
IMPORTANT: Never leave the steam
mop in one spot on any surface for any
period of time with a damp or wet micro-
fiber cleaning pad attached as this will
damage your floors.
6
FAMILIARISEZ-VOUS VADROUILLE À VAPEUR
Fiche technique
Tension : 120 V, 60 Hz
Intensité : 1550 watts
Capacité : 8 onces (US) (250 ml)
*Remarque : Les illustrations peuvent différer de l’appareil réel
21
1. Poignée ergonomique
2. Cordon d'alimentation
à déroulement rapide
3. Tube de rallonge supérieur
4. Tube de rallonge inférieur
5. Enrouleur inférieur
de cordon d'alimentation
6. Activateur de la pompe
7. Bouchon
8. Réservoir d'eau
9. Témoin d'alimentation (vert)
10. Tête de la vadrouille
11. Gobelet de remplissage
12. Chiffon de microfibre (2)
13. Entonnoir
14. Cordon d’alimentation (pas illustré)
13

OPERATING INSTRUCTIONS
Water
• Use tap water for all your cleaning
needs.
• However, if you live in an area with
hard water, it is recommended that
you use distilled water
IMPORTANT: Do NOT add cleaning
solutions, scented perfumes, oils or any
other chemicals to the water used in
this appliance, as this may damage it or
make it unsafe for use. Use distilled
water if the tap water in your area is
very hard.
7
Care and Maintenance
If you consistently use distilled water,
cleaning the water tank is unnecessary.
CAUTION: This appliance must be
unplugged from the electrical outlet
before performing any cleaning or
maintenance tasks on the unit.
Rinsing Out the Steam Mop
1. Let the appliance cool down
completely before cleaning or storing.
2. Empty all water from the water tank
after each use.
MESURES DE PRÉCAUTION IMPORTANTES
SUPPLÉMENTAIRES
1. Afin d’éviter une surcharge électrique, n’utilisez pas un autre appareil sur le
même circuit électrique.
2. Si vous devez absolument utiliser une rallonge, utilisez un cordon de 15 ampères
minimum de calibre 14. Les rallonges de calibre moindre pourraient surchauffer.
Disposez les rallonges de façon à ce que personne ne puisse les tirer ou y
trébucher.
3. Ne laissez pas l’appareil sans surveillance lorsqu’il est branché.
20
CONSERVEZ CE MODE D’EMPLOI
POUR USAGE DOMESTIQUE SEULEMENT
IMPORTANT: N’AJOUTEZ PAS de produit nettoyant, de parfum, huile ou
autre produit chimique à l’eau utilisée avec cet appareil. Utilisez l’eau du robinet
ou de l’eau distillée si vous êtes situé dans une zone d’eau dure.
AVERTISSEMENT: Risque de brûlure. Soyez prudent lorsque
vous utilisez la vadrouille à vapeur. La vapeur qui s’échappe est très
chaude.
MISE EN GARDE: Afin de réduire les risques d’électrocution, cet appareil
est doté d’un cordon à fiche polarisée (une lame est plus large que l’autre). Cette
fiche ne s’insère que dans un seul sens dans une prise polarisée. Si la fiche ne
s’insère pas dans la prise, retournez la fiche. Si elle ne s’adapte toujours pas,
contactez un électricien qualifié afin d’installer la prise appropriée. N’altérez la
fiche d’aucune façon.
MISE EN GARDE: Votre vadrouille à vapeur est conçue pour nettoyer les
surfaces de plancher pouvant supporter une chaleur élevée. Ne l'utilisez pas sur
le bois nu ni sur la céramique non vernie. La chaleur et l’action vaporisante peut
élimer les surfaces traitées à la cire ou autre produit. Il est toujours recommandé
d’effectuer un test sur une zone isolée de la surface avant de procéder. Nous vous
recommandons également de vérifier les consignes d'utilisation et d'entretien du
fabricant de plancher.
IMPORTANT: Ne rangez pas l’appareil sans retirer son tissu de microfibre
encore humide ou mouillé. Ne laissez jamais la vadrouille à vapeur au même
endroit lorsque le tissu de microfibre y est fixé : cela endommagerait votre
plancher.

EURO-PRO Operating LLC warrants this product to be free from defects in material and
workmanship for a period of one (1) year from the date of the original purchase, when
utilized for normal household use, subject to the following conditions, exclusions and
exceptions.
Should any defect covered by the terms of the limited warranty be discovered within one
year, EURO-PRO Operating LLC will repair or replace any defective part provided the
unit is returned by the original purchaser, freight prepaid, to:
U.S.:
EURO-PRO Operating LLC., 94 Main Mill Street, Door 16, Plattsburgh, N.Y., 12901
Canada: EURO-PRO Operating LLC., 4400 Bois Franc, St Laurent, QC H4S 1A7
Proof of purchase date and $ 9.95 for handling and return packing/shipping charges must
be included.*
The liability of under this warranty is limited solely to the cost of the replacement parts or
the complete unit at our option. LABOUR CHARGES ARE NOT INCLUDED.
This warranty does not cover normal wear of parts and does not apply to any unit that has
been tampered with or used for commercial purposes. This Limited Warranty does not
cover damage caused by misuse, negligent handling, or damage due to faulty packaging
or mishandling in transit (by any common carrier).
This warranty is extended to the original purchaser of the unit and excludes all other legal
and/or conventional warranties. The responsibility of EURO-PRO Operating LLC, if any,
is limited to the specific obligations expressly assumed by it under the terms of the limited
warranty. In no event is EURO-PRO Operating LLC liable for incidental or consequential
damages of any nature whatsoever. Some States/Provinces do not permit the exclusion
or limitation of incidental or consequential damages, so the above may not apply to you.
This warranty gives you specific legal rights which vary from state to state or province to
province.
*Important: Carefully pack item to avoid damage in shipping. Be sure to attach a tag to
item before packing with your name, complete address and phone number with note
giving purchase information, model number and what you believe is the problem with
item. We recommend you insure the package (as damage in shipping is not covered by
your warranty). Mark the outside of your package “ATTENTION CUSTOMER SERVICE”.
We are constantly striving to improve our products, therefore the specifications
contained herein are subject to change without notice
.
yyyyyyyyyyyyyyyyyyyyyyyyyyyyyyyyyyyyyyyyyyyyyyyyyyyyyyyyyyyyyyyyy
OWNERSHIP REGISTRATION CARD
FOR CANADIAN CONSUMERS ONLY
Please fill out and mail the product registration card within ten (10) days of purchase. The registration will enable us
to contact you in the unlikely event of a product safety notification. By returning this card you acknowledge to have
read and understood the instructions for use, and warnings set forth in the accompanying instructions.
RETURN TO: EURO-PRO Operating LLC, 4400 Bois Franc, St. Laurent, QC H4S 1A7
______________________________________________________________________
Appliance model
______________________________________________________________________
Date purchased Name of store
______________________________________________________________________
Owner's name
______________________________________________________________________
Address City Province Postal Code
1 YEAR LIMITED WARRANTY
Models
S3101 - S3101A
S3101C - S3101W
9
Models: S3101 - S3101A - S3101C - S3101W
Printed in China
EURO-PRO Operating LLC garantiza este producto contra defectos de materiales y mano de obra
por un término de un (1) año a partir de la fecha de compra original, siempre que sea utilizado para
uso doméstico normal, sujeto a las siguientes condiciones, exclusiones y excepciones.
Si tiene algún problema cubierto por esta garantía dentro del primer año desde la fecha de compra,
EURO-PRO Operating LLC reparará o reemplazará cualquier parte defectuosa siempre que la
unidad sea retornada por el comprador original, con los gastos de envío pagos, a:
EE.UU.: EURO-PRO Operating LLC., 94 Main Mill Street, Door 16, Plattsburgh, N.Y., 12901
Canadá: EURO-PRO Operating LLC, 4400 Bois Franc, St. Laurent, QC H4S 1A7
Debe incluir un comprobante de la fecha de compra y $ 9,95 para cubrir los gastos de envío. *
La responsabilidad de EURO-PRO Operating LLC se limita únicamente al costo de reparación o
reemplazo de la unidad, a nuestro criterio. LOS CARGOS POR MANO DE OBRA NO ESTÁN
INCLUIDOS.
Esta garantía no cubre el desgaste normal de las partes y no cubre ninguna unidad que haya sido
alterada o utilizada con fines comerciales. Esta garantía limitada no cubre daños ocasionados por
uso inadecuado, negligencia o daños causados por embalaje inapropiado o maltrato durante el
transporte (de cualquier compañía de transportes).
Esta garantía es válida para el comprador original del producto y excluye cualquier otra garantía
legal y/o convencional. La responsabilidad de EURO-PRO Operating LLC, de existir, se limita a las
obligaciones específicas asumidas expresamente bajo los términos de esta garantía limitada. Bajo
ninguna circunstancia EURO-PRO Operating LLC será responsable por daños incidentales o
indirectos de ninguna clase. Algunos Estados/Provincias no permiten la exclusión o limitación de
daños consiguientes o incidentales, por lo tanto lo anterior puede no ser válido para usted.
Esta garantía le otorga derechos legales que varían de estado a estado o de provincia a provincia.
*Importante: Embale el producto cuidadosamente para evitar daños durante el transporte.
Asegúrese de incluir un comprobante de la fecha de compra y de colocarle una etiqueta al producto
con su nombre, dirección completa y número de teléfono, una nota proporcionando información de
la compra, número de modelo y una descripción del problema. Le recomendamos asegurar el
paquete (puesto que la garantía no cubre daños de envío). Escriba en el exterior del paquete
“ATTENTION CUSTOMER SERVICE”. Nosotros nos esforzamos constantemente en mejorar
nuestros productos, por lo tanto las especificaciones aquí indicadas pueden cambiar sin
previo aviso.
---------------------------------------------------------------------------------------------------------------------------------
TARJETA DE REGISTRO DEL CLIENTE
SÓLO PARA CONSUMIDORES CANADIENSES
Complete y envíe la tarjeta de registro del producto dentro de los diez (10) días posteriores a la
compra. El registro nos permitirá contactarnos con usted en caso de existir alguna notificación de
seguridad con respecto al producto. Retornando esta tarjeta usted reconoce haber leído y entendido
las instrucciones de uso y advertencias incluidas en estas instrucciones.
ENVIAR A: EURO-PRO Operating LLC, 4400 Bois Franc, St. Laurent, QC H4S 1A7
______________________________________________________________________
Modelo del Artefacto
______________________________________________________________________
Fecha de compra Nombre del Negocio
______________________________________________________________________
Nombre del Usuario
______________________________________________________________________
Dirección Ciudad Provincia Código Postal
GARANTÍA LIMITADA DE 1 AÑO
Modelos
S3101 - S3101A
S3101C - S3101W
18
Modelos: S3101 - S3101A - S3101C - S3101W
Impreso en China
/