Page is loading ...

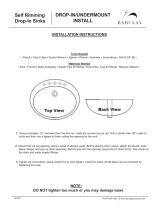
250mm
320mm
H2
H1
H3
820mm
W1
40mm
W2
70mm
W3
150mm
W4
230mm
Suggestion of installing size
()
,
.
.
NOTICE
slight difference 2%may exist between the indicated dimensions
in the drawing and the actual dimensions please check whether the
cutting line drawing are sort well with the actual dimensions of the
product after cutting the drawing please refer to actual dimensions
for standard size if not suitable
BC3020
BC3020 UNDER COUNTER BASIN
Cutting line
Cutting line drawing
Installation table
6 Install the metal brackets to fix and support the under counter basin according to
the size of the basin and the installing position on the table.
.
7 Clean up the sawdust on the table. Put the under counter basin onto the installing
hole and adjust it to the right position. Mark the installingposition along the edge
of the basin with pencil on the table, then remove the basin.
.
Note: Be careful when you move and place the product to avoid any damages
or hurt. Two persons are required to work together because the under counter basin is heavy.
8 Check the position again, and daub a layer of silicon along the upper edge
of the under counter basin.Aim the basin carefully tothe installing hole, then
adjust the position to make the basin and the marked line aligning and press
the basin upwards.
Fasten the screws of the bracket to make the basin well against the table.
.
Note: Daub silicon evenly with daubing knife if the silicon is uneven.
9 Scrape off the extrusive silicon immediately. Fill with silicon if there is
gap between the basin and the table.
.
10 Install the faucet follow the installation instruction and procedure
after silicon is completely dry.
.
11 Get the supply pipe and the drain connected..
12 Turn on the faucet and the switch. Check the units and the connection
carefully to make sure there is no leakage.
.
13 Clean the basin and the table with uncorrosive cleaner..
Wall
Connection of water
supply units
Connection of
drain units
Table
Silicon
Ceramic
Before installing
Installation Procedure
2 Put the cutting line drawing onto the table, and make sure there is enough distance
between faucet and wall. Check the space under the basin whether there is enough
space to instal supply pipes and drainpipes
.
.
1 Make sure the pipelines for water supply and drain are prepared on the wall. .
2 Make sure the existing incision is suitable for the new basin if you
want to replace the old one with the new one
.
.
3 Make out the correct cutting line according to the illustration on the installation
instruction.
.
4 Make sure water supply has been turned off..
1 Cut along the cutting line illustrated on the installation instruction to get the correct cutting
line drawing.
.
3 Mark the cutting line on the table with pencil along the cutting line drawing..
4 Drill one hole inside the marked cutting line a little distant from the line, and cut out
the installing hole along the cutting line.
.
5 Drill the installing hole of the faucet correctly follow the size of the faucet and the table..
Note: The size of the installing hole for the faucet must be
correct, otherwise the faucet may not work.
Upper edge
of the basin
WARNING
The connection between the supply pipe and the faucet must be
tight enough so that to avoid any leakage.
120
195
380
540
W1
H3
H2
H1
W4
/