Page is loading ...

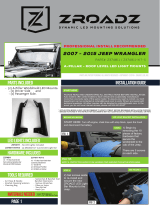
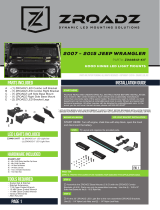
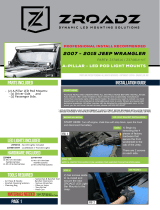
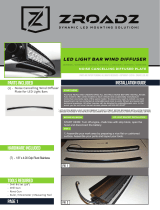
FIG 1
FIG 2FIG 2
Page 1
START HERE
PLEASE READ AND UNDERSTAND ALL INSTRUCTIONS BEFORE INSTALLATION.
Auto makers offer varied models to each vehicle and occasionally manufacture
more than one body style of the same model. To assure your part is correct; our tech
department can be contacted at [email protected] to verify tment and assist with
technical questions. All other inquires can be directed to [email protected]. In the
event you do not have internet access please call 844-653-8040
BEFORE YOU BEGIN
START HERE: Turn off engine, chalk tires with stop block, open the hood
and disconnect the battery. Layout and organize all the provided parts.
STEP 1
STEP 2
2) Assemble the
provided hardware
as seen in Figure
#2.
Hex Bolt
Lock Washer
Flat Washer
* APPLICATION MODELS VARY. WE RECOMMEND TO VERIFY FITMENT BEFORE BEGINNING INSTALLATION PROCESS.
* IMAGES FEATURED IN THE INSTRUCTION DOCUMENTS MAY NOT ALWAYS EXACTLY MATCH YOUR MODEL OR PART.
LED LIGHT BRACKET INSTALLATION
SEE FIGURE 2
1) Insert the M6
Extruded “U“ Nuts
on to the ZROADZ
Mounting Bracket as
seen in Figure #1.
Note the orientation.
- (1) Rear Bumper Mounting Bracket
- Air Hose & Nozzle
- Alcohol Cleaning Solution
- Cleaning Rag
- Socket Set & Ratchet Tool
Ratchet Extensions
- Various Wrenches
- Dikes or Snips
- Torq Bit Set
- Heat Gun
Tools Required
LED LIGHTS included
hardware included
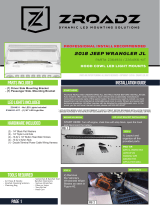
Parts included
- No LED Lights Included
- (1) 10” LED Light Bar
- No Power Cable Included
- (1) Power Cable Wiring Harness
Z384931
Z384931-KIT
Z384931
Z384931-KIT
(2) - M6-1.0 x 100mm Hex Bolts
(2) -1/4” Lock Washers
(2) - 1/4” x 1 1/2” Flat Washers
(2) - M6-1.0 Extruded “U“ Nuts
Installation Guide
Parts are PATENT PENDING. All Rights Reserved - Copyright ©2018 - ZROADZ LED, INC.
2018 JEEP WRANGLER JL
PART#: Z384931 / Z384931-KIT
REAR BUMPER LED LIGHT MOUNTS
PROFESSIONAL INSTALL RECOMMENDED

Page 2
STEPS 5 - 7
5) Put into place the ZROADZ Mounting Bracket & use a socket or
wrench to tighten hardware and secure ZROADZ Mountign Bracket into
position.
6) Put into place the Single Row 10” LED Light Bar so that is sits in the
ZROADZ Mounting Bracket cradle as seen in Figure #6.
7) Go over and tighten all hardware. Secure all LED Light Power Wires
and connect harness. Route power wires & harness inside the chassis.
STEPS 3 & 4
At the rear of the vehicle, underneath rear
bumper, identify the Vehicle’s Rear Frame.
3) Put into place and mock up the ZROADZ
Mounting Bracket into position to gain
familiarity and identify where it will mount to
frame. There are two holes that are 4” apart
from each other. See Figures #3, #4, & #5.
4) From the forward facing side of the rear
frame, insert the assembled hardware
through the frame holes as seen in Figure
#4.
SEE FIGURES 5 & 6
SEE FIGURES 3 - 5
STEPS 8 & 9
8) ZROADZ recommends LED Lights be wired with ZROADZ harness kit (part# Z390020D-25A ) or by utilizing a compatible
custom wiring harness. Wiring must be installed by competent & knowledgable automotive electrician.
9) To adjust the angle of your Light Bar, rotate the LED(s) to adjust the angles till your desired light pattern is reached.
There will be minimal adjustment due to curved light bar orientation. You may than tighten the hardware and secure everything into place.
Be careful not to over tighten the mounting hardware.
It is best to adjust the angle with the vehicle on level ground with lights facing a wall, garage door or other solid barrier.
We recommend checking from a distance of 25’. Your installation is now completed.
ADJUSTMENT TIPS
LED Light Bracket Installation - Continued
FIG 3 FIG 4
FIG 6FIG 5FIG 6
BACK OF
VEHICLE
BACK OF
VEHICLE
VEHICLE’s
REAR FRAME
ZROADZ
MOUNTING
BRACKET
BACK OF
VEHICLE
FRONT OF
VEHICLE
FRONT OF
VEHICLE
FRONT OF
VEHICLE
LED Light Bracket Installation - Complete
Parts are PATENT PENDING. All Rights Reserved - Copyright ©2018 - ZROADZ LED, INC.

ZROADZ PRODUCT WARRANTY
ZROADZ warrants its grille products to be free from defects in material and workmanship for the lifetime of the grille. ZROADZ warrants the
finish of its grille products for a 3 year period beginning at the time of sale to the end user. These warranties are limited warranties and do
not cover abuse, modification or improper installation nor do they cover finish failure caused by caustic cleaning agents, road salts or other
chemicals. ZROADZ reserves the right to repair or replace a defective product at its sole discretion. Any ZROADZ product must be returned to
ZROADZ for warranty consideration and must be returned at the customer’s expense. In the event that the product is deemed to be defective,
the repaired or replaced item will be returned via a surface shipping method to the customer at ZROADZ expense. No provision is made for
any labor, rental car or other costs incurred by the failure of its products.
GENERAL GUIDELINES
LED Lights & LED Light Bars operate at relatively high currents and should only be installed by qualified personnel with experience in
switched / relayed high draw DC Circuits.
- Light Bars are designed for use only with standard 12v DC power systems
- Light Bars are for OFF-ROAD USE ONLY. Check your local laws & regulations regarding vehicle mounted lights.
- Some Light Bars are equipped with waterproof connectors while others are simply pig-tailed
- Red Wires = POSITIVE | Black Wires = NEGATIVE
- ALWAYS install your lights on a fused circuit. Basic fusing guidelines: maximum 5A for every 10” of LED Light Bar.
WARNING
PLEASE CONSULT YOUR LOCAL AUTOMOTIVE ELECTRICAL PROFESSIONAL FOR INSTALLATION SERVICES AND ADVICE. ZROADZ IS ONLY
EQUIPPED TO PROVIDE BASIC TECHNICAL ASSISTANCE DUE TO THE DIVERSITY OF VEHICLES, VEHICLE OPTIONS & MODIFICATIONS AND
LIGHTING CONFIGURATION OPTIONS AVAILABLE. ZROADZ cannot be held liable due to improper component installation and / or faulty wiring.
GENERAL USE, INSTALL AND ADJUSTMENT TIPS
NOTE 1: ZROADZ LED Light Bars themselves are for OFF-ROAD USE ONLY.
NOTE 2: Light Bars depending on the configuration of your vehicle and its options and/or modifications may need to be adjusted for appropriate
beam projection. To adjust the angle of your light bars simply loosen the mounting hardware on either side of each Light Bar, rotate the Light Bar
to adjust the angle, then tighten the hardware once the desired angle is achieved (please be careful not to over-tighten the mounting hardware or
scratch the protective powder-coat finish). It is best to adjust the angle with the vehicle on level ground with the lights facing a wall, garage door
or other solid barrier at a distance of approximately 25-30 feet.
NOTE 3: Please consult a qualified automotive electrical professional for light bar wiring installation.
NOTE 4: An optional universal wiring harness (part# Z390020S-A) is also available that includes high-heat & oil/fuel resistant wires, waterproof
connector, 12v relay, 12v rocker switch, inline fuse holder. Our universal wiring harness significantly expedites the installation process but is not a
vehicles specific “Plug & Play“ product and does not eliminate the need for a professional installation.
Please contact your local ZROADZ dealer for more information or visit www.zroadz.com.
PRODUCT CARE INFORMATION
Wash regularly as you would when caring for your vehicles. Never use dish soap. Never leave wet water spots as that may leave a blemish.
GLOSS BLACK FINISH
ZROADZwith Gloss Black Powder Coated Finish may be washed regularly as you would when caring for your vehicles finish using soap and
water. ZROADZshould be waxed at the same time that you wax the vehicle. As a general rule, anything you use to clean your vehicles painted
surfaces can be used to clean and maintain your ZROADZ grille. A Gloss powder Coated Finish can be cared for in the same fashion that you
would care for your vehicles factory paint job. Never leave wet water spots as that may leave a blemish.
MATTE BLACK FINISH
Paint warranty applies to defects in material and / or workmanship, it does not cover the matte finish surface appearance.
To enjoy the matte appearance for many years to come, please follow these owner care and maintenance tips.
Get a no-shine matte car wash soap that uses no fillers, no silicone, and won’t strip your matte paint of its layer of protection.
Do not use wax, detail spray, armorall®, or any products made for normal paint. Use only products specifically developed for matte
finish paint. Do not use products that are even mildly abrasive, such as polishes, glazes, or rubbing compounds. Do not use mechanical
cleaners or polishers. Do not use terrycloth, cloth, or paper towels. Do not rub the finish vigorously, this will burnish the paint finish,
causing a permanent shiny spot. Shiny spots cannot be removed.
Do not use commercial car wash facilities or their shine enhancement products. Most car wash brushes, large mechanized “towels,”
and shine enhancement products can damage matte paint.
Remove foreign substances such as insect remains, tar, and road debris using a soft applicator and a mild solvent; saturate and soak
area before cleaning—rub lightly.
Hand-wash with a soft wash mitt and mild cleaning product safe for matte paint. Use microfiber cleaning cloths with alcohol-based window
cleaner for basic surface clean-up.
zroadz PRODUCT WARRANTY
LED Lighting Equipment Installation / Disclaimer
PRODUCT Care Information
Parts are PATENT PENDING. All Rights Reserved - Copyright ©2016 - ZROADZ LED, INC.
Parts are PATENT PENDING. All Rights
Reserved - Copyright ©2015 - ZROADZ.com
/
