Page is loading ...

INSTRUCTIONS FOR:-
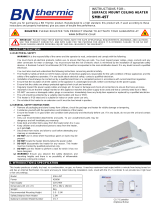
SURFACE MOUNT CEILING HEATER
SMH-45
IMPORTANT: PLEASE READ THESE INSTRUCTIONS, NOTE THE SAFE OPERATIONAL REQUIREMENTS, WARNINGS, AND CAUTIONS.
USE THIS PRODUCT CORRECTLY, AND WITH CARE FOR THE PURPOSE FOR WHICH IT IS INTENDED. FAILURE TO DO SO MAY
CAUSE DAMAGE AND/OR PERSONAL INJURY AND WILL INVALIDATE THE WARRANTY.
Thank you for purchasing a BN Thermic product. Manufactured to a high standard, this product will, if used according to these instructions and
properly maintained, give you years of trouble free performance.
1. SAFETY INSTRUCTIONS
1.1 ELECTRICAL SAFETY
WARNING! It is the responsibility of the owner and the operator to read, understand and comply with the following:
You must check all electrical products, before use, to ensure that they are safe. You must inspect power cables, plugs, sockets and any
other connectors for wear or damage. You must ensure that the risk of electric shock is minimised by the installation of appropriate safety
devices. A Residual Current Circuit Breaker (RCCB) should be incorporated in the main distribution board. If in any doubt consult a qualified
electrician.
You must also read and understand the following instructions concerning electrical safety.
▪ The Health & Safety at Work Act 1974 makes owners of electrical appliances responsible for the safe condition of those appliances and the
safety of the appliance operators. If in any doubt about electrical safety, contact a qualified electrician.
▪ Installation should always be carried out by a qualified electrician or a competent person in accordance with current electrical regulation.
▪ Ensure that the insulation of all the cables on the appliance is undamaged and safe, before connecting it to the power supply.
▪ Ensure that the cables are always protected against short circuit and overload.
▪ Regularly inspect the power supply cables and plugs etc. for wear or damage and check all connections to ensure that none are loose.
▪ Important: Ensure that the voltage marked on the appliance matches the power supply to be used and that a correctly rated fuse is fitted.
▪ DO NOT use worn or damaged cables, plugs or connectors. Immediately have any faulty item repaired or replaced by a qualified electrician.
▪ The unit should be protected by a suitably rated isolator and fuse or MCB.
▪ This heater is IP20 rated and is suitable for indoor or under cover use only.
▪ Do not attach this heater to an extension cord it must be hard wired in position.
1.2 GENERAL SAFETY INSTRUCTIONS
✓ Remove all packaging and store it away from children, check the package and heater for visible damage or tampering.
✓ Familiarise yourself with the applications and limitations of the heater.
✓ Ensure the heater is in good order and condition both physically and electrically before use. If in any doubt, do not use the unit and contact
your supplier.
✓ Only use recommended attachments and parts. To use unauthorised parts may be dangerous and will invalidate your warranty.
✓ Keep tools and other items away from the heater when it is in use.
✓ Keep children and unauthorised persons away from the heater, as it gets hot.
✓ Disconnect from mains and allow to cool before attempting any cleaning or maintenance.
X DO NOT use in areas where hazardous gasses or dusts may be present.
X DO NOT disassemble the heater for any
reason. This heater must be checked by
qualified personnel only.
X DO NOT use this heater to perform a task
for which it has not been designed.
❑
WARNING! This heater is not equipped
with a built in device to control the room
temperature. Do not use this heater in a
small room if it is occupied by people not
capable of leaving the room on their own,
unless constant supervision is provided.
❑
WARNING! Ensure you observe the safety
distances and mounting heights and there
is no possibility of inflammable materials
coming into contact.
2. INTRODUCTION & SPECIFICATION
This heater produces a totally dry heat, no condensation, no gas, no fumes. It reaches maximum heat output within a minute from being turned on. It
is quick and easy to install reducing installation costs. Used with the CS-7 controller it can provide low / high heat or fan only settings.
Model
SMH-45
Power
4500W
Input supply
220-240V
Dimensions (W x D x H)
575 x 392 x 152mm
Weight
9kg
Recommended Mounting Height
3.0 - 3.5M
Safety Distance from Heater
1.5M
Optional Controller Model Number
CS-7
CS-7 Controller
(Optional Extra)
RST-TP Thermostat
(Optional Extra)
REGISTER: PLEASE REGISTER THIS PRODUCT ONLINE TO ACTIVATE YOUR GUARANTEE AT
www.bnthermic.co.uk

M6 Threaded Holes
3. MOUNTING INSTALLATION
3.1 CEILING MOUNTING
❑
IMPORTANT! Ensure that the ceiling is capable of taking the weight of the heater.
For optimum results do not fit in ceilings higher than 3.5m. Air is taken in through the large grille and discharged through the smaller grille. The air
intake and discharge areas must be kept completely clear for a minimum of 1.5m from the front of the heater. In an area using multiple units,
heaters should be spread to provide an even heat distribution.
Remove the front grille / cover by undoing the 8 screws securing it in place (You don’t need to remove this cover if using M6 drop rods or M6 hanging hooks.)
Using the drawing above mark out the holes required to secure the heater case to the ceiling. Use the 4 x keyhole slots and an additional 2 holes (at
least one each side) once installed to lock the heater in place.
These additional 2 holes MUST be used to stop the possibility of the case sliding off its Keyhole fixings.
Secure to the ceiling using suitable fixings (not supplied). It will be easier to do some of the electrical connections before finally securing to the ceiling.
3.2 DROP ROD MOUNTING
The heater has 4 x M6 threaded holes and 4 x M10 keyhole holes suitable for using M6 or M10 drop rod studding. If using M6 threaded holes fully
screw the studding into each hole and use a lock nut to stop it rotating and coming out. If using M10 studding a nut must be placed and tightened
above and below the case on each of the 4 studs to hold the case securely to the M10 drop rods (Removal of the grille / guard will be needed so
you can add an M10 Nut inside the heater). Use the diagram above to determine the spacing of the drop rods. If you use drop rods you should be
able to gain access to all the electrical connections after you mount the heater.
4. ELECTRICAL CONNECTIONS
4.1 230V SINGLE PHASE – Without controls.
Please make sure you have read the Safety instructions and that you are a suitably qualified electrician before continuing.
Drawings show connections inside the black terminal box on the outside of the heater. Do NOT use power tools to undo or do up terminal screws.
Please Note:- Specified cable sizes are for typical installations, correction factors may need to be used when determining actual cable sizes.
Standard Connection and Use
Use 2.5mm² 3 Core Mains Cable (see note above).
Connect Brown wire – Terminal 1 or L.
Connect Blue wire – Terminal 5 or N.
Connect Green / Yellow wire – Terminal E or
Ensure the 3 links are in position between terminals
1 and 2, 2 and 3, 3 and 4 as shown in drawing to the left.
If you wish to de-rate the heater from 4.5kW to 2.25kW remove
the link between terminal 3 and terminal 4. Ensure you tighten
up the screws after removing the link. See drawing to the right.
PLEASE CHECK ALL CONNECTIONS BEFORE TURNING ON
AS INCORRECT WIRING IS NOT COVERED BY THE
GUARANTEE
Control Box

4.2 230V SINGLE PHASE – With Thermostat (RST-TP).
Please make sure you have read the Safety instructions and that you are a suitably qualified electrician before continuing.
Drawings show connections inside the black terminal box on the outside of the heater and the inside of the RST-TP Thermostat. Other thermostats
may be used BUT they must be suitable for a 4.5kW load. Do NOT use power tools to undo or do up terminal screws.
Please Note:- Specified cable sizes are for typical installations, correction factors may need to be used when determining actual cable sizes.
Standard Connection using RST-TP Thermostat
Use 2.5mm² 3 Core Mains Cable (see
note above)
Use 2.5mm² 4 Core Cable to connect
the heater to the thermostat (see note
above).
Remove link in heater control
box between terminals 1 and 2.
Ensure the remaining 2 links are in
position between terminals 2 and 3, 3
and 4 as shown in drawing to the left.
Mains Cable (Power Supply Box
Connect Brown wire – Terminal 1 or L.
Connect Blue wire – Terminal 5 or N.
Connect Green / Yellow wire – Terminal
E or
Heater (Control Box) to Thermostat Cable– (Colours for reference only)
Connect Brown wire – Terminal 1 or L of heater and Terminal 3 of Thermostat.
Connect Grey wire – Terminal 2 of heater and Terminal 1 of Thermostat.
Connect Blue wire – Terminal 5 or N of heater and Terminal 4 or N of Thermostat.
Connect Green / Yellow wire – Terminal E or of the heater and earth connection on Thermostat.
If you wish to de-rate the heater from 4.5kW to 2kW remove the link between terminal 3 and terminal 4. Ensure you tighten up the screws after
removing the link.
PLEASE CHECK ALL CONNECTIONS BEFORE TURNING ON AS INCORRECT WIRING IS NOT COVERED BY THE GUARANTEE
4.3 230V SINGLE PHASE – With CS-7 Controller (CS-7 Controller provides on / off / high heat / low heat / fan only settings).
Please make sure you have read the Safety instructions and that you are a suitably qualified electrician before continuing.
Drawings show connections inside the black terminal box on the outside of the heater and the inside of the CS-7 Controller.
Do NOT use power tools to undo or do up terminal screws.
Please Note:- Specified cable sizes are for typical installations, correction factors may need to be used when determining actual cable sizes.
Standard Connection using CS-7 Controller
Use 2.5mm² 3 Core Mains Cable (see note above).
Use 2.5mm² 5 Core Cable to connect the heater to the CS-7 Controller (see note above).
Remove any links that may be present in heater terminal box between terminals 1,2,3,4 or 5.
Mains Cable (Power Supply Box)
Connect Brown wire – Terminal 1 or L.
Connect Blue wire – Terminal 5 or N.
Connect Green / Yellow wire – Terminal E or
Heater (Control Box) to CS-7 Controller Cable– (Colours for reference only)
Connect Brown wire – Terminal 1 or L of heater and Top Terminal L2 on right DP Switch of CS-7.
Connect Grey wire – Terminal 2 of heater and Centre switch Terminal 1 of CS-7.
Connect Blue wire (adding red or another suitable colour sleeve to both ends first) – Terminal 3 of heater and Terminal 1 on Left SP Switch of CS-7.
Connect Black wire – Terminal 4 of heater and Terminal 2 on left SP Switch of CS-7.
Connect Green / Yellow wire – Terminal E or of heater and earth connection on CS-7.
PLEASE CHECK ALL CONNECTIONS BEFORE TURNING ON AS INCORRECT WIRING IS NOT COVERED BY THE GUARANTE

4.4 230V SINGLE PHASE – With CS-7 Controller and RST-TP Thermostat.
Please make sure you have read the Safety instructions and that you are a suitably qualified electrician before continuing.
Drawings show connections inside the black terminal box on the outside of the heater and the inside of the CS-7 and RST-TP Thermostat
Controllers. Other thermostats may be used BUT they must be suitable for a 4.5kW load. Do NOT use power tools to undo or do up terminal screws.
Please Note:- Specified cable sizes are for typical installations, correction factors may need to be used when determining actual cable sizes.
Standard Connection using CS-7 Controller and Thermostat
Use 2.5mm² 3 Core Mains Cable (see note above).
Use 2.5mm² 6 Core Cable to connect the heater to the CS-7 Controller (see note above).
Use 2.5mm² 4 Core Cable to connect the CS-7 Controller to Thermostat (see note above).
Remove any links that may be present in heater terminal box between terminals 1,2,3,4 or 5.
Mains Cable (Power Supply Box)
Connect Brown wire – Terminal 1 or L.
Connect Blue wire – Terminal 5 or N.
Connect Green / Yellow wire – Terminal E or
Heater (Control Box) to CS-7 Controller Cable – (Colours for reference only)
First remove the Brown link cable between L1 and 1 on CS-7 and replace with a link between L1 and 3 (shown above by dark brown wire)
Connect Brown wire – Terminal 1 or L of heater and Top Terminal L2 on right DP Switch of CS-7.
Connect Grey wire – Terminal 2 of heater and Centre switch Terminal 1 of CS-7.
Connect Red wire – Terminal 3 of heater and Terminal 1 on Left SP Switch of CS-7.
Connect Black wire – Terminal 4 of heater and Terminal 2 on Left SP Switch of CS-7.
Connect Blue wire – Terminal 5 or N of heater and Top Terminal N2 on right DP Switch of CS-7.
Connect Green / Yellow wire – Terminal E or of heater and earth connection on CS-7.
CS-7 Controller to Thermostat Cable – (Colours for reference only)
Connect Brown wire – Bottom Terminal L1 on right DP Switch of CS-7 and Terminal 3 of the Thermostat.
Connect Grey wire –Terminal 1 of middle switch of CS-7 and Terminal 1 of the Thermostat.
Connect Blue wire – Bottom Terminal N1 on right DP Switch on CS-7 and Terminal 4 or N of the Thermostat.
Connect Green / Yellow wire – Terminal E or of CS-7 and earth connection of the Thermostat.
PLEASE CHECK ALL CONNECTIONS BEFORE TURNING ON AS INCORRECT WIRING IS NOT COVERED BY THE GUARANTEE
5. MAINTENANCE
Note: Before examining or carrying out any maintenance ensure the heater has cooled down and is disconnected from the mains supply.
The heaters are intended to operate for many years, problem free. All moving parts are factory lubricated and therefore should require no service.
Maintenance is limited to keeping both the inlet and outlet areas free from any accumulation of dust or any other foreign materials. This is especially
important immediately before the heating season. Any dust build up can be loosened using a brush and a vacuum cleaner applied to the airways to
ensure completed removal of any dust. When the heater is first turned on after cleaning an unusual odour may be noted this is due to the dust
particles which inevitably will be disturbed and will be burnt off from the heating element.
If in any doubt always consult a qualified electrician for advice.
6. AUTO CUT OUT
This heater is fitted with a semi-automatic safety device to prevent overheating. The device will isolate the heating element while the fan continues
to operate. Should this occur, disconnect the heater from the mains supply for a minimum of 5 minutes, check and remove any foreign materials
around the airways. If the heater fails to operate or the safety cut out operates again, turn off the heater and contact a qualified electrician.
NOTE: It is our policy to continually improve products and as such we reserve the right to alter data, specifications and component parts without
prior notice.
IMPORTANT: No liability is accepted for incorrect use of this product.
WARRANTY: Your BN Thermic product is guaranteed for one year from date of purchase. We will repair
or replace at our discretion any part found to be defective. We cannot assume any consequential liability.
This guarantee in no way prejudices your rights under common law and is offered as an addition to
consumer liability rights.
REGISTER:
Activate your warranty by registering online at www.bnthermic.co.uk and retain this
installation data for future reference.
SMH-45
INS-v03-1
WEEE REGULATIONS:
This appliance bears the symbol of the crossed waste bin. This indicates that, at the end of its useful life, it must not be disposed of as
domestic waste, but must be taken to a collection centre for waste electrical and electronic equipment. It is the user's responsibility to
dispose of this appliance through the appropriate channels. Failure to do so may incur penalties established by laws governing waste
disposal.
BN Thermic Ltd,
34 Stephenson Way,
Crawley, RH10 1TN
Tel: +44 (0) 1293 547361
www.bnthermic.co.uk
/
