Page is loading ...

SES-CONT-1 for 120 V
SES-CONT-2 for 208-277 V
DESCRIPTION
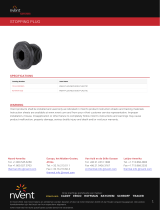
The nVent RAYCHEM SES-CONT is a NEMA 4X rated continuity indicating
end seal kit. It is designed for use with RAYCHEM BTV-CR, BTV-CT,
QTVR-CT, XTV-CT, KTV-CT and VPL-CT parallel heating cables.
These kits may be installed at temperatures as low as −40°F (−40°C). For
easier installation store above freezing until just before installation.
For technical support call nVent at (800) 545-6258.
TOOLS REQUIRED
• Wire cutters • Pliers or adjustable wrench
• Utility knife • Amp 55929-1 crimp tool or equivalent
• Needle nose pliers • Large slotted screwdriver
• Marker • Wire stripper (for VPL-CT)
ADDITIONAL MATERIALS REQUIRED
• Pipe strap
• GT-66 or GS-54 glass cloth tape
• Small pipe adapter for 25 mm (1 in) and smaller pipes: cat no. JBS-SPA
This component is an electrical device that must be
installed correctly to ensure proper operation and to
prevent shock or fire. Read these important warnings and
carefully follow all of the installation instructions.
• To minimize the danger of fire from sustained electrical
arcing if the heating cable is damaged or improperly
installed, and to comply with the requirements of nVent,
agency certifications, and the National Electrical Code,
ground-fault equipment protection must be used. Arcing
may not be stopped by conventional circuit breakers.
• Component approvals and performance are based
on the use of nVent specified parts only. Do not use
substitute parts or vinyl electrical tape.
• The black heating cable core and fibers are conductive and
can short. They must be properly insulated and kept dry.
• Damaged bus wires can overheat or short. Do not break
bus wire strands when scoring the jacket or core.
• Keep components and heating cable ends dry before
and during installation.
• Use only fire resistant insulation materials, such as
fiberglass wrap or flame-retardant foam.
HEALTH HAZARD: Prolonged or repeated contact with the
sealant in the core sealer may cause skin irritation. Wash
hands thoroughly. Overheating or burning the sealant will
produce fumes that may cause polymer fume fever. Avoid
contamination of cigarettes or tobacco. Consult MSDS VEN
0058 for further information.
HEALTH HAZARD: Gel in the splices may cause eye and
skin irritation. Wash exposed areas thoroughly with soap and
water. Consult MSDS VEN 0046 for further information.
CHEMTREC 24-hour emergency telephone: (800) 424-9300
Non-emergency health and safety information: (800) 545-6258.
WARNING:
CAUTION:
KIT CONTENTS
Item Qty Description
A 1 Stand
B 1 Box with electronics
C 1 Lid
D 1 Cable tie
E 3 Crimps (one spare)
F 1 Core sealer
G 1 Cable lubricant
A
G
B
C
D
F
E
APPROVALS
Class I, Div. 2, Groups A, B, C, D
Class II, Div. 1 and 2, Groups E, F, G
Class III
Hazardous Locations
-WS
SES-CONT
Smart End Seal Continuity Monitoring Transmitter Installation Instructions

2 | nVent.com
30 cm
(12 in)
Indentation (bus
wire connection
on power limiting
heating cables only).
190 mm
(7 1/2 in)
45 cm
(18 in)
Label on stand
indicates
direction of
box opening.
• Allow approximately
60 cm (24 in) of
heating cable for
installation. For
VPL, cut cable 30
cm (12 in) from bus
indentation.
• Cut off heating cable
end at about 45° for
easier insertion.
• Lightly score outer jacket around
and down as shown.
• Bend heating cable to break jacket
at score, then peel off jacket.
• With label on stand
facing desired direction
of box opening, push 45
cm (18 in) of heating
cable through stand. Use
cable lubricant if needed.
• Square off cable end with
90° cut.
• Do not attach stand to
pipe until step 12.
• Remove all exposed braid.
Clear jacket
Inner jacket
Braid
Outer jacket
Heating element
Conductor
Bus wire connection
Inner jacket
Braid
Outer jacket
Spacer
Conductive fiber
Conductive fiber
self-regulating
Conductive core
self-regulating
Power limiting
Bus wire
Bus wire
Conductive core
Inner jacket
Braid
Outer jacket
Conductive insulation
Heating cable types
Preparing the heating cable
1
3
2
4

nVent.com | 3
XTV, KTV
BTV, QTVR
VPL
Go to Page 4
Step 5C
Go to Page 4
Step 5B
Go to Step 5A
13 mm
(1/2 in)
152 mm
(6 in)
VPL
• Bend heating cable to break
jacket at the score then peel off
jacket.
• Unwind heating element, cut
and remove as shown.
• Lightly score clear jacket
around and down as shown.
• Bend heating cable to break
jacket at the score then
peel off jacket.
• Remove insulation from
ends of bus wires.
Go to Page 5 Step 6
5A

4 | nVent.com
BTV, QTVR
5 mm
(1/4 in)
165 mm
(6 1/2 in)
165 mm
(6 1/2 in)
XTV, KTV
• Lightly score base jacket
around and down as shown.
• Peel off base jacket.
• Notch core.
• Peel bus wire from core.
• Score core between
bus wires at inner
jacket.
• Bend and snap core.
• Peel core from bus wire.
• Remove any remaining core
material from bus wires.
• Lightly score base jacket around
and down as shown.
• Peel off base jacket.
• Cut and
remove all
fiber strands.
• Score and remove
center spacer.
• Remove any remaining core
material from bus wires.
Go to Page 5 Step 6 Go to Page 5 Step 6
5B 5C

nVent.com | 5
5/8 in
(15 mm)
Make sure the bus
wires do not kink,
bunch, or crossover.
13 mm (1/2 in)
25 mm (1 in)
Tubes
Make sure all strands
go into the tubes.
• Mark the jacket as shown.
• Push core sealer onto the heating
cable to the mark made in step 6.
Note: Extra force may be required
for larger cables or at lower
temperatures.
• Trim bus wires.
• If needed, re-twist and straighten bus wires,
then insert into the guide tubes as shown.
• Remove the guide tubes and
dispose of them in a plastic bag.
• Pull heating cable back
into stand so 25 mm (1 in)
is exposed as shown. Use
cable lubricant if needed.
CAUTION: Health Hazard. Wash hands after contact
with sealant. Consult material safety data sheet VEN
0058.
Installing core sealer
6
8
6
7
9
11

6 | nVent.com
25 mm
(1 in)
Adapter
for small
pipes
Note: For 25 mm (1 in)
and smaller pipes
use adapter
(purchased
separately) and
install between
stand and pipe.
Position
adapter
this side
up.
Trim
• Fasten stand to pipe with label facing desired direction of
box opening. Do not pinch heating cable.
• Loop and tape extra heating cable to pipe.
• Tape heating cable to pipe with glass cloth tape.
• Screw box onto stand until it stops. Do not overtighten.
• Twist power leads and bus wires together before
crimping. This connection must be protected by a ground-
fault equipment protection device.
• Your electronics board is equipped with a red splice
connector. Do not remove it.
• Insert cable tie through slots on stand and box, and
tighten firmly to prevent box rotation.
Fastening stand to pipe
Installing the enclosure
Connecting power leads
12
13
15
14

nVent.com | 7
Address
switches
Record address number
Weather seal
• Set address switch to a value between 001 and 127.
• Ensure that no SES units have the same address number
as any other SES or SPC unit on the same PLI.
• Record address number and physical location to facilitate
set-up with the controller.
• Stow wires in enclosure, making sure they do not get
caught between the lid and the box. Install lid and
tighten screws.
• Record address number on lid in area shown.
• Apply insulation and cladding.
• Weather-seal the stand entry.
• Leave these instructions with the end user for
future reference.
Setting the address
16
17
18

North America
Tel +1.800.545.6258
Fax +1.800.527.5703
Europe, Middle East, Africa
Tel +32.16.213.511
Fax +32.16.213.604
Asia Pacific
Tel +86.21.2412.1688
Fax +86.21.5426.3167
Latin America
Tel +1.713.868.4800
Fax +1.713.868.2333
nVent.com
©2018 nVent. All nVent marks and logos are owned or licensed by nVent Services GmbH or its aliates. All other trademarks are the property of their respective owners.
nVent reserves the right to change specications without notice.
Raychem-IM-H56868-SESCONT-EN-1805 PN 001686-000
/


