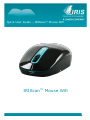
IRIScan IRIScan is an all-in-one wireless mouse and scanner. With the scan function, you can scan documents by sliding the mouse over them. The scan results can be saved in several ways. You can drag-and-drop them to file folders and applications. Save them directly as Doc, PDF, and XLS files. Share them via Mail, Facebook©, Twitter©, and Flickr©. And send them to apps such as Cardiris, Dropbox©, Evernote©, and Google© Translate.
IRIScan IRIScan is an all-in-one wireless mouse and scanner. With the scan function, you can scan documents by sliding the mouse over them. The scan results can be saved in several ways. You can drag-and-drop them to file folders and applications. Save them directly as Doc, PDF, and XLS files. Share them via Mail, Facebook©, Twitter©, and Flickr©. And send them to apps such as Cardiris, Dropbox©, Evernote©, and Google© Translate.


-
 1
1
-
 2
2
-
 3
3
-
 4
4
-
 5
5
-
 6
6
-
 7
7
-
 8
8
-
 9
9
-
 10
10
-
 11
11
-
 12
12
-
 13
13
-
 14
14


IRIScan IRIScan is an all-in-one wireless mouse and scanner. With the scan function, you can scan documents by sliding the mouse over them. The scan results can be saved in several ways. You can drag-and-drop them to file folders and applications. Save them directly as Doc, PDF, and XLS files. Share them via Mail, Facebook©, Twitter©, and Flickr©. And send them to apps such as Cardiris, Dropbox©, Evernote©, and Google© Translate.
Ask a question and I''ll find the answer in the document
Finding information in a document is now easier with AI

Other documents
-
VuPoint SM-FL10-VP User manual
-
LG LSM-100 User manual
-
IRIS IRISCAN BOOK 5 WHITE Owner's manual
-
-
-
-
 Areson B-180 User manual
-
Logitech 910-001105 Installation guide
-
Areson Technology Corp. B003MR User manual
-
Brookstone Mouse User manual
