Page is loading ...

Masterbuilt Manufacturing, Inc
A Georgia Company
450 Brown Avenue
Columbus, Georgia 31906
Customer Service 1-800-489-1581
Failure to follow these warnings and instructions properly could result in fire or explosion, which could
cause property damage, personal injury, or death.
Burning wood chips gives off carbon
monoxide, which has no odor and can
cause death.
DO NOT burn wood chips inside homes,
vehicles, tents, garages or any enclosed
areas.
Use only outdoors where it is well
ventilated.
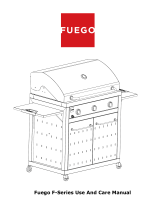
ASSEMBLY, CARE & USE MANUAL
WARNING & SAFETY INFORMATION
MODELs 20030107, 20030108,
20030707, 20030807
VERANDA GAS GRILL
THIS PRODUCT IS FOR OUTDOOR USE ONLY
CARBON MONOXIDE HAZARD
This instruction manual contains
important information necessary for the
proper assembly and safe use of this grill.
Read and follow all warnings and
instructions before assembling and using
grill and during use.
Follow all warnings and instructions
when using this grill.
Keep this manual for future reference.
WARNING
Tools required for assembly: Phillips Head Screwdriver.
(LP Gas Cylinder not included)
Manual Code: 900000051 071023

1
14
COMPLETE & RETURN TO
ATTN: WARRANTY REGISTRATION
Masterbuilt Manufacturing, Inc.
450 Brown Avenue, Columbus, GA 31906
Name:
Address:
City:
State/Province: Postal Code:
Phone Number: E-Mail Address:
Model Number: Serial Number:
Purchase Date: Place of Purchase:
WARRANTY INFORMATION
Masterbuilt warrants its products to be free from defects in material and workmanship under proper assembly,
normal use and recommended care for 90 days from the date of original retail purchase.
Masterbuilt warranty does not cover paint finish as it may burn off during normal use.
Masterbuilt warranty does not cover rust of the unit.
Masterbuilt requires reasonable proof of purchase for warranty claims and suggests that you keep your receipt.
Upon the expiration of such warranty, all such liability shall terminate.
Within the stated warranty period, Masterbuilt, at its discretion, shall repair or replace defective components free of
charge with owner being responsible for shipping. Should Masterbuilt require return of component(s) in question for
inspection Masterbuilt will be responsible for shipping charges to return requested item.
This warranty excludes property damage sustained due to misuse, abuse, accident, damage arising out of
transportation, or damage incurred by commercial use of this product.
This expressed warranty is the sole warranty given by Masterbuilt and is in lieu of all other warranties, expressed
or implied including implied warranty, merchantability, or fitness for a particular purpose.
Neither Masterbuilt nor the retail establishment selling this product, has authority to make any warranties or to
promise remedies in addition to or inconsistent with those stated above.
Masterbuilt’s maximum liability, in any event, shall not exceed the purchase price of the product paid by the original
consumer/ purchaser. Some states do not allow the exclusion or limitation of incidental or consequential damages.
In such a case, the above limitations or exclusions may not be applicable.
California residents only: Not withstanding this limitation of warranty, the following specific restrictions apply; if
service, repair, or replacement of the product is not commercially practical, the retailer selling the product or
Masterbuilt will refund the purchase price paid for the product, less the amount directly attributable to use by the
original buyer prior to the discovery of the nonconformity. Owner may take the product to the retail establishment
selling this product in order to obtain performance under warranty.
This expressed warranty gives you specific legal rights, and you may also have other rights which vary from state to
state.
1. Never operate this appliance unattended.
2. Never operate this appliance within 10 feet
(3m) of any structure, combustible material
or other gas cylinder.
3. Never operate this appliance within 25 feet
(7.5m) of any flammable liquid.
4. If fire should occur keep away from
appliance and immediately call your fire
department. Do not attempt to extinguish
an oil/grease fire with water.
FAILURE TO FOLLOW THESE INSTRUCTIONS AND WARNINGS
PROPERLY COULD RESULT IN FIRE OR EXPLOSION, WHICH COULD
CAUSE PROPERTY DAMAGE, PERSONAL INJURY OR DEATH.
DANGER
If you smell gas:
1. Shut off gas to the appliance.
2. Extinguish any open flame.
3. Open lid.
4. If odor continues, keep away from
the appliance and immediately call
your Fire Department.
DANGER
CAUTION
• Fatty foods (hamburgers,etc.) can have excess grease and cause flare ups. When
cooking fatty foods, use a low setting with lid open.
• Clean internal base pan before each use. This will cut down on build-up and flare ups.

2
13
• When outside temperature is cooler than 65°F (18°C) and/or altitude is above 3,500 ft. (1067m),
additional cooking time may be required. To insure that meat is completely cooked use a meat
thermometer to test internal temperature.
•
Lifting grill lid during cooking process may extend cooking time due to heat loss.
APPROXIMATE GRILLING TIMES
BEEF SIZE GRILLING TIME INTERNAL TEMP
Steaks
3
/4
” (2cm) thick
3 to 4 min. /side med rare 145°F (62°C)
4 to 5 min. /side med 160°F (71°C)
Kabobs 1” (2.5cm) cubes 3 to 4 min. /side 145°-160°F (62-71°C)
Hamburger patties
1
/2” (12mm) thick 3 to 4 min. /side med 160°F (71°C))
Roast, rolled rump 4-6 lbs. (1.8-2.7kg) 18 to 22 min /lb. 145°-160°F (62-71°C)
Sirloin tip 3
1
/2--4 lbs. (1.5-1.8kg) 20 to 25 min. /lb. 145°-160°F (62-71°C)
Ribs, back cut in 1-rib portions 10 min. /side med 160°F (71°C)
half, 2-3 lbs. (0.9-1.3kg) 10 to 12 min. /side med rare 145°F (62°C)
Tenderloin whole, 4-6 lbs. (1.8-2.7kg) 12 to 15 min. /side med 160°F (71°C)
PORK SIZE GRILLING TIME INTERNAL TEMP
Chops, bone-in
3
/4” (2cm) thick 3 to 4 min. /side med 160°F (71°C)
Chops, bone-out 1
1
/2
” (4cm) thick
7 to 8 min. /side med 160°F (71°C)
Tenderloin
1
/2-1
1
/2 lbs. (0.2-0.6kg) 15 to 25 min. total med 160°F (71°C)
Ribs (indirect heat) 2-4 lbs. (0.9-1.8kg) 1 1/2 to 2 hrs. med 160°F (71°C)
VENISON SIZE GRILLING TIME INTERNAL TEMP
Roast, saddle or leg 6-7 lbs. (2.7-3.1kg) 25 to 30 min. /lb. 145°-160°F (62-71°C)
Steaks
3
/4” (2cm) thick 6 to 7 min. /side med 160°F (71°C)
CHICKEN SIZE GRILLING TIME INTERNAL TEMP
Broiler fryer (indirect
heat)
3-4 lbs. (1.3-1.8kg) 60 to 75 min. in thigh 180°F (82°C)
Cornish hens 18-24 oz. (510-680g) 45 to 55 min. in thigh 180°F (82°C)
Breast halves, bone-in 6-8 oz. ( 170-226g) each 10 to 15 min. /side 170°F (77°C)
Breast halves, boneless 4 oz. (113g) each 6 to 8 min. /side 170°F (77°C)
Legs or thighs 4-8 oz. (113-226g) 10 to 15 min. /side 180°F (82°C)
Drumsticks 4 oz. (113g) 8 to 12 min. /side 180°F (82°C)
Wings 2-3 oz. (56-85g) 8 to 12 min. /side 180°F (82°C)
GENERAL WARNINGS AND SAFETY INFORMATION
• Unit is for outdoor use only.
• Never use inside enclosed areas such as patios, garages, buildings or tents.
• Never use inside recreational vehicles or on boats.
• Never operate unit under overhead construction such as roof coverings, carports,
awnings, or overhangs.
• Never use unit as a heater.
• Maintain a minimum distance of 10ft (3m) from overhead construction, walls, rails or
other structures.
• Keep a minimum 10ft (3m) clearance of all combustible materials such as wood, dry
plants, grass, brush, paper, or canvas.
• Keep appliance clear and free from combustible materials such as gasoline and other
flammable vapors and liquids.
• Use unit on a level, non-combustible, stable surface such as dirt, concrete, brick or
rock.
• Keep children and pets away from unit at all times. Do NOT allow children to use unit.
• Unit has an open flame. Keep hands, hair, and face away from burner flame. Do NOT
lean over burner when lighting. Loose hair and clothing may catch fire.
• Allow unit to cool below 115°F (45°C) before moving or storing.
• Avoid bumping or impacting unit.
• This unit is HOT while in use and during cooling process. Wear protective gloves/mitts.
• Use of alcohol, prescription or non-prescription drugs may impair user's ability to
properly assemble or safely operate unit.
• Never use glass, plastic or ceramic cookware in unit.
• Do NOT allow anyone to conduct activities around unit during or following its use until
it has cooled.
• Accessory attachments not supplied by Masterbuilt Manufacturing, Inc. are not
recommended.
• Never use unit for anything other than its intended use. This unit is NOT for commercial
use.
• Use in accordance with local, state and federal fire codes.
• This appliance is not for frying turkeys.

SAFE STORAGE AND MAINTENANCE
• Inspect all hardware in assembled parts for tightness on a regular basis to insure unit is in safe
working condition.
• ALWAYS allow unit to cool completely before handling.
• Clean unit, including special surfaces such as cooking grates with mild cleaning agents. Wipe
outside of unit with damp rag. DO NOT use oven cleaner.
• ALWAYS cover and store cold unit in a protected area.
• Unit is made of steel and may rust over time. If rusting occurs on outside surfaces, clean area
with sand paper or steel wool, then cover with heat resistant paint.
• NEVER USE PAINT ON INSIDE SURFACES OF UNIT.
Combustion by-product produced when using this product contains
chemicals known to the State of California to cause birth defects,
other reproductive harm, or cancer.
WARNING
3
12
GENERAL WARNINGS AND SAFETY INFORMATION continued
• Use 20LB (9kgs) gas cylinder that has protective collar (cylinder not included
with unit).
• Installation of unit must conform with local codes or, in the absence of local codes, with
National Fuel Gas Code, ANSIZ223.1/NFPA 54, Storage and Handling of Liquefied
Petroleum Gasses, ANSI/NFPA 58, Natural Gas and Propane Installation Code, CSA
B149.1, Propane Storage and Handling, CSA B149.2.
• LP gas cylinder being used must be constructed and marked in accordance with
specifications for LP gas cylinders of US Department of Transportation (DOT) or the
Standard for Cylinders, Spheres and Tubes for the Transportation of Dangerous Goods,
CAN/CSA-B339.
• Always perform soapy water test (see “Soapy Water Test Instructions” in this manual)
EVERY TIME you use unit.
• Before each use check all nuts, screws and bolts to make sure they are tight and secure.
• Before each use inspect gas hose for signs of damage.
• Always disconnect gas cylinder from unit when not in use.
• Never attach/disconnect gas cylinder, move or alter gas fittings when unit is in
operation.
• Never use gas cylinder if there is evidence of dents, gouges, bulges, fire damage,
erosion, leakage, excessive rust, or other forms of visible external damage. This may
be hazardous and cylinder should be taken to a liquid propane supplier to be checked.
• Regulator and hose assembly supplied with unit MUST be used. For replacement parts,
if needed, contact Masterbuilt Customer Service at 1-800-489-1581.
• When lighting burner remove all grill parts to prevent explosion from gas build up.
• If burner does not ignite, turn off regulator control valve first, then gas cylinder, and wait
5 minutes. After time is up, repeat burner lighting steps.
• Keep fuel supply hose away from unit while in operation.
• Keep fuel supply hose away from any heated surface
• Do NOT obstruct flow of combustion and ventilation. Keep ventilation openings of
cylinder enclosure free and clear of debris.
• When use is complete, always turn regulator control valve OFF first, then gas cylinder
valve OFF.
• Gas MUST be turned off at the supply cylinder when not in use.
• Do NOT store spare LP gas cylinder under or near unit. Gas cylinder safety relief valve
may overheat allowing gas to release causing fire which may cause death or serious
injury.
• Never fill cylinder over 80% full or cylinder may release gas causing fire which may
cause death or serious injury.
• If you smell, hear or see gas escaping, immediately get away from gas cylinder and call
the Fire Department. Fire may cause death or serious injury.
• Place a dust cap on cylinder valve outlet whenever cylinder is not in use. Only install
dust cap provided with cylinder. Other caps or plugs may cause leaks.
• Cylinder MUST be stored outdoors, out of children’s reach and must NOT be stored in a
building, garage, or any other enclosed area.

11
4
Testing Gas Valve:
• Turn gas cylinder valve ON and watch for bubbles. DO NOT LEAVE GAS ON MORE
THAN 12 SECONDS. If bubbles appear, stop, turn gas cylinder OFF and retighten fitting.
Repeat test.
Testing Regulator and Hose:
• AFTER gas cylinder valve has passed Soapy Water Test, turn gas cylinder valve ON,
open regulator control valve one full turn and check for bubbles at valve location, along
full length of hose and at burner connection. DO NOT LEAVE GAS ON MORE THAN 12
SECONDS. If bubbles appear, stop, turn regulator valve OFF, turn gas cylinder OFF and
retighten the connection that is leaking gas. If hose is source of leak, STOP, do not use
unit. Hose must be replaced.
• When test is complete, and there are no leaks, wait minimum of 5 minutes for gas fumes
to diminish before lighting cooker.
DURING ANY PORTION OF SOAPY WATER TEST IF BUBBLES CONTINUE TO
APPEAR, STOP, DO NOT USE UNIT. CONTACT LOCAL PROPANE DEALER OR
MASTERBUILT CUSTOMER SERVICE @ 1-800-489-1581.
Note: Use 20LB (9kgs) gas cylinder that has a protective collar with this unit.
Cylinder NOT included with this unit.
BURNER ALIGNMENT, SOAPY WATER TEST WARNINGS & PROCEDURES
Warnings:
• Soapy Water Test MUST be performed each time gas cylinder is connected to burner/hose or
each time it is used.
• Soapy Water Test MUST be performed outdoors in well ventilated area.
• When performing Soapy Water Test keep grill away from open flames, sparks or lit
cigarettes.
• Grill is designed to work with propane gas only. This product will NOT operate with natural
gas.
• Never use an open flame to test for gas leaks.
Preparation:
• Remove any cookware from grill.
• Make sure gas cylinder valve is turned to OFF position.
• Prepare soapy water solution: (1) part dish washing liquid (or more if desired), (3) parts water.
• Apply soapy water solution to gas cylinder valve, regulator and hose length up to burner.
APPLY SOLUTION TO GAS
CYLINDER VALVE.
APPLY SOLUTION WHERE VALVE AND HOSE ARE
CONNECTED.
FAILED TEST WILL PRESENT
BUBBLES AS SHOWN BELOW
PLACEMENT OF APPLIANCE FOR SAFETY
Before using grill check wind direction & place cylinder UPWIND, upright 12” (30.5cm) away from unit.
This is necessary so that cylinder supply system is arranged for vapor withdrawal.
WARNING: HOSE IS A TRIP HAZARD
10 ft (3m)
Wind Flow
10 ft (3m)
Wall
Rails
Overhead Construction
12” (30.5cm) Apart
OR
STEP 5.
Insert grease catcher (15) into back of
pedestal (7).
Place cooking grate (9) inside grill.
Set regulator into bracket as shown.
Attach either a 1lb gas cylinder or
attach pigtail (4) and attach to 20lb gas
tank. Position 20lb gas tank slightly
behind grill pedestal.
15
4
9
7
GRILL IS READY FOR USE.
Caution! Make sure valve and burner are correctly installed and aligned as shown below.
Burner
Burner
Orifice
Valve
•Make sure orifice is seated in burner so that at least half of orifice is inside burner opening.
•Orifice must be secured upright. Do not angle.

5
10
WARNING
Perform “Soapy Water Test” before each use. See “Soapy Water Test” section in manual.
Extinguish all open flames before connecting regulator to gas cylinder.
Turn gas OFF after each use.
STEP 3.
Place star washer (D) on phillips flange
screw (C) and insert through holes in
grill lid (17).
Place spacer (B) on screw. Thread into
threaded sleeve on handle (1).
Repeat STEP 3 on other side.
17
1
B
STEP 4.
Secure knob (A) to valve (4) on
control panel (10) as shown.
A
4
10
• Inspect hose before each use. If there are signs of wear, cuts, or leaks, replace
unit. DO NOT USE.
• Inspect burner before each use. Check burner and burner venturi tube for
insects and insect nests. A clogged tube can lead to a fire beneath appliance.
• Connect hose regulator to LP Gas Cylinder-
1. Make sure control knob on grill is in the “OFF” position.
2. Remove protective cap from gas cylinder if applicable.
3. Center and insert valve outlet into regulator as shown in figure on the left.
Turn gas bottle counterclockwise until it stops. DO NOT CROSS THREAD.
• Perform Soapy Water Test.
• To use, turn burner control knob clockwise and push ignitor button to light.
• If ignition does not occur, wait one minute and re-try. If ignition still does not occur
wait five minutes and then match light.
• Place unlit match in grasps at small end of match light stick. Light match and use
match light stick to ignite burner.
• After use, turn burner control knob OFF.
• Burner control knob adjusts burner flame. Turn control knob clockwise
SLOWLY to increase flame. Turn control knob counter-clockwise to decrease flame
and shut flame off.
• Visually check burner flame. A CORRECT FLAME should be blue with a small
amount of yellow at the tip. An INCORRECT FLAME is excessively yellow and
irregular. If an incorrect flame occurs, turn burner control knob to “OFF position,
turn off propane tank. Allow unit to cool and then clean burner. Let
burner completely dry before re-lighting.
REGULATOR, BURNER AND GAS VALVE CONNECTION & OPERATION
CLOCKWISE
COUNTER
CLOCKWISE
INCORRECT
FLAME
CORRECT FLAME
BLUE
YELLOW
1. Read all instructions and warnings before lighting.
2. Mount match (paper or wood) in match light stick as shown.
3. Check gas control valve on control panel to be certain in OFF
position before connecting to gas cylinder. Perform soapy water
test before each use.
4. Turn gas control valve on.
5. Light match and slide match light stick through cooking grate to
ignite burner.
6. After each use, first turn gas control valve off. Always allow unit to
cool completely before touching, moving or storing.
MATCH LIGHT INSTRUCTIONS
1LB GAS CYLINDER
C
D

9
Tools needed for assembly:
Phillips Head Screwdriver
Carefully position grill as
shown.
STEP 1.
Attach pedestal middle (6) to
pedestal base (5) using phillips
flange screws (E).
STEP 2.
NNOOTTEE::
Make sure propane bracket (2)
is mounted correctly. (See picture)
Attach pedestal top (7) to assembled
pedestal middle (6) as shown using
phillips flange screws (E).
Before assembly read
instructions carefully.
Assemble unit on a clean, flat
surface.
5
E
6
6
E
2
7
WARNING
Perform “Soapy Water Test” before each use. See “Soapy Water Test” section in manual.
Extinguish all open flames before connecting regulator to gas cylinder.
Turn gas OFF after each use.
REGULAT
OR, BURNER AND GAS VALVE CONNECTION & OPERATION
CLOCKWISE
COUNTER
CLOCKWISE
INCORRECT
FLAME
CORRECT FLAME
BLUE
YELLOW
• Inspect hose before each use. If there are signs of wear, cuts, or leaks, replace
unit. DO NOT USE.
• Inspect burner before each use. Check burner and burner venturi tube for
insects and insect nests. A clogged tube can lead to a fire beneath appliance.
• Connect hose regulator to LP Gas Cylinder-
1. Make sure gas cylinder valve is closed. Turn knob clockwise until it stops.
2. Make sure control knob on grill is in the “OFF” position.
3. Remove protective cap from gas cylinder and coupling nut if applicable.
4. Remove 1lb cylinder if connected to regulator.
5. Attach brass connector on pig tail to regulator by threading connector up
into regulator and tighten. (See picture below)
6. Center and insert regulator nipple into valve outlet on gas cylinder as
shown in figure on the left. Turn regulator coupling nut clockwise until it
stops. DO NOT OVER TIGHTEN.
• Perform Soapy Water Test.
• To use turn gas cylinder ON, turn burner control knob counter-clockwise and push
ignitor button to light.
• If ignition does not occur, wait one minute and re-try. If ignition still does not occur
wait five minutes and then match light.
• Place unlit match in grasps at small end of match light stick. Light match and use
match light stick to ignite burner. (See match light instructions)
• After use turn burner control knob OFF then turn gas cylinder OFF.
• Burner control knob adjusts burner flame. Turn control knob clockwise SLOWLY to
increase flame. Turn control knob counter-clockwise to decrease flame and shut
flame off.
• Visually check burner flame. A CORRECT FLAME should be blue with a small
amount of yellow at the tip. An INCORRECT FLAME is excessively yellow and
irregular. If an incorrect flame occurs, turn burner control knob to “OFF position,
turn off regulator and propane tank. Allow unit to cool and then clean burner. Let
burner completely dry before re-lighting.
6
ATTACH BRASS
CONNECTOR TO REGULATOR
20LB (9KG) GAS TANK
17.75”
(45cm)
approx.
12.25” (31cm)
approx.

HARDWARE LIST
7
8
(C)
SS Phillips Screw
M4x48
qty - 2
(A)
Knob
qty - 1
(E)
SS Phillips
Flange Screw
M6x15
qty - 6
(D)
Star Washer
qty - 2
(B)
Bakelite
Spacer
qty - 2
DO NOT RETURN TO RETAILER
For Assembly Assistance, Missing or Damaged Parts
Call: MASTERBUILT Customer Service at 1-800-489-1581
STOP!
REPLACEMENT PARTS LIST
PARTS LIST
1
9
16
10
13
3
12
2
11
6
7
8
15
17
14
ITEM NO. QUANTITY DESCRIPTION
10 1 Flared Control Panel (pre-assembled)
11 1 Knob
12 1 Ignitor (pre-assembled)
13 1 Burner (pre-assembled)
14 1 Temperature Gauge (pre-assembled)
15 1 Grease Catcher
16 1 Grill Base (pre-assembled)
17 1 Grill Lid (pre-assembled)
18 2 Spacer
ITEM NO. QUANTITY DESCRIPTION
1 1 Handle
2 1 Propane Bracket
3 1 Match Lighting Stick
4 1 Hose w/Regulator (pre-attached) Pig
Tail/ Gas Valve
5 1 Pedestal Base
6 1 Pedestal Middle
7 1
Pedestal Top/Cooking Head
(pre-assembled)
8 1 Inner Bowl/Flame Disk (pre-assembled)
9 1 Cooking Grate
18
ITEM NO. DESCRIPTION
990060292 Base Kit
990060293 Center Pedestal Kit for Model 20030107
990060326 Center Pedestal Kit for Models 20030307, 20030108, 20030707
990000009 Center Pedestal Kit for Model 20030807
990060294 Outer Bowl Kit for Models 20030107, 20030307, 20030108, 20030707
990000010 Outer Bowl Kit for Model 20030807
990060295 Lid Kit
990060296 HVR Kit
990060297 Igniter Kit
990060298 Burner Kit
990060299 Control Panel Kit
990060300 Temperature Gauge Kit
990060301 Lid Handle Kit
908060010 Cooking Grate
900000127 Inner Bowl w/ Flame Disk
908060002 Propane Bottle Bracket
908060005 Pig Tail
908060003 Match Lighting Stick
908060018 Grease Cup
908060013 Knob
908070010 Grill Cover for Models 20030107, 20030807
900000051 Instruction Manual
998060024 Hardware Bag - ENG/SPN
998060025 Hardware Bag - ENG/FRN
5
4
/