
ge.com
N
Safety Information ........... 2-4
Operating Indru_ions
Care and Cleaning ............. 8, 9
Deflosting Insuuctions
(for Manual Deflost Models) ...... 7
Features ..................... 5, 6
Starting tile Freezer .............. 5
Installation Instruc¢ions
Preparing to Install the Freezer ... 10
Troubleshooting Tips ........ 11, 19
Normal Operating
Ch aracteiJstics ................. 11
Consumer Support
Consumer Support ............. 16
Production Registration for
Customers in Canada ........ 17, 18
Production Registration tbr
Customers in the U.S ......... 13, 14
_'arrantv ..................... 15
Upright--Manual
DefrostModels.
FUMI2
FUM14
FUM17
FUM21
Upright--No-Frost
Models:
FUF14
FUF17
FUF20
Chest--Manual
DefrostModels:
FCM7
FCM9
FCM15
FCM20
FCM25
Model number:
Serial number:
You can find them on a plate either on
the upper leti wall inside the freezer
(Upright models) or on the leti exterior
wall (Chest models).
297077100 162D9627PO08 49-60441 12-05JR

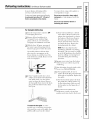
iMPORTANTSAFETYiNFORMATiON.
READALLiNSTRUCTiONSBEFOREUSING.
WARNING!
Use this appliance only for its intended purpose as described in this Owner's Manual
SAFETYPRECAUTIONS
When using electrical appliances, basic safety precautions should be followed, including the following:
i_::This fl'eezer must be properly installed and
located in accordance with tile Installation
Instructions before it is used.
i)::Do not allow children to climb, st;rod or hang
on the shelves in the fl'eeze_: They could damage
tile fl'eezer and seriously iqiure thelnselves.
::__Mtei"your ti'eezei" is in operation, do not touch
the cold sudi_ces, particularly when hands are
damp or wet. Skin may stick to these extremely
cold sun'aces.
_'_Do not store or use gasoline or other flammable
\:q)o_s and liquids in the vicinity of this or any
other appliance.
i)::Unplug tile fl'eezer before cleaning, making
repairs or changing the light bulb.
NOTE: We stronglyrecommendthat anyservicingbe
performedbyaquaddedindMdua/.
::_¢Turning tile control to tile OFFposifion does
not remove power to the light circuit on models
with interior light.
i)::Do not refi'eeze fl'ozen foods which have
thawed complemly:
i)::The maximum amount of food your fl'eezer is
designed to fl'eeze at one time is approximately
3 pounds (1.5 kg) per cubic foot (ff fl'eezer
capaci_:. In no_mal position, your freezer's
temperature control will maintain sttflidenflv
low temperatures in tile fl'eezer to fl'eeze
recommended quantities of food.
::__(;aution should be used when removing tile door
ofa fl'eeze_: Particular caution should be used
when removing the lid of a Chest freeze_; as most
Chest fl'eezer lids are under spring tension.
Contact tile manuli_cturer's representative for
a m eth od of sali_ removal.
i)::This product is UIA71 recognized.

ge.com
DANGER!RISKOFCHILDENTRAPMENT
PROPERDISPOSALOFTHEFREEZER
When using electrical appliances, basic safety precautions should be followed, including the following:
Child entraplnent and suffocation are not
problems of the past..Junked or abandoned
refi_igerato_ and ffeeze_ are still dangerous...even
if they will sit fin" "just a few days." If you are getting
rid of vom" old refrigerator or fl'eeze_; please tbll_m'
the instructions below to hel I) prevent accidents.
Before YouThrowAway YourOld
Refrigeratoror Freezer:
::Ji::Take off the dome.
Refrigerants
M1 refi_igeration products contain refl_igerants,
which trader federal law I/lÂlStbe removed prior
to product disposal. If you are getting rid of an
old refl_igeration product, check with the company
handling the disposal about what to do.
iJi::I,eave the shelves in place so that children may
not easiE climb inside.
USEOFEXTENSIONCORDS
Because of potential safety hazards under certain conditions, we strongly recommend against
the use of an extension cord.
However; if you must use an extension cord, it is absolutely necessary that it be a UIAisted (in the United
States) or a CSA-listed (in Canada), 3 "
•-\_n'e ,gmtmdin°-, type appliance extension cord haxim,_ a ,gr°tmding,
type plug and outlet and that the electrical rating of the cord be 15 amperes (minimum) and 120 xolts.
3

IMPORTANTSAFETYINFORMATION.
READALLINSTRUCTIONSBEFOREUSING.
WARNING!
HOWTOCONNECTELECTRICITY
Do not, under any circumstances, cut or remove the third (ground) prong from the power cord.
For personal safe_ this appliance must be properly grounded.
Tile power cord of this appliance is equipped
with a 3-prong (grounding) plug which mates
with a standard 9)-prong (grounding) wall outlet
to minimize the possibiliQ' of electric shock
hazard from this appliance.
Have tile wall outlet and circuit checked bv a
qualflied electrician to make sure the outlet is
properly grounded.
If tile outlet is a standard 2-prong wall outlet, it
is your i)e_onal responsibiliQ, and obligation to
have it replaced with a properly grounded S-prong
wall outlet.
Tile fl'eezer should always be I)ltwged_, into its own
indixidual electrical outlet which has a xoltage _v_ting
that matches the rating plate.
This provides tile best i)e_l'o_nance and also
I)rexents oxerloading, house wiring, circuits which
could cause a fire hazard fl'om oxerheated wires.
Never unplug your fl'eezer by pulling on tile power
cord. ?dways grip I)hl(*_fimfl) and pull straight ()lit
fl'om tile outlet.
Repair or replace immediately all power cords that
have become fl'a)'ed or otherwise damaged. Do not
rise a cord that sho_:s cracLs or abrasion damage
ahmg its length or at either end.
_._]/en moving tile fl'eezer away fl'oln tile wall, be
careful not to roll over or damage the power cord.
READANDFOLLOWTHISSAFETYINFORMATIONCAREFULLY.
SAVETHESEINSTRUCTIONS
4

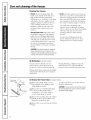
Aboutthe operationofyourfreezer, ge.com
StartingtheFreezer
_] Clean the inside of the fi'eezer with a mild solution of baking soda and water (see Care and Cleaning).
] (_onnect cord to power Otlt]et.
_]On models with a Temperature Monitor or High-Temp _Mam_ Switch, set the switch to the OFFposition.
[_ Make sure the temperature control is set at 4.
_] Nlow ti'eezer to operate for at least four hotu_ before placing food inside.
On models with a Temperanu'e Monitor or High-Temp Mam_ Switch, set the switch to the 0Nposition.
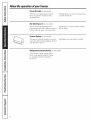
Temperature Control
Freezing temperature selection is made by
setting the control from /to 7 (coldest).
If you W;lIlt colder or W;IF/I/eI" [ei/ll)ei':ltui'es _
a(!iust the control one step at a time.
_Mlow several horus after each one-step
a(!justment tor the freezer temperature
to stabilize.
Turning the control to OFFstops the cooling
process but does not shut off power to the
freezer.
I TEMO ALARMPOWERON
k oce o_ j
Located on front of freoze_
°" °" I
HIGH-TEUP
Located on back oflicL
Temperature Monitor/High-Temp Alarm
An almm will sound if the ti'eezer
temperature reaches unsaie levels.
The alam/operates on household
electricity: If the power fifils, the alam/
will not perfi)m/.
An 0N/0FFswitch allows the temperature
alam_ to be deactivated if desired. The
ti'eezer is shipped with the switch in the
OFFposition. AJ'ier the ti'eezer has run
long enough to lower the temperattn'e,
you may set the switch to the 0Nposition.
Switch (onsomemodels)
CAUTION: Adding more than 3 pounds {1.5kg)
of warm food per cubic foot of freezercapacity
can trigger the alarm.
Toactivate the alarm, set the switch to the
0Nposition.
Todeactivate the alarm, set the switch to the
OFFposition.

Aboutthe operationofyourfreezer.
Power-On Light(onsomemodels)
The Powe>On IJght indicates that the
fl'eezer is i)roperly com_ected to the
electrical powe_:
The light glows even when the temperatm'e
control is turned off.
Key-Ejecting Lock (onsomemodels)
The key for the spring-loaded lock is
automatically ejected-key will not remain in
lock in either the open or closed position.
Keepthekeyoutof reachofchildrenandaway
fromthefreezer
Freezer Shelves (onsomemodels)
The space_ (on some models) are used to
secm'e the shelves during shipping. Remove
and discard the space_.
Smallobjectsareachokehazardtochildren.
Refrigerated Cabinet Shelves (onsomemodels)
These shelves contain cooling coils to
fl'eeze leeds quickly and allow cold air
to constantly circulate throughout
the fl'eeze_:

Defrostinginstructions.(forManual Defrost models) ge.com
In most clilnates, defl'osting will be
Ilecess_lI'_ ()n]x_ _lbo//t t_vice _1 _e_lÀ;
Tohave your freezer operate most efhciently,
do not permit mere than I/2" (13 mm) of
frost to accumulate on the shelves.
To remove fl'ost, scrape with a plastic or
wood spattlla oI" S('i';ll)ei:
Do not use an ice pick or sharp-edged
instrument as it may damage or scratch the
freeze_
Do not use any electrical device in
defrosting your freezer.
For Complete Defrosting
[_] Turn tile teml)erature control to OFF
and unl)lug tile ti'eezei:
[] Remoxe all food and place it in
corrugated boxes, insulated bags,
picnic coole_5, etc. Lrse towels and
newsl)al)ei_ for insulation as needed.
_] _4]th tile door/lid open, use l)_lns of
hot water to speed loosening of ti'ost.
Remove lalge pieces betore they melt.
On models without a deti'ost drain,
place rowels or ne_vsl)al)ei_ on tile
freezer bottom to catch the fi'ost, The
fi'ost will loosen aim tifll, Remove towels
and/or ile_Sl)al)eiN.
DrainHose
_a. Solne Upright inodels have a hose
adapter and a drain hose behilM the
base grille which car_)' the defrost
water out ti'om the ti'eezei: Relnove
the base glille; then remove the drain
i)lug aim let the deii'ost water drain
into a pan.
/1. Some Chest models have a deti'ost
water drain at tile ti'ont aim a hose
adapter that is packaged in a bag in
the bottom _ffthe ti'eezei: Ilemove
the drain cap on the ti'ont of the
ti'eezei; insert tile hose connectoi"
and attach tile hose. Remove tile
drain i)lug inside the cabinet.
NOTE:X&'_termay dri I) ti'om tile
back flange of tile lid cover dtu_ing
deti'osting. This is nolmal. Ice builds
up in the lid insulation when the lid is
open for adding or removing food,
and melts duling tile deli'osting
operation.
S )onoe excess water ][i'OIIl tile bottom
[] o_ theti'eezer as it collects to prexent
overfl_wing.
@Mter defi'osting, clean the inside of the
ti'eezer (see &re and Cleaning).
_a. On Upright models, be sure to
replace the drain i)lug and return the
drain robe to its posidon, Replace the
base grille,
b. On Chest models, replace the drain
plug inside tile cabinet aim tile cap
on tile defi'ost drain. Fold over and
dry the gasket on the hinge side of
the lid.
Phlo In t|_ •
_] g " _,,e H'eezei: Returi_ tile
teml)erature control to its i)revious
position aim return tood to the fl'eezei:
Toremove the base grille (on solne
models), use a screwdlJver to press tile
tab toward the center of the grille, then
pull tile grille away ti'om tile cabinet.

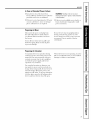
Careand cleaning ofthe freezer.
Cleaning YourFreezer
iJi::Outside.Protect tile paint finish. Tile
finish on tile outside ot tile fl'eezer is a
high quality, baked-on paint finish.
X4]tl/proper care, it Mll stay nm_qooking
and rust-flee fin" veai_. Apply a coat ot
appliance polish wax when the freezer
is new and then at least twice a veax:
Appliance polish wax also works well
to I'elllOVe [ape residue t1"oi/1 freezer
S/lI'J[ilces.
Keep the finish clean. '_,_]peMth a clean
cloth lightly dampened Mth appliance
polish wax or mild liquid dishwashing
detergent. Dry and polish with a clean,
soft cloth. Do not wipe tile fl'eezer with
a soiled dishwashing cloth or wet towel.
Do not use scom-ing pads, powdered
cleaners, bleach, or cleaners containing
bleach.
CAUTION: Careshou/dbe takenin mow))gthe
freezeraway from the wall.Aft typesof floor
coven))gscanbe damaged,particularlycushioned
coven))gsandthosewith embossedsurfaces.
iJi::Inside. Clean tile inside of wmr fl'eezer at
least once a veax; X_'erecommend that the
fl'eezer be mq)lugged befln'e cleaning. If
this is not practical, wring excess moisture
out of sponge or cloth when cleaning in
the vicinity of switches, lights or controls.
Use w;mn water and baking soda
solution-about a tablespoon of baking
soda to a quart of water: Rinse thoroughly
with water and wipe d_w: Do not use
cleaning i)owde_ or other abrasive
cleaners.
An open box of baking soda in tile
fl'eezer will absorb stale fl'eezer odm_.
Change the box eve_T three months.
No Defrosting(onNo-Frostmodels)
Y()/I never have to defl'ost VO/li" new
No-Frost ti'eezer It has been pre-set at
tile ti_ctorv to deti'ost itself automatically.
Package labels always remain clearly legible,
and packages will remain easy to separate
_lll(1 I'elIIOVe.
Dtwing defl'osfing, a slight noise may be
noticed if the door is opened while the
fl'eezer is in tile automatic defl'osfing cycle.
PlasticNinge (---'_
Hinge
(onsomemodels)
ToRemove the Freezer Door(onUpwhtmodels)
_] Remove tile plastic hinge cover by To replace tile (lomb, reve_e tile order of
either lifting it off or fi)lding it back tile aboxe instructions.
(depending on model). CAUTION: /t lSveiy lmportant thata/ihlngescrews
_ ]_elnoxe tile screws holding tile hinge aresecureiytightened toensurea secureassembiy
to tile toi ) of the cabinet using, a andprevent hlngesiippage.
screwdfixe_; 5/16" socket driver or
wrench (dei)ending on inodel).
[_] Remoxe tile top hinge ti'om tile cabinet
and lift tile door up and off tile lower
hinge pin. Set tile door aside.
[_ Remove tile two screws fl'om tile bottom
hin ,e

g_com
In Case of Extended Power Failure
::Ji::Kee I) fl'eezer door/lid closed. Your
fl'eezer will kee I) t0od fl'ozen fin" 94 horns
provided wam_ air is not a(hnitted.
::Ji::If fl'eezer is out of operation fin" 24 hours
or inore, add (h T ice. i,eave ice in large
pieces. Add more ice as required.
WARNING: Handlingof dry icecancause
freezingof the hands--gloves or otherprotection
is recommendecL
::Ji::If (h T ice is not availal)le, move tood to a
fl'ozen food locker teml)oraril_unfil
power is restored.
Preparing to Move
Disconnect the power cord plug ti'om
the wall outlet, Remove foods, defl'ost
(on Manual Defi'ost models) and clean
the freeze_:
Secure all loose items such as grille and
shelves by taping them se('urelv in place
to prevent damage.
Be sure fl'eezer stays in upright position
during actual moving and in van. The
freezer must be secured in van to prevent
movement. Protect outside of freezer
with blanket.
Preparing for Vacation
To maintain fi'eezer in operation during
\_cations, be sure your house power is not
turned off. For sure protection of fl'eezer
contents, you may want to ask a neighbor
to check the power supply and ti'eezer
operation every 48 hom_.
For extended V_lC_l[ions or absences, )'O/t
may I)reler to move your frozen fi)ods to a
storage locker temporarily. If your fl'eezer is
to be left emI)_; disconnect power cord
plug ti'om wall outlet. To prevent fimnation
of odo_, place open box of baking soda in
ti'eezer and leave ti'eezer door/lid open.
When the fl'eezer is not operating, it can be
left in an unheated house or room without
damage to cabinet or mechanism.

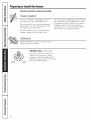
Preparingtoinstall the freezer.
Read these instructionscompletely and carefully.
FreezerLocation
Yore" fl'eezer should be conveniently located for
day-to-day use in a dr,v, well-ventilated room.
Do not install the fl'eezer where the temperatm'e
will go below O°F or above l ] O°K because it will
not maintain proper temperatures.
Be sm'e to install yore" fl'eezer on a floor strong
enough to support it when it is flfllv loaded.
The fl'eezer must be solidly positioned on the floor
if it is to flmction at its best. Shims may be used to
accomplish this wherever the floor is too uneven.
If the place selected for the fl'eezer is damp or
moist, place 2 X 4's (51 mm X 102 ram) trader its
entire length to assm'e adequate support.
Clearances
On all models, allow 3" (76 ram) on top, back and
sides fi)r proper air circulation.
Turn rigm Tun eft
[o luwer [o raise
Adjustable Legs(onUprightmodols)
I,egs at the fi'ont cornexs of the fl'eezer
should be set so the fl'eezer is firefly
positioned on the floo_; and the fl'ont is
raised just enough so the door closes easily
when opened about halfwa>
10

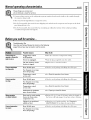
Normal operatingcharacteristics, gecom
These things are normal and
do not indicate a need for service.
::Ji::A wam_ cabinet exterior as the refl_igerafion systen_ transfe_ heat ti'on_ the inside to the outside through
the exterior cabinet walls.
;;Ji::The sound of the high-efficiency compressor m oto_:
_: On No-Frost models, the sound ot wamr dril)ping as it melts fl'om the evaporator and escapes to the drain
pan dtwing defl'ost cycle.
::Ji::On No-Frost models, the sotmd of the tim circulating air within the interior ot the cabinet providing
a consistent temperature throughout.
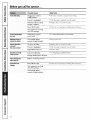
Beforeyoucall forservice...
Troubleshooting -tips
Save time and money! Review the charts on the following
pages first and you may not need to call for service.
Possible Causes
Freezer doesnot Temperature control
operate or Power-On in OFFposition.
Light is not on Freezer is unplugged. • Push the l_lu"_completely, into the outlet.
The fuse is blown/dreuit * Replace tt/se or reset the breakel:
breaker is tripped.
if )a(ka-e is holding door/lid ol)en.Freezer Marts/stops Door/lid left open. • Check to see l
toofrequently Too frequent or too long
door/lid ope,fings.
Temperature control * Sue About the operation of your freezer
set too cold.
Freezer operates Door/lid left open. • Check to see if l)ackage is holding door/lid ol)en.
too long Too frequent or too long
door/lid openh_gs.
Temperature control * See About the operation of your freezer
set too cold.
Inadequate air circulation * Sue Preparing to install the freezer
space around cabinet.
• 2 X 4 ,_(51 mm X 102 ram) under the length ofNoisy operation Floor may be weak, causing Placing ' _ 's
or cabinet vibrates freezer to vibrate when the fl'eezer will hel l) stq)port it and may reduce vibration.
compressor is on.
Cabinet is not positioned • A(!just legs (on Upright models). Sue Preparing to
solidly Oil floor, install the freezer Or t/se shims for t/llevell POOl:
Freezer temperature Door/lid left open. • Check to see if l)ackage is holding door/lid ol)en.
too warm
Too frequent or too long
door/lid openh_gs.
What ToDo
• Moxe the control to a teml)eratm'e setting,.
11

Beforeyoucall forservice...
Possible Causes What ToDo
Foods defrosting Temperature control * Move tile control to a teml)eratm'e setting.
ha OFFposition.
Freezer is unplugged. * Push the l)lu,,_ conq_letelv, into the oudet.
The fuse is blown/circuit * Replace fl/se (>r reset tire breaker:
breaker is tripped.
if )acka_,e is holding door/lid open.Door/rid left open. * Check to see l _ ,
Too frequent or too long
door/rid ope_fings.
Freezertemperature Temperature control *See About theoperationof yourfreezer.
toocold set too cold.
Moisture forms on Not unusual during * Wipe stuq_ilcedi_i.
outsideofcabinet periods of high hmnidity.
Interiorlightdoes No power at outlet. * Replace fl/se or reset tire breaker:
network Freezer is unplugged. * Push tire l_lm'_ completely, into tire outlet.
Light bulb burned out. * Replace bulb.
Door/rid won't fully Legs need adjusting. * See Preparingtoinstallthe freezer.
close by #serf Package holding door/rid open.
Slow starting time Bttih-in overload protection.
after being off
Excessive frost Door/rid left open. * Check to see if l)ackage, is holding door/lid open.
buildup
Too frequent or too long
door/rid ope_fings.
Not unusual during
periods of high humidity.
12

GE Service Protection Plus rM
GE, a name recognized _ orklwide ff)r quality and dependability, offers you
Service Protection Plus'"--compreher_sive protection on all your appliar_ces--
No Matter What Brand!
Benefits Include:
* Backed by GE
* All brands covered
* Unlimited service calls
* All parts and labor costs included
* No out-of-pocket expenses
o No hidden deductibles
o One 800 ntmlber to call
We 71Cover Any Appliance.
Anywhere. Anytime. *
You _ill be completely satisfied with our service i)rotect]o_ or )ou ma} reqt_est _otlr n_o_ex back
on the remaining value of your cow,tract. No qt_esti(ms asked. It's that sinq)le.
Protect your refl'igerator, dishwasher, washer and (byer, range, TV; VCR and much more-aJay brand!
Plus there's no extra charge fl)r emergency service and low monthly finallcing is available. Even icemaker
coverage and fl)od spoilage protection is oftered. You can rest easy, knowing that all your valuable
household prochlcts are protected against expensive repairs.
Place ,otu" coi_fidenre in (;E and call us in the U.S. toll-free at _SUU.OZD.ZZZzt:
tot I//ore ]ll_orI//at]()ll.
*MI ])YillldS (N)'_(?l(!d, lip IO _0 y(?_tl'_ old_ ix) the (OlltJl"_(!llt_l] I _.
Please place in envelope and mail to:
GeneralElectricCompany
Warranty Registration Department
P.O. Box 32150
Louisville, KY 40232-2150
73

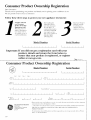
Consumer Product Ownership Registration
Dear Customer:
Thank you tbr purchasing our product and thank you for placing your confidence in us.
_'e are proud to haxe you as a customer'.
Follow these three steps to protect your new appliance investment:
Complete mid mail
your Consmner
Product Ownerslfip
Registration today.
t]a_e the t)eace o/
mind of knowing we
c_ln contact you ill
th( unlikely (v(nt of
a sa/;t'ty nlodi/ication.
AJler mailing tile
registration below,
store this(toctll//ellt
in a sa/b place. It
contains int()rlnation
you will need should
you require service.
Our service nmnber is
800.GE.CAI,_ES
(800.432.2737).
[_U}t(t VO/lr Owner's
Mamml carefullx.
It will hel t) you
operate your new
appliance properly.
Model Number Serial Number
, , , , , , I I , , , , ,
Important: If you did not get a registration card with your
product, detach and return the form below to
ensure that your product is registered, or register
online at www.ge.com.
._,,,_ (MI h(r(
Consumer Product Ownership Registration
_) Model Number Serial Number
I,,,,,, , , , , , I I , , , , , ,
Ms. M*>,. Mi_s
Fir'q I I Lasll
Name I I I I I I I I I Nanl(! I I I I I I I I I I I I
_11-( (!1 I
A&hx ss I I I I I I I I I I I I I I I I I I I I I I I I
, I
I
I
Ap.#l, , , , i i , I g-lnailAddress*
Zip I
l)ue Ha(ed
Monlh
GE Consumer & Industrial
Appliances
General Electric Company
Louisville,KY40225
ge.com
* Please provide your e-lnail address to receixe, via e-mail, discounts, special otlbp, and other important
communications from GE Appliances (GEA).
Check here if you do not want to receixe communications from GEA's carefully select_ d partners.
FAII.t 7RE TO (_OMPLETE AND RETt 7RN Tt tlS CARD DOES NOT DIMINISII hX)t 7R
_%RRAN'IY RI(;IH'S.
For intkmnation about GEA's prixacy and data usage policy, go to _v.ge.com and click on "Prixacy
Policy" or call 800.626.2224.
14

Freezer Warranty.
All warranty service provided by our Factory Service Centers,
or an authorized Customer Care®technician. Toschedule service,
on-line, 24hours a day, contact us at ge.com, or call SOO.GE.CARES
(U.S.), 1.800.361.3400(Canada).Please have serial number and
model number available when calling for service.
Staple your receipt here.
Proofof the original purchase
date is needed to obtain service
under the warrant_
Fromthe dateof the
originalpurchase
GE Will Replace:
Anypart of the ti'eezer which tifils due to a defect in materials or workmanship, During this
limited one-year warranty, GE will also i)rovide, free of charge, all labor and related service to
replace the detecti\'e part,
_: Service trips to your home to teach you how to use
the product.
!i/:hnproper h_staJlation, delivery or maintenance.
::Ji::Failure of the product if it is abused, misused, or used for
other than the intended purpose or used commercially.
_: Food spoilage caused by:
a) Power interruption from the utility.
b) Blown fuse, open circuit breaker or other power
dJscmmection on the owner's premises.
c) Freezer not operating because of abnormally low
electric power voltage or inadequate house wiring.
!_,_Damaage caused after delivery.
)_:Replacement of house fuses or resetting of circuit
breakers.
::Ji::Dmnage to the product caused by accident, fire, floods
or acts of God.
_: Incidental or consequentiaJ damaage caused by possible
defects with this applimlce.
!i_:Product not accessible to provide required service.
EXCLUSION OFIMPLIED WARRANTIES--Your sole and exclusive remedy is product repair as provided in this
Limited Warranty. Any implied warranties, including the implied warranties of merchantability or fitness for a
particular purpose, are limited to one year or the shortest period allowed bylaw.
This warranty is extended to the original purchaser and any succeeding owner for products purchased for home
use within the USA and Canada. If the product is located in an area where service by a GEAuthorized Servicer
is not available, you may be responsible for a trip charge or you may be required to bring the product to an
Authorized GEService location for service. In Alaska, the warranty excludes the cost of shipping or service calls
to your home.
Some states do not allow the exclusion or limitation of incidental or consequential damages. This warranty gives
you specific legal rights, and you may also have other rights which vary from state to state. Toknow what your
legal rights are, consult your local or state consumer affairs office or your state's Attorney General
Warrantor: General Electric Company. Louisville, KY 40225
Camco Inc., Suite 310, 1Factory Lane, Moncton, N.B. EIC 9M3
/5

ConsumerSupport.
gEAppliancesWebsite ge.com
Have a question or need assistance with your appliance? Try tile GE Appliances _.Vebsite 24 hours a day,
any day of the year'. For greater convenience and taster se_Mce, you can now download Owner's Manuals,
order parts, catalogs, or even schedule service on-line. You can also "_sk Our Team of EN)erts _'''
your questions, and so much more...
ScheduleService
Expert (;E repair setsice is onl_ one step away fl'om xour door Get on-line and schedule your set\ice at
xour conxenience 24 hours any (lax of tile year! Or call 800.GE.(:AI/ES (800.432.2737) during n{mnal
business hours.
ge.com
RealLifeDesignStudio ge.com
GE supports tile Universal Design concept--products, services and environments that can be used by
people of all ages, sizes and capabilities. We recognize tile need to design fin" a wide range of physical and
mental abilities and impaimmnts. For details of GE's Universal Design applications, including kitchen
design ideas tot people with disabilities, check out our Websim today. For the heating impaired, please call
800.TDD.GEAC (800.833.4322).
ExtendedWarranties
ge.com
Purchase a (;E extended warrant_ and learn about special discounts that are available while your warranla,
is still in effect. You can i)urchase it on-line an}time, or call 800.626.2224 during n(mnal business hours.
(;E (_onsulner Home Ser',ices will still be there alter your warrant} expires.
PartsandAccessories
ge.com
Individuals qualified to se_'ice their own appliances can have parts or accessolJes sent directly to their homes
(VISA, MasterCard and Discover cards are accepted). Order on-line u>day, 24 hours e\'ei T day or by phone
at 800.626.2002 dudng nomml business hours.
Instructions contained in this manual coverprocedures to be performed byany user. Otherservicing generally
should be referred to qualified service personnel Cautionmust be exercised, since improper servicing may cause
unsafe operation.
ContactUs
ge.com
If you are not satisfied with the service you receive fl'om (;E, contact us on our _&'ebsite with all the details
including your phone ntlI/lbeI'_ oi" write to: General Manager; Customer Relations
GE Appliances, Appliance Park
I,ouisville, KY 40225
RegisterYourApplbnce
Register your new applimlce on-line--at your conYenience[ Timely product registration will allow fin"
enhanced communication and prompt se_Mce under tile terms of w)ur warranty, should the need a_ise.
You may also mail in tile pre-p_inted registration card included in tile packing material, or detach and
use the titan in this Owner's Manual.
ge.com
] _ Printed in the United States
-
 1
1
-
 2
2
-
 3
3
-
 4
4
-
 5
5
-
 6
6
-
 7
7
-
 8
8
-
 9
9
-
 10
10
-
 11
11
-
 12
12
-
 13
13
-
 14
14
-
 15
15
-
 16
16


Ask a question and I''ll find the answer in the document
Finding information in a document is now easier with AI
Related papers
Other documents
-
Hotpoint HTS22GBPDRCC Owner's manual
-
AMERICANA A4425GDTAWW Owner's manual
-
-
-
Hotpoint FFUQ 18 Series Owner's manual
-
-
-
Electrolux E42BS75EPS Owner's manual
-
-
Kenmore 2539239180 Owner's manual