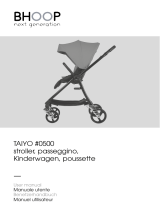
Mountain Buggy Terrain Operating instructions

Category
Strollers
Type
Operating instructions

Mountain Buggy Terrain is a versatile stroller system that offers a smooth ride and easy maneuverability for parents and a comfortable, secure journey for your little one. With its all-terrain wheels, it's perfect for navigating different surfaces, from city streets to rough paths. The adjustable handlebar and multiple recline positions allow you to customize the stroller to your needs and your baby's comfort. You can also attach a carrycot or car seat to the stroller frame, making it a convenient travel system for your growing child.

Mountain Buggy Terrain is a versatile stroller system that offers a smooth ride and easy maneuverability for parents and a comfortable, secure journey for your little one. With its all-terrain wheels, it's perfect for navigating different surfaces, from city streets to rough paths. The adjustable handlebar and multiple recline positions allow you to customize the stroller to your needs and your baby's comfort. You can also attach a carrycot or car seat to the stroller frame, making it a convenient travel system for your growing child.

These instructions are for the Single Carrycot which fits the following model strollers:
Te r rain Single - T1204-000 Urban Single - U1204-000 Rollerbug Single - R1204-000 C:drive Single - C1204-000
SINGLE CARRYCOT INSTRUCTIONS
IMPORTANT, KEEP FOR FUTURE REFERENCE
AMSCis1/8/02gen
Remove support wire 1 from
the plastic joint 2 on the side
nearest to you.
Then remove wire from the plastic
joint on other side.
3
Unfasten sunhood fabric from the stroller frame and seat near handle
bar.
21
Standing beside stroller and
using a degree of force, pull sunhood
support wire towards you by about
50mm/2in.
Removing Sunhood
1
2
Support brackets for Carrycot are different for each
model, except Rollerbug and C:drive use the same brack-
ets. Check label on the bracket to ensure you have the
correct bracket(s) for your model stroller.
3
All Models
WARNING
Do not use this Carrycot until you have read and un-
derstood the instructions!
Carrycot is suitable for newborn baby to 6 months, or
until baby can sit up unaided.
•Before placing baby into position check that the
Carrycot is secure and will not tip or fall.
Baby must not be in the Carrycot when it is being
fastened or removed from the stroller frame.
The depth from the top of the mattress to the top of
the side of the Carrycot at, or at any position within
300mm/11.8in from the harness attachment points,
should not be reduced to less than 140mm/5.5in when
the mattress is in position. Mattress purchased
separately should conform to BS1877 part 10.
Do not use accessories not designed for your stroller
as they may be unsafe
.
Do not use the Carrycot to transport children in a
motor vehicle.
•Never leave your child unattended.
1
2
4
3
Unfasten seat from frame along
side tubes.
Unfasten strap underneath seat at
point A (does not apply to Terrain
models).
Push seat forward, then slide
fabric off seat support wire.
Remove seat support wire
from stroller frame at B and C.
3
1
2
Removing Seat
A
B
C
seat
support
wire.
All Models
4
The Sunhood and Seat need to be removed from the stroller before
fitting the Carrycot. Store items removed in a dry safe place.
These instructions are for the Single Carrycot which fits the following model strollers:
Te rrain Single - T1204-000 Urban Single - U1204-000 Rollerbug Single - R1204-000 C:drive Single - C1204-000
SINGLE CARRYCOT INSTRUCTIONS
IMPORTANT, KEEP FOR FUTURE REFERENCE
AMSCis1/8/02gen
Remove support wire 1 from
the plastic joint 2 on the side
nearest to you.
Then remove wire from the plastic
joint on other side.
3
Unfasten sunhood fabric from the stroller frame and seat near handle
bar.
21
Standing beside stroller and
using a degree of force, pull sunhood
support wire towards you by about
50mm/2in.
Removing Sunhood
1
2
Support brackets for Carrycot are different for each
model, except Rollerbug and C:drive use the same brack-
ets. Check label on the bracket to ensure you have the
correct bracket(s) for your model stroller.
3
All Models
WARNING
Do not use this Carrycot until you have read and un-
derstood the instructions!
Carrycot is suitable for newborn baby to 6 months, or
until baby can sit up unaided.
Before placing baby into position check that the
Carrycot is secure and will not tip or fall.
Baby must not be in the Carrycot when it is being
fastened or removed from the stroller frame.
The depth from the top of the mattress to the top of
the side of the Carrycot at, or at any position within
300mm/11.8in from the harness attachment points,
should not be reduced to less than 140mm/5.5in when
the mattress is in position. Mattress purchased
separately should conform to BS1877 part 10.
Do not use accessories not designed for your stroller
as they may be unsafe
.
Do not use the Carrycot to transport children in a
motor vehicle.
•Never leave your child unattended.
1
2
4
3
Unfasten seat from frame along
side tubes.
Unfasten strap underneath seat at
point A (does not apply to Terrain
models).
Push seat forward, then slide
fabric off seat support wire.
Remove seat support wire
from stroller frame at B and C.
3
1
2
Removing Seat
A
B
C
seat
support
wire.
All Models
4
The Sunhood and Seat need to be removed from the stroller before
fitting the Carrycot. Store items removed in a dry safe place.
Fastening Carrycot to Stroller Frame
Terrain Single Model
1
2
Fasten support bracket
onto frame side tubes
immediately above plastic hinge
joint.
Fasten support bracket
over each side of second
fastener (130mm/5ins) up from
heel rest.
2
3
Attach Carrycot sunhood
to Carrycot by pushing
sunhood support wire into
plastic joint on both sides.
Place Carrycot onto support
brackets. Ensure Carrycot
sunhood is at the opposite
end from stroller handlebar.
Check that Carrycot rests
horizontally, if not check
position of support brackets
are the same as shown in
diagram.
Fasten safety straps to
frame at points A & B on
both sides (total of 4
fasteners).
4
5
Urban Single Model
1
2
Attach Carrycot
sunhood to Carrycot by
pushing sunhood support
wire into plastic joint on
both sides. Place Carryco
t
onto support bracket and
the front end of seat
support tube. Ensure
Carrycot sunhood is at the
opposite end from stroller
handle bar. Check that
Carrycot rests horizontally,
if not check position of the
support bracket is the same
as shown in diagram.
3
Fasten safety straps to
frame at points A & B on
both sides (total of 4
fasteners).
4
Refasten storage tray.
5
Remove storage tray under
stroller by unfastening front end
and sliding it off back end of the
seat support tube.
Slide support bracket
as far as it will go, onto seat
support tube.
1
2
130mm/5in
heel rest
A
B
3
seat
support
tube
A
B
buckle
plastic hinge
joint
Rollerbug and C:drive Single Models
3
seat
support
tube
4
Buckle
heel rest
130mm/5in
A
B
1
2
Remove storage tray
under the stroller by
unfastening the front end
and sliding off the back end
of the seat support tube.
Slide support bracket
as far as it will go, onto seat
support tube.
Fasten support bracket
over each side of the
second fastener (130mm/
5ins) up from the heel rest.
3
Buckle safety strap
between the claws on
support bracket .
4
Attach Carrycot sunhood
to Carrycot by pushing
sunhood support wire into
plastic joint on both sides.
Place Carrycot onto support
brackets. Ensure Carrycot
sunhood is at the opposite
end from stroller handle bar.
Check that Carrycot rests
horizontally, if not check
position of support brackets
are the same as shown in
diagram.
5
Fasten safety straps to
frame at points A & B on
both sides (total of 4
fasteners).
6
Refasten storage tray.
7
Buckle safety strap betwee
n
claws on support bracket
.
WARNING
Before placing baby into position check that the Carrycot is secure and will not tip or fall.
3
4
4
3
2
2
1
  • Page 1 1
  • Page 2 2

Mountain Buggy Terrain Operating instructions

Category
Strollers
Type
Operating instructions

Mountain Buggy Terrain is a versatile stroller system that offers a smooth ride and easy maneuverability for parents and a comfortable, secure journey for your little one. With its all-terrain wheels, it's perfect for navigating different surfaces, from city streets to rough paths. The adjustable handlebar and multiple recline positions allow you to customize the stroller to your needs and your baby's comfort. You can also attach a carrycot or car seat to the stroller frame, making it a convenient travel system for your growing child.

Ask a question and I''ll find the answer in the document

Finding information in a document is now easier with AI