Motorola MOTO Q 9c Quick start guide
- Category
- Mobile phones
- Type
- Quick start guide
This manual is also suitable for
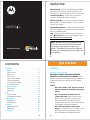
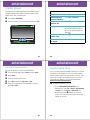
Motorola MOTO Q 9c keeps you on top of work with on-the-go email access and editing capabilities with Documents To Go. Bluetooth wireless technology frees you from wires. Customize the home screen, set personal ringtones, and transfer media files from your computer. On-phone help is just a few clicks away.
Motorola MOTO Q 9c keeps you on top of work with on-the-go email access and editing capabilities with Documents To Go. Bluetooth wireless technology frees you from wires. Customize the home screen, set personal ringtones, and transfer media files from your computer. On-phone help is just a few clicks away.


-
 1
1
-
 2
2
-
 3
3
-
 4
4
-
 5
5
-
 6
6
-
 7
7
-
 8
8
-
 9
9
-
 10
10
-
 11
11


Motorola MOTO Q 9c Quick start guide
- Category
- Mobile phones
- Type
- Quick start guide
- This manual is also suitable for
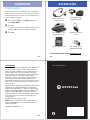
Motorola MOTO Q 9c keeps you on top of work with on-the-go email access and editing capabilities with Documents To Go. Bluetooth wireless technology frees you from wires. Customize the home screen, set personal ringtones, and transfer media files from your computer. On-phone help is just a few clicks away.
Ask a question and I''ll find the answer in the document
Finding information in a document is now easier with AI
Related papers
-
Motorola Q9c Quick start guide
-
Motorola MOTO Q 9c Quick start guide
-
-
-
-
-
Motorola MOTOSURF A3100 User manual
-
-
-
Motorola MOTO Q8 User manual
