Wi-Fi
Wi-Fi
CHOOSE A NETWORK...
< Settings
My Devices
Local Device
RExxx
XX-XX-XX-X X-XX-X X
Q1. What should I do if the Tether app cannot nd my device during
setup?
Try another method by following the steps below:
1. Connect your smartphone to the extender’s network TP-Link_Extender.
2. Launch the Tether app, and select your extender.
3. Follow app instructions to complete the setup.
If you are still having problems, contact our technical support.
Q2. What should I do if the LED doesn’t turn solid on after
completing setup via the Tether app or web browser?
You may have entered incorrect Wi-Fi password for your host router during the
conguration. Check the password and try again.
Make sure the extender is close to your router, preferably within 16 feet, and away
from large electrical appliances.
If you have enabled wireless MAC ltering, wireless access control, or access
control list (ACL) on your router, disable them rst, then follow any method on the
front page to complete the conguration.
Try setting it up via the WPS button.
Reset the extender and go through the conguration again.
If you are still having problems, contact our technical support.
Q3. How do I reset the extender?
With the extender powered on, use a pin to press the RESET button for 1 second.
The extender will reboot.
Safety Information
Keep the device away from water, re, humidity or hot environments.
Do not attempt to disassemble, repair, or modify the device. If you need service, please
contact us.
Do not use the device where wireless devices are not allowed.
The socket-outlet shall be installed near the equipment and shall be easily accessible.
Please read and follow the above safety information when operating the device. We cannot
guarantee that no accidents or damage will occur due to improper use of the device.
Please use this product with care and operate at your own risk.
TP-Link hereby declares that the device is in compliance with the essential requirements
and other relevant provisions of directives 2014/53/EU, 2009/125/EC, 2011/65/EU and
(EU)2015/863.
The original EU declaration of conformity may be found at https://www.tp-link.com/en/ce.
For technical support, the user guide and other information, please
visit https://www.tp-link.com/support/, or simply scan the QR code.
If you have any suggestions or needs for our product guides, you
To communicate with TP-Link users or engineers, please join the
TP-Link Community at https://community.tp-link.com.
Tip: If you have connected to the extender’s Wi-Fi but still cannot nd your device, try turning o
your cellular data.
Method 2: Via a Web Browser
Method 1: Via the Tether App
1. Connect your computer or smartphone to the extender’s network
.
If you are
using a computer, unplug the Ethernet cable if any.
2. Launch a web browser, enter http://tplinkrepeater.net in the address bar, and
log in.
3. Manage the extender as needed.
1. Connect your smartphone to the extender‘s or router’s network.
2. Launch the Tether app, select your extender, and log in.
3. Manage the extender as needed.
Manage the Extender
After setup, you can manage the extender via any of the methods below.
Note: If your extender and router use the same network name, Method 1 is recommended.
TP-Link OneMesh
TM
router and extenders work together to form one unied
Wi-Fi network. Walk through your home and stay connected with the fastest
possible speeds thanks to OneMesh’s seamless coverage.
OneMesh
TM
with Seamless Roaming
Seamless Roaming
Devices automatically switch between your router and extenders as you move through your
home for the fastest possible speeds.
Unied Wi-Fi Network
Router and extenders share the same wireless settings, including network name, password,
access control settings and more.
Easy Setup and Management
Set up a OneMesh network with a push of WPS buttons. Manage all network devices on the
Tether app or at your router’s web management page.
To check full list of TP-Link OneMesh devices, scan the QR code,
or visit https://www.tp-link.com/One-Mesh/compatibility.
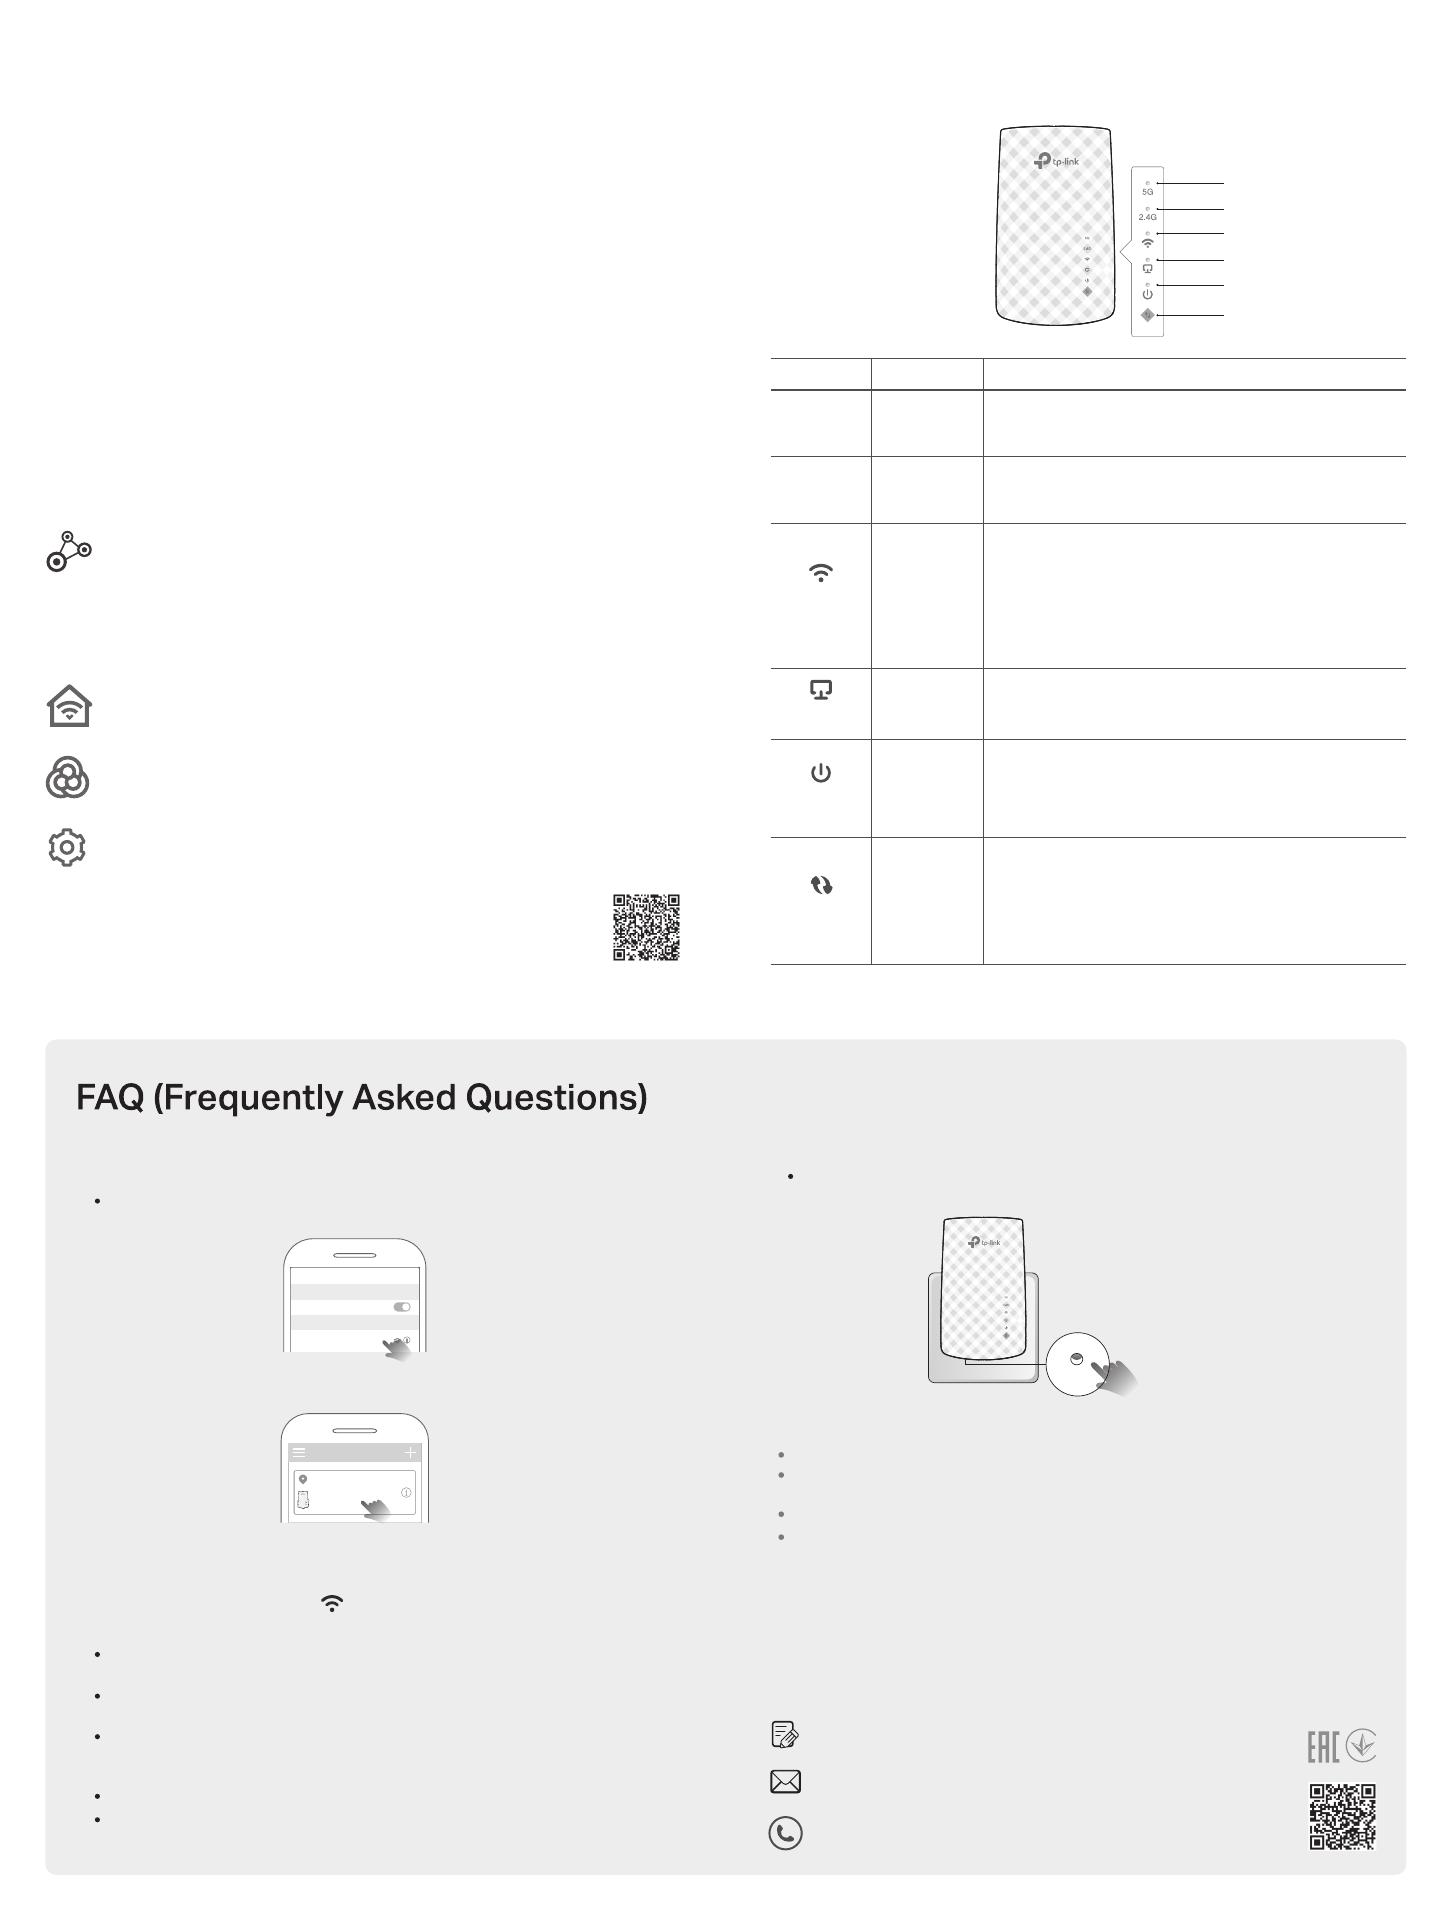
LED Explanation
The extender is connected or not connected to the
5GHz wireless network of your host router.
5GHz
LED Status Indication (For Range Extender Mode)
On/O
The extender is connected or not connected to the
2.4GHz wireless network of your host router.
2.4GHz On/O
The Ethernet port is connected or not connected
to a powered-on device.
(Ethernet)
On/O
The extender is on or o.
The system is starting up or rmware is being
upgraded.
(Power)
On/O
Blinking
WPS connection is established.
WPS connection
is in progress
.
WPS connection has been established for more
than 5 minutes or WPS connection failed.
(WPS)
On
Blinking
O
The extender is connected to your router’s wireless
network and is in a suitable location.
The extender is experiencing poor signal strength.
Try relocating it closer to your router.
No wireless connection is established.
(Signal)
Solid green
Solid red
O
5GHz
2.4GHz
Signal
Ethernet
Power
WPS


