Outdoor Grilling Pro ducts
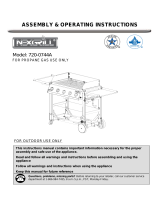
DUAL BLAZE PORTABLE GAS GRILL
MODEL: CGG-522
ASSEMBLY AND OPERATING INSTRUCTIONS
m DANGER
1. Do not store or use gasoline or other flammable
liquids or vapors in the vicinity of this or any
other appliance.
2. An LP cylinder not connected for use shall not be
stored in the vicinity of this or any other appliance.
m DANGER
If you smell gas:
1. Shut off gas to the appliance.
2. Extinguish any open flame.
3. Open lid.
4. If odor continues, keep away from the
appliance and immediately call your
fire department.
m DANGER
Failure to follow these instructions
could result in fire, explosion or burn
hazard, which could cause property
damage, personal injury or death.
m DANGER
1. Never operate this appliance unattended.
2. Never operate this appliance within 10 feet (3.05m) of any other gas cylinder.
3. Never operate this appliance with 25 feet (7.5m) of any flammable liquid.
4. lf a fire should occur, keep away from the appliance and immediately call your fire department.
Do not attempt to extinguish an oil or grease fire with water.
5. Heated liquids remain at scalding temperatures long after the cooking process. Never touch
cooking appliance until liquids have cooled to 115ºF (45ºC) or less.
m DANGER
Failure to follow these instructions could result in fire, explosion or burn hazard, which
could cause property damage, personal injury or death.
m WARNING: FOR OUTDOOR USE ONLY
m
This instruction manual contains important information necessary for the
proper assembly and safe use of the appliance
m Read and follow all warnings and instructions before
assembling and using the appliance
m Follow all warnings and instructions when using the appliance
m Keep this manual for future reference
Note to installer:
Leave this Owner’s Manual with the consumer after delivery and/or installation.
Note to customer: Leave this Owner’s Manual in a convenient place for future reference.
1
m WARNING
CALIFORNIA PROPOSITION 65
1. Combustion by-products produced when using
this product contain chemicals know to the State
of California to cause cancer, birth defects, and
other reproductive harm.
2. This product contains chemicals, including
lead and lead compounds, know to the State of
California to cause cancer, birth defects or other
reproductive harm.
Wash your hands after handling this product.

Table of Contents
1. Warnings and Safety Instructions 3
2. Illustrated Parts List 4
3. Exploded View 5
4. Assembly Instructions 6
5. Operating Your Grill
5.1 Select a proper location 8
5.2 Special Instructions for the use of regulator and cylinder 8
5.3 Checking for gas leak 9
5.4 Lighting instructions 9
5.5 Match lighting 9
5.6 Using the grill 10
6. Care and Maintenance 10
7. FAQ and Troubleshooting 11
8. Warranty Program and
Replacement Parts 12
3
1. Warnings and Safety Instructions y Instructions
If these instructions are ignored, there is a possibility of a hazardous fire or explosion which
could result in physical injury or property damage! It is your responsibility to assemble,
operate and maintain your gas grill properly.
READ ALL WARNINGS AND INSTRUCTIONS PRIOR TO ASSEMBLING
AND OPERATING YOUR GRILL
WARNINGS:
m This grill is for outdoor use only. It should NOT be used in a building, garage or any other
enclosed area.
m The use of alcohol, prescription or non-prescription drugs may impair an individual’s ability to
properly assemble or safely operate this appliance.
m Do not leave the grill unattended.
m Keep children and pets away from the grill all the times.
m Do not use the grill in high wind.
m This grill must be used with propane gas only. Liquid propane is not natural gas. The conversion or
attempted use of natural gas in a liquid propane grill is dangerous and will void your warranty.
m Do not attempt to attach this grill to the self-contained propane system of a camper, trailer, motor
home or house.
m Do not use charcoal or lighter fluid.
m Do not use gasoline, kerosene or alcohol for lighting. The LP-gas cylinder must be constructed
and marked in accordance with the specifications for propane gas cylinder of the U.S. Department
of Transportation (DOT).
m Do not move appliance when in use. Allow the grill to cool to 115º (45) before moving or storing.
m Do not use the grill unless it is COMPLETELY assembled and all parts are securely fastened and
tightened. If there are any missing or damaged parts, contact customer service for a replacement.
m Do not alter the grill in any manner.
m Do not operate the grill if there is gas leak present.
m The use and installation of this product must conform to local codes. In the absence of local
codes, use the National Fuel Gas Code: ANSI.NFPA 58 or Natural Gas and Propane Installation
Code, CSA B149.1; Propane Storage and Handling, CSA B149.2. Natural Gas and Propane Installa-
tion Code.
m This appliance is not intended to be installed in or on a boat or recreational vehicle.
m Locate the grill away from any combustible or non-combustible materials or construction by at
least 24 inches (61cm) from the back and sides.
m The appliance shall not be located used under overhead unprotected combustible construction.
m This appliance is not intended for and should never be used as a heater.
m This appliance will be hot during and after use. Use insulated oven mitts or gloves for protection
from hot surfaces or splatter from cooking liquids.
m This appliance is not intended for commercial use.
m The pressure regulator supplied with the Cuisinart Portable LP Gas Grill must be used.
m PROPOSITION 65 WARNING: Handling the brass material on this product exposes you to lead,
a chemical known to the state of California to cause cancer, birth defects or other reproductive
harm. (Wash hands after handling this product.)
2

2. Illustrated Parts List
North American Distributor: The Fulham Group, Newton, MA 02466
4
5
3. Exploded View
1 Lid handle 13 Back Right Leg 25 Drip tray bracket-Right
2 Thermometer 14 Spring (Back leg) 26 Control knob
3 Thermometer bezel 15 Handle 27 Control panel
4 Lid 16 Handle rod 28 Regulator assembly
5 Upper hinge 17 Spring (Front leg) 29 Valve assembly
6 Hinge pin 18 Front Right Leg 30 Stopper
7 Lid cotter pin 19 Locking pin 31 Electrode
8 Lower hinge 20 Lock Spring 32 Left burner
9 Right burner 21 C Ring 33 Cooking grate
10 Fire box 22 Locking switch 34 Match holder
11 Support bracket 23 Drip tray
12 Leg Pivot pin 24 Drip tray bracket-Left

4. Assembly Instructions
Remove all the contents from packaging, and ensure all parts are present before
attempting to assemble. (See Parts List on page 4)
6
7
Step 1:
Install the leg assembly.
Step 2:
Align the leg with the bracket to
insert the leg pivot pin and lock
with a cotter pin.
Step 3:
Insert the drip tray.
Step 4:
Insert the cooking grate.
To store the grill:
Pull the sliding switch down to release the leg from lock position, and
move the leg up. Be sure both handles are latched on the each side of the
lid preventing lid open during transit.
When the grill not in use :
To prevent damage to the regulator and hose, secure the
hose and regulator on to the handle when the grill is not
used by using the hook that come with the regulator.

8
9
5.3 Checking for Gas Leak
m DANGER
LEAK TESTING GENERAL: Although gas connections on the grill are leak tested prior to shipment, a complete leak test
must be performed at the installation site. Before each use, check all gas connections for leaks using the procedures
listed below. If the smell of gas is detected at any time, you should immediately check the entire system for leaks.
BEFORE TESTING: Make sure all packing materials have been removed from the grill
Make a solution of one part liquid detergent and one part water. You will need a spray bottle, brush, or rag to apply the
solution to the ttings. For the initial leak test, make sure the Liquid Propane cylinder is full.
TO TEST
1. Turn the burner valves off.
2. Turn the Liquid Propane cylinder valve counterclockwise to open the valve.
3. Apply the soap solution to all gas ttings. Soap bubbles will appear where a leak is present.
4. If a leak is present, immediately turn the gas supply “OFF” and tighten leaky ttings.
5. Turn the gas back “ON” and recheck.
6. Should the gas continue to leak from any of the ttings, turn the gas supply “OFF” and contact customer service at
866-994-6390 or email [email protected]
7. If there is evidence of excessive abrasion or wear, or the hose is cut, it must be replaced prior to the outdoor cooking
gas appliance being put into operation. Only those parts recommended by the manufacturer should be used on the
grill. Substitutions will void the warranty.
5.4 Lighting Instructions
1. Read all instructions before lighting.
2. Open lid during lighting.
3. Make sure the gas control knob is in “OFF” position.
4. Push the gas control knob and quickly turn counterclockwise to “HIGH” position. The igniter will click and light the
burner.
5. If ignition does not occur in 5 seconds, turn the gas control knob off, wait 5 minutes, and repeat steps 2 - 5.* Before
cooking on this grill for the rst time, operate the grill for about 15 minutes with the lid closed and the gas turned on
“HIGH”. This will “heat clean” the internal parts and dissipate odor from the painted nish.
*Clean your grill after each use. See Section 6.3 for instructions
*If the burner does not light, turn the gas control knob off and wait 5 minutes to let the gas clear before you try again.
5.5 Match lighting
IMPORTANT!
A match lighting hole is located on the left side of the rebox.
Match lighting instructions:
1. Read all instructions before lighting.
2. Open lid during lighting.
3. Make sure the gas control knob is in “OFF” position.
4. Strike a long wooden match and position the burning match through the match lighting hole in the left side of the
rebox. Place the ame near the bottom edge of the burner.
5. Push down and turn the burner control knob counterclockwise to the high setting.
6. The burner should light. The ame will carry around the burner. Allow grill to pre-heat with the grill lid closed for
2-3 minutes before cooking.
5. Operating Your Grill
5.1 Select a Proper Location
Once you have assembled your new grill, nd a suitable location for use.
Note: The use and installation of this product must conform to local codes. In absence of local codes, use the National
Fuel Gas Code: ANSI Z223.1/NFPA54, Storage and Handling of Liquied Petroleum Gases, ANSI.NFPA 58 or Natural
Gas and Propane Installation Code, CSA B149.1; Propane Storage and Handling, CSA B149.2.
m DANGER
1. Never use this outdoor grill inside any building, garage, shed or breezeway, or inside any boat, trailer or
recreational vehicle and/or boat, to prevent possible re and to prevent the possibility of carbon
monoxide poisoning or asphyxiation.
2. Always place your grill on a hard and level surface far away from combustible materials and structures.
3. Do not use this grill under an overhead combustible surface or covered area ( e.g., awnings, umbrellas, porches or
gazeboes ). Keep all combustible surfaces at least 24” (61cm) away.
4. Locate the grill away from any combustible and non-combustible material or construction by at least 24 inches
(61cm) from back and 24 inches (61cm) from side.(See the diagram below)
5. Never store or use gasoline or other ammable or volatile substances in the vicinity of this grill or in the vicinity of
any other heat-generating appliance, because of the danger of starting a re.
6. The cylinder be disconnected when the appliance is not in use.
5.2 Special Instructions for the Use of Regulator and Propane Cylinder
GAS HOOK-UP: Only the pressure regulator and hose assembly supplied with the grill should be used. Any replace-
ment pressure regulator and hose assembly must be specied by the grill manufacturer. This grill is congured for Liquid
Propane. Do not use a Natural Gas supply.
LIQUID PROPANE CYLINDER REQUIREMENTS: (20-lb Cylinder) A dented or rusty Liquid Propane cylinder may be
hazardous and should be checked by your supplier. Never use a cylinder with a damaged valve. The Liquid Propane cyl-
inder must be constructed and marked in accordance with the specications for Liquid Propane cylinders by the United
States Department of Transportation (DOT) or the National Standard of Canada, CAN/CSA-B339, Cylinders, Spheres and
Tubes for Transportation of Dangerous Goods Commission. The 20-lb cylinder must have a shut off valve terminating
in a valve outlet specied, as applicable, for connection type QCC1 in the standard for compressed gas cylinder valve
outlet and inlet connection ANSI/CGA-V-1. Storage of an outdoor cooking gas appliance indoor is per missible only if the
cylinder is disconnected and removed from the outdoor cooking gas appliance. The cylinder system must be arranged
for vapor withdrawal. The cylinder must include a collar to protect the cylinder valve. Manifold pressure: (operating) 11
inches water column (W.C.), (non-operating) 11.2 inches water column (W.C.). The Liquid Propane cylinder must be tted
with an Overll Protection Device (OPD). Remove the plastic valve cover from the Liquid Propane cylinder. Make sure the
grill gas hoses do not contact the grease pan or grill rebox when the Liquid Propane cylinder is placed into the cart.
CONNECTING THE LIQUID PROPANE CYLINDER: To connect the Liquid Propane gas supply cylinder: The cylinder
valve should be in the “OFF” position. If not, turn the valve clockwise until it stops. Make sure the cylinder valve has the
proper type-1 external male thread connections per ANSI Z21.81. Make sure the burner valves are in the “OFF” position.
Inspect the valve connections, port and regulator assembly. Remove debris and inspect the hose for damage. When
connecting the regulator assembly to the valve, use your hand to tighten the nut clockwise until it stops. Use of a wrench
could damage the quick coupling nut and result in a hazardous situation Open the cylinder valve fully by turning the
valve counterclockwise. Before lighting the grill, use a soap and water solution to check all the connections for leaks. If a
leak is found, turn the cylinder valve “OFF” and do not use the grill until a local Liquid Propane dealer can make repairs.

10
6. Care And Maintenance
6.1 Care
Regular care of your grill will help keep it operating properly. All maintenance should be done only when the
grill is cool and with the fuel supply turned off. Occasionally inspect and tighten hardware that may become loose.
6.2 Cleaning The Venturi Tube
A spider’s nest or wasp’s mud inside the Venturi Tube can block gas ow and can even cause a re at the gas
control valve. Such a re can cause operator injury and serious damage to your grill.
To prevent insect related problems, inspect the Venturi Tube screen cover regularly and remove any dirt.
m WARNING!
Do not disassemble or alter the fuel supply system. Improper assembly can result in a hazardous condition.
Seek qualied professional assistance if repairs are required.
6.3 Cleaning And Maintenance
• WARNING: Do not clean any grill surface while grill is operating.
Let grill cool to a safe temperature prior to cleaning.
• Disconnectthefuelsupplyandremovethefuelsupplycylinderpriortocleaning.
• Cleaningshouldbedonewheredetergentwon’tharmworksurfaceorlawn.
Exterior Cleaning
• Cleangrillexteriorsurfaceswithwarmsoapywater.
• Washdriptrayinwarmsoapywater–donotrunthroughdishwasher.
Interior Cleaning
• Cookinggratecanbecleanedwithagrillbrush.Forbestresults,cookinggrateshouldbewarm
(warm,nothot–neverbrushwithgrilloperating,orwheninteriorisveryhot).Ifdesired,cool
cooking grate can be removed from grill and cleaned with warm soapy water.
• Shouldyouwishtoremoveaccumulateddebrisfromthebottomoftherebox,proceedasfollows:
– Letgrillcoolcompletely
– Removecookinggrateandsetaside
– Carefullyscrapeandremovedebrisfrombottomofreboxusingcarenottotouchburnerelement,
igniter, or igniter wire.
WARNING: DO NOT APPLY ANY CLEANERS OR LIQUIDS TO BURNER ELEMENT
OR ATTEMPT TO CLEAN IN ANY WAY.
– DO NOT USE WATER OR LIQUIDS TO CLEAN GRILL INTERIOR
11
7. FAQ and Troubleshooting
Frequently Asked Questions
Can I use my Cuisinart Gas Grill with natural gas?
“NO. Your Cuisinart Gas Grill is intended for use only with LP (Liquid Propane) gas. Natural Gas is NOT Liquid Propane.
Never use any other fuel source with your grill, as it will create a dangerous situation.”
“Can I add lava rocks, ceramic tiles, or charcoal briquettes to my Cuisinart Gas Grill?”
“NO. Your grill is not intended to operate with these items, and doing so may create an unsafe situation, and will
void your warranty. You may use wood planks or a wood chip “”smoker box”” on top of the cooking grate surface,
but nothing should go under the cooking grate.”
Where can I buy accessories or replacement parts?
Visit www.cuisinart.com or call 1-800-211-9604.
Troubleshooting
Grill doesn’t reach high enough temperature
“Your LP tank has a safety device that is intended to reduce gas ow in the event of a leak. When this device is active,
it is commonly called “”bypass””. This device can be inadertantly activated by not following proper lighting procedures.
Should you experience low ame, you should do the following:
1) shut off grill
2) close tank valve fully
3) remove conversion hose to relieve pressure, then re-attach
Then, restart the grill (and start the grill each time) using the proper procedure:
1) ensure the grill fuel knob is turned to OFF
2) slowly open the gas tank valve fully
3) WAIT 15 SECONDS
4) follow the grill lighting steps (printed on grill, and in owner’s manual)”
For additional FAQs, please visit www.cuisinartgrilling.com/customerservice
5. Operating Your Grill (cont.)
mCAUTION:
Do not touch any hot grill parts. The outside of the grill bottom especially becomes very hot during use. Use pro-
tective gloves to handle any parts that might become hot during use.
5.6 Using the Grill
Inspect the burner ame by looking through the match lighting holes.
A good ame should be blue with some yellow tips coming from the burner holes. Yellow tips
on ames up to 1/4“ in height are acceptable as long as no carbon or soot deposits appear.
During operation, stand to the side of grill when opening the grill lid.
Do not expose any part of your body directly above the cooking area.
The burner opening must be positioned properly over the valve orices.

8. Warranty and Replacement Parts
This warranty covers defects in parts and workmanship for a period of 3 years from the original
purchase date. Any damage claim regarding the enameling must be submitted within 30 days of
purchase to be covered by the warranty.
The following conditions are NOT covered by this warranty:
• Unevennessandcolorvariationsinthecoatedsurfaces.
• Damagecausedbyimproperassemblyordisregardofthemanual.
• Useofsparepartsnotsuppliedbymanufacturer.
• Damageresultingfrommodicationsorinappropriateuse.
• Abuseofthegrill
• Damagecausedbyimpropermaintenanceorrepairsbyanunauthorizedperson.
Limitations and exclusions:
1. This warranty applies only to the original purchaser and may not be transferred.
2. If you can not verify the purchase date of the grill the warranty period will begin on the date the
grill was manufactured.
3. Replacement or repair parts are warranted for the remaining period of the original part warranty.
Your obligations:
This grill must be assembled, installed, operated and maintained in accordance with all applicable
codes and the instruction manual furnished with this grill. You must keep an invoice, cancelled
check or payment record to verify the purchase date of the grill.
For troubleshooting, FAQs or customer service, visit us at
www.cuisinartgrilling.com or contact us at 1-866-994-6390
To order replacement parts or additional Cuisinart Grilling products,
visit us at www.cuisinart.com or call 1-800-211-9604
Model#CGG-522
North American Distributor:
The Fulham Group
Newton, MA 02466
12
/