Page is loading ...

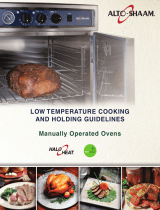
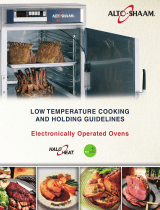
LOW TEMPERATURE COOKING
AND HOLDING GUIDELINES
Manually Operated Ovens

#566 • 2/08
LOW TEMPERATURE COOKING AND HOLDI NG OVENS
GE N E RA L IN D E X
W 1 6 4 N 9 2 2 1 W a t e r S t r e e t
●
P. O . B o x 4 5 0
●
M e n o m o n e e F a l l s , W i s c o n s i n 5 3 0 5 2 - 0 4 5 0
●
U . S . A .
PHONE: (262)251-3800 (800)558-8744 U.S.A./CANA DA
●
FAX: (262)251-7067 (800)329-8744 U.S.A.
●
www.alto-shaam.com
SECTION 1 • Low Temperature Cooking Introduction
Alto-Shaam Halo Heat . . . . . . . . . . . . . . . . . . . 1
Low Temperature Cooking Facts
Meat and Nutrition . . . . . . . . . . . . . . . . . . . . . 2
Shrinkage Control and Cooking Time . . . . . . . 3
Preventing Bacteria Growth . . . . . . . . . . . . . . 3
Labor and Equipment Cost Reduction . . . . . . 4
Options and Accessories . . . . . . . . . . . . . . . . . 5
SECTION 2 • Low Temperature Cooking Operation
General Operation — Manual Ovens
Oven Characteristics . . . . . . . . . . . . . . . . . . . . 6
Start-Up . . . . . . . . . . . . . . . . . . . . . . . . . . . . . . 6
Control Panel Identification . . . . . . . . . . . . . . 7
Cooking & Holding Procedures . . . . . . . . . 8-10
Chef Operating Tips . . . . . . . . . . . . . . . . . . . . 11
SECTION 3 • Cleaning and Maintenance . . 12-13
SECTION 4 • Cooking Guideline
Product Index . . . . . . . . . . . . . . . . . . . . . . . . . 14
Oven Preheating Instructions . . . . . . . . . . . . 14
Beef . . . . . . . . . . . . . . . . . . . . . . . . . . . . . . 15-25
Veal . . . . . . . . . . . . . . . . . . . . . . . . . . . . . . . . . 26
Lamb . . . . . . . . . . . . . . . . . . . . . . . . . . . . . 27-28
Pork . . . . . . . . . . . . . . . . . . . . . . . . . . . . . . 29-34
Processed Meats . . . . . . . . . . . . . . . . . . . . . . . 35
Poultry . . . . . . . . . . . . . . . . . . . . . . . . . . . . 36-44
Fish . . . . . . . . . . . . . . . . . . . . . . . . . . . . . . 45-47
Miscellaneous . . . . . . . . . . . . . . . . . . . . . . 48-60
SECTION 5 • Smoker Operation
General Operation — Smokers
Control Panel and Operation . . . . . . . . . . . . . 62
Cooking/Smoking/Holding Procedures . . . . 63
Smoking Times . . . . . . . . . . . . . . . . . . . . . . . . 64
Smoking Procedure Options . . . . . . . . . . . . . 65
Care and Cleaning . . . . . . . . . . . . . . . . . . . . . 65
SECTION 6 • Cooking & Smoking Guidelines
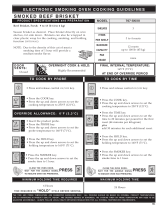
Smoked Beef Brisket . . . . . . . . . . . . . . . . . . . . 66
Smoked Beef Tongue . . . . . . . . . . . . . . . . . . . 66
Smoked Fresh Hams . . . . . . . . . . . . . . . . . . . . 67
Smoked Pork Ribs . . . . . . . . . . . . . . . . . . . . . 67
Smoked Duck . . . . . . . . . . . . . . . . . . . . . . . . . 68
Smoked Turkey . . . . . . . . . . . . . . . . . . . . . . . . 68
Smoked Fish Fillets . . . . . . . . . . . . . . . . . . . . 69
Smoked Salmon, Whole . . . . . . . . . . . . . . . . . 69
Smoked Shrimp . . . . . . . . . . . . . . . . . . . . . . . 70
Cold Smoked Salmon . . . . . . . . . . . . . . . . . . . 71
SECTION 7 • Food Holding and Sanitation
Food Holding - Function & Value . . . . . . . . . 72
General Holding Guidelines . . . . . . . . . . . . . 72
General Holding Cabinet Operation . . . . . . . 73
Holding Temperature Range . . . . . . . . . . . . . 73
Sanitation and Handling . . . . . . . . . . . . . . . . 74
Food Safety Guidelines . . . . . . . . . . . . . . . . . 75

SECTION 1 • LOW TEMP E RATU R E CO O KI N G I N TROD U CT IO N
1.
Welcome to the
cost saving convenience
of Low Temperature Cooking.
In 1968, Alto-Shaam invented the first
automatic, commercial cook and hold oven
featuring the principle of Halo Heat. The
heating method provided by Halo Heat low
temperature cooking and holding ovens
consists of an electric thermal cable that
encircles the entire cooking and holding
chamber. This creates a gentle blanket or
HALO of radiant heat — surrounding food
with a consistent and uniform temperature
with no air movement inside the oven
compartment. This gentle heating concept
cooks at low temperatures and at a high
level of humidity to preserve product
moisture, flavor, and nutrition. Halo Heat
ovens are designed to convert automatically
from a cooking temperature to a holding
temperature where the product can remain
until it is ready to be served.
Halo Heat is an entirely different system
of cooking. Utilizing this uniform heat
source, Halo Heat dramatically reduces
meat shrinkage; provides natural enzyme
(aging) action for more tender, flavorful
meat; and preserves natural juices along
with nutritional values in all foods. Halo
Heat cooking reduces energy cost, cuts back
on labor and handling and solves kitchen
space problems. There is no mechanical
ventilation or oven hood necessary in most
areas so the ovens can be moved wherever
they are needed.
Read this booklet carefully. Halo Heat is
a cooking system that requires minimal care
once you have learned the basic principles.
For best results with many products, we
recommend you start your cooking cycle the
evening before — for serving the next day.
In many areas, off-peak power rates are also
lower at night.
If anything you cook in a Halo Heat low
temperature cooking and holding oven
doesn’t meet your highest standards of
quality, please contact one of our food
service professionals for help. Usually, only
a minor change in procedure is required.
LOW TEMPERATURE
COOKING INTRODUCTION

SECTION 1 • LOW TEMP E RATU R E CO O KI N G I N TROD U CT IO N
2.
M
EAT AND NUTRITION
Meat plays a significant role in the diet;
therefore, one of the primary goals in food
preparation is proper nutrition. Meat is one of the
best sources of protein; is a rich source of B
vitamins such as thiamine, riboflavin, and niacin;
and includes fats, carbohydrates, minerals,
pigments, enzymes and water.
All of these elements are affected by cooking,
but over-heating destroys many of them. Low
temperature Halo Heat cooking helps preserve
unstable, heat-sensitive vitamins and nutrients.
A report on the Nutrient Analysis of Roast Beef,
conducted by the University of Wisconsin-Stout
in July 1971, concluded, “
…
it is apparent that
Alto-Shaam cooking method results in lower
moisture losses. Even after a 24 hour holding
period, the Alto-Shaam product is nutritionally
equal to, and possibly better than beef roast cooked
in a conventional oven and removed immediately
after cooking.”
Fat contributes greatly to the flavor of meat.
During the cooking process, fat not only melts, but
also changes chemically. With low temperature
cooking there is less chemical change and less fat
melt resulting in a more flavorful finished product.
The enzymes found in meat break down the
tissues and act as natural tenderizing agents. A
premium price is paid for aged meats where this
enzyme action has already started, however;
enzymes are destroyed by high temperatures.
Low temperature cooking does not destroy these
enzymes and, particularly in the hold cycle, creates
this natural chemical action to tenderize or age the
meat right in the oven. For this reason, it is
important to use fresh beef and it is essential to
allow the product to remain in the hold cycle for
at least the minimum amount of time suggested
in the individual procedures. The longer meat is
left in the hold cycle the more tender it becomes,
making the purchase of more expensive, aged
meat unnecessary.
Meat is seventy to seventy-five percent water.
High temperatures cause this water to evaporate
during cooking resulting in loss of product
moisture. Cooking at low temperatures in a Halo
Heat oven retains the maximum amount of water
content resulting in a juicier finished product and
an extended holding life.
Along with better nutrition, a more tender
finished product, less shrinkage and higher
moisture content, meat will not require the addition
of as much salt as needed with conventional
cooking methods. Natural flavors are preserved.
This is a significant factor in today’s health
conscious diets.
LOW TEMPERATURE COOKING INTRODUCTION
L OW T E M P E R AT U R E C O O K I N G FAC T S

SECTION 1 • LOW TEMP E RATU R E CO O KI N G I N TROD U CT IO N
3.
LOW TEMPERATURE COOKING INTRODUCTION
T O C A L C U L AT E M E AT S H R I N K A G E
STARTING WEIGHT (Weight of Raw Product)
-MI NUS: ENDING WEIGHT (Weight of Cooked Product)
E QUA L S: AMOUNT OF SHRINKAGE
AMOUNT OF SHRINKAGE (Total Weight L o s t i n C o o king)
÷ D I V I DED B Y: S TA RTING W E IGHT ( Weight o f R a w P r oduct)
E QUA L S: P E RCENT O F S H RINKAGE
E X A MPLE: Raw Beef Roast: 100 l b (45 k g )
Cooked Beef Roast: -95 l b (-43 k g )
= AMOUNT OF SHRINKAGE: 5.0 l b (2 kg)
SHRINKAGE DIVIDED BY
0.05 = 5% 0.05 = 5%
STARTING WEIGHT:
100 5.0 45 2.0
E QUA L S: PERCENT OF SHRINKAGE
L OW T E M P E R AT U R E C O O K I N G FAC T S
SHRINKAGE CONTROL AND COOKING TIME
THERE ARE TWO MAJOR FACTORS CONTROLLING
M
EAT SHRINKAGE OR COOKING LOSSES.
1. Temperature at which meat is cooked:
The higher the temperature at which meat is cooked
the more shrinkage will result. Over-cooked meat
also results in higher losses. Higher temperatures
and over-cooking draws moisture to the surface and
this moisture evaporates or drips out of the meat.
2. Internal temperature of the meat:
Like over-cooking, as meat is brought to a higher
internal temperature shrinkage is increased. For
these two reasons, it is suggested most cuts of red
meat be cooked at 250°F (121°C) and that all cooking
be based on internal product temperature. The use
of a thermometer is encouraged.
THERE ARE FOUR MAJOR FACTORS INVOLVED IN
DETERMINING COOKING TIMES FOR MEAT:
1. The degree of aging on the meat:
Aged meat will cook faster, shrink more, and has a
much shorter holding life than fresh meat.
2. Internal temperature before cooking:
Meat should be placed in a preheated oven directly
from a refrigerated temperature of 38° to 40°F
(3° to 4°C). Meat cooked from a frozen state will
require approximately one and one-half to two times
the normal cooking time. In addition, freezing
ruptures tissue cells creating additional moisture
loss during the cooking process and will result in
more shrinkage.
3. Desired degree of doneness:
The higher the degree of internal temperature
required, the longer the necessary cooking time.
Cooking times in this guideline are based on the
most popular internal product temperatures.
4. Quantity and quality of product.
PREVENTING BACTERIA GROWTH
The surface of raw meat may become contaminated
in processing, handling by the butcher or chef, or by
other means. Food contamination can also be caused
by unsanitary personal hygiene and work habits,
unclean slicers, knives, and probes, or by faulty
operational procedures. It is important, therefore, that
sanitary procedures be followed at all times during
food preparation and handling. This is your main
protection in guarding against food contamination. For
additional information see the Cleaning and
Maintenance section of this manual.

SECTION 1 • LOW TEMP E RATU R E CO O KI N G I N TROD U CT IO N
4.
LABOR AND EQUIPMENT COST REDUCTION
Halo Heat ovens are easy to operate and maintain. After the raw product is placed in the oven and the
controls are set, there is no need to check, stir, or adjust the time or the temperature. Minimal time is spent
attending the product during cooking. This advantage, combined with the automatic conversion to the hold
cycle, frees key personnel to concentrate on other tasks including final product and presentation.
When cooking in a Halo Heat oven at a
temperature of 250°F (121°C), outside venting and
expensive exhaust hoods are not necessary in
most areas. Kitchens remain cooler, lowering
energy costs by reducing the exchange of heated
air. Because the ovens do not need outside
venting, they can be put almost anywhere — in
the corner of the kitchen, on a buffet line, or in a
banquet room. The ovens can also be built into a
counter or to save space, can be stacked in
combination with another Halo Heat oven or
holding cabinet of the same or similar
dimensions.
Cooking at low temperatures also reduces
cleaning time. Most food does not normally
carbonize or burn on the interior of the oven.
LOW TEMPERATURE COOKING INTRODUCTION
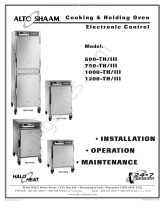
500-TH SERIES 750-TH SERIES 1000-TH SERIES 1000-TH SERIES
SINGLE COMPARTMENT SINGLE COMPARTMENT SINGLE COMPARTMENT DOUBLE COMPARTMENT
40 lb (18 kg) Capacity 100 lb (45 kg) Capacity 120 lb (54 kg) Capacity 120 lb (54 kg) Capacity
Stackable Design Stackable Design Stackable Design Per Compartment

SECTION 1 • LOW TEMP E RATU R E CO O KI N G I N TROD U CT IO N
5.
LOW TEMPERATURE COOKING INTRODUCTION
M
A N U A L C O O K & H O L D O V E N — O P T I O N S & A C C E S SO R I E S
1000-TH-I 1000-TH-II 1000-TH-II SPLIT 750-TH-II 500-TH-II
DESCRIPTION
BUMPER FULL PERIMETER 5005103 5005103 5005103 5004861 5006782
CARVING HOLDER P
RIME RIB
HL-2635 HL-2635 HL-2635 HL-2635 HL-2635
4459 4459 4459 4459 —
CASTERS, STEM
2
R
IGID
, 2 S
WIVEL W
/B
RAKE
5
"
D
IA
:— 5004862 5004862 5004862 5004862
RIGID (EACH) 3
-1/2"
DIA: CS-25674 —— ——
SWIVEL W/BRAKE (EACH) 3
-1/2"
DIA: CS-25675 —— ——
DOOR LOCK with KEY E
ACH HANDLE
LK-22567 LK-22567 LK-22567 LK-22567 LK-22567
DRIP PAN WITH DRAIN 14824 14824 14824 14831 14813
LEGS, 6" (ONE SET OF 4) FLANGED 5004863 5004863 5004863 5004863 5004863
PAN GRID, WIRE 18" X 26" PAN INSERT PN-2115 PN-2115 PN-2115 PN-2115 —
SECURITY PANEL CONTROL COVER
•INCLUDES PANEL KEY LOCK 5005776 5005776 5005776 5004750 5006787
SHELF S
TAINLESS STEEL FLAT WIRE
SH-2325 SH-2325 SH-2325 SH-2324 SH-2326
S
TAINLESS STEEL RIB RACK
SH-2773 SH-2773 SH-2773 SH-2743 —
STACKING HARDWARE ——5004864 5004864 5004864
STEAMSHIP OR CAFETERIA ROUND
WITH ATTACHED PAN
SMOKER OPTIONS A ND MANUAL MANUAL
ACCESSORIES DESCRIPTION 767-SK 1767-SK
BUMPER FULL PERIMETER 5004861 5004861
CARVING HOLDER PRIME RIB HL-2635 HL-2635
4459 4459
CASTERS, 5" (
ONE SET OF 4)
2 RIGID, 2 SWIVEL W/BRAKE 5004862 INCLUDED
DOOR LOCK WITH KEY EACH HANDLE LK-2763 LK-2763
DRIP PAN WITH DRAIN 14831 14831
LEGS, 6" (ONE SET OF 4) FLANGED 5004863 5004863
PAN GRID, WIRE 18" X 26" PAN INSERT PN-2115 PN-2115
SECURITY PANEL CONTROL COVER
INCLUDES PANEL KEY LOCK 5004750 5004750
SHELVES STAINLESS STEEL FLAT WIRE SH-2324 SH-2324
STAINLESS STEEL RIB RACK SH-2743 SH-2743
STACKING HARDWARE
767-SK OVER 767-SK, 750-TH-II, OR 750-S 5004864 —
WOOD CHIPS (20 lb BULK PACK) Apple WC-22543 WC-22543
Cherry WC-22541 WC-22541
Hickory WC-2829 WC-2829
Sugar Maple WC-22545 WC-22545
THE TOTAL WEIGHT OF WOOD CHIP BULK
PACKS MAY VARY DUE TO HIGH MOISTURE
CONTENT WHEN PACKAGED
.
1000-TH-II
SPLIT WITH 1000-S
750-TH-II
WITH 750-TH-II, 767-SK OR 750-S
500-TH-II
WITH 500-TH-II OR 500-S

SECTION 2 • OP E RATI O N
6.
OPERATION
OVEN CHARACTERISTICS
The oven is equipped with a special, low-heat-
density, heating cable. Through the Halo Heat
®
concept, the heating cable is mounted against the
walls of the cooking and holding compartment to
provide an evenly applied heat source, controlled
by an oven sensor. The design and operational
characteristics of the unit eliminates the need for a
moisture pan or a heat circulating fan. Through
even heat application, the food product is cooked
evenly and provides the ability to hold foods for
longer periods of time.
START-UP
1. Before operating the oven, clean both the
interior and exterior of the unit with a damp
cloth and any good commercial detergent at
the recommended strength. Rinse surfaces by
wiping with a sponge and clean warm water to
remove all detergent residue. Wipe dry with a
clean cloth or air dry.
2. Wipe door g askets and control panel dry with
a soft cloth.
3. Clean and install the oven side racks, oven
shelves, and external drip tray. Shelves are
installed with curved edge toward the back
of the oven. Insert the drip pan on the interior
bottom surface of the oven.
4. Before operating the unit with product,
become familiar with the operation of the
controls. Read the following "Control
Description" and "Operation" section of this
cooking guide and begin by operating the
various control functions.
AT NO TIME SHOULD THE INTERIOR OR
EXTERIOR BE STEAM CLEANED, HOSED
DOWN, OR FLOODED WITH WATER OR
LIQUID SOLUTION OF ANY KIND. DO NOT
USE WATER JET TO CLEAN.
SEVERE DAMAGE OR ELECTRICAL HAZARD
COULD RESULT.
WARRANTY BECOMES VOID IF APPLIANCE IS FLOODED.

SECTION 2 • OP E RATI O N
7.
OV E N C O M PA RT M E N T C O N T R O L PA N E L I D E N T I F I C AT I O N
1. Press oven POWER SWITCH 쐄 “O N.”
• POWER “ON” INDICATOR SWITCH will illuminate and will remain lit as long as the power switch
is in the “ON” position.
2. Set “HOL D” thermostat 쐇 to required holding temperature.
• HOLDING INDICATOR LIGHT will illuminate as the holding thermostat calls for heat.
This process will continue as long as the Power Switch is in the “ON” position and holding
thermostat is activated.
3. Set “COO K” thermostat 쐋 to required cooking temperature.
4. Activate the “COOK” thermostat to preheat the oven by turning the “COOKIN G” timer 쐏 clockwise.
• COOKING INDICATOR LIGHT and the HOLDING INDICATOR LIGHT will alternately illuminate
as each thermostat calls for heat. This process will continue until the cooking timer cycles or is
turned to the “OFF” position.
I
o
I
o
OPERATION
TEMPERATURE GAUGE 쐃 will indicate the
air temperature inside the oven compartment.
HOLDING INDICATOR LIGHT COOKING INDICATOR LIGHT POWER “ON” INDICATOR SWITCH
햶
햳
HOLD THERMOSTAT
햴
COOK THERMOSTAT
햵
COOKING TIMER
햲

SECTION 2 • OP E RATI O N
8.
OPERATION
1. PREPARE OVEN FOR COOKING
A. Insert and adjust the required number of
s
helves inside the cooking compartment.
Place the curved edge of the shelf toward
the back of the oven.
B. Adjust the inside door vents as indicated in
the individual cooking procedure selected.
C. Insert drip pan directly on the bottom surface
of the oven compartment.
2. PREHEAT OVEN
A. Press power switch 쐄 “
ON.”
B. Set the HOLD thermostat 쐇 to the required
holding temperature.
C. Set the COOK thermostat 쐋 to the required
cooking temperature.
D. Turn the timer knob 쐏 clockwise to activate
the COOK thermostat.
E. Allow oven to preheat for 45 minutes.
3. PREPARE PRODUCT FOR COOKING
A. Refer to individual cooking instructions.
4. LOAD PRODUCT ON SHELVES
A. Refer to individual cooking instructions.
DO
NOT overload the oven.
B. Most meat products are cooked directly on
wire shelves. For many products, the use of
pans is not recommended.
5. CLOSE DOOR
A. Keep door closed during the cooking cycle
6. RESET COOKING TIMER
FOR CORRECT NUMBER OF HOURS.
A. To set time, turn the timer knob 쐏 past the
required number of hours then immediately
bring it back to the correct setting.
B. Refer to individual cooking instructions for
length of time necessary to cook.
C. When timer cycles to the “
OFF ” position,
the temperature automatically lowers to
the selected HOLD temperature.
D. The product will continue to cook as the oven
temperature lowers to the selected holding
temperature and must remain in the oven, at
the selected HOLD temperature, for the
minimum number of hours indicated in the
individual cooking instructions.
7. OVERNIGHT COOK AND HOLD
A. For maximum product tenderizing and to
reduce labor during peak preparation hours,
overnight cook and hold is highly
recommended for many products.
Refer to individual cooking instructions.
CONTINUED
COOKING and HOLDING PROCEDURES — MANUAL OVENS

SECTION 2 • OP E RATI O N
9.
OPERATION
8. DETERMINING IF PRODUCT
IS SUFFICIENTLY COOKED
A. Allow COOK timer to cycle to the
“OF F” position.
B. Before opening the oven door, leave the
product in the HOLD cycle for a minimum of
one hour. This time period will allow the
oven temperature to decrease from the COOK
setting to the selected HOLD temperature.
During this one hour period, the product will
continue to cook.
C. Insert a thermometer into the center of the
product to determine if the correct internal
temperature has been reached.
R E D M E AT :
RARE: 130° to 135°F
(54° to 57°C)
MEDIUM: 140° to 145°F
(60° to 63°C)
WELL: 155° to 160°F
(66° to 71°C)
D. When following the procedures in the
individual product cooking instructions,
additional cooking time should not be
necessary. If, however, the required internal
product temperature has not been reached
after the product has remained in the HOLD
cycle for the one hour minimum time period,
additional cooking time may be added.
Use the same COOK temperature set for the
original cooking cycle until the correct
internal temperature has been reached.
In the United States, FDA food code
requires products such as red meat to
remain in “HOLD” for a specified time
period. This holding time requirement
i
s based on the internal product
temperature desired for the finished
product and includes the one hour
time period while the oven decreases
from the cooking temperature to the
holding temperature and the product
continues to cook.
COOKING and HOLDING PROCEDURES — MANUAL OVENS
INTERNAL PRODUCT
TEMPERATURE
TI ME * IN HOLD CYCLE
R
EQU IR ED BY FOO D CODE
130°F (54°C) 1 HOUR, 52 MINUTES
131°F (55°C) 1 HOUR, 29 MINUTES
133°F (56°C) 56 MINUTES
135°F (57°C) 36 MINUTES
136°F (58°C) 28 MINUTES
138°F (59°C) 18 MINUTES
140°F (60°C) 12 MINUTES
142°F (61°C) 8 MINUTES
144°F (62°C) 5 MINUTES
145°F (63°C) 4 MINUTES
147°F (64°C) 2 MINUTES, 14 SECONDS
149°F (65°C) 1 MINUTES, 25 SECONDS
151°F (66°C) 54 SECONDS
153°F (67°C) 34 SECONDS
155°F (68°C) 22 SECONDS
157°F (69°C) 14 SECONDS
158°F (70°C) 0 SECONDS
*HOLDING TIME MAY INCLUDE POST-OVEN HEAT RISE

SECTION 2 • OP E RATI O N
10.
OPERATION
COOKING and HOLDING PROCEDURES — MANUAL OVENS
9. R E H E AT I N G
A. Any over production must be removed
from the oven, wrapped, rapidly chilled,
and refrigerated.
B. Product can be removed from refrigerator,
returned to the oven, and reheated the
next day.
C. Products must be reheated at a temperature
range of 250° to 275°F (121° to 135°C). Refer
to individual cooking instructions for the
correct thermostat setting for the product
being reheated.
D. Length of time necessary to reheat a product
depends on the type of product and the
quantity to be reheated. Time should be
based on internal product temperature.
Use a pocket thermometer to determine
the internal product temperature of the
reheated product.
United Sates food code requirements
indicate cooked foods that have been
cooled, followed by reheating for hot
food holding, must be reheated to
165°F (74°C). The temperature of
165°F (74°C) must be maintained for
a period 15 seconds.
Always follow federal and local health
(hygiene) codes for the time and internal
temperature required for reheating products.
10. C A R E A N D C L E A N I N G
A. Clean interior oven cavity, wire shelves, and
drip pan daily, at the end of each cook and
hold cycle.
B. Refer to Care and
Cleaning instructions
in Section 3.

SECTION 2 • OP E RATI O N
11.
OPERATION
C H E F O P E R AT I N G T I P S
1
. For cooking specific products, refer to
individual cook and hold instructions.
2. To set time, turn the timer knob past the
required number of hours, then immediately
bring it back to the correct setting.
3. When cooking at 250°F (121°C), it takes
approximately one hour for the cooking
temperature to decrease to the selected
holding temperature. During this one hour
time period, the product will continue to cook.
4. The cooking times in this guide are based on
meat taken directly from a refrigerated
temperature of 38° to 40°F (3.3° to 4.4°C), and
placed in a preheated oven. Adjustments must
be made for cooking products at other than
refrigerated temperatures.
5. It is recommended the oven door remain
closed during the cooking cycle. Opening the
door will only increase the length of time
necessary to cook the product.
6. Puncturing an item with any sharp instrument
may introduce bacteria inside the product.
Avoid using a fork to handle products, and
always use standard sanitary methods when
handling any food item.
7. Use a thermometer to check the internal
temperature of a product. Be certain to
sanitize the thermometer before each use.
8. Aged meat will cook faster, shrink more, and
cannot be held as long as fresh meat. Because
of the tenderizing capabilities of the oven, aged
meat or tenderizing agents such as M.S.G. are
not necessary, and are not recommended.
9. When cooking full loads, never cook below the
second shelf spacing from the bottom of the
oven compartment.
10. Fully clean the oven interior, drip pan, shelves,
and side racks on a daily basis.
11. Since there is no air
movement inside the
Halo Heat
®
low
temperature cooking and
holding oven, condensation will
form on the inside of the door during
operation and may leak out of the oven door
vents. This is a normal operating condition,
however; any condensation spilling on the
floor should be periodically wiped as a safety
precaution. There is an External Drip Tray
included as standard with most ovens.
12. Drip pan overflow is a condition caused by
cooking some cuts of beef to an internal
temperature in excess of 130°F (54°C). The
External Drip Tray will help alleviate some of
this overflow problem. There is also an extra
large drip pan available as an option for the
1000-TH series ovens.
13. Overflow may also be caused by overloading
the oven compartment. DO NOT OVERLOAD
THE OVEN. Follow the recommended load
capacities listed in each individual procedure.
14. For best results, many products should be
cooked on an overnight cook-and-hold basis.
Consult individual procedures for this
recommendation.
The Alto-Shaam staff includes corporate
executive chefs who welcome questions.
You are invited to contact anyone on our
staff by phone (800.558. 8744) or e-mail
through the Contact Us section of our
web site (www.alto-shaam.com) for help
with any cook and hold procedure.
N
E
E
D
SO
ME
H
E
L
P
?

CLEANING & MAINTENANCE
SECTION 3 • CL E AN I NG & MA I NT E NA NC E
12.
PROTECTING STAINLESS STEEL SURFACES
It is important to guard against
corrosion in the care of
stainless steel surfaces.
Harsh, corrosive, or
inappropriate chemicals can
completely destroy the
protective surface layer of stainless steel. Abrasive
pads, steel wool, or metal implements will abrade
surfaces causing damage to this protective coating
and will eventually result in areas of corrosion.
Even water, particularly hard water that contains
high to moderate concentrations of chloride, will
cause oxidation and pitting that result in rust and
corrosion. In addition, many acidic foods spilled
and left to remain on metal surfaces are
contributing factors that will corrode surfaces.
Proper cleaning agents, materials, and
methods are vital to maintaining the appearance
and life of this appliance. Spilled foods should be
removed and the area wiped as soon as possible
but at the very least, a minimum of once a day.
Always thoroughly rinse surfaces after using a
cleaning agent and wipe standing water as quickly
as possible after rinsing.
CLEANING AGENTS
Use non-abrasive cleaning products designed for use
on stainless steel surfaces. Cleaning agents must be
chloride-free compounds and must not contain
quaternary salts. Never use hydrochloric acid
(muriatic acid) on stainless steel surfaces. Always use
the proper cleaning agent at the manufacturer's
recommended strength. Contact your local cleaning
supplier for product recommendations.
CLEANING MATERIALS
The cleaning function can usually be accomplished
with the proper cleaning agent and a soft, clean
cloth. When more aggressive methods must be
employed, use a non-abrasive scouring pad on
difficult areas and make certain to scrub with the
visible grain of surface metal to avoid surface
scratches. Never use wire brushes, metal scouring
pads, or scrapers to remove food residue.
CLEANING AND PREVENTIVE MAINTENANCE
CONTINUED

CLEANING & MAINTENANCE
SECTION 3 • CL E AN I NG & MA I NT E NA NC E
13.
The cleanliness and appearance of this equipment will contribute considerably to operating
efficiency and savory, appetizing food. There is an important relationship between
c
leanliness and food flavor and aroma. Good equipment that is kept clean works
better and lasts longer.
Under normal circumstances, this oven should provide you with long and trouble-
free service. There is no preventative maintenance required, however, the following
Equipment Care Guide will maximize the potential life and trouble-free operation of this oven.
1. CLEAN DAILY
Disconnect the oven from the power source.
Remove all detachable items such as wire
shelves, side racks, and drip pans. Clean these
items separately. Clean the interior metal
surfaces of the oven with a damp, clean cloth
and any good commercial detergent or grease
solvent at the recommended strength. Use a
plastic scouring pad or oven cleaner for
difficult areas. Rinse carefully to remove all
residue and wipe dry.
NOTE: Avoid the use of
abrasive cleaning
compounds, chloride
based cleaners, or
cleaners containing
quaternary salts.
Never use hydrochloric
acid (muriatic acid) on stainless steel.
Always follow appropriate state or local
health (hygiene) regulations regarding
all applicable cleaning and sanitation
requirements for equipment.
2. CLEAN THE EXTERIOR OF THE CABINET
WITH A STAINLESS STEEL POLISH.
To help maintain the protective film coating on
polished stainless steel, clean the exterior of the
cabinet with a cleaner recommended for
stainless steel surfaces. Spray the cleaning
agent on a clean cloth and wipe with the grain
of the stainless steel.
3. CHECK OVERALL CONDITION
OF THE OVEN ONCE A MONTH.
Check the oven once a month for physical
damage and loose screws. Correct any
problems before they begin to interfere with the
operation of the oven.
4. CHECK THE COOLING FAN
IN THE OVEN CONTROL AREA.
While the oven is warm, check that the cooling
fan in the oven control area is functioning.
The fan is located on the back of the unit,
toward the top.
AT NO TIME SHOULD THE INTERIOR OR
EXTERIOR BE STEAM CLEANED, HOSED
DOWN, OR FLOODED WITH WATER OR
LIQUID SOLUTION OF ANY KIND. DO NOT
USE WATER JET TO CLEAN.
SEVERE DAMAGE OR ELECTRICAL HAZARD
COULD RESULT.
WARRANTY BECOMES VOID IF APPLIANCE IS FLOODED.

SECTION 4 • BE E F
14.
COOKING GUIDELINES
BE E F
Beef Brisket . . . . . . . . . . . . . . . . . . . . . . . . . . .15
Beef Short Ribs . . . . . . . . . . . . . . . . . . . . . . . .16
Beef Striploin . . . . . . . . . . . . . . . . . . . . . . . . .17
Corned Beef . . . . . . . . . . . . . . . . . . . . . . . . . . .18
Hamburgers . . . . . . . . . . . . . . . . . . . . . . . . . .19
Prime Rib (#109) . . . . . . . . . . . . . . . . . . . . . . .20
Prime Rib, Special . . . . . . . . . . . . . . . . . . . . . .21
Ribeye Roll . . . . . . . . . . . . . . . . . . . . . . . . . . .22
Beef Round . . . . . . . . . . . . . . . . . . . . . . . . . . .23
Beef Round,
CAFETERIA/STEAMSHIP . . . . . . . . . . .24
Tenderloin . . . . . . . . . . . . . . . . . . . . . . . . . . . .25
Veal Loin . . . . . . . . . . . . . . . . . . . . . . . . . . . . .26
L A MB
Lamb, Leg . . . . . . . . . . . . . . . . . . . . . . . . . . . .27
Lamb Racks (Frenched) . . . . . . . . . . . . . . . . .28
P ORK
Ham, Fresh . . . . . . . . . . . . . . . . . . . . . . . . . . .29
Ham, Cured & Smoked . . . . . . . . . . . . . . . . . .30
Pork Chops . . . . . . . . . . . . . . . . . . . . . . . . . . .31
Pork Loin . . . . . . . . . . . . . . . . . . . . . . . . . . . . .32
Pork Shoulder . . . . . . . . . . . . . . . . . . . . . . . . .33
Pork Ribs . . . . . . . . . . . . . . . . . . . . . . . . . . . . .34
P ROC E SSE D ME ATS
Sausage . . . . . . . . . . . . . . . . . . . . . . . . . . . . . .35
P OU LTRY
Chicken Breasts . . . . . . . . . . . . . . . . . . . . . . . .36
Chicken, Pieces & Halves . . . . . . . . . . . . . . . .37
Chicken, Whole . . . . . . . . . . . . . . . . . . . . . . . .38
Chicken, Fried
TWO-STEP METHOD . . . . . . . . . . . .39
Cornish Hens . . . . . . . . . . . . . . . . . . . . . . . . .40
Duck, Whole . . . . . . . . . . . . . . . . . . . . . . . . . .41
Turkey, Whole . . . . . . . . . . . . . . . . . . . . . . . . .42
Turkey Breast . . . . . . . . . . . . . . . . . . . . . . . . .43
Turkey Roll . . . . . . . . . . . . . . . . . . . . . . . . . . .44
F ISH
Fish, Baked FILLETS . . . . . . . . . . . . . . . . . . . . . .45
Salmon Steaks . . . . . . . . . . . . . . . . . . . . . . . . .46
Trout . . . . . . . . . . . . . . . . . . . . . . . . . . . . . . . .47
MISC E L L A N E OU S
Potatoes . . . . . . . . . . . . . . . . . . . . . . . . . . . . . .48
Quiche . . . . . . . . . . . . . . . . . . . . . . . . . . . . . . .49
Rice . . . . . . . . . . . . . . . . . . . . . . . . . . . . . . . . .50
Baked Egg Custard . . . . . . . . . . . . . . . . . . . . .51
Sheet Cake . . . . . . . . . . . . . . . . . . . . . . . . . . . .52
Cheese Cake . . . . . . . . . . . . . . . . . . . . . . . . . .53
Frozen Convenience Entrée
PANS . . . . . . . . . . . . . . . .54
Frozen Convenience Entrée
PORTIONED . . . . . . . . .55
Frozen Finger Foods . . . . . . . . . . . . . . . . . . . .56
Breakfast Sandwiches . . . . . . . . . . . . . . . . . . .57
Cookies . . . . . . . . . . . . . . . . . . . . . . . . . . . . . .58
Doughnuts . . . . . . . . . . . . . . . . . . . . . . . . . . . .59
Proofing Dough . . . . . . . . . . . . . . . . . . . . . . . .60
SMOKE D FOODS
Beef Brisket . . . . . . . . . . . . . . . . . . . . . . . . . . .66
Beef Tongue . . . . . . . . . . . . . . . . . . . . . . . . . . .66
Ham, Fresh . . . . . . . . . . . . . . . . . . . . . . . . . . .67
Pork Ribs . . . . . . . . . . . . . . . . . . . . . . . . . . . . .67
Duck . . . . . . . . . . . . . . . . . . . . . . . . . . . . . . . .68
Turkey . . . . . . . . . . . . . . . . . . . . . . . . . . . . . . .68
Fish Fillets . . . . . . . . . . . . . . . . . . . . . . . . . . . .69
Salmon, Whole . . . . . . . . . . . . . . . . . . . . . . . .69
Shrimp . . . . . . . . . . . . . . . . . . . . . . . . . . . . . . .70
Salmon, Cold Smoked . . . . . . . . . . . . . . . . . . .71
O V E N P R E H E A T I N S T R U C T I O N S
B E F O R E C O O K I N G P R O D U C T:
1 . Turn power switch “O N .”
2 . Set the HOLD thermostat to the required holding temperature.
3 . Set the COOK thermostat to the required cooking temperature.
4 . Turn the timer knob clockwise to activate the COOK thermostat.
5 . Allow oven to preheat until the COOK Indicator Light goes out.
C O O K I N G G U I D E L I N E I N D E X

Beef Brisket, Fresh: 9 to 13 lb (4 to 6 kg)
Season brisket and wrap individually in clear plastic wrap for cooking. Place wrapped brisket directly on wire shelves.
SECTION 4 • BEEF
15.
BEE F BRI S KET
5 0 0 S E R I E S 7 5 0 S E R I E S 1 0 0 0 S E R I E S
M O D E L S
NUMBER OF SHELVES
ITEMS PER SHELF
APPROXIMATE
MAXIMUM CAPACITY
PANS
165°F (73°C)
6 hours
24 hours
160°F
(71°C)
250°F
(121°C)
323
1 roast 3 to 4 roasts 2 to 3 roasts
3 roasts
up to 40 lb (18 kg)
6 to 8 roasts
up to 100 lb (45 kg)
6 to 9 roasts
up to 100 lb (45 kg)
none none none
The time and temperature are suggested guidelines only. All cooking should be based on internal product temperatures.
Due to variations in product quality, weight and desired degree of doneness, the cooking timer may need to be adjusted accordingly.
Always follow local health (hygiene) regulations for all internal temperature requirements.
P R O D U C T S P E C I F I C AT I O N S a n d P R E PA R AT I O N
S E T H O L D T H E R M O S TAT S E T C O O K T H E R M O S TAT
S E T C O O K I N G T I M E R
M I N I M U M H O L D I N G T I M E R E Q U I R E D M A X I M U M H O L D I N G T I M E
A D D I T I O N A L I N F O R M AT I O N • N O T E S
F I N A L I N T E R N A L P R O D U C T T E M P E R A T U R E
O V E R N I G H T C O O K & H O L D
TIME REQUIRED IN “HOLD” CYCLE BEFORE SERVING.
CAPACITIES ARE BASED ON U.S.
PAN SIZES. GASTRONORM PANS
MAY HOLD MORE OR LESS THAN
THE FOOD QUANTITIES INDICATED
.
P R E H E AT T H E O V E N
D O O R V E N T S : O N E - H A L F O P E N
Highly Recommended
20 minutes per pound for the first roast (44 minutes per kilogram)
plus
add 30 minutes for each additional roast.
COOKING GUIDELINES

Short Ribs: 10 to 12 oz. pieces
S
eason as desired. Place ribs side-by-side in pans.
For an overnight cook and hold, cover pans loosely with clear plastic wrap to retain additional
product moisture.
SECTION 4 • BEEF
16.
BEE F SHO RT RIB S
5 0 0 S E R I E S 7 5 0 S E R I E S 1 0 0 0 S E R I E S
M O D E L S
NUMBER OF SHELVES
ITEMS PER SHELF
APPROXIMATE
MAXIMUM CAPACITY
PANS
170° to 190°F (77° to 88°C)
6 hours
18 hours
160°F
(71°C)
250°F
(121°C)
33none
1 half-size sheet pan 1 full-size sheet pan 1 full-size sheet pan
3 half-size sheet pans 3 full-size sheet pans 4 full-size sheet pans
18" x 13" x 1"
(GN
1
/1: 530 x 325 x 20mm)
(NO SHELVES REQUIRED)
18" x 26" x 1"
(GN
2
/1: 530 x 650 x 20mm)
(NO SHELVES REQUIRED)
18" x 26" x 1"
(GN
1
/1: 530 x 325 x 20mm)
(ON WIRE SHELVES)
The time and temperature are suggested guidelines only. All cooking should be based on internal product temperatures.
Due to variations in product quality, weight and desired degree of doneness, the cooking timer may need to be adjusted accordingly.
Always follow local health (hygiene) regulations for all internal temperature requirements.
P
R O D U C T S P E C I F I C AT I O N S a n d P R E PA R AT I O N
S E T H O L D T H E R M O S TAT S E T C O O K T H E R M O S TAT
S E T C O O K I N G T I M E R
M I N I M U M H O L D I N G T I M E R E Q U I R E D M A X I M U M H O L D I N G T I M E
A D D I T I O N A L I N F O R M AT I O N • N O T E S
F I N A L I N T E R N A L P R O D U C T T E M P E R A T U R E
O V E R N I G H T C O O K & H O L D
TIME REQUIRED IN “HOLD” CYCLE BEFORE SERVING.
CAPACITIES ARE BASED ON U.S.
PAN SIZES. GASTRONORM PANS
MAY HOLD MORE OR LESS THAN
THE FOOD QUANTITIES INDICATED
.
P R E H E AT T H E O V E N
D O O R V E N T S : O N E - H A L F O P E N
MUST
do an overnight cook and hold.
3 hours for the first pan
plus
add 30 minutes for each additional pan.
COOKING GUIDELINES

Loin, Strip Loin, Short-Cut, Boneless: 8 to 12 lb (4 to 5 kg)
Season as desired. Place roasts directly on the wire shelves with fat side down. Place larger roasts toward the top of the
oven compartment.
SECTION 4 • BEEF
17.
BEE F STR I PLOIN
5 0 0 S E R I E S 7 5 0 S E R I E S 1 0 0 0 S E R I E S
M O D E L S
NUMBER OF SHELVES
ITEMS PER SHELF
APPROXIMATE
MAXIMUM CAPACITY
PANS
130°F (54°C) RARE
4 hours
12 hours
140°F
(60°C)
250°F
(121°C)
223
2 roasts 4 roasts 3 roasts
4 roasts
up to 40 lb (18 kg)
8 roasts
up to 100 lb (45 kg)
9 roasts
up to 100 lb (45 kg)
none none none
The time and temperature are suggested guidelines only. All cooking should be based on internal product temperatures.
Due to variations in product quality, weight and desired degree of doneness, the cooking timer may need to be adjusted accordingly.
Always follow local health (hygiene) regulations for all internal temperature requirements.
P R O D U C T S P E C I F I C AT I O N S a n d P R E PA R AT I O N
S E T H O L D T H E R M O S TAT S E T C O O K T H E R M O S TAT
S E T C O O K I N G T I M E R
M I N I M U M H O L D I N G T I M E R E Q U I R E D M A X I M U M H O L D I N G T I M E
A D D I T I O N A L I N F O R M AT I O N • N O T E S
F I N A L I N T E R N A L P R O D U C T T E M P E R A T U R E
O V E R N I G H T C O O K & H O L D
TIME REQUIRED IN “HOLD” CYCLE BEFORE SERVING.
CAPACITIES ARE BASED ON U.S.
PAN SIZES. GASTRONORM PANS
MAY HOLD MORE OR LESS THAN
THE FOOD QUANTITIES INDICATED
.
P R E H E AT T H E O V E N
D O O R V E N T S : O N E - H A L F O P E N
Optional
8 to 10 lb ROASTS (4 to 4,5 kg):
8 minutes per pound for the first roast
(18 Minutes per kilogram)
plus add 8 minutes for each additional roast
COOKING GUIDELINES
12 lb ROASTS (5 kg):
10 minutes per pound for the first roast
(22 Minutes per kilogram)
plus add 8 minutes for each additional roast

Corned Beef: 9 to 12 lb (4 to 5 kg)
Leave the corned beef in the original plastic bag and place the corned beef bag directly on the wire shelf.
SECTION 4 • BEEF
18.
COR N ED BE EF
5 0 0 S E R I E S 7 5 0 S E R I E S 1 0 0 0 S E R I E S
M O D E L S
NUMBER OF SHELVES
ITEMS PER SHELF
APPROXIMATE
MAXIMUM CAPACITY
PANS
175°F (79°C)
If desired, corn beef can be removed from the bag and wrapped in clear plastic wrap for cooking.
6 or more hours
24 hours
160°F
(71°C)
250°F
(121°C)
223
2 roasts 3 to 4 roasts 2 to 3 roasts
4 roasts
up to 40 lb (18 kg)
6 to 8 roasts
up to 100 lb (45 kg)
6 to 9 roasts
up to 100 lb (45 kg)
none none none
The time and temperature are suggested guidelines only. All cooking should be based on internal product temperatures.
Due to variations in product quality, weight and desired degree of doneness, the cooking timer may need to be adjusted accordingly.
Always follow local health (hygiene) regulations for all internal temperature requirements.
P
R O D U C T S P E C I F I C AT I O N S a n d P R E PA R AT I O N
S E T H O L D T H E R M O S TAT S E T C O O K T H E R M O S TAT
S E T C O O K I N G T I M E R
M I N I M U M H O L D I N G T I M E R E Q U I R E D M A X I M U M H O L D I N G T I M E
A D D I T I O N A L I N F O R M AT I O N • N O T E S
F I N A L I N T E R N A L P R O D U C T T E M P E R A T U R E
O V E R N I G H T C O O K & H O L D
TIME REQUIRED IN “HOLD” CYCLE BEFORE SERVING.
CAPACITIES ARE BASED ON U.S.
PAN SIZES. GASTRONORM PANS
MAY HOLD MORE OR LESS THAN
THE FOOD QUANTITIES INDICATED
.
P R E H E AT T H E O V E N
D O O R V E N T S : O N E - H A L F O P E N
MUST
DO AN OVERNIGHT COOK AND HOLD.
20 minutes per pound for the first corned beef (44 minutes per kilogram)
plus
add 30 minutes for each additional corned beef.
COOKING GUIDELINES
/