Page is loading ...

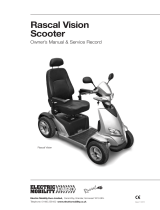
Ultralite 355 / 355XL Scooter
Owners Manual & Service Record
Electric Mobility Euro Limited, Canal Way, Ilminster, Somerset TA19 9DL
Telephone: 01460 258100 www.electricmobility.co.uk Issue 3: 05/08

Thank you for purchasing your UltraLite™ Vehicle. With proper care, your vehicle will give you loads of fun and
excitement. You will enjoy the freedom to go where you want, when you want, and to do what you want to do.
UltraLite Vehicles’ mission is to provide easy to use, convenient and portable mobility products to help you get
more out of your life. UltraLite Vehicles is a new division of Electric Mobility Corporation (EMC). Twenty years
ago, EMC introduced the revolutionary Rascal Scooter which changed the mobility industry because it was
more lightweight, portable, and versatile than conventional electric wheelchairs. Today, the Rascal is
recognised as the world leader in mobility vehicles.
Our new UltraLite is another revolutionary vehicle that is destined to change the way people get around like the
Rascal did in 1983. Lightweight, portable and powerful, this new electric convenience vehicle is so easy to use;
it just folds to go wherever you want it to go!
Please tell your friends about your wonderful new mobility vehicle. For free literature on the UltraLite Vehicle,
just call 01460-258100. Your satisfaction means everything to us. Information on our service and warranties
are spelled out throughout this manual. Please call us at 01460-258100 if you have any questions.
Sincerely,
President
Electric Mobility Euro Ltd offers these innovative lightweight scooters for convenient indoor and outdoor use.
They can be easily and quickly folded and dismantled for transporting in the boot of a car.
So long as your scooter is maintained and operated in accordance with this manual it should last for many
years, and provide you with freedom and independence.
Please read this manual thoroughly before using this scooter. If you have any doubts about warnings or
instructions, ask your dealer for an explanation. If at any time you feel you may not be able to control the vehi-
cle safely, do not drive, but consult your dealer for a solution.
If you think the scooter may be damaged, do not drive it but contact your dealer for advice.
We suggest that you keep this manual in a safe place. It contains essential information on the operation of the
scooter and includes the maintenance records.
2
2Ultralite 355 & 355XL Scooter Owner’s Manual & Service Record
Warning!
This manual contains important safety notices. Please take time to read and understand them. Ignoring
them may endanger you or others.

3
Contents Foreword 2
EMI Warning 4
Safety Information 5
Intended Use of Vehicle 5
Dealer Information 7
Features and layout 7
Accessories 8
Operating your Ultralite vehicle 8
Seat arms installation and adjustment 9
Control features 10
Free-wheel Lever 11
Rolling your vehicle 12
Tyres and wheels 12
Installing accessories 13
Driving the vehicle 14
Driving the vehicle - hazards 15
Learning to get around 16
Taking your vehicle along 18
Transporting your vehicle 19
Removing and reassembling your vehicle 20
Batteries and battery changing 21
Care of batteries 22
Disposal 22
355XL “Take apart system” 23
User maintenance 24
Servicing and maintenance 24
Engineer’s checklist 25
Care and maintenance 26
Troubleshooting 27
Limited Warranty 27
Technical Specification 28
Rules for Operating your Ultralite vehicle 29
Additional safety information 29
Frequently asked questions 30
Additional information 30
Brochure request 31
Warranty Card 31
Service log 33
Guarantee and warranty 34

4Ultralite 355 & 355XL Scooter Owner’s Manual & Service Record
EMI Warning
Electromagnetic Interference (EMI) From Radio Wave Sources
Powered motorised electric vehicles may be susceptible to electromagnetic interference (EMI), which is interfer-
ing electromagnetic energy (EM) emitted from sources such as radio stations, TV stations, amateur radio (HAM)
transmitters, two-way radio, and cellular phones. The interference (from radio wave sources) can cause the
powered vehicle to release its brakes, move by itself or move in unintended directions. It can permanently dam-
age the powered vehicle control system. The source of radiated EMI can be broadly classified into three types.
Hand-held portable transceivers (transmitters-receivers) with the antenna mounted directly on the transmit-
ting unit. Examples include: citizens band (CB) radios, “walkie-talkie”, security, fire and police transceivers,
mobile telephones and other personal communication devices.
Note: Some cellular telephones and similar devices transmit signals while they are ON, even when not being used.
Medium-Range mobile transceivers, such as those used in police cars, fire trucks, ambulances
and taxis. These usually have the antenna mounted on the outside of the vehicle.
Long-Range transmitters and transceivers, such as commercial broadcast transmitters (radio and
TV broadcast antenna towers) and amateur (HAM) radios.
Note: Other types of hand-held devices, such as cordless phones, laptop computers, AM/FM radios, TV sets,
CD players and cassette players, and small appliances such as electric shavers and hair dryers, are not likely to
cause problems to your powered vehicle.
Powered Vehicle Electromagnetic Interference (EMI)
Because EM energy rapidly becomes more intense as one moves closer to the transmitting antenna (source),
the EM fields from hand-held radio sources (transceivers) are of special concern. It is possible to unintentionally
bring high levels of EM energy very close to the powered vehicle control system while using these devices. This
can affect powered vehicle movement and braking. Therefore, the warnings listed below are recommended to
prevent possible interference with the control system of the powered vehicle.
Warning!
The following warnings listed below should reduce the chance of unintended brake release or powered
vehicle movement, which could result in serious injury.
• Do not operate hand-held transceivers (transmitters-receivers), such as citizen band (CB) radios, or turn
ON personal communication devices, such as cellular phones, while the powered vehicle is turned ON.
• Be aware of nearby transmitters, such as radio or TV stations, and try to avoid coming close to them.
• If unintended movement or brake release occurs, turn the powered vehicle OFF as soon as it is safe.
• Be aware that adding accessories or components, or modifying the powered vehicle, may make it more
susceptible to EMI (NOTE: There is no easy way to evaluate the overall immunity of the powered vehicle).
Report all incidents of unintended movement or braking to UltraLite Vehicles, and note whether there are
sources of EMI nearby.

5
Safety Information
Read this manual thoroughly before driving or operating the vehicle. This handbook is applicable for
all 355 and 355 XL Models.
© 2008 Electric Mobility Euro Ltd.
No liability is assumed with respect to the use of any information contained in this publication. While every pre-
caution has been taken in the preparation of this publication Electric Mobility Euro Ltd. assumes no responsibili-
ty for errors of omissions nor is any liability assumed for damages resulting from the use of information con-
tained in this publication. This publication, as well as the operational details described herein, is subject to
change without notice.
Intended use of the vehicle
This vehicle is designed for use by adults with a disability (up to the maximum recommended weight) who require
a light and easily transportable scooter that is ideal for indoor use as well as shopping and other visits. Model 355
scooters have been specifically designed to be quickly and easily folded for transportation by car.
The scooters are intended for use in the home, and for shopping areas and trips on reasonably paved areas.
Kerbs should be avoided, but the scooters can, with care, mount kerbs and small obstacles - see technical
specification for further information. Users could endanger themselves and others if they are not capable of
driving this scooter safely. Dealers will advise on the most suitable vehicle from the Electric Mobility range, but it
is up to users to ensure that they have the manual dexterity to drive the vehicle, adequate sight and hearing to
perceive danger in time, and can at all times operate the scooter safely in the expected conditions. If in doubt
we suggest you consult a healthcare professional or your nearest dealer for advice on the most suitable scoot-
er for your particular condition. Users should also regularly assess their ability to operate their vehicle safely.
The Model 355 scooters have small wheels to enable easy transportation; they should not be used on uneven,
rutted or potholed surfaces or on slippery grassy areas.
Safety Information
General Warnings
Warning ! The operation of scooters can endanger the life of the driver or third parties. Any driver should
always be fully capable of operating this vehicle safely.
Warning ! Sitting for long periods may increase the chance of thromboses or pressure sores. Users prone to
such conditions are advised to take medical advice.
Warning ! The Model 355 scooters have been designed and tested for drivers up to 220 lbs or 100 kgs. This
weight should never be exceeded.
Warning ! Front Basket. The basket mounted on the front has a weight limit of 10 lbs or 4.5 kgs. Do not
Within this manual there are important safety notices. They are clearly marked with the sign (left)
Make sure that you understand all these notices. If you have any doubt, phone your dealer.

6Ultralite 355 & 355XL Scooter Owner’s Manual & Service Record
exceed this as it could affect steering. Do not carry or attach anything to the handlebars or controls
as this could affect the driving safety.
Warning ! Passengers. Passengers, even children, should never be carried.
Warning ! Electromagnetic interference may affect the driving of this scooter:
• Do not operate devices such as CB radios or mobile phones while the vehicle is switched on.
• Avoid getting close to transmitter masts, such as television and radio stations.
• If your vehicle ever starts to operate by itself switch it off and report this to your Dealer.
Warning ! The operation of any scooter may affect sensitive electronic circuits such as alarm systems, garage
doors or automatic doors in shops.
Warning ! Do not attempt to open the battery vent plugs.
Driving
Warning ! Freewheel device. Before getting on the scooter, always check that the freewheel lever is in the
"Drive” Position. When the lever is in the Freewheel position there is no braking and the scooter
could run down a slope and cause injury or even death.
NEVER SIT ON THE SCOOTER WHEN IN FREEWHEEL.
Warning ! Tiller Lock. Before driving off, always check that the tiller is locked and secure.
Warning ! Seat Catch. Before driving off, always check that the seat catch is engaged, the front seat legs
are in their sockets and that the seat is locked and secure.
Warning ! Damage. Before driving off check the scooter for damage, particularly that which might affect the
steering, or the security of the seat.
Warning ! Battery Charge. Before driving off always check the battery indicator. If you are in any doubt,
ensure the batteries are fully charged before starting on a journey.
Warning ! Slopes. On steep slopes the scooter could topple over. Always try to avoid slopes and in particular
crossing a slope. If you have to cross a slope, take great care to avoid tipping. Never make sharp turns
on slopes. Never drive on slippery or icy slopes. Never back down a slope as your scooter could tip
over backwards. If you are not comfortable with the hill gradient, consider an alternative route.
Warning ! Kerbs. Because of the Model 355 has small wheels for ease of transportation, it should not be
driven up or down kerbs as this may cause the scooter to topple. Avoid kerbs and use access
ramps wherever possible. If you have to climb or descend a low kerb, always tackle it straight on.
Warning ! Speed. Turning at maximum speed might cause the scooter to topple over. Always slow down for turns.
Warning ! Stopping. If the scooter stops suddenly when turning, the scooter might topple. Try not to brake
when turning.
Warning ! Leaning Over. Do not lean sideways, as this could cause the scooter to topple.
Warning ! Escalators. Never drive this scooter onto an escalator as this could cause toppling and severe injury.
Warning ! Roads. Model 355 scooters are not for use on roads, apart from crossing roads at designated places.
Warning ! Sunlight. If the vehicle is left out in the sun, surfaces could become extremely hot. Always try to
park the vehicle in the shade.
Warning ! This vehicle is not suitable for use as a seat for an occupant when in a motor vehicle.

7
Dealer Information
For product information see serial number plate on the seat post under the seat.
Manufacturer
Electric Mobility Euro Limited
Canal Way, Ilminster, Somerset TA19 9DL
Company Registration in England No. 2419231
Features and Layout
A great deal of thought has gone into the design of your UltraLite Vehicle. Its 4-wheel design provides the
stability of much larger vehicles while the front dual wheels provide the manoeuverability of a 3-wheel vehicle. In
addition, the vehicle incorporates a convenient removable folding camp seat with adjustable width, folding arm
rests. A full technical specification for this model can be found later in this manual.
Figure 1 - Model 355 UltraLite Vehicle
This is your contact number
for service and support
Dealer Stamp
Telephone:
Email:
Product Model Number
Serial Number
Date of Purchase
Owner
Removable folding
camp seat
Removable battery pack
with power switch
Anti-tip wheels
Adjustable, fold
down tiller
Wire basket
Dual front wheels

8Ultralite 355 & 355XL Scooter Owner’s Manual & Service Record
Accessories
The following optional accessories are available to complement your riding enjoyment:
• Folding Basket • Head & Tail Lights
• Beverage “Caddy” • Seat Bag
• Lifting Harness
Instructions concerning these standard accessories are provided in this manual.
Operating your Ultralite vehicle
Adjusting Your Tiller
The tiller of your vehicle is uniquely designed to allow you to position it in a comfortable driving position. It can
be placed in its full upright position or folded down for transportation. Positioning the tiller is accomplished by
flipping the tiller lock lever located on the bottom of the T-bar.
Folded and upright positions are shown in Figures 2 and 3. For rider comfort, the tiller easily locks in any of five
positions using the tiller lock lever as shown in Figures 4 and 5.
Warning! Always make sure the tiller lock lever is in one of the locked positions and secure before
driving your vehicle.
Figure 2 - Folded position Figure 3 - Upright position
Figure 4 - Lever in Open Position Figure 5 - Lever in Locked Position

9
Seat arms installation and adjustment
Your UltraLite Vehicle may be equipped with Width Adjustable Folding Arms on the seat.
To install the arms
1. Loosen the Adjustment Knobs on the Arm Receiver under the rear of the seat (Figure 6).
2. Slide the square end of the Arm into the Arm Receiver and position the Arm at the desired width (Figure 7).
3. Firmly tighten the Adjustment Knobs to secure the arms.
The arms may be readjusted at any time by loosening the knobs and sliding the arms inward or outward and
re-tightening the knobs.
Armrest Adjustment
When getting seated on the scooter lift the armrest up.
When riding always have the armrest in the down position.
Avoid pinching fingers as you lower the armrest. Never drive
with the armrest up.
Figure 6 - Adjustment knob Figure 7 - Arm receiver
Figure 8 - Armrest in raised position
Warning! Never use the arms of the vehicle for transfers. The arms are designed for comfort and
convenience only and will not support your weight during transfers.
Be sure to tighten the adjustment knobs securely. To ensure that the user is sitting centrally, the armrests
should always be adjusted to be equidistant from the centre of the seat. Do not adjust the arms to more
than 69 cm wide.

10 Ultralite 355 & 355XL Scooter Owner’s Manual & Service Record
Control Features
Your controls are located on the handle bar dashboard. Control locations are shown in Figure 9.
Tiller Battery
1. Reverse control lever 7. Charger Connection
2. Speed dial 8. On/off switch
3. Battery Gauge 9. Battery Gauge
4. Forward control lever
5. On/off switch
6. Horn
On-off Switches
The ON-OFF Switches are in two locations. The main switch is located on the top of the battery pack at the
rear of the vehicle (Figure 10). The secondary switch is located facing the rider on the dashboard on the tiller.
To turn on your vehicle, toggle the main switch on the battery pack to the “ON” position. The battery gauge
needle should move to the right into the green bar area. (If the needle does not move refer to the troubleshoot-
ing section of this manual).
NEXT: Toggle the ON-OFF switch on the dashboard to the “ON” position. The switch should light and the
battery gauge needle should move to the right into the green bar area.
NOTE: If the main switch on the battery pack is not in the “ON” position, the dashboard switch and
the vehicle will not operate.
To turn off your vehicle, toggle the ON/OFF switch to the “OFF” position.
Battery Indicator Gauge
The Battery Indicator Gauges are located on the Battery Pack and on the dashboard. When your vehicle is
turned on, the needle on the gauges will move to the right over the green area of the indicator scale indicating
fully charged batteries. As the power decreases, the needles will move gradually to the left indicating power dis-
charge. When the needles move into the yellow area on the left side of the gauge, your batteries should be
charged (see Batteries and Battery Charging section of this manual). For maximum battery life, it is recommend-
ed that you charge your batteries before they are fully discharged (as indicated by the red portion of the gauge).
1
2
34
56
Figure 9 - Tiller control locations Figure 10 - Battery pack control locations
8
7
9

11
Speed Adjustment Dial
This allows you to pre-select your maximum desired speed. The dial selects different speed levels and can be
set anywhere between low and high speed. Turn the Speed Adjustment knob counter-clockwise towards
minimum for slow operation and clockwise towards maximum to increase your speed.
NOTE: When attempting to climb slopes, you will need to set the dial to a high speed setting.
Remember, the further clockwise you set your speed dial, the faster your vehicle will travel when the
engager finger lever is squeezed.
Finger Lever Control
The Finger Lever Control is located forward of the handlebar grips. Your speed for forward and reverse motion
is controlled by this lever. The right finger (black) lever moves your vehicle in a forward motion and also controls
the rate of speed by the proportional amount of pressure applied. Releasing the lever will return it to the neutral
position causing the vehicle to come to a gentle stop and automatically engage the parking brake.
The left finger (red) lever moves the vehicle in a reverse direction and controls the rate of speed by the
amount of pressure applied.
Freewheel Lever
When the vehicle is switched off the brakes are automatically engaged. This is called “Failsafe
Braking”. Also, if the batteries are flat, the brakes are applied.
There may be occasions where you may wish to move the vehicle without power. To do this there is
a Freewheel Device fitted.
• Make sure the ignition is switched off.
• Move the lever forward. The vehicle can now be pushed in Freewheel.
• Move the lever back to engage drive. The vehicle is now braked. This is the normal operating position.
IF YOU ARE NOT COMPLETELY SURE OF THIS
FEATURE CONTACT YOUR DEALER BEFORE
OPERATING THE SCOOTER.
The Free-Wheel Lever is located on the back right side of the
motor (Figure 11). Move the red release lever forward to
disengage the brakes. This will enable you to free wheel (roll)
the vehicle and push it around.
Warning! If you are not an accomplished outdoors powered vehicle driver, we strongly recommend that
you first practice in an open, safe area that’s free from traffic. We also recommend that you have a
companion with you who can assist you.
Figure 11 - Free-wheel Lever

12 Ultralite 355 & 355XL Scooter Owner’s Manual & Service Record
Freewheeling (Rolling) Your UltraLite Vehicle
Free-wheeling is used when you want to move (roll) your unit without riding on it. If you want to free wheel your
vehicle, there are two ways to accomplish this:
1. By disengaging the parking brake, or
2. Lifting the front of the unit and pulling it on its anti-tip wheels at the rear of the vehicle.
To disengage the parking brakes with the power “OFF”, simply move the free-wheeling lever located on the right
side of the motor upward until it “clicks”. You can easily reach it without having to take the unit apart. When you are
finished moving your vehicle, always remember to move the free wheeling lever to the down position until it “clicks”.
Rolling your vehicle
Your vehicle is equipped with a safety clutch which keeps the vehicle from rolling too fast. The clutch activates
at the speed of a brisk walk. You may feel the clutch activate as you are pushing the vehicle - this is normal -
simply slow your pace to deactivate the clutch. This feature reduces uncontrolled vehicle rollaway.
Tyres and wheels
Your Model 355XL scooter is fitted with solid foam filled tyres which co not need
inflating. If these tyres appear to be damaged, they should be replaced. You
should not attempt to replace the wheels and tyres yourself but you should
contact your dealer who will replace the tyre and also check the scooter has not
suffered any damage.
Warning! If the freewheel device is in “freewheel” the braking is disabled. Never select the freewheel
device if the scooter is on a slope or could be pushed onto a slope.
Warning! Never sit on your vehicle with the parking brake in the disengaged free-wheel position. When
the parking brake is disengaged, you will roll if pushed or on an incline. Do not park your vehicle on a
incline with the parking brake disengaged. If your vehicle is in the free wheel mode when you pull the speed
control, the vehicle will not operate. To correct this, make sure unit is in “off” position and move the free-
wheel lever down to the engaged position until it “clicks”. Turn your vehicle on to operate.
General: If you are able to push your vehicle, the free-wheel lever is on, and the parking brake is disengaged.
Figure 12 - Foam filled tyres

13
Installing Accessories
Your UltraLite Vehicle has the following optional accessories that can be installed by the user before using.
These include:
• Folding Basket
• Headlight & Taillight
• Beverage “Caddy”
• Seat Bag
Instructions to install these accessories are provided in the following.
Installing the Folding Basket
The Folding Basket accessory can be installed in place of the existing basket as a space-saving alternative that
can be easily expanded (unfolded) when needed or collapsed (folded) to improve front end clearance of the
vehicle. The Folding Basket is installed onto the Basket Mount on the front of the tiller.
To unfold the basket:
• Flip the latch at the top up
• Pull out front and sides
• Flip bottom down until it latches with front
To fold:
• Lift bottom up towards rear
• Collapse front and sides so that they flatten against front of tiller
• Secure in folded state by latching front
Installing Headlight and Taillight
The battery-powered headlight and taillight accessories can be installed onto your vehicle for increased visibility
and safety. Both the headlight and taillight include adjustable, detachable brackets and separate light fixtures
designed for installation onto the tiller (headlight) and seat frame (taillight). The headlight accessory requires 4
AAA (LR03) batteries. The red taillight accessory requires 2 AA batteries. Batteries are not included. Install batter-
ies into the headlight by removing the 4 Philips-head screws from the back of the fixture and insert 4 AAA batter-
ies as shown. Install batteries into the taillight by prying the red lens from case and insert 2 AA batteries as indi-
cated within case. Test both fixtures before installing to ensure batteries are functioning. Attach corresponding
mounting bracket to tiller (headlight) and seat frame (taillight). Install fixtures onto brackets accordingly.
Installing the Beverage “Caddy” Accessory
This accessory allows you to use a convenient folding, adjustable Beverage “Caddy” onto your UltraLite Vehicle
to securely transport a wide assortment of cups, cans, bottles, etc. Installation consists of mounting the supplied
Cup Holder Bracket onto the tube of the tiller, then attaching the Cup Holder using the supplied hardware. Use
the following to install.
• Select desired location on tiller for Beverage “Caddy” to be installed.
• Install Round Tube Bracket and secure using supplied screw.
• Attach Cup Holder Mount onto bracket using the two supplied philips-head screws.
• Position Cup Holder onto mount and use winghead screw to attach.
Select desired positioning (pitch) before tightening winghead screw so that you can easily and comfortably reach
the Cup Holder.
Seat Bag
The Seat Bag accessory is a zippered nylon fabric bag with adjustable straps to attach it to the backrest of the
seat. To install, loop straps around front of backrest and tighten straps to secure.

14 Ultralite 355 & 355XL Scooter Owner’s Manual & Service Record
Driving the Vehicle
1. Before you set out, do check the weather forecast. We suggest that you make sure you are wearing
suitable clothing, whether your journey is long or short.
2. If you are taking medication check with your doctor or physician that your ability to control the vehicle will
not be impaired and do not drink alcohol and drive.
3. Only use the vehicle for the purpose its intended for. Do not drive through water or on slippery
surfaces; do not transport more than one person; do not tow other vehicles or carry excess weight.
4. Before getting onto your scooter, check the freewheel lever is not in the Freewheel position and the
steering lock is disengaged. Make sure the vehicle is on level ground.
5. Check the battery charger is disconnected.
6. Check the seat and chassis are securely assembled. (see assembly instructions)
7. Check the Tiller is locked.
8. Check you have adjusted the seat arms as instructed in this manual, and they are locked in postion –
get comfortable.
9. Speed Control. Set the speed control knob to a low setting.
10. Make sure the way ahead is clear.
11. Switch on the vehicle by pushing in the ignition pin. Check the ignition light illuminates steadily and the
battery level indicator is in the green area.
12. Pull in right hand lever slowly. The vehicle will now move off. The more you pull the lever in the faster
the vehicle will go.
13. To brake, release the lever. If you become unsure or feel unsafe release the lever immediately.
14. As you get accustomed to the power you can increase the speed.
Warning! Read this before driving the vehicle!
Whether or not this is your first mobility vehicle, please read these guidelines as all vehicles differ.
Failure to do this may cause damage to you, a third party or the vehicle.

15
Driving the vehicle - hazards
1. Getting on and off the vehicle: When getting on make sure that the vehicle is on level ground, and not
in freewheel mode. Ensure that the armrests are secure. When getting off, park on level ground, turn off
the ignition and remove the key before leaving your seat. Make sure you get off the vehicle in a safe area.
2. Tiller Position: Drive with the tiller in an upright position that feels comfortable with the controls in easy reach.
3. Kerbs and Obstacles: Try to avoid kerbs and obstacles. Use ramps wherever possible. Never ride up or
down kerbs or obstructions higher than that in the Technical Specification Sheets. Always tackle obstacles
head on. Always try to avoid crossing a slope. If you have to cross a slope, take great care to avoid
tipping. Never make sharp turns on slopes. Note that the anti-tip rollers at the rear of the scooter may
contact the kerb as you descend; this is normal.
4. Hills & Slopes: Going Up Hill. Lean forward when going up. Make sure you have enough speed to
climb the slope. Do not stop or turn the vehicle around. If you have to turn while climbing an incline, keep
going until you reach a level area. If you have to start on an incline, lean forward and apply power slowly –
do not start and stop. Never make turns on slopes. If you are not comfortable about tackling a gradient,
consider an alternative route. Note: Always check that the battery level is high; going up hill takes a lot of
energy. If the level drops too low the vehicle will cut out leaving you stranded.
5. Hills & Slopes: Going Down Hill. Lean back in the seat when going down, and turn the speed control
dial to low. If you are not comfortable about tackling a gradient, consider an alternative route.
Try to avoid crossing slopes – always try to drive straight up and down the slope NEVER BACK DOWN
A SLOPE!
6. Turning: Slow down and look in the direction you are travelling – If there is a blind corner sound the horn.
7. Bad Weather: If it is snowing or icy stay at home! Remember that ice, snow and slippery surfaces such
as manhole covers, wet grass and drains could affect braking and steering. Use caution at all times.
8. Tyres: Your vehicle is fitted with solid tyres. Should they become damaged they should be replaced by
your dealer. Do not attempt to replace them yourself.
Warning! Before driving the scooter you should be aware that, under certain circumstances it could
become unstable and tip over. Your scooter has been designed to operate on paved, even surfaces and
should not be used on rough terrain like fields, rutted tracks or over potholes.

16 Ultralite 355 & 355XL Scooter Owner’s Manual & Service Record
Learning to get around
Getting on
Whenever you get on or off your scooter make sure you and your vehicle are stable on a level surface and your
scooter is not in freewheel.
Turn the battery pack power switch “ON”. Make sure that the power switch on the dashboard is “OFF” before sit-
ting on the vehicle. When you sit on the vehicle, make sure both of your feet are on the deck of the vehicle.
Next, turn the “speed adjustment dial” fully counter clockwise to the lowest speed setting, and toggle the on/off
switch to the “ON” position. The switch should light and the battery state indicator needle will move. Pull the right
finger control lever to start you in a forward motion. To stop simply let go; the brakes will automatically engage.
Getting off
Always switch your vehicle “OFF” using the dashboard switch before getting off the vehicle. Make sure you are
on a level surface when you get off the vehicle.
Basic Driving
After your first few rides, and you have become more confident, you can increase the speed setting. Pull the
“lever control” as described earlier. You will slowly accelerate. Release the lever and you will gently stop.
Practice these two basic functions until you feel comfortable with them.
Steer the vehicle by turning the handlebars in the direction you wish to ride. Be sure to remember to give
enough clearance when turning so that the rear wheels follow the path of the front ones instead of cutting
short. Cutting short on pavement corners means that a back wheel may go off the pavement causing a stability
problem. Avoid this at all times by steering an exaggerated wide arc around the obstacle.
If you must steer in a tight spot, stop, and then turn the handlebars to where you want to go. Set the speed
control to slow and apply the power gently. This will make the vehicle turn sharply while remaining stable.
Practice this manoeuvre in an open area until you feel confident.
Riding in reverse requires special care. Be sure your “speed control dial” is turned to “slow” before you operate the
vehicle in reverse. Pull the left reverse lever. REMEMBER: when you are in reverse, you have to steer in the
opposite direction of the way you want to go. Practice riding in reverse in an open space until you feel confident.
REMEMBER: When making a tight turn, turn your steering column before applying power. Steer wide of all
corners and obstacles; and please move slowly and with care.
Warning! Please take care not to have your finger on the forward/reverse lever when you switch your
vehicle “On.” This will result in a fault mode, and your vehicle will not work. Switching it “Off”
then “On” again without touching the control lever clears this fault.
Warning! Do not turn your vehicle off while it is in motion. Failure to observe this warning may
irreparably damage the main electronic speed control unit or drive transmission. Always make sure your
vehicle is fully stopped before you switch the vehicle off.
Warning! Never back down a slope as this could result in tipping over backwards.

17
Control Through Doors
Approach an unfamiliar door slowly by sizing it up. Does it have a knob or a push bar? Does it open toward
you or away? Think in terms of using the power of the vehicle to do the work for you!
Hold the doorknob or bar in one hand and apply power with the other hand (Remember that you can drive for-
ward by using your left finger to move the throttle lever away from you). If the door is self-closing, you can go
through allowing the door to close behind you. If the door is not self-closing, just stop when you are clear of
the door, and push it closed. If the door opens towards you, hold the knob or bar with one hand, and gently let
the reverse power do the work. When the door is open wide enough, go ahead quickly, leaving the hand on
the door to keep it free of the vehicle and letting go as you pass the doorjamb. It is an easy technique. Practice
makes perfect. Remember, your vehicle can do the work without wearing you out!
Control on Ramps
More and more buildings are equipped with ramps for wheelchair access. Some have a change of direction in
the middle, and good steering skills are required. Make a wide maneuver with your front wheels around tight
corners, so that your back wheels follow in a wide arc to stay clear of the corner. If you stop while facing uphill,
the automatic parking brake will hold the vehicle from rolling backward. To start again, simply pull the forward
direction lever; the parking brake will be released, and you will start to move.
While going down the ramp, keep the speed dial set to “slow” (1/minimum). This will keep you in a safely con-
trolled descent. If you wish to stop completely, release the control lever, and you will slow to a gentle stop.
Control over Grass, Gravel and Inclines
Your scooter is designed for paved surfaces. You can also tackle smooth grass, packed gravel pathways and
gentle slopes, but do not exceed the Maximum Safe Slope recorded in this manual. If you are unsure
about a situation, avoid it. Packed gravel such as on driveways or roads will present few problems. Loose,
deep gravel should be avoided, as well as loosely packed sand.
DO NOT DRIVE THROUGH WATER OR LEAVE YOUR VEHICLE EXPOSED TO HEAVY RAIN.
Only attempt a turn when all wheels are on or off the pavement. Failure to observe this warning could result in
the vehicle becoming unstable and toppling over. Always lean forward when ascending kerbs. This will enable
you to climb easily and help eliminate instability.
PLEASE NOTE: The rear stability of your vehicle is dependent on a number of factors which you should
consider before attempting to climb a steep slope or other obstacle:
• Your height
• The angle of your backrest
• Your weight
• The angle of the slope or height of obstacle you are attempting to climb.
• Position of your upper body
• The angle of the slope or height of obstacle you are attempting to climb.
• Position of your upper body weight (lean forward to prevent near tipovers)
All of these factors can affect the rear stability of your vehicle. If you are unsure of your capability to climb an
obstacle, always think “safety first”.
Warning! Always lean forward when climbing up ramps or inclines to prevent accidentally tipping over
backwards.

18 Ultralite 355 & 355XL Scooter Owner’s Manual & Service Record
Parking in public
If you need to park and leave your vehicle, toggle both power switches to the off position. This will keep the park-
ing brake on and will make your vehicle difficult to move. A cable lock accessory is available for added security.
Taking your vehicle along
Whether for holiday, visiting family and friends or a trip to the shops, you can take your vehicle along. Follow these
simple steps to make your UltraLite Vehicle fit easily into virtually any car. This procedure is quick and requires no
tools. Always make sure both power switches are in the “OFF” position before transporting your vehicle.
Folding your UltraLite Vehicle
1. Grasp the seat handle at the rear of the seat bottom, and
depress the seat latch to unlock the seat frame.
2. Swing the inner seat legs away from the latch while lifting the
seat by the seat handle. This will move the lower portion of the
inner seat legs to the rear and out of the front seat leg sockets.
3. Swing the inner seat leg forward, and gently lower the seat to
the frame, fold down the seat back and arms. The seat will nest neatly
on the vehicle frame. (Figure 15)
4. Unlock the tiller latch, and fold the tiller down. (Figure 16)
5. With the vehicle in this folded position, you can easily lift the
front end by the frame handle, and roll the vehicle on the anti-tip
wheels. (Figure 17)
Warning! Dismantling the scooter involves lifting and handling heavy parts. Weights are given in the
Technical Specification; consider if you need help in handling parts before you try to lift them. The Model
355 has been designed to be easily folded and stowed in a car. Contact your dealer for advice on how
best to transport you scooter in your vehicle
Warning! Pinching or Crushing. Be careful to avoid being pinched or having your hands crushed when
lifting or handling parts. Wear gloves whenever possible.
Warning! This vehicle is not suitable for use as a seat for an occupant in a motor vehicle. To transport
your scooter you will need to dismantle it. Follow these instructions. Do not attempt this unless you are
capable of lifting 13kg or 28lb. You are advised to wear gloves.
Figure 17 - Rolling folded vehicle
Figure 14 - Removing seat
Figure 13 - Unlock seat frame
Figure 16 - Folding tiller
Figure 15 - Folding seat

19
Removing Battery Pack and Seat
You can make your vehicle even easier to handle by removing the battery pack and seat. To remove the battery
pack, release the red latch handle on top of the battery pack mount, and swing the battery pack to the rear.
Using the convenient handle, carefully lift the battery pack up and away from the vehicle. (Figures 18, 19 and 20)
You can remove the seat from the vehicle either folded or unfolded. To remove the seat in its folded position,
release the red seat latch handle at the right rear of the vehicle, and lift the seat away from the vehicle. Be sure
to hold the seat frame while you lift the seat. (Figure 21) To remove the seat in its unfolded position, release the
red seat latch handle, and pivot the rear of the seat upward; slide the front legs rearward out of the leg sockets.
The latched unfolded seat may be used as a portable, lightweight seat when it is not attached to the vehicle. If
you sit in the seat when it is detached from the vehicle, be sure to place it on a firm, level surface. (Figure 22)
Transporting your Vehicle
In its folded state, your vehicle will fit into most car boots. Your vehicle is so lightweight putting it in and taking
it out of your boot is easy, too!
1. Drive or bring your vehicle close to the automobile boot you plan to use. Open the boot and place a
blanket or protective pad over the lip of the boot to avoid damage to the vehicles’ finish.
2. Disassemble your vehicle, removing the seat and battery. Fold down the tiller and secure with vehicle straps.
3. Carefully lift the front of the vehicle, using the frame handle, and place it over the lip of the boot, on
top of the protective pad (Figure 23). With the vehicle securely leaning against the automobile, lift the back
of the vehicle by the rear bumpers, and slip the vehicle into the boot (Figure 24).
Warning! Protect clothing when lifting vehicle parts; some components may have surface lubricants on
them which may stain clothing.
Figure 20 -Removing
Battery
Figure 19 - Releasing BatteryFigure 18 - Unlatching battery
Figure 22 - Detached seatFigure 21 - Unlatching seat

4. Carefully lift the folded seat into the boot, and find a secure place to store it so it will not be damaged
or damage the vehicle (Figure 25).
5. Carefully return the battery pack to its holder at the rear of your vehicle. AVOID ANY METAL
CONTACT WITH THE BATTERY PACK TERMINALS!
6. Gently close the boot lid checking for any contact which may cause damage to the vehicle or automobile.
Reposition the vehicle if necessary.
Experiment to find the best positions for stowing your vehicle and its components. This may vary for different
automobiles. Padding may be necessary to protect the components from rubbing against each other.
Removing and Reassembling Your Vehicle
1. Open your automobile’s boot and carefully remove the folded seat and battery pack. Place them on a
solid surface where they cannot trip you.
2. Put the protective pad over the lip of your automobile’s boot.
3. Carefully lift the rear of the vehicle over the automobile’s boot lip. Pivot the rear of the vehicle over
the boot lip and carefully lower it to the ground so the vehicle is leaning on the automobile (Figure 26).
4. Grasp the front frame handle of the vehicle, and gently lower the front of the vehicle to the ground.
5. Lift the vehicle’s tiller into riding position, unfold and install the seat being certain to insert the front
frame legs into the frame sockets. Check the seat latches to be sure they are secure. Lift the seat back, and
unfold the seat arms (if applicable).
6. Install the battery pack being certain that the latch is secure.
Finally check the scooter is not damaged and it is properly assembled.You are now ready to drive the scooter away.
20 Ultralite 355 & 355XL Scooter Owner’s Manual & Service Record
Figure 23 - Boot loading Figure 24 - Positioning in boot Figure 25 - Seat positioning in boot
Warning! Assembling the scooter involves lifting and handling heavy parts. The 355 Scooter has been
designed to be easily assembled. Your dealer should advise you on the best way to assemble your scooter.
Warning! Pinching or Crushing. Be careful to avoid being pinched or having your hands crushed when
lifting or handling parts. Wear gloves whenever possible.
Warning! Never unload your scooter on sloping or uneven ground. It could run down the slope and injure
someone.
/