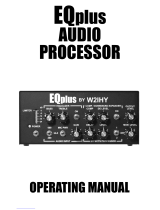
WiMo 3 x 4 SWITCH PLUS Operating instructions
- Category
- Network switches
- Type
- Operating instructions
This manual is also suitable for

W2IHY
8BAND
AUDIOEQUALIZER
AND
NOISEGATE
OPERATINGMANUAL

W2IHY 8BAND AUDIO
EQUALIZER AND
NOISEGATE
OPERATINGMANUAL
October2003
JuliusD.Jones
19VanessaLane
Staatsburg,N.Y.(12580)
(845)889-4253
E-mail:Julius@W2IHY.COM
HomePage:http://www.w2ihy.com
c2000W2IHY, ALL RIGHTSRESERVED
-2-
TECHNOLOGIES
W2IHY
MICOUT&POWERCABLEWIRING
-27-
TENTEC
DRAKETR7
DRAKET4XB
COLLINS32S1,32S3
COLLINSKWM2A
COLLINS32V2,32V3
KWS-1
Hallicrafters
E.F.Johnson
HI-Z
HI-Z
Kenwood
TS520/TS530
TS820/TS830
+Mic
+Mic
+Mic
+Mic
-Mic
-Mic
-Mic
-Mic
-Mic
+Mic
+Mic
-Mic
PTT
PTT
PTT
PTT
PTT
PTT
GND
GND
GND
GND
GND
GND
4PinMicConnectorPin3
4PinMicConnectorPin2
4PinMicConnectorPin3
4PinMicConnectorPin2
4PinMicConnectorPin2
4PinMicConnectorPin3
4PinMicConnectorPin1
4PinMicConnectorPin3
4PinMicConnectorPin1
4PinMicConnectorPin1
2PinMicConnectorPin1
2PinMicConnectorPin2
2PinMicConnectorSpring/Case
4PinMicConnectorPin2
4PinMicConnectorPin1
4PinMicConnectorPin4
Equalizer/NoiseGateMicOuttoXcvrcablewiring
Power GND
+7to14Vdc
ShieldofCable
ShieldofCable
ShieldofCable
ShieldofCable
ShieldofCable
ShieldofCable
DINconnectorsshownonthesidetobesoldered
DONOT SOLDER TOSHIELDOFDIN

TABLEOFCONTENTS
Introduction...........................6
FrontPanelControls.....7-9
-Pictorial
-
-PowerOnLED
-EqualizerOn/Off
-EqualizerControls
-NoiseGateOn/OffSwitch
-NoiseGateLED
-NoiseGateLevel
-NoiseGateDelay
-MicGainLED
PowerOn/Off/PhoneVolumecontrol
-3-
RearPanelControls..10,11
-Pictorial
-MicSelect
-MicInput(8pin)
-MicInput(XLR)
-MicInput(RCA)
-PTTInput(RCA)
-MicOutputSelect
-MicOutput A
MICOUT&POWERCABLEWIRING
-26-
AlincoDX77
Kenwood
TS130/140
TS430/440
TS850/TS870
TS930/940/950
SG2020
K2
JapanRadio
JST-135
JST-245
Yaesu
FT990/ft992
FT1000MP/M-V
+Mic
PTT
GND
ICOM
735
745/746
756/756PRO
775
781
KACHINA
Gnd
PTT
+Mic
Gnd
Gnd
PTT
PTT
-Mic
-Mic
-Mic
-Mic
+Mic
+Mic
8PinMicConnectorPin8
8PinMicConnectorPin5
8PinMicConnectorPin3
8PinMicConnectorPin1
8PinMicConnectorPin1
8PinMicConnectorPin7
8PinMicConnectorPin5
8PinMicConnectorPin6
ShieldofCable
ShieldofCable
ShieldofCable
ShieldofCable
8PinMicConnectorPin2
8PinMicConnectorPin2
8PinMicConnectorPin6
8PinMicConnectorPin7
8PinMicConnectorPin7
8PinMicConnectorPin1
8PinMicConnectorPin8
+Mic
PTT
GND
-Mic
8PinMicConnectorPin6
8PinMicConnectorPin7
ShieldofCable
8PinMicConnectorPin8
ICOMBALANCED
MODULATOR
746
756/756PRO
775
781
910H
+Mic
PTT
GND
-Mic
8PinDINConnectorPin3
8PinDINConnectorPin2
ShieldofCable
8PinDINConnectorPin4
DINconnectorsshownonthesidetobesoldered
DONOT SOLDER TOSHIELDOFDIN
Yaesu
FT102/107
FT707/747/757/767
FT847
FT1000/1000D

TABLEOFCONTENTS
-4-
RearpanelControls...........12
-MicOutputB
-Phones
-Power
BottomPanelControls...13
-Pictorial
-MicInGain
-MicOutputLevel
-Micinputimpedance
Schematics
-8bandMotherBoard...14,15
-8BandEQPotBoard…16
GettingStartedTutorial..18,19
- AdjustingMicInLevel
- AdjustingMicOutLevel
- AdjustingNoiseGateLevel
- AdjustingNoiseGateDelay
- AdjustingtheEqualizer
ChangingEQBandpass
CenterFrequencies........17
-25-
MICOUTWIRINGOPTIONS
MICOUT A/B
5PinMaleDIN
Dinconnectorsshown
onsidetobesoldered Gnd
PTT
-Mic
+Mic Balanced
Output
Hi-ZOutput
LowImpedanceBalancedOutputtoLowImpedanceRadio
5PINDINMICOUTPUTCONNECTION
LowImpedanceUnbalancedOutputtoLowImpedanceRadio
LowImpedanceUnbalancedOutputtoHighImpedanceRadio
HighImpedanceUnbalancedOutputtoHighImpedanceRadio
DONOTCONNECTMICWIRESHIELDTOSHIELDOFDINCONNECTOR
CONNECTONLY ASSHOWN
MICOUT A/B
5PinMaleDIN
Dinconnectorsshown
onsidetobesoldered Gnd(Miccableshield)
PTT
-Mic
+Mic Balanced
Output
MICOUT A/B
5PinMaleDIN
Dinconnectorsshown
onsidetobesoldered Gnd(Miccableshield)
PTT
+Mic Unbalanced
Output
MICOUT A/B
5PinMaleDIN
1KOhm
Dinconnectorsshown
onsidetobesoldered Gnd(Miccableshield)
PTT
+Mic
MICOUT A/B
5PinMaleDIN
1KOhm
Dinconnectorsshown
onsidetobesoldered Gnd(Miccableshield)
PTT
HI-Z

INTERNAL WIRING
-24- -5-
TABLEOFCONTENTS
PCBoardsandParts
-MotherBoard...................21
-8BandEQBoard.............22
-RearConnectorBoard....23
Internalwiring........................24
PreliminaryEqualizerSettings...20
MicOutandPowerCableWiring
-MicOutWiringOptions....25
-MicOutandPwrCableWiring26,27
MICIN
Shortest
Lead
Shortest
Lead
Shortest
Lead
Shield
not
Connected
J16 C41-.01uf
J2
MICIN
PIN1
PIN7
J9
PHONES
PIN1
PIN2
J1-3
J1-1
J1-15
J1-2
J1-16
J1-14
J1-13
10“
16-1/2“
10“
6“
10“
E17
NotethatJ1-Xistheflatribbon
cableshownonpage15
Shield
Shield
Shield
Shield
Shield
Shield
Shield
Shield
Shield

INTRODUCTION
W2IHY AUDIOEQUALIZER
AND
NOISEGATE
Analoganddigitaltechnologyhaveformanyyearsbeenusedinthe
audioindustrytodoaudioequalizationandnoisereduction.Many
amateurshavepurchasedaudioequalizersandotherequipmentwith
thehopeofimprovingtheirtransmittedaudiosignal. Theamateurswho
havesucceededhaveinmanycaseshadtopaypremiumpricesfor
audioequipmentthatnotonlyrequiredmodifying,toproperly
interfacewiththeiramateurstations,butalsohadtobehardenedto
tolerateR.F.
TheW2IHY 8Band AudioEqualizerandNoiseGatesolvestwobasic
problemsmanyhamsexperience. The AudioEqualizerallowsthe
usertochangethetransmittedaudiofrequencyresponsewithout
changingmicrophonesormicrophonecartridges. Transmittedaudio,
withsubstantialhighfrequencycontent,canbeusedtoworkDXor
communicateinbandconditionswherethereisasignificantamount
ofnoise. A balancedfrequencyresponsemaybemoredesirablein
strongsignal,fullnoisequietingenvironments.Manyamateuroperators
transmitaudioinhighambientnoiseenvironments. Typicalhighnoise
sourcesincludelinearamplifierfans,dehumidifiers,roomair
conditioners,roadandwindnoiseduringmobileoperation,etc..
TheNoiseGateeliminatestheaforementionednoisefrombeing
transmitted.Ontheairtestsinhighambientnoiseconditionshave
showntheNoiseGatetobeveryeffective. Theremovalofmoderate
toveryhighlevelsofambientnoise,fromthetransmittedaudiosignal,
resultsinaudiowithincreasedclarityandpresence.
ExtensivetestingwasdoneoftheNoiseGateandEqualizer. Theunit
hasbeendesignedtoworkinhighRFenvironments.Wefeelso
confidentthatyouwillbedelightedwiththeunit
TheW2IHY Audio
EqualizerandNoiseGaterepresentsaffordableaudiotechnology
designedforamateurradiouse.
weoffera30day
moneyback,noquestionsasked,guarantee.
-6- -23-
8BANDEQREARCONNECTOR
PCBOARDLAYOUT ANDPARTS
C41,C42-.001ufmylar
C40-.01mylar,
C7,C13,C37,C39-.1uFceramicmonolithic
C39-4.7uftantalumelectrolytic
J2,J4,J5-Male5PinDIN
R33,R34-47Kohm¼watt5%resistor
RFC2,RFC3-100uhR.F.choke
RFC4,RFC5-470uhR.F.choke
S4-4pole3positionrotaryswitch
S5-4PDT slideswitch
T1-600ohm:600ohmaudiotransformer

FRONTPANEL CONTROLS
This sectiondescribes each ofthecontrols onthefrontpanel. You
can readthroughthis sectionnow.Someofthedescriptions
willbemoremeaningfulafteryou first work throughthegetting
startedtutorial.
This switchandpotentiometer(Pot.)turns theunit's poweronand
offandis also used toadust theaudiolevel intothePhonejack (18)
This LEDgoes onwhenpoweris onintheunit.
This switchturns theequalizer onandoff.Whentheequalizer is
offadjusting theequalizer's controls has noeffect ontheoutput
audio.
(1)
(2)PoweronLED(LED3)
(3)Equalizer On/OffSwitch(S3)
PowerOn/OffSwitch(S1)/Phones(monitor)VolumeControl(R29)
-7-
1
2
3
4
5
69
8
7
8BANDEQBOARD
PCBOARDLAYOUT ANDPARTS
*MountedonpinsideofP.C.board
-22-
C15-.1uFmylar
C16-.1uFmonolithic
C17-.18uFmylar
C18-19-4.7uF Tantalumelectrolytic
C20-100uFelectrolytic
R1-10ohm¼watt5%Res
R2-R31Kohms¼watt5%Res
R4-3.3kohm10pin9RESSIP
R5-R6-3.3Kohm10Pin5ResSIP
R7-15.0Kohm¼watt1%Res
R8-100Kohm10Pin9ResSIP
R9-R1010Kohm¼watt5%Res
R11-R18,R20100KohmSlidePots*
R195KohmSlidePot*
R21-1Mohm10Pin9ResSIP
R22-R231m10PinResSIP
U1-U3 Tl074orJRC2060(14PinDIP)
J1(16PinDIP)
C1-300pFmylar
C2-390pFmylar
C3-560pFmylar
C4-.0012uFmylar
C5-.003uFmylar
C6-.0022uFmylar
C7-.0039uFmylar
C8-.0047uFmylar
C9-.0056uFmylar
C10-.01uFmylar
C11-.012uFmylar
C12-.018uFmylar
C13-.022uFmylar
C14-.047pFmylar

FRONTPANEL CONTROLS
(4)Equalizer CONTROLS(R11-R18)
(5)NoiseGateOn/OffSwitch(S2)
(6)NoiseGateLED(LED1)
These slide potentiometers work only whentheEqualizer On/Off
Switch S3is intheonposition. Thepotentiometers control
theoutputof8bandpass filters. Thecenter frequency ofthese
filters are50Hz, 100Hz, 200Hz, 400Hz, 800Hz, 1600Hz,
2400Hz and3200HZ. Thescale,forsetting these potentiometers,
is calibrated between-16db.to+16dB.Pushing apotentiometer
forward(up)willincreasetheoutputoftheequalizer withinthe
bandpass ofthefilterwhose slide potentiometeris changed.
Pushing apotentiometerbackward(down)willdecreasethe
outputoftheequalizer withinthebandpass ofthefilterwhose
slide potentiometeris changed. Settingall8potentiometers atthe
zero marking willproduce audioataboutthesame outputlevel
as whentheEqualizer On/OffSwitch S3(3)is intheoffposition.
Adjusting theequalizer 50Hz, 100Hz and200Hz slide pots
affects theheaviness /weightoftheaudio. Adjusting theequalizer
400Hz and800Hz slide pots affects thewarmthoftheaudio.
Adjusting theequalizer 1600Hz, 2400Hz and3200Hz slide
pots affects theclarity andpresenceoftheaudio.
This switchturns thenoise gateonandoff.Whenthenoise
gateis offchanging thegatedelay orlevel controls has
noeffect ontheaudio.Whenthenoise gateis offaudiois
always beingpassed(gated)throughthenoise gatetotheoutput.
This LEDis used tohelpproperly adjust thenoise gatelevel
control andtoindicate whenaudiois beingsent (gated)tothe
output. TheLEDbeingon(green)indicates thataudiois being
gatedthroughtheunittotheoutput. TheLEDbeingoffindicates
thataudiois notbeingpassed(gated)throughtotheoutput.
WhentheNoise GateOn/OffSwitch (5)is intheoffposition the
noise gateLEDis on.
-8-
8BANDEQMOTHERBOARD
PCBOARDLAYOUT ANDPARTS
-21-
*PartsmountedonpinsideofP.S.Board
C1,C3,C4,C6,C14,C25-C28,C334.7uFradialelectrolytic
C7*,C13*,C16,C17,C32.1uFceramicmonolithic
C8-22uFradialelectrolytic
C9,C29-4.7uFnonpolarizedradialelectrolytic
C10,C11,C12,C15,C31-100uFradialelectrolytic
C2,-10uFradialelectrolytic
C4-1uFradialelectrolytic
C18-C20-.1uFmylar
C5-.033uFmylar
C23-C24-470uFradialelectrolytic
C21,C34-.01uFmylar
C36-120pfceramic
C22,C35-.001uFmylar
D1,D2-1N914
D3-1N4001
LED1-GreenLED;LED2-RedLED;LED3- Amber
Q1-2N3417
REG1-7805withheatsink
Rfc1-470uHR.F.choke
R1,R2,R22-10Kohm5Resistor10pinSIP
R3-100ohm5Resistor10pinSIP
R4-1Kohm5Resistor10PinSIP
R5,R6,R27,R30-10ohm¼watt5%Resistor
R7,-6.8Kohm¼watt5%Resistor
R8,R9-5.6Kohm¼watt5%Resistor
R10-10Kohm¼wattResistor
R11-2.2Kohm¼wattResistor
R12-100KohmhorizontalPotmountedonPCboard
R13-20KohmhorizontalPotmountedonPCboard
R19-33Kohm¼watt5%Resistor
R14-75Kohm¼watt5%Resistor
R15*-R17*-25KohmSlidePot
R18*-5KohmSlidePot
R21-680ohm5Resistor10PinSIP
R23-200ohm¼watt5%Resistor
R20,R24,R25,R33*.R34*-47K¼watt5%Resistor
R26-0Ohms(Pieceofwire)
R28-22Kohm5Resistor10pinSIP
R29*-10KPotwithSwitch(Usedforvolumecontrol)
R31-1Kohm¼wattResistor
R32-33Kohm¼watt5%resistor
U1,U5- Tl074orJRC2060;U2-74HC00;
U3-74LS123;U4-74HC4053;U6-LM386-1

FRONTPANEL CONTROLS
(7)NoisegateLevel(R19)
(8)NoiseGateDelay(R20)
(9)MicGainLED(LED2)
Thisslidepot.worksonlywhenthenoisegateison. Thispot.
setsthelevelatwhichbackgroundnoisewillbenotgatedtothe
audiooutput.Pushingthiscontrolupwillmaketheunitless
sensitivetohigherbackgroundambientnoise.Pushingthis
controldownwillmaketheunit,moresensitivetobackground
noise.
Thiscontroladjuststhelengthoftimeaudiowillbegatedtothe
outputafterthenoisegatehasautomaticallyturnedoff(Noisegate
LEDoff).Pushingthedelayslidepot.upincreasesthedelay
(decay)time.Pushingthepot.downdecreasesthedelaytime.
ThisLEDisusedtohelpadjusttheMICInGainpot.Whenthe
LEDgoesonthisindicatesthattheEQisbeingoverdriven.
ThisLEDshouldnevergoon.
-9-
-20-
PRELIMINARY EQUALIZERSETTINGS

-10-
(10)MicSelect(S4)
(11)MicInput(J8)
ThisthreepositionswitchselectstheICOM,KENWOODor
YAESUmicrophonepluggedintothe8pinMicInputJ8(11).
8Pinmicrophonemaleconnector.Donotusethisconnector
whenMicinJ6(13)orMicInJ9(12)arebeingused.
REARPANEL CONTROLS
IcomKen Yaesu
+Mic+Mic
+5VPTT+5V
PTT+5V
PTT
Gnd-MicGnd
Gnd+Mic
1
2
5
6
7
8
J8
Pin
PTT
PTT
Gnd
Gnd
11
14 16 19
13 17 18
15
10
12
The controlsetsthedecaytimeofthetrailing
edgeofthe Audio,whenthenoisegateturnsoff. This
circuitryexponentiallyreducestheaudiooutputwhenthereisno
audiopresentinthe .(Thedelaycircuitryhelpstomakethe
transitionsofgatingandnotgatingofaudiosmoothandmore
pleasingtotheear.) Thedurationoftheexponentialdecay
isdependentonthesettingofthe control. The
delaycontrolsetataminimumvalue(theslidepotalltheway
down)willexponentiallydecaytheaudioinabout100milliseconds.
Thedelaycontrolsetatamaximumvaluewillallowtheaudioto
decayoverafewseconds.Ontheairtestsshowthewhitebarpart
oftheNoiseGateDelayrangegivesverypleasingaudiotransitions.
(decaytimeofabout.3to.5second). Youcanexperimentonyour
owntofindthebestsettingforyou.
Ifyouhavemedium-to-highlevelsofambientnoisepresentwhen
youaretransmitting,withthe intheoff
position,whenyoustoptalkingyourpowermeterwillindicateR.F.
stillbeingtransmitted.(setpowermeteronavg.powertodothis
experiment).Whenthenoisegateisturnedonandproperly
adjustedwhenyoustoptalkingthepoweroutputwilldroptothe
bottomofthescale(nopoweroutput).Peoplewholistentoyour
signalwillbeabletohearthedifferenceandtheywillwonderwhere
thenoisewent.
Turnthe on.Setall8equalizerslide
potentiometerstothe0dbpoint(markedonthecase).Refertothe
PreliminaryEqualizerSettingtableonpage20.Usethistable,asa
guidetodetermineinitialstartingpointsforequalizersettings.Itis
suggestedthatthephonesmonitorbeutilizedtoassistinadjusting
theequalizer. Asyoumodifyyourequalizersettings(todeterminewhat
theoptimalsettingisforyou)itisrecommendedthatyoumake
changesstartingatthehighestaudiofrequency(3200Hz)firstand
changethenextlowestfrequency(band)nextuntilthelowestfrequency
(50hz)isadjusted.Ontheairexperimentationwillberequired
tofindtheoptimalsettingsbasedupontheusersvoice
characteristicsandbandconditions.
NoiseGateDelay
MicOut
MicIn
NoiseGateDelay
NoiseGateSwitch
EqualizerSwitch
AdjustingThe AudioEqualizer
-19-
GETTINGSTARTEDTUTORIAL

REARPANEL CONTROLS
-11-
(12)MICInput(J9)
(13)MicInput(J6)
This3pinXLRfemaleconnectorworksindependent
ofthemicselectswitchandmaybeusedasanothermicsource.
DonotusethisconnectorwhenMicInJ6orJ8isbeingused.
ThisRCA femaleconnectorisusedasanauxiliary
microphoneinput. Thisconnectorworksindependentofthemic
selectswitchandmaybeusedforanotheraudiosourceor
microphone. Thisinputisalsolowimpedance.Donotuseifmic
isconnectedtoJ8(11)orJ9(12).
(14)PTTINPUT(J7)
(15)MICOutSelect A/B(S4)
(16)MicOutput A (J5)
RCA femaleconnectorforauxiliarypushtotalkcontrol. A foot
switchorothercontrolmaybeconnectedtothisconnector.
Groundingthecenterjackoftheconnectorgroundsthepush
totalklineontheMicOut.
Thistwopositionslideswitchdirectsaudiotothe5PinDIN
MicOut A (16)orthe5PinDINMicOutB(17).
5PinfemaleDINconnectorthathasnoisegate/equalizer
audiopluspushtotalkoutputted. Thisconnectorisactive
onlywhentheMicOutSlideSwitchS4(15)isinthe
MicOutSelect A position.
XLR PIN Description.
1 gnd. / shield
2 + Mic
3 - Mic
-18-
Beforepluggingthepowertransformer intothewallpreset the
followingcontrols as indicated:
and switches alloff.
toselectmicrophone you willbeusing.
Connect your microphone intothe rearconnector.Plugthe
powertransformer (module)intothewallandintothe
connectoroftheunit. Attach themicrophone cable betweenyour
transceiver/transmitterandthe oftheunit.Ifthemicrophone
beingused is anelectret mic (ICOMHM12,SM6,...)andrequires
D.C.onthemic lineplugtheshorting jumpersupplied ontothe
pins atthebottomofthecaseotherwise leave itoff. Turn
the switchon. Theorange/yellow should goon.
,using ascrewdriver,turnthe
(located atthebottomoftheunit)clockwise
untilthe just goes on.NowturntheMic inLevel control
counterclockwise suchthat whenyou
speak intothemic.
,using ascrewdriver,turnthe
control clockwiseuntiltheaudiolevel, as shown by
your transceiver's/ transmitters meteringis attheproperlevel. If
you areusing push totalk onyour transceiver you willhave to
push thePTT switchonyour microphone whilemaking this
adjustment.
Turnthe on.(Please notethatwhenthe
is offthe should always go
onindicating audiois beingsent /gatedtothe .Whenthe
is turnedonthe may beon
oroffdependingontheposition ofthe control
andthe audiolevel.) Adjust theNoise GateLevel control until
theNoise GateLEDjust goes off.
(Ifaudiois coming fromyour
transceiver's/ receiver's speakeryou should turnofftheaudio.)
Whenyou nowtalk intoyour microphone the
should goonindicating audiois beingsent tothe When
you stop talking the should turnoffindicating
thataudiois notbeingsent andbackgroundnoise is notbeing
sent /gatedtothe .
Power,Equalizer NoiseGate
MicSelect
MicIn
Power
MicOut
MIC
Jumper
Power PoweronLED
MicInLevelControl
MicLED
MicOutLevel
NoiseGateSwitch
NoiseGateSwitch NoiseGateLED
MicOut
NoiseGateSwitch NoiseGateLED
NoiseGateLevel
MicIn
NoiseGateLED
MicOut.
MicOutLED
MicOut
AdjustingtheMicLevels
theLEDnevergoeson
Whiletalking intothemicrophone
Whiletalking intothemicrophone
This adjustment should bemade
withthelevel ofambientnoise thatwillbepresent whenyou will
betalking intothemicrophone.
NoiseGate Adjustments
GETTINGSTARTEDTUTORIAL

-12-
(18)Phones(J3)
(19)Power
1/4“Stereoheadphoneconnectorusedtomonitoraudiofrom
theequalizer. Theoutputlevelofthisconnectoriscontrolledby
phonevolumecontrolR29(1)
(Aninlineadapter
shouldbeusedwithheadsetsthatdonotuse1/4“stereo
connectors.StoreslikeRadioShackhaveaudioplugadapters
available.)
5PinDinconnector.7-14VDCinputat100ma.
Headphonesusingotherthan
1/4“stereoconnectorsmaynotoperateproperlywhen
pluggedintostereophonesconnectorJ3.
+7to14V
GND
Power
5PinMaleDIN
Dinconnectorsshown
onsidetobesoldered
(17)MicOutputB(J4)
5PinfemaleDINconnectorthathasnoisegate/equalizer
audiopluspushtotalkoutputted. Thisconnectorisactive
onlywhentheMicOutSlideSwitchS4(15)isintheMicOut
selectBposition.
Gnd
PTT
-Mic
+Mic Balanced
Output
Hi-ZOutput
MICOUT A/B
5PinMaleDIN
Dinconnectorsshown
onsidetobesoldered
REARPANEL CONTROLS
-17-
C2-.1uf
100Hertz
C1-.01uf
7
R1
3.3K R2
3.3K
R5-100K
U2b
TL074
+
-
R6
100K
R3
1M R4
1M
EachEQbandpassfilterisverysimilar.Thecenterfrequencies,ofeach
bandpassfilterisdeterminedbythevaluesofthecapacitorsand
resistorsused.Theequationsbelowdefinewhatcapacitorvaluesare
requiredforagivencenterfrequency.Belowisaschematicofa
bandpassfilterwithacenterfrequencyof100Hz.
C1=(.9046)/(FreqinHz.)<=Inuf=>C2=C1x10
Theaboveequationsarevalidforonlytheresistorvaluesshowninthe
schematicabove.
Thebandpassfilterintheschematichasacenterfrequencyat100hz.
example:Thecapacitorvaluesrequiredtoobtainabandpassfiltercenter
frequencyof4800hziscalculatedasfollows:
C1=.9046/FREQ=.9046/4800=,0001885UF=188.5PF
C2=C1x10=.0018858uf
Theclosestrealvaluecapacitorsthatcanbepurchasedareasfollows
-C1calculatestobe188.5pf.Theclosestrealvaluethat
canbepurchasedis180pf
-C2calculatestobe.001885uf.Theclosestrealvaluethat
canbepurchasedis.0018uf
CHANGINGEQBANDPASS
FILTERCENTERFREQUENCIES

BOTTOMPANEL CONTROLS
(20)MicJumper
(21)MicInGain(R12)
Microphonecartridgeswith
verylowoutput(LikeaHeilHC4orHeilHC5)mayrequire
theMicInGainControltobeadjustedtomaximumgain.
(22)MicOutputLevel(R13)
(23)MicInputImpedance
Pluggingthejumper(shortingblock)puts+5VontheMicIn
lineofthemicrophone'scartridge(11,12&13).Requiredformic's
suchasICOM’sHm12,HM36andSm6andtheHeilHmiandMH2
(madefortheElecraftradio’s)andotherelectretmicrophones.
Thispot.,whenturnedclockwise,increasesthemicrophone
amplifier'sgain. Thegainshouldbechangedwhilespeaking
intomicrophoneuntilMicLED(10)justbarelygoesonNow
turnthepotcounterclockwise,whilespeakingintothemictil
theLEDNEVERgoeson.(TheLEDgoingonindicatesthat
theEQisbeingoverdriven.)
Changestheunit'saudiooutput.(Clockwiserotationincreases
output.)
Insertionofoneofthesejumpers(shortingblocks)selects
200or600ohminputimpedance.
.
Nojumpersconnectedselects
highimpedance
-13-
20 23 21
22
8 Band Equalizer Pot Board with Noise Gate Pots
Audio IN
C7 - .0039 uf
U3b
TL074
7
C2
390 pf
C20 - 100 uf C16 - .1 uf R1
10
R16 - 100 K
R8f
100 K
R17 - 100 K
R21g
1M
R23c
1M
R4g
3.3K
R6b
3.3K R6c
3.3K
+5 V
U3c
TL074
+
10
9
8
-
+R2
1K R3
1K
R8G
100 K
R23b
1 M
8
8
8
16
5
2
315
6
1
71
4
3
1
4
3
C17 -.18uf C15 - .1uf C14 - .047uf C13 - .022uf
400 Hertz
C6
.0022uf
200 Hertz
100 Hertz
C10 - .01uf
C8 - .0047uf
R8a
100K
+5V
1
35
6
7
2
R7
14.3K
1%
R4b
3.3K R5b
3.3K
R4c
3.3K
R5c
3.3K
R4d
3.3K
R14 - 100 K
R21d
1M
R22c
1M
R21c
1M R8c
100K
R21A
1M
R22a
1M
R11 - 100 K R12 - 100 K R13 - 100 K
C12 - .018uf
U1a
TL074
U2a
TL074
U2b
TL074
U2c
TL074
+
++
13
12
+
10
9
8
---
C9 - .0056 uf
C11 - .012 uf
C5 - .003 uf
2400 Hertz
3200 Hertz
1600 Hertz
800 Hertz
R9
10K
R10
10K
C19
4.7 uf
+5V
4
11 1
3
2
C18
4.7 uf
+
+
-
R8b
100K
R21B
1 M R22b
1 M
R5a
3.3K 1
1
1
2
2
1
1
4
3
2
1
3
3
4
4
3
3
3
53
1
1
4
4
4
1
1
1
5
6
2
56
31
1
2
2
2
R8d
100K
R22d
1M
50 Hertz
U2d
TL074
U3a
TL074
+14
+
3
21
+5V
+
6
5
-
--
C1
300 pf
J1-7
J1-6
R15 - 100 K
R21e
1 M
R23a
1 M
R4e
3.3K
R6a
3.3K
R8e
100 K
R21h
1M R23d
1M
R4f
3.3K R6d
3.3K
J1- 12
J1- 4
J1- 5
J1- 9
R4h
3.3K
R18 - 100 K
R20 - 5K
R19 - 100 K
C3
560 pf
C4
.0012 uf
U3d
TL074
14
13
12
+
-
Audio Out
+ 5V
GND
R8h
100 K
R21f
1 M
R5d
3.3K
R4a
3.3K 1
5
5 7 8
1
2
8
7
19
9
9
1
18
7
31
2
7
82
3
1
1
3
2
1
7
7
1
1
6
6
6
2
3
2
1
2
1
2
1
3
1
1
1
1
1
23
J1-10
J1-11
Noise Gate
Delay Control
Noise Gate
Level Control
Note: Slide Pots are mounted on Pin side of the board
Julius Jones REV 1 6 -14-99 Note: J1 goes to a 16 pin DIP socket

-
 1
1
-
 2
2
-
 3
3
-
 4
4
-
 5
5
-
 6
6
-
 7
7
-
 8
8
-
 9
9
-
 10
10
-
 11
11
-
 12
12
-
 13
13
-
 14
14
WiMo 3 x 4 SWITCH PLUS Operating instructions
- Category
- Network switches
- Type
- Operating instructions
- This manual is also suitable for
Ask a question and I''ll find the answer in the document
Finding information in a document is now easier with AI
Other documents
-
 W2IHY EQplus User manual
-
 W2IHY EQplus Operating instructions
-
ICOM IC-202S Owner's manual
-
YAESU CPU-2500R User manual
-
Kenwood AUDIO PROCESSOR User manual
-
Swann 350 Operation And Maintenance
-
 MFJ 9420 User manual
-
Ericsson Monorgam MHP 300 Maintenance Manual
-
Maxon FM Mobile radio SM-2000 User manual
-
Motorola DVP MCX100 User manual


