JBL B08XWVZSWR Owner's manual
- Category
- Car audio amplifiers
- Type
- Owner's manual
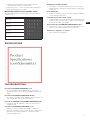
JBL B08XWVZSWR: Your portable audio powerhouse! Seamlessly transition from a powerful car subwoofer to a standalone Bluetooth speaker with the JBL BassPro Go. Enjoy deep, rich bass in your vehicle, then detach and take your music with you, thanks to its quick-disconnect design.
JBL B08XWVZSWR: Your portable audio powerhouse! Seamlessly transition from a powerful car subwoofer to a standalone Bluetooth speaker with the JBL BassPro Go. Enjoy deep, rich bass in your vehicle, then detach and take your music with you, thanks to its quick-disconnect design.


-
 1
1
-
 2
2
-
 3
3
-
 4
4
-
 5
5
-
 6
6
-
 7
7
-
 8
8
-
 9
9


JBL B08XWVZSWR Owner's manual
- Category
- Car audio amplifiers
- Type
- Owner's manual
JBL B08XWVZSWR: Your portable audio powerhouse! Seamlessly transition from a powerful car subwoofer to a standalone Bluetooth speaker with the JBL BassPro Go. Enjoy deep, rich bass in your vehicle, then detach and take your music with you, thanks to its quick-disconnect design.
Ask a question and I''ll find the answer in the document
Finding information in a document is now easier with AI
Related papers
Other documents
-
Fortyfour Group 2AWVU WRISTLER Wearable speaker User manual
-
 Bass Pro Shops Johnny Morris CarbonLite JCL10HLA User manual
-
Harman JBL Stage A3001 Owner's manual
-
Infinity none User manual
-
-
-
 JBL Professional EON208P User manual
-
Infinity Reference 4555A Owner's manual

