Page is loading ...

SONY
Digital Video Camera Recorder
Operating Guide
DCR-HC28
Getting Started
Using the Menu
Dubbing/Editing a
Troubleshooting
Additional Information
Spanish Quick Guide/
Guia rapida en espa_ol
U i rli }r_-_ '_igits'vi_Jeo _'nfoL'TH_IUMQ _'nfoL'TH'UM_
C_ssette SERIES SE_IE_
© 2006 Sony Corporation

To reduce fire or shock hazard, do
not expose the unit to rain or
moisture.
CAUTIONTO_UO_ THERISKOF_ _CT_ICS_IOCK
REFERSERVlClN_TOOU_IFIEDSEnVl¢__E_SO_E[-
This symbol is intended to alert
the iiser to the presence of
unhlsulated "dangerous
voltage" within the product's
enchlsure t]lal lllay be of
sufficient lnagnimde to
constitute a risk of electric
shock to persons.
This symbol is intended to alert
the user 1o lhe presence of
important operating and
maintenance (servicing)
instructions in tile lilerature
accompanying the appliance.

IMPORTANTSAFEGUARDS
For your protection, please read these safety
instructions completely before operating
the appliance, attd keep this manual for
future reference.
Carefully observe all warnittgs, precautions
and ittstructions oil the appliance, or the otte
described iu the operating instructions :utd
adhere to them.
PowerSources
This set should be operated only Ii'om tile type (51
power source indicated on tile marking labeh It
you are not sure oI the type of electrical power
supplied to your home, consull your dealer or
local power conlpany. For those setsdesigned to
opel_lte |ronl b_lUel y po reel-, or other sources, le |_r
to tile operaling illstructions,
Polarization
This set may be equipped with a polarized ac
power coM phlg (a phlg ha_ing one blade wider
than the olher).
This plug will tit into the power outlet only one
way. This is a satcty Icamre. If you are unable to
insert tile plug tully into the outlet, fly reversing
the plug, If the plug should still Iidl to fit, contact
your electrician to have a suitable outlet installed,
Do not dellrat the salcty purpose of the polarized
plug by lorcing it in.
Overloading
Do not o_,erload w_lll oullets, extensioll cords or
comenience receptacles beyond their capacity',
since this can result in lirc (51"electric shock.
ObjectandLiquidEntry
Ne_er push objects of any kind into tile set
through openings as they nmy touch dangerous
_,oltiJge points Ill"short OUtparts that could rcsu][
in a fire or electric shock. Never spill liquid of any
kind on the set.
Attachments
Do noI use _ltt_lchlllents llOt reCOlllnlended by tile
ii/anul;lclur_2r, as they may cause hazards.
Cleaning
Unplug tile set fi'om the wall outlet belore
cle_uling or polishing it. Do not use liquid cleaners
or _,erosol clemlers. Use _,cloth lightly dampened
with w;tter for cleaning tile exterior OItile set.
Water andMoisture
Do not use power-line operi/ted _ts neilr water
lor example, near a bathtub, washbowl, kitchen
sink, (51"hmndry tub, in it wet basement, or near _l
swinmling pool, etc.
Power-CordProtection
Route tile power cord SOthitt it is llOt likely Iv)be
walked on or pinched by items placed upon or
againsl lhem, paying particular attention to file
plugs, receptacles, and the point where the cord
exits Irom the appliance.
Accessories
Do not place the set Oil illl/instilhle carl, sla,nd,
tripod, bracket, or table. The sel may tall. causing
serious inju W to a child or an adult, and serious
danlzlge to tile set. Use only a carl, stand, tripod,
brackel, or lable recommended by lhe
ii/anuI_lclurcr,
Ventilation
Tile slots and openings in the cabinet mc prm ided
Ior necessmy ventilation. To ensure reliable
operation oI tile set, and to protect it h'oln
overheating, these slots and openings must never
be blocked or covered.
Never cover tile slots and openings with a cloth
or olher nlalerials.
Never block tile slots and openings by placing
tile set on a bed, sol_,, rug, or other silnilar
surlgce.
Never place the set in a confined space, such as
a bookcase, or buill-in cabinel, unless proper
venlilation is provided.
Do not place lhe set near or over a radiator or
Ileal register, or where il is exposed to direct
sunlighl,
Continued._ 3

_?ORTANT SAFEGUARDS(go_i_ed}
Lightning
For added protection t_>rthis _t during _Llighming
slornl, or wllen it is lefi unatlended and unused fi)r
long periods ol time. unplug it hxml tile wall
oullet and disconnect lhe illltelllla or citble systellL
This will prevenl damage to tile set due to
lighming and power-line surges.
SafetyCheck
Upon conlpletion of _uly selvice or repairs to tile
set. ask the service technician to l_erlbrnl routine
salbty checks (as specilied by tile manulacturer)
to determine tlliLt the set is ill siLle operathlg
condition.
DamageRequiringService
Unplug the sel fixml tile wall outlel and rcl_:r
sel_ icing to qualified _r_ice personnel under lhe
tollowing conditions:
When the power cord or plug is damaged or
frayed.
If liquid Ilas been spilled or objects have fallen
into the set.
If the _t has been exposed to rain or water.
If file set has been subject to excessive shock by
being dropped, or the cabinet has been
damaged.
If the set does not opert_te nornlally when
li_llowing the operating instructions. A(liust
only those controls that are specified in the
operating instructions, hnproper adjustment of
other controls nlay resull in damage and will
ol}en require exlensive work by a qualified
technician 1o restol_ the set to normal operalJon,
When the set exhibits a distinct change in
perlormance this indicates a need fi)r service.
Servicing
Do nol alttelnpl to serxice tile sel yourself glS
opening or r_nloving covers may expose you lo
dangerous voltage or olller hazards.
Reler all servicing to qualified service personnel.
Replacementparts
Wllen replacement pal'ls are required, be sure lhe
service technician has used replacement parts
specified by tile manufacturer lhat have tile sanle
cllaracteristics as tile original parls.
Unauthorized substitutions may rcsull ill fire.
electric shock, or olher hazards.

Readthis first
Before operating the unit, please read this
manual thoroughly, and retain it for future
reference.
Replace the battery with the
specified type only. Otherwise, fire
or injury may result.
RECYCLINGLITHIUM-IONBATTERIES
Lithium-Ion baueries are
O
recyclable. You can help preserve
our environlllenl by returning
your used rechargeable baueries
to the c<)llecti<)lland recycling
]ocation neaD2sl you.
For morn in%rmation regarding recycling of
rechargeable batteries, call toll flee 1-800-822-
8837. or visil http://www.rbrc.org/
Caution: Do not handle damaged or leaking
Lithium-Ion baueries.
Batterypack
This de_ice complies with Part 15 of the FCC
Rules. Operation is subjecl 1o lhe kdlowing lwo
conditions:
(1) This device may not cau_ harmflfl
interlPrence, and (2) this device inust accept any
interlPrence received, including interlPrcnce thai
may cau_ undesired operalion,
This Class B digital apparatus complies with
Canadian ICES-003,
If you have any questions about this
product, you may call:
Sony Customer hfformation Center 1-800-
222-SONY (7669).
The number below is for the FCC related
matters only.
RegulatoryInformation
Declaration of Conformity
Trade Nanle: SONY
Model NO.: DCR-HC28
Responsible Party: Sony Eleclronics Inc.
Address: 16530 Via Esprillo, San Diego, CA
92127 U.S.A.
Telephone Number: 858-942-2230
This device complies wilh Pair 15 of the FCC
Rules.
Operation is suI_iect 1o file lbllowing two
conditions:
!1) This device may not cause harmlul
imerfelvncc, and (2) this device nmst accepl any
interference received, including interlerence
lhal may cause undesired operation.
CAUTION
You are cautioned thai any changes or
moditic_aions not expressly approved in dis
manual could void your mlthol'ity to operate this
equipmenl.
Note
This equiplnela has been lcstcd and tbund to
comply with tile limits tor u ('lass B digital
device, pursuant to Part 15 of tile FCC Rules.
These limits are designed to provide reasoniJble
prolection againsl hamlflfl inlerlemncc in a
residential installation. This equipment generates,
uses, and can radiate radio flequency energy and,
if not installed and used in accordance with tile
instructions, may cause harml/d inler|Prcnce to
radio comnlunicalions.
Continued._ 5

Readthis fffst (C0_tim_e_}
However, their is 11o guarantee thai inlerlc,vnce
will not occur in a particular installation. If this
equipment does cause harmlul intcrlbmnce to
radio or television reception, which can be
determined by turning the equipment oll and on,
the user is encouraged to uT to correct tile
interlbrence by one or more of the lollowing
uleasures:
Reorient or relocate tile receiving antenna.
Increase the separation belween lhe equipnlenl
and rcceiver.
Connect the equipment into an oullet on a
circuil dillbrent hom lbat to which lhe receiver
is connected.
Consult tile dealer or an experienced radio/TV
technician R)r help.
Tile supplied intellacv cable umst be used with the
equipmenl in order 1o comply wilh the limits lor a
digilal device pursuanl to Subpart B of Parl 15 of
FCC Rules.
Owner's Record
Tile model and serial numbers are located on tile
bouonl. Record the serial nunlber in tile space
provided below. Relbr to these numbers whene_ er
you call your Sony dealer regarding this product.
Model No. DCR-HC28
Serial No.
Model No. AC-
Serial No.
Forthe State of Calilornia, USAonly
Pcrchlorate Material - special handling may
apply. See
www,dtsc,ca.gov/bazardouswasle/perchlorate
Pcrcldorale Material: Lithium baucry contains
perchlorate.
Typesofcassetteyoucanuseinyour
camcorder
• You c:m use mini DV cassettes marked
with M_[_*.Yourcamcorder is not
compatible with the Cassette Memory
flmction (p. 65).
Usingthe¢amcorder
• Do not hold tile camcorder by tile
following parts.
Viewfinder Battery pack
LCD panel
• Tile camcorder is not dustproof, dripproof
()r waterproof.
See "Maintenance and precautions"
(p. 68).
• Before connecting your camcorder to
another device with an i.LINK cable, be
sure to insert the connector plug the
correct way, and not forcibly to avoid
damaging the terminal, or cause a
malfunction of your camcorder.
Aboutmenuitems, LCDpanel,
viewfinder, and lens
• A nlenuitem that is gra>ed out is not
available uuder tile c/lrreut recordingor
playback conditions.

• Tile LCD screen and tile viewfiuder are
manufactured using extremely high-
precision technology, so over 99.990_ uf
the pixels are operational for effective
use. However. there may be some tiny
black points and/or bright points (white.
red. blue. or green in culor) that appear
constantly on the LCD screen :rod the
viewfinder. These points are norm:d
results of the manufacturing process and
do nut affect the recording in any way.
• Television programs, fihns, video tapes,
and uther materials may be copyrighted.
Unauthorized recording of such materials
may be contrary tu the copyright laws.
Aboutthis manual
• The images of the LCD screen and the
viewfiuder used in this manual lk_r
illustration purposes are captured using a
digital still camera, and therelk_re may
appear different.
• The on-screen displays in each lucal
language are used fur illuslratiug the
operating procedures. Change the screen
language belk_re using your camcorder if
necessary (p. 17).
• Design and specifications of recording
media and accessories are subject to
change without notice.
point
_White, red, blue
or green point
• Exposing the LCD screen, the viewfiuder.
or the lens to direct sunlight for lung
periods uf time may cause malfunctions.
• Do not aim at the sun. Doing su might
cause yollr calucorder to ulalfuoctiuu.
Take pictures of the sun only in luw light
conditions, such as at dusk.
Onrecording
• Belk_restarting to record, test the
recording fuuctiun to make sure the
picture and sound are recorded without
any prublems.
• Compensation for the contents of
recordings canuut be pruvided, even if
recording or playback is not possible due
tu a malfunction of the camcorder, sturage
media, etc.
• TV color systems differ depending on the
countries/regions. To view your
recordings on a TV, you need an NTSC
system-based TV.
Aboutthe Carl Zeisslens
Your camcorder is equipped with a Carl
Zeiss lens. which was developed jointly by
Carl Zeiss. in Germany, and Sony
Corporation. and produces superior images.
It adopts the MTF* measurement system fur
video cameras and offers a quality typical
uf a Carl Zeiss lens.
* MTF slands lot Modulation Translkr
Function. The number value indicates the
anlount of ligla fl*olna subjecl conling inlo
file lens.

TableofContents
IMPORTANT SAFEGUARDS .................................................................. 3
Read this first ........................................................................................... 5
4
Step 1: Checking supplied items ............................................................ 11
Step 2: Charging the battery pack ......................................................... 12
Step 3: Turning the power on and holding your camcorder firmly ......... 15
Step 4: Adjusting the LCD panel and viewfinder .................................... 16
Step 5: Using the touch panel ................................................................ 17
Changing the language setting .................................................................... 17
Checking the screen indicators (Display guide) .......................................... 17
Step 6: Setting the date and time ........................................................... 19
Step 7: Inserting a Cassette ................................................................... 20
Easy Recording/Playback (Easy Handycam) ........................................ 22
Recording ............................................................................................... 24
Playback ................................................................................................ 25
Functions used for recording/playback, etc ........................................... 26
Recording
To use zoom
To record in dark places (NightShot plus)
To adjust the exposure for backlit subjects (BACK LIGHT)
To adjust the focus for an off center subject (SPOT FOCUS)
To fix the exposure for the selected subject (Flexible spot meter)
To record in mirror mode
To use a tripod
To use a Shoulder Belt
Playback
To play back the images with added special effects (Picture effect)
Recording/playback
To check the remaining battery (Battery Info)
To turn off the operation confirmation beep (BEEP)
To initialize the settings (RESET)
Other part names and functions
Indicators displayed during recording/playback ..................................... 28
Searching for the starting point .............................................................. 30
Searching for the last scene of the most recent recording
(END SEARCH) .................................................................................. 30
Searching manually (EDIT SEARCH) ........................................................... 30

Reviewingthemostrecentlyrecordedscenes(Recreview).......................31
PlayingthepictureonaTV....................................................................32
Using the menu items ........................................................... 34
Operation button items ........................................................................... 36
Menu items ............................................................................................. 41
[] MANUAL SET menu ...................................................................... 42
PROGRAM AE/P EFFECT, etc.
[] CAMERA SET menu ...................................................................... 43
D ZOOM/WIDE SEL/STEADYSHOT, etc.
VCR SET menu .............................................................................. 4,5
AUDIO MIX
[] LCDNF SET menu ......................................................................... 45
LCD B.L./LCD COLOR/VF B.L., etc
[] TAPE SET menu ............................................................................ 46
REC MODE/AUDIO MODE/REMAIN
SETUP MENU menu ...................................................................... 47
CLOCK SET/LANGUAGE, etc.
OTHERS menu .............................................................................. 47
WORLD TIME/BEEP, etc.
Dubbing to VCR/DVD device, etc ........................................................... 48
Recording pictures from a TV or VCR/DVD device, etc ......................... 50
Dubbing sound to a recorded tape ......................................................... 51
Jacks to connect external devices .......................................................... 53
Troubleshooting ...................................................................................... ,54
Warning indicators and messages ......................................................... 61
Continued ._

Using your camcorder abroad ................................................................ 64
Usable cassette tapes ............................................................................ 65
About the "lnfoLITHIUM" battery pack ................................................... 66
About i.LINK ........................................................................................... 67
Maintenance and precautions ................................................................ 68
Specifications ......................................................................................... 71
Index ...................................................................................................... 74
I, _ , _ , ,I I, " " I,|1
18

Step1: Checkingsupplieditems
Make _,ure that you have following items
supplied with your camcorder.
The nuinber in the parentheses indicates the
nu tuber of that item supplied.
Rechargeable battery pack NP-FP30 (1)
(p. 12, 66)
AC Adaptor (1) (p. 12)
Operating Guide (This manual) (1)
Power cord (1) (p. 12)
AN connecting cable (1) (p. 32, 48)
m
g
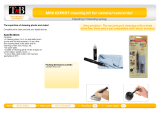
Lens cap (1) (p. 15, 24)
• To attach the lens cap
Aoach lhe lens cap to the melal fillings of the
grip bell, as illustrated below, using the strap.
11

Step2: Chargingthe batterypack
You can charge the "InfoLITHIUM"
battery pack (P series/H series)
(p. 66) after attaching it to your
camcorder.
POWER switch
/ Slide the POWER switch in the
direction of the arrow to
OFF(CHG) (The default setting).
POWER
3 Connect the AC Adaptor to the
DC IN jack on your camcorder.
Power cord
1Align the terminals of the battery
pack and your camcorder O, then
attach the battery pack and click
it into place Q.
With the • mark facing to the
LCD screen
4Connect the power cord to the AC
Adaptor and the wall outlet.
CHG (charge) lamp
12
Tile CHG (charge) l_uaap lighls up and
charging sl_lrts.

5 The CHG (charge) lamp turns off
when the battery is fully charged.
Disconnect the AC Adaptor from
the DC IN jack.
Disconnect the AC Adaptor lbom the
DC IN jack holding both the camcorder
and tile DC plug.
Touseanoutsidepowersource
You can operate your camcorder using tile
power from the wall outlet by making tile
same connections as you do when charging
the battery pack. The battery pack will not
lose its charge in this case.
Toremovethebatterypack
(_) Slide tile POWER switch to
OFF(CHG). Hold down tile •
BATT/battery/release lever with one
hand.
(_) Remove the battery in the direction of
the arrow with the other hand.
POWER switch
• BATT (battery)
release lever
Whenstoringthebatterypack
Fully discharge the battery before storing it
for an extended period (p. 66).
Chargingtime
Approximate time (rain.) required when
you fully charge a fully discharged battery
pack.
NP-FP30 /supplied) 115
NP-FP50 125 m
NP-FPTI 17(1
NP-FPg0 22(}
g
NP-FH50 135
NP-FH70 170
NP-FH 100 390
Recordingtime
Approximate time (min./available when
you use a fully charged battery pack.
NP-FP30 95 45
/ supplied) 110 55
NP-FP50 135 65
16(1 80
NP-FP71 330 165
395 195
NP-FP90 500 250
58(} 290
NP-FH50 155 75
18(} 90
NP-FHT0 330 165
395 195
NP-FH 100 760 380
89(1 445
• All times measured under tile R_llowing
condilions:
Top: Recording with LCD screen.
Bottom: Recording with viewfinder while the
LCD panel closed.
* Typical recording time shows the time when
you repeat recording slarl/_,top, turning the
power on/oll and zooming.
Continued._ 13

St+p2: ghaNi_ the battery pack (C+_ti_u+d)
14
Playing time
Approximate time (rain.) available when
you use a fully charged battery pack.
NP-FP30
105 135
(supplied)
NP-FP50 150 190
NP-FP71 370 465
NP-Ffx)O 550 705
NP-FH50 17(1 220
NP-FH70 37(1 465
NP-FH100 845 1065
On the battery pack
• Before changing tile barrel T pack, slide tile
POWER switch to OFP(CHG).
• The CHG (charge) lamp flashes during
charging, or the Battel T Inlo (p. 27) will not be
correctly displayed under lhe lollowing
conditions.
The battery pack is not altached correcl]y+
Tile battery pack is damaged.
The balte W pack is worn-oul+ (For Batlery
lnlo only.)
• The power will not be supplied lrom the battc W
as long as the AC Adaptor is connected to the
DC IN jack of your camcorder, even when the
power cord is disconnected lrom lhe wall oulIeL
On the charging/recording/playback time
• Times measured with tile camcorder at 25 op
177 OF). ( lO °C to 30 op 1511OFto 8(_OF)is
recommended.)
• The recording and playback time will be shorter
when you use your call/corder ill low
temperalurcs.
• Tile recording and playback time will be shorter
depending on the conditions under which you
use your camcorder+
On the AC Adaptor
• Use tile nearby wall outlet when using tile AC
Adaptor. Disconnect the AP Adaptor fi+onltile
wall outlet inmlediately il any maltimction
occurs while USJllg your catllcorder.
• Do not u_ the AC Adaptor placed in a nan+ow
space, such as between a wall and lumiture.
• Do not sholl-circuit the DC plug of the AC
Adaptor or ballery terminal wilh any metallic
objects, This may cause a mallunction,
PRECAUTION
• Even if your canlcorder is turned oil, AC power
(house current) is still supplied to it while
connecled to the wall oul]el via the AC Adaplor.

Step3: Turningthe poweronandholdingyour
camcorderfirmly
To recerd er play back, slide tile POWER • Alter you have set the date and time
switch repeatedly to mrn on the respective ([CLOCK SETI, p. 19),tilenext time you
lamp. tUrll on tile pllwer ol yollf Calllcorder, the
When/lsil'ig il for ll'le l]rsl time. lhe currenldate andlime will be displayedon
the LCD screenlot a IEwseconds.
[CLOCK SET] screen appears (p. 19).
POWER switch Lens cap
3 Hold the camcorder correctly.
A
HI. Ensure a good grip, then fasten
1 Remove the lens cap by pressing
the
grip
belt.
both knobs on the sides of the
cap.
ii_iiiiii_!_!¸ , [l[l[l[l@,l,,,
Slide the POWER switch
repeatedly in the direction of the
arrow to turn on the respective
lamp.
IfIhe POWER
swilch is sel to
OFF(CHG), slide it
while pressing the
green button.
Lamps that light up
CAMERA: To record on alape.
PLAY/EDIT: To play or edil pictures.
®
To turn off the power
(_) Slide the POWER switch to
OFF(CHG).
(_) Attach the lens cap.
• At tile time of purchase, the power will be set to
turn off autonlatically if you leave your
catncorder withoul any operalion altetllpled lor
approximately 5 minutes, to save battery power
([A.SHUT OFF], p. 47).
m
g
g.
15

Step4: Adjustingthe LCDpanelandviewfinder
Open the LCD panel 9(I degrees to the
camcorder (@), then rotate it to the best
angle lo record or play (@).
180 degrees
90 degrees to the
90 degrees camcorder
(max.)
• If you rotate the LCD panel 180 degrees to the
lens side, you can close the LCD panel with the
LCD screen lacing out. This is convenieni
during playback operations.
• See [LCD BRT] (p. 39) to a¢{iusi tile brighiness
of lhe LCD screen.
You can view pictures using tile viewfinder
to avoid wearing down the battery, or when
the picture seen on the LCD screen is poor.
clear.
• You can adjust the brightness of lhe viewfinder
backlight by _leciing _ (ECD/VF SET) -
[VF B.L.I (p. 4_,).
• You can adjust lhe [FADERI and the
[EXPOSUREI _uing using the viewfinder
(p. 37).
16

Step5: Usingthe touchpanel
You can play back recorded piclures
(p. 25), or change the settings (p. 34) using
the touch paneh
Place your hand on the rear side of
the LCD panel to support it. Then,
touch the buttons displayed on the
screen.
DISP/BATT INFO
You can change tile on-screen displays to
show messages in a specified language.
Select the screen language in [
LANGUAGE] on tile [] (SETUP
MENU) (p. 34, 47).
m
g
You can easily check the meaning of each
indicalor (p. 291 that appears on the LCD
screen, m.
1 Touch [_.
Touch Ihe butlon on Ihe LCD screen.
• If tile buttons on tile touch panel do not work
correctly, adjust lhe LCD screen
/CALIBRATION) (p. 70).
• Dots in lines may appear on the LCD screen, bul
this is not a n/alfllnclion, These dots arc not
recorded.
T0 hide the screen indicators
Press DISP/BATT INFO to toggle tile
screen indicators (such as time code) on or
off.
2Touch [DISP GUIDE].
...... /% (o........
The indicatorsvary depending on Ihe
settings.
Continued._ 17

Step 5: Usi_ the touch pa_N {go_tim_÷_}
3 Touch the area including the
indicator that you want to check.
Tile meanings of the indicators in the
area are listed on the screen. If you
cannot find tile indicator you want to
check, touch [PAGE ,_]/[PAGE T] to
toggle.
When you touch [_ RET. ], the screen
returns to the area selecting display.
Tofinishthe operation
Touch IENDI.
18

Step6: Settingthe dateandtime
Set the date and time when using this
camcorder for the first time. If you do not
set the date attd time. the [CLOCK SET]
screen appears every time you turn on your
camcorder or change the POWER switch
position.
• If you do not useyour camcorder lot about 3
months, tilebuilt-in mchargeuble batle W gets
discharged and the d_lleandtime settings may
be clearedlrom lhe memoW.In that case,
charge the rechargeableballcWand then set lhe
date and time again (p. 71).
POWER switch
Skip to slep 4 when you set the clock for
the first time.
1Touch _ --+ [MENU].
MANUAL SET 7
[_ pnoGn_ AE
_-4 p EFFECT
_ AUTOSHm
2 Select _ (SETUP MENU) with
[BZ]/_, then touch [EXEC].
SETUp MENU
_ oE_oMODE
3 Select [CLOCK SET] with _/
EiZ], then touch [EXEC].
CLOOK SET
¥t MT D_ _t M_
_07 1T00?o
ES_ES_ _l
4 Set [Y] (year) with [ZZ]/[ZZ],
then touch _.
You can set any year up to the year
2079.
CLOCK SET
2007D2 _ 1 12:00AMYT MT DI _t M_
5 Set [M] (month), then touch
and repeat for [D] (day), [H] (hour)
and [M] (minute).
For midnight, set it to 12:00 AM.
For midday, set it to 12:00 PM.
The clock starts.
• The date and time arc not displayed while
recording, but they are automatically recorded
on the tape, and can be displayed during
playback (see page 39 lor [DATA CODEI
(During Easy Handycam operation, you can sel
only [DATE/TIMEI)).
m
g
g.
19

Step7: Insertinga Cassette
You can use mini DV Mti_,'r cassettes only
(p. 65).
• Tile recordable time varies depending on [REC
MODEl (p. 46).
1Slide and hold the [- OPEN/
EJECT lever in the direction of the
arrow and open the lid.
[-" OPEN/EJECT lever
/ Insert a cassette with its window
facing outwards, then press
Push the ccnlcr of the back
of Ihe casselte lighlly.
Window
Lid
Tile casselle c(mlparlment autematically
comes OUt and opens tip.
Cassette compartment
The cassette compartment
automatically slides back in.
• Do not force the cassette
compartment closed by pressing the
portion marked _ while
it is sliding in. It may cause a
malfunction.
3 Close the lid.
To eject the cassette
Open tile lid following the stone procedure
as described in slep 1 and remove Ihe
cassetle.
2O
/