Newco Enterprises, Inc. AK-LD Operating instructions
- Category
- Coffee makers
- Type
- Operating instructions

Man Pt No 110402
ISS 0599
N E W C O E N T E R P R I S E S
INSTALLATION and OPERATION MANUAL
for AK SERIES BREWERS
BREWER SPECIFICATIONS
Model
No of
Warmers Width Length Height*
US 120V
Amps**
Canada 120V
Amps**
AK-1 1 8-1/2" 16-3/8" 16-15/16 12.5 11.2
AK-2 2 8-1/2" 16-3/8" 18-9/16 13.3 10.8
AK-3 3 15-1/2" 16-3/8" 16-15/16 14.2 11.7
AK-LD N/A 8-1/2" 16-3/8" 21-3/16 14.6 11.7
AK-TC N/A 8-1/2" 16-3/8" 17-5/8 14.6 11.7
AK-AP N/A 8-1/2" 16-3/8" 22-15/16 14.6 11.7
AK-D N/A 8-1/2" 17-3/8" 27-3/8 14.6 11.7
* Height with ABS base shown for Airpot/Dispenser models
** Other Wattages/Voltages available as special order
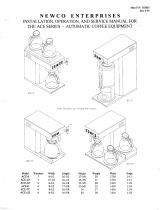
AK-LD
Note: Decanters and Dispensers not Included
AK-3AS

INSTALLATION / SETUP INSTRUCTIONS
WARNING:
- Read and follow installation / setup instructions before plugging or wiring in machine to electrical
circuit. Warranty will be void if machine is connected to any voltage other than that specified on the name plate.
FILL BREWER TANK WITH WATER BEFORE CONNECTING TO POWER SUPPLY !
1) Place the decanter under brew basket, raise top evaporation cover and pour three decanters of water through
the top pour-in screen. Water should come through the brew basket as the third decanter of water drains out of
the pour in basin.
2) Brewer is shipped with thermostat turned on. Plug or wire in machine to appropriate voltage circuit as indicated
on serial tag.
3) Allow 10 to 15 minutes for water in tank to heat to brewing temperature. Additional water may drip from brew
basket on initial expansion of water in the tank. This will not occur thereafter.
4) After water has reached brewing temperature (thermostat will click off, heating noise will stop and green ready
light will be on) pour 1 decanter (60 oz.) of water through pour-in screen. More than 1 decanter of water will
flow into decanter below brew basket due to water expansion in the tank. Machine is now ready to use.
5) Pour 1 decanter of water through pour-in screen to check for the proper temperature setting with an accurate
thermometer. Take the temperature of this water at a point below the brew basket opening, at the start of the
brew cycle and when the decanter is half full. Recommended temperature of the water is approximately 195 F.
6) In higher altitude locations (5000 feet above sea level) the thermostat may have to be adjusted lower to prevent
boiling.
COFFEE PREPARATION PROCEDURES
1) Place filter into brew basket.
2) Put the proper amount of coffee into the filter.
3) Slide the brew basket into holder.
4) Place the appropriate empty decanter into position below the brew basket. For airpots first open lid and remove
pump stem unless it is of the brew thru design. For other dispensers without brew thru lids, remove the lid.
Turn lower warmer switch to the ON position for warmer units.
5) Raise the top evaporation cover and pour one decanter of cold water through the pour in screen into the basin.
Do not overfill unit by pouring in more than one decanter of water at a time.
6) Hot water will be delivered through the sprayhead. This distributes the hot water evenly over the coffee bed
within the brew basket. The coffee brew will drain from the brew basket into the decanter below.
7) TURN OFF WARMERS WHEN NOT IN USE. Red light in switch indicates when warmer is on.
8) To clean brew basket simply remove from brew rails and dump filter into waste basket. The brewing process,
as described above, can now be started again.
AUTOMATIC WARMER SAFETY SHUT OFF - OPTIONAL FEATURE
Warmer models may be equipped with an electronic control system which automatically monitors the
length of time the warmers are on, and shuts them off after they have been turned on for a preset length of time.
The model number on the serial tag of brewers equiped with this feature is appended by "AS". For example an
AK-3AS is a 3 warmer AK brewer with Automatic Shutoff.
The warmer shutoff control is initially set at the factory for two hours but the duration of on time for the
warmers may be adjusted anywhere between thirty minutes and four hours, depending on the needs of your
customer. To adjust the time, simply remove the access panel located on the right side of the brewer. Use a
screwdriver to turn the knob. Turning the knob clockwise will increase the on time and counter clockwise will
decrease the length of time the warmers will stay on.
The warmer control circuit will operate all warmers on for the same amount of time. The on time will
automatically be reset to the programmed time when any warmer is turned on. For example, if the customer has
turned on the lower warmer and then 30 minutes later turns on the second warmer, the on time for both warmers
will automatically be reset for the full programmed time of two hours, assuming the factory set time of two hours is
used. This feature eliminates individual warmers shutting off separately. A warmer may be turned off manually by
depressing the appropriate control switch. The red pilot light indicates that the warmer is on.
LIMING
To prevent liming problems in tank fittings remove sprayhead and insert deliming spring all the way into the
tank. When inserted into tank properly, no more than ten inches of the spring should be visible at the
sprayhead fitting. Saw back and forth five or six times. This will keep fittings open and clear of lime. In hard
water areas this should be done everyday. This process takes approximately one minute. In all areas the
sprayhead should be cleaned at least once a week. Where bad liming has already occurred, a new complete
tank assembly may be installed. The tank may be changed in approximately 5-10 minutes time.

WARRANTY
Newco coffee brewers are warranted against defects in workmanship or materials, under normal use, for
90 days from the date of purchase. Brewer parts are warranted against defect for 12 months from date of
purchase.
Liability in all events is limited to the purchase price paid and liability under the aforesaid warranty is
limited to replacing or repairing any part or parts which are defective in material or workmanship, and returned to
our factory, shipping cost prepaid. No warranty expressed or implied, other than the aforesaid is made or
authorized by Newco Enterprises, Inc.
Prompt disposition will be made if item proves to be defective, within warranty. Before returning any item,
write or call Newco, or the dealer from whom the product was purchased, giving model number, serial number,
and date of purchase, and describe the nature of the defect. If damage was incurred during transit to you, file
claim with the carrier.
AK POUR OVER BREWER - REPLACEMENT PARTS LIST
Electrical Components Tank and Plumbing Components
101419 Thermostat Assembly, Regulating 101842 Tank Assy, 1400 W
100043 Knob, Thermostat, Regulating 101857 Tank Assy, 1750 W
100174 Thermostat, Hi-Limit 705199 Lid Assy, 1400 W Tank
100143 Bracket, Hi-Limit 705399 Lid Assy, 1750 W Tank
202025 Element, Tank, 1750W 120V 704119 Tank, Only
701170 Element, Tank, 1400W 120V 704221 Gasket, Tank, Main
202057 Element, Tank, 1100W 120V 700016 Gasket, 1.062" OD X .578" ID, Sil
100187 Element, Warmer, 100W 120V 700325 Pan, Receiving
101840 Board Assy, Warmer Shutoff 781555 Gasket, Delivery Tube
101390 Board Only, Warmer Shutoff 701200 Nut, Slotted Hex, 3/4-16
102844 Support, Board, Snap In 700015 Washer, 1" OD X 3/4" ID, S/S
110581 Support, Board, Screw mounted
100500 Switch, Rocker ON/OFF, Red
Hardware and Miscelaneous
100085 Switch, Rocker ON/OFF, Lighted, Red 100008 Plate Only, Warmer, Black
102562 Switch, Momentary, Auto Shutoff Units 100010 Plate Assy, Warming, Black
781432 Switch, Rocker, Red Light 100160 Screw, 4-40 X 5/8, SPHMS S/S
100022 Cord, 120 V Power 100078 Foot, Bumper,With Screw
101035 Grommet, Strain Relief, 120 V Cord 700118 Basket, Brew, 8 Sided Black
110130 Light Assy, Green, AK 102799 Rail, Brew, R.H.
101698 Lens, Ready Light, Green 102800 Rail, Brew, L.H.
108014 Plate, Board Access
Labels/Decals
110624 Pour-In, Cover, Plastic
100254 Decal, "Hot Surfaces" 110625 Pour-In, Grid and Cover
101717 Label, Switch Plate, AK-2AS 101726 Tube Assy, Sprayhead
101718 Label, Switch Plate, AK-3AS 100024 Sprayhead, S/S 5 Hole
101719 Label, Faceplate, AK Dispenser Models 100025 Gasket, Sprayhead
110057 Label, Switch Plate, AK-2 201173 Nut, Sprayhead, 7/16-20
110058 Label, Switch Plate, AK-3
110120 Label, Hot Liquids
CAUTION:DISCONNECT BREWER CORD FROM ELECTRICAL OUTLET BEFORE
REMOVAL OF ANY PANEL OR REPLACEMENT OF ANY COMPONENT!
NOTE: IN CANADA REPAIRS ARE TO BE DONE BY CERTIFIED ELECTRICIAN OR BREWER MUST BE
REINSPECTED TO MAINTAIN APPLICABLE CERTIFICATION

AK WARMER MODELS - WITH AUTO WARMER SHUTOFF
AK WARMER MODELS - WITHOUT AUTO WARMER SHUTOFF
AK THERMAL (AIRPOT/DISPENSER) MODELS
WIRING DIAGRAMS
Newco Enterprises, Inc. * 1735 S. River Rd. * P.O. Box 852 * St. Charles, MO 63302
-
 1
1
-
 2
2
-
 3
3
-
 4
4
Newco Enterprises, Inc. AK-LD Operating instructions
- Category
- Coffee makers
- Type
- Operating instructions
Ask a question and I''ll find the answer in the document
Finding information in a document is now easier with AI
Related papers
-
Newco Enterprises, Inc. FC Operating instructions
-
Newco GXF1-30 Operating instructions
-
Newco Enterprises, Inc. NKPPA-AF User manual
-
 Newco ACE-S Owner's manual
-
Newco KP-2A Owner's manual
-
 Newco AKH AP Operating instructions
-
Newco AKH-2 Operating instructions
-
Newco Enterprises, Inc. 20:1 TD Datasheet
-
Newco GKF-2 User guide
-
 Newco NKT3 Operating instructions
Other documents
-
Curtis ALPHA-5DS User guide
-
Curtis CAFE0AP10A000 User manual
-
Bloomfield 8752KFT Operating instructions
-
Bunn A10A User manual
-
 Newco NKPPA-AF Owner's manual
-
Crathco / Grindmaster AT-APE User manual
-
Curtis CAFE1DB10A000, CAFE2DB10A000, CAFE3DB10A000 User guide
-
Grindmaster CPO-3P-15A Operating instructions
-
Bloomfield 2086 Operating instructions
-
Grindmaster B-SAP Operating instructions


