Support Oakcastle User manual

Category
DVD players
Type
User manual

Support Oakcastle Vision DVD Player lets you enjoy DVD movies on a variety of televisions. Connect it to your TV via the provided RCA, HDMI, or component cables, and use the included remote control to operate the device and navigate on-screen menus. The DVD player also supports playing video and audio content from USB drives, and it can display JPEG images. You can even control basic playback with the buttons on the front of the device.

Support Oakcastle Vision DVD Player lets you enjoy DVD movies on a variety of televisions. Connect it to your TV via the provided RCA, HDMI, or component cables, and use the included remote control to operate the device and navigate on-screen menus. The DVD player also supports playing video and audio content from USB drives, and it can display JPEG images. You can even control basic playback with the buttons on the front of the device.

VISION
USER MANUAL
2
UK CONTENTS
Contents ������������������������������������������������������������������������������������������������������������������������� 2
Box Contents ����������������������������������������������������������������������������������������������������������������� 3
Controls & Functions ���������������������������������������������������������������������������������������������������� 4
Getting Started �������������������������������������������������������������������������������������������������������������� 7
DVD Operation �������������������������������������������������������������������������������������������������������������� 8
USB Operation ��������������������������������������������������������������������������������������������������������������� 9
Playing JPEG/Picture CD & MP3 Discs ����������������������������������������������������������������������� 10
System Set-Up ������������������������������������������������������������������������������������������������������������� 11
Troubleshooting ���������������������������������������������������������������������������������������������������������� 17
Spec & Warranty ��������������������������������������������������������������������������������������������������������� 18
Safety Information ������������������������������������������������������������������������������������������������������ 19
Register your product online for a FREE 3 year
extended warranty at: www.oakcastle.co.uk
3YEAR
WARRANTY
3
UK
BOX CONTENTS
WHAT’S IN THE BOX
A. Oakcastle Vision DVD Player
B. Remote Control
C. Instructions Guide
D. RCA AV cable
A
DCB
4
UK
REMOTE CONTROL
CONTROLS & FUNCTIONS
1
2
3
4
5
6
7
8
9
10
13
12
14
16
18
11
15
17
20
21
22
23
26
25
27
29
30
33
32
34
36
38
31
35
37
19 39
24
28
5
UK
CONTROLS & FUNCTIONS
1. On/O
2. OSD
3. Step: Press to turn play picture by
picture on/o.
4. Press to switch between DVD/USB.
5. Mute/Unmute
6. Title
7. Left (<)
8. Setup: Press for setup menu
9. L/R: Use for VCD or CD discs. Press to
select left or right channel, or stereo
10. Previous (I<<): In DVD mode, press to
go to previous chapter. With SVCD, VCD,
CD, MP3 discs, press to go to previous
track.
11. Volume down (-)
12. Next (>>I): In DVD mode, press to go to
next chapter. With SVCD, VCD, CD, MP3
discs, press to go to next track.
13. Play/Pause
14. Video: Switch to video output mode
(cvbs.yuv.rgb)
15. Programme (See page 7)
16. Repeat: Press repeatedly in DVD mode
to scroll through: repeat a title, chapter,
track or go to the beginning. In SVCD,
VCD or CD mode: track repeat, all repeat
or repeat cancel.
17. PBC: Playback control
18. Language: Press to select on-screen
display language options
19. Subtitle: Press to turn subtitles on
20. Open/Close DVD Tray
21. 0-9/10+: While playing DVD/VCD/CD/
MP3 discs, use key to select desired
track/chapter in menu selection.
22. Time: Press to manually set up the time
on the DVD player display unit
23. Return to main DVD title menu
24. Navigate up
25. Right (>)
26. Enter/Conrm
27. Zoom: Press to zoom in, press again
to zoom out. Use arrow keys to move
picture.
28. Navigate down
29. N/P: Press to switch the TV system
between NTSC and PAL.
30. Rewind (<<)
31. Volume up (+)
32. Fast Forward (>>)
33. Stop
34. A-B: Press to repeat certain sections.
Press button on start point (A) and the
end point (B) to select section. Cancel by
pressing button a third time.
35. Clear: Press to clear input selections
36. Slow: Press to select slow speed playing.
37. Return: Return to VCD menu.
38. Reset: Reset DVD player settings
39. Angle: Change angle in DVD mode
6
UK
CONTROL BUTTONS
CONTROLS & FUNCTIONS
40. DVD Tray
41. Remote Sensor
42. Display
43. USB Port
44. Open/Close
45. Play/Pause
46. Stop
47. Power On/O
48. (Y.Pb/Cb.Pr/Cr) Output
49. Power Cable Outlet
50. HDMI Output
51. 2 x Audio Output ports
52. Video Output
40 41 42
43
44
45
46
47
48 49
50 51 52
7
UK
GETTING STARTED
Setting Up
Connect the DVD player power plug to a wall outlet. The power indicator and timer
on the front panel will illuminate.
Follow one of the steps below for connecting your DVD player:
Connecting Via RCA Cable
Connect a RCA cable between the 2 channel Audio Output port and the RCA input
on your TV.
Connecting via HDMI
Connect a HDMI cable between the HDMI Output on the back panel of the DVD
player (Ref.50) to the HDMI input on your TV.
Connecting via Component (Y Pb/Cb Pr/Cr) Cable
Connect a (Y Pb/Cb Pr/Cr) cable via the (Y/Cb/Pb Cr/Pr) Output of the DVD player
(Ref.48) to your TV (R/L/Video port and cable).
Programme Button
If the disc has two or more tracks, chapters, or titles, you can set up playing
order preference. Press the button to then input the number of the track, title or
chapter. If the programmed tracks are over 10, press ‘Next’ to go on programming.
Use the up/down/left/right key to move the cursor to ‘Start’. Press ‘Enter’ to start
programmed play. With MP3 discs, press the button to enter ‘Directory-Play’ mode.
Press ‘Programme’ again to enter le-list mode.
8
UK DVD OPERATION
The following DVD formats can be played: DVD, DVD-R-RW, CD Video, Mpeg4.
1. Ensure that your TV is set to the correct mode for DVD playback.
2. Plug in the DVD player and press the ‘Power’ button to turn the unit on. You can
do this on the unit (Ref.47) or via the remote (Ref.1).
When the machine is switched on, pressing the POWER button on the remote
control will make it go into standby mode. Press the button again and the machine
will switch on.
WARNING: If the product will not be used for an extended period of time, it is
advisable to unplug it for safety.
3. Press the Open/Close button on the front panel (Ref.44) or on the remote
control (Ref.20) and place a DVD disc on the disc tray. Press the Open/Close
button again to close the tray.
4. The DVD player will read the DVD disc and begin playing. You can control the
playback and settings via the remote control.
9
UK
This device has a USB port in the front interface for MP3/Movie playback.
Insert a USB device into the USB port (Ref.43).
Press the DVD/USB button on the remote control (Ref.4) and select ‘USB’ to switch
the source to USB. The DVD player will read and display the le list from the USB
drive.
Browse through the le list by pressing the buttons (Ref� 7, 24, 25, 28)
on the remote control. Select a le by pressing the Enter button (Ref.26) of the
remote control.
Playing MP3 Discs
The following formats can be played: Mp3, WMA, CD Audio, CD-R-RW, CD
Whilst a MP3 disc is playing, a menu screen will display on the TV. Press the
buttons (Ref.24)/(Ref.28) to scroll through tracks or folders. Press the ENTER
button to select the track or folder.
Press the PROG button in le play mode. The screen will then display the total
track number and the current track playing. Use the digit buttons (Ref.21) to key in
and select the track or use the buttons to shift to the track and press the
ENTER button (Ref.26) to play the track.
USB OPERATION
10
UK PLAYING JPEG/PICTURE CD & MP3 DISCS
The following formats can be played: Jpg, Jpeg, CD Photo
Press the STOP button and 12 small pictures will show on the TV screen.
Press the buttons to select the desired picture to view. (Ref.7), (Ref.24),
(Ref.25), (Ref.28).
To access the instructions menu, use the buttons to navigate and then
press the ENTER button to conrm. The following options will display:
1. PROG - Select to change picture transform mode
2. STOP - Entering picture preview mode
3. PREV - Previous picture
4. NEXT - Next picture
5. PLAY - Play picture
6. UP - Mirror image in vertical
7. DOWN - Mirror image in horizontal
8. LEFT - Rotate 90 degrees anticlockwise
9. RIGHT - Rotate 90 degrees clockwise
10. ZOOM - Change zoom mode
11. FAST FORWARD - Zoom in the picture
12. FAST REWIND - Zoom out the picture
13. - Move zoom focus for picture.
11
UK
Press the SET-UP button (Ref.8) on the remote control and the SET-UP menu will
display.
The menu options are as follows:
Menu 1: System Setup
Menu 2: Language Setup
Menu 3: Audio Setup
Menu 4: Video Setup
Menu 5: Speaker Setup
Menu 6: Dolby Digital Setup
After accessing the SET-UP menu, press the buttons (Ref.7), (Ref.24),
(Ref.25), (Ref.28) to access your chosen sub-menu. Press the ENTER button to
conrm your selection.
To end the set-up, press the SET-UP button again.
Follow the guidance on the next pages for editing these settings.
SYSTEM SET-UP
MENU OPERATION
12
UK
MENU 1: SYSTEM SETUP
SYSTEM SET-UP
TV System (NTSC/PAL 60/PAL/AUTO): This unit is suitable for all makes for TV’s.
You can select PAL or NTSC if necessary. PAL must be selected for use in Europe.
Auto Play: Turn Auto Play On/O.
Video: Select between Interlace-YUV and P-Scan YPBPR video output.
Resolution: Select resolution levels from the HDMI output: 480 I/576I, 480P/576P,
720P, 1080I, 1080P
TV Type: Dierent values will be displayed here depending on your TV set. In most
cases you will be able to select from 4:3/PS (Pan and Scan), 4:3/LB (Letterbox), and
16:9 (best for widescreen TV sets).
Password: The initial factory password is 0000. You can change the password
here.
Rating: Select to control parental control settings. Any disc with a parental level
higher than the set level will not be played.
Resume (O/On): If the last memory is set when the unit is on and the unit is
switched o, the last position on the DVD player will be memorised.
Default: Select to revert to original factory set up on this unit.
Next Page: Navigate to next page of settings
Prev Page: Navigate to previous page of settings
Exit Setup: Exit Setup screen. Alternatively, press the ‘Setup’ button on the
remote.
13
UK
MENU 2: LANGUAGE SETUP
Osd Language
Select a language for the on-screen display language (English, German, Spanish,
French, Portuguese, Italian).
Audio Language
Select a language for the audio (English, French, Spanish, Portuguese, German,
Italian, Japan, Latin).
Subtitle Language
Select a language for the subtitles (English, French, Spanish, Portuguese, German,
Italian, Japan, or O).
Menu Language
Select a language for the menu (English, French, Spanish, Portuguese, German,
Italian, Japan, Latin).
SYSTEM SET-UP
14
UK
MENU 3: AUDIO SETUP
SYSTEM SET-UP
Audio Out
SPDIF/OFF: Turn o the Optical/Coaxial audio signal.
SPDIF/RAW: Use with Dolby Digital/DBS enabled speaker systems or TVs
SPDIF/PCM: Use with any other type of speaker system or TV. PCM is the simplest
digital audio signal, with no special eects.
Key
Adjust the left/right audio pitch. Positive numbers increase audio pitch, negative
numbers decrease audio pitch.
15
UK
MENU 4: VIDEO SETUP
Change settings for Brightness, Contrast, Hue, and Saturation.
MENU 5: SPEAKER SETUP
Downmix: Mixing audio Channels
Choose between the following audio mix settings:
LT/RT (Left total/Right total)
Stereo: Select to play the audio via the two front speakers of the TV.
VSS (Virtual Surround Sound): Select to play simulated surround sound via the
speakers.
SYSTEM SET-UP
16
UK
MENU 6: DOLBY DIGITAL SETUP
OP Mode
Select to choose between Line Out/RF Remod settings.
Dynamic Range
Select to change the bass and treble settings, to create a ne detailed sound. This
mode is recommended for reduced sound to avoid disturbance for night time
viewing.
Dual Mono
Select to change between the following audio settings:
Stereo: stereo output
Mono L: mono-left channel
Mono R: mono-right channel
Mix Mono: mix mono channel
SYSTEM SET-UP
17
UK
TROUBLESHOOTING
Symptoms Solutions
No power/function
Check that the power is switched on at the wall.
Check that the power adaptor is properly connected
to power outlet.
No video
Make sure that the video cables are connected
correctly.
Reset the settings of the DVD player.
Check that the input setting on the TV is correct.
No audio
Make sure that the audio cables are connected
correctly.
Make sure that the coaxial connected stereo is
powered on.
Reset the settings of the DVD player.
Distorted video Clean DVD disc of dust/dirt
The playback is on rewind/fast forward mode.
Unable to play
Place a DVD disc in the disc tray.
Place the disc in on the correct side up.
Clean DVD disc of dust/dirt.
Close the setup of the DVD player.
Check that the le is compatible with the unit.
Remote Control does not work
Aim the Remote Control towards the front panel of
the DVD player.
Use the Remote Control closer to the DVD player.
Check the battery level of the batteries.
If you require further assistance with your new DVD player, please contact our
support team on the Oakcastle website: www.oakcastle.co.uk
SUPPORT
18
UK
SPECIFICATIONS
All products come with a standard 12 month warranty. All items must be
registered on www.oakcastle.co.uk for the warranty to be valid. Once on the
web page, use the menu to nd “register your product”. You will also be given the
chance to extend your warranty for an additional 24 months, free of charge.
SPEC & WARRANTY
Power Supply AC 100-240V
0.5A
Frequency Response ~ 50/60Hz
Power Consumption <15W
Compatible Connections
HDMI
A/V RCA Output
USB Input
(Y Pb/Cb Pr/Cr)
R/L/Video
Compatible Formats DVD: DVD, DVD-R-RW, CD Video, Mpeg4
AUDIO: Mp3, WMA, CD Audio, CD-R-RW, CD
PHOTO: Jpg, Jpeg, CD Photo
Dimension (WxHxD) 22.5 x 19 x 4.5 cm
742g
WARRANTY
19
UK
SAFETY INFORMATION
1� Read these instructions�
2. Keep these instructions. Instructions are also avail-
able for download at www.oakcastle.co.uk
3. Heed all Warnings
4. Follow all instructions
5. Do not clean the apparatus near or with water
6. Do not block any ventilation openings. Install in
accordance with the manufacturer’s instructions
7. Do not install near any heat sources such as
radiators, heat registers, stoves, or other apparatus
(including ampliers) that produce heat.
8. Protect the power from being walked on or pinched
particularly at plugs, convenience receptacles, and
the point where they exit from the apparatus.
9. Only use attachments/accessories specied by the
manufacturer.
10. Unplug this apparatus during light storms or when
unused for long periods of time.
11. Refer all servicing to qualied service personnel.
Servicing is required when the apparatus has been
damaged in a way, such as power-supply cord or
plug is damaged, liquid has been spilled or objects
have fallen into the apparatus, the apparatus has
been exposed to the rain or moisture, does not
operate normally or has been dropped.
12. No naked ame sources, such as lit candles, should
be placed on the apparatus.
13. Dispose of used electrical products and batteries
safely according to your local authority and
regulations.
ADDITIONAL WARNINGS
The apparatus shall not be exposed to dripping or
splashing and no objects lled with liquid, such as
vases, shall be places on the apparatus.
Main plug is used to disconnect device and it should
remain readily operable during intended use. In order
to disconnect the apparatus from the main mains
completely, the mains plug should be disconnected
from the main socket outlet completely.
Battery shall not be exposed to excessive heat such as
sunshine, re or the like.
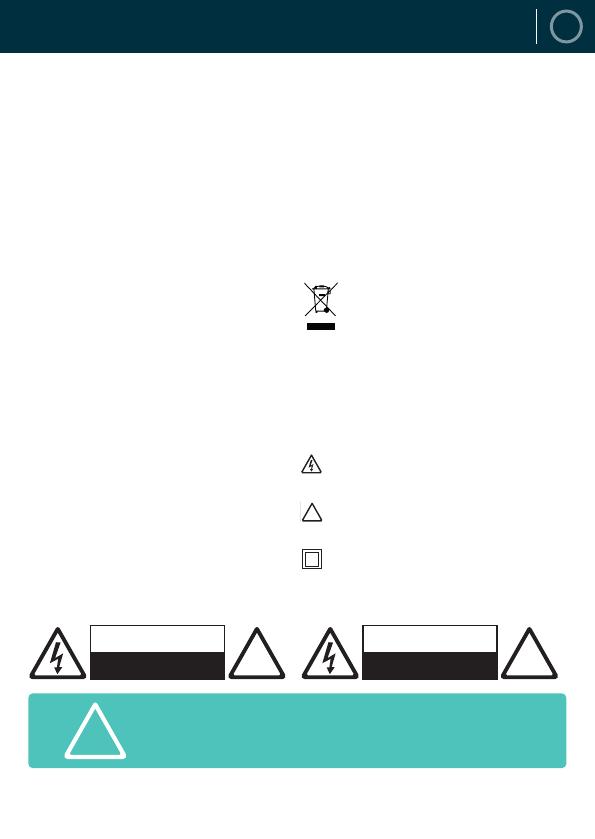
RECYCLING ELECTRICAL PRODUCTS
You should now recycle your waste electrical
goods and in doing so help the environment.
This symbol means an electrical product should
not be disposed of with normal household waste.
Please ensure it is taken to a suitable facility for dispos-
al when nished with.
IMPORTANT: Please read all instructions carefully
before use and keep for future reference.
Risk of electric shock.
Do not open
Read all instructions carefully before use
and keep for future reference
When servicing, use only identical
replacement parts
ATTENTION
RISQUE D’ELECTROCUTION
NE PAS OUVRIR !
CAUTION
RISK OF ELECTRIC SHOCK
DO NOT OPEN !
!
IMPORTANT: Please read all instructions carefully
before use and keep for future reference
!
WWW.OAKCASTLE.CO.UK
  • Page 1 1
  • Page 2 2
  • Page 3 3
  • Page 4 4
  • Page 5 5
  • Page 6 6
  • Page 7 7
  • Page 8 8
  • Page 9 9
  • Page 10 10
  • Page 11 11
  • Page 12 12
  • Page 13 13
  • Page 14 14
  • Page 15 15
  • Page 16 16
  • Page 17 17
  • Page 18 18
  • Page 19 19
  • Page 20 20

Support Oakcastle User manual

Category
DVD players
Type
User manual

Support Oakcastle Vision DVD Player lets you enjoy DVD movies on a variety of televisions. Connect it to your TV via the provided RCA, HDMI, or component cables, and use the included remote control to operate the device and navigate on-screen menus. The DVD player also supports playing video and audio content from USB drives, and it can display JPEG images. You can even control basic playback with the buttons on the front of the device.

Ask a question and I''ll find the answer in the document

Finding information in a document is now easier with AI