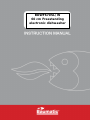
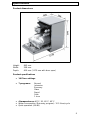
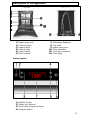
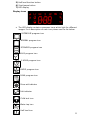
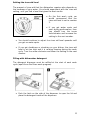
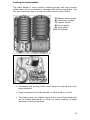
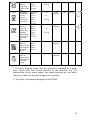
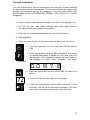
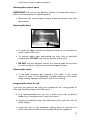
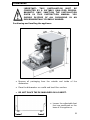
The Baumatic BDWF670W is a freestanding electronic dishwasher with a 14 place setting capacity and a quiet operation of 49 dB. It features 7 programs including Normal, Intensive, Economy, Glass, Rapid, Soak, and 1 Hour, allowing you to choose the most suitable cycle for your dishes. With its LED display, you can easily select and monitor the progress of your wash cycle. The dishwasher also comes with a delay start function, allowing you to set the wash to start at a later time, and a half load option for smaller loads.
The Baumatic BDWF670W is a freestanding electronic dishwasher with a 14 place setting capacity and a quiet operation of 49 dB. It features 7 programs including Normal, Intensive, Economy, Glass, Rapid, Soak, and 1 Hour, allowing you to choose the most suitable cycle for your dishes. With its LED display, you can easily select and monitor the progress of your wash cycle. The dishwasher also comes with a delay start function, allowing you to set the wash to start at a later time, and a half load option for smaller loads.


-
 1
1
-
 2
2
-
 3
3
-
 4
4
-
 5
5
-
 6
6
-
 7
7
-
 8
8
-
 9
9
-
 10
10
-
 11
11
-
 12
12
-
 13
13
-
 14
14
-
 15
15
-
 16
16
-
 17
17
-
 18
18
-
 19
19
-
 20
20
-
 21
21
-
 22
22
-
 23
23
-
 24
24
-
 25
25
-
 26
26
-
 27
27
-
 28
28
-
 29
29
-
 30
30
-
 31
31
-
 32
32
-
 33
33
-
 34
34
-
 35
35
-
 36
36
-
 37
37
-
 38
38
-
 39
39
-
 40
40
-
 41
41
-
 42
42
-
 43
43
-
 44
44


The Baumatic BDWF670W is a freestanding electronic dishwasher with a 14 place setting capacity and a quiet operation of 49 dB. It features 7 programs including Normal, Intensive, Economy, Glass, Rapid, Soak, and 1 Hour, allowing you to choose the most suitable cycle for your dishes. With its LED display, you can easily select and monitor the progress of your wash cycle. The dishwasher also comes with a delay start function, allowing you to set the wash to start at a later time, and a half load option for smaller loads.
Ask a question and I''ll find the answer in the document
Finding information in a document is now easier with AI
