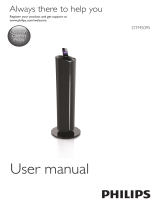
AS170

Philips AS170, AS170/12 User manual

  • Hello! I am an AI chatbot trained to assist you with the Philips AS170 User manual. I’ve already reviewed the document and can help you find the information you need or explain it in simple terms. Just ask your questions, and providing more details will help me assist you more effectively!
  • How do I set the alarm timer?
    How do I set the sleep timer?
    How do I connect the docking system to a power source?
    Can I charge my Android device through the docking system?
    How do I play audio through the docking system?
    How do I tune to FM radio stations?
www.philips.com/welcome
User manual
Always there to help you
Register your product and get support at
AS170
Question?
Contact
Philips
Question?
Contact
Philips
1EN
Contents
1 Important 2
Important Safety Instructions 2
2 Your Docking System for Android™ 3
Introduction 3
What's in the box 3
Overview of the docking system 4
3 Get started 6
Connect power 6
Turn on 6
Select a source 6
Set time 6
4 Play through Bluetooth 8
Compatible with Android™ 8
Play audio through manual Bluetooth
connection 8
Play audio through auto Bluetooth
connection with Philips Bluetooth
Audio Connect 9
Disconnect a device 11
5 Dock and charge Android-
powered phone 13
Charge through Micro USB connector 13
Charge through USB socket 13
6 Listen to FM radio 15
Tune to FM radio stations 15
Store FM radio stations automatically 15
Store FM radio stations manually 15
Select a preset radio station 15
7 Play through audio cable 16
8 Other features 17
Set alarm timer 17
Set sleep timer 17
Adjust display brightness 17
9 Product information 18
General information 18
Bluetooth 18
Tuner (FM) 18
Amplier 18
Speakers 18
10 Troubleshooting 19
General 19
About Bluetooth device 19
11 Notice 20
Compliance 20
Recycling 20
Trademark notice 20
Copyright 20
2 EN
1 Important
Important Safety Instructions
• Heed all warnings.
• Follow all instructions.
• Do not use this apparatus near water.
• Clean only with dry cloth.
• Do not block any ventilation openings.
Install in accordance with the
manufacturer's instructions.
• Do not install near any heat sources such
as radiators, heat registers, stoves, or
otherapparatus(includingampliers)that
produce heat.
• Protect the power cord from being
walked on or pinched, particularly at plugs,
convenience receptacles, and the point
where they exit from the apparatus.
• Onlyuseattachments/accessoriesspecied
by the manufacturer.
• Only use power supplies listed in the user
manual.
• Unplug this apparatus during lightning
storms or when unused for long periods
of time.
• Referallservicingtoqualiedservice
personnel. Servicing is required when
the apparatus has been damaged in any
way, such as power-supply cord or plug
is damaged, liquid has been spilled or
objects have fallen into the apparatus, the
apparatus has been exposed to rain or
moisture, does not operate normally, or
has been dropped.
• Apparatus shall not be exposed to
dripping or splashing.
• Do not place any sources of danger on the
apparatus(e.g.liquidlledobjects,lighted
candles).
• Where the plug of the Direct Plug-in
Adaptor is used as the disconnect device,
the disconnect device shall remain readily
operable.
3EN
2 Your Docking
System for
Android™
Congratulations on your purchase, and
welcometoPhilips!Tofullybenetfromthe
support that Philips offers, register your product
at www.philips.com/welcome.
Introduction
With this docking system, you can:
• enjoy audio from your Bluetooth devices
or other external audio devices;
• charge your android-powered device;
• listen to FM radio; and
• wake up to buzzer alarm or radio.
What's in the box
Check and identify the contents of your
package:
• Main unit
• Power adapter
• Audio input cable (3.5 mm connectors)
• Short user manual
• Safety and notice
Quick start guide
4 EN
Overview of the docking
system
a POWER
• Press to turn on the docking system or
switch it to standby mode.
b AUDIO IN
• Connect an external audio device.
c CHARGING
• Charge your mobile phone.
d FM ANTENNA
• Improve FM reception.
e DC IN
• Connect to the power adapter.
m
l
k
h
i
j
a
d
g
f
e
c
b
f SOURCE/SET
• Press to select a source: FM preset, FM,
Bluetooth, or AUX IN.
• Press and hold to start to set the clock.
• Press and hold to store preset radio
stations.
g Wheel
• Rotate to adjust the height of micro
USB connector.
h AL1/AL2
• Press and hold to start to set alarm.
• Press to view alarm settings.
• Press to activate or deactivate alarm
timer.
5EN
i SNOOZE/BRIGHTNESS/SLEEP
• Press and hold to set sleep timer.
• Press to adjust display brightness.
• Press to snooze alarm.
j Display panel
• Show current information.
k VOLUME +/-
• Press to increase or decrease the
volume.
l - TUNE/TIME/TUNE/TIME +
• Press and hold to search for FM radio
stations.
• Press to tune to FM radio stations in
FM mode.
• Press to select a preset radio station in
FM preset mode.
• Press to set the clock.
m Micro USB connector
6 EN
3 Get started
Always follow the instructions in this chapter in
sequence.
Connect power
Caution
Risk of product damage! Make sure that the power
supply voltage matches the voltage printed on the
bottom of the docking system.
Risk of electric shock! When you unplug the AC
adapter, always pull the plug from the socket. Never
pull the cord.
Note
The type plate is located on the bottom of the docking
system.
Connect the AC power adapter between
• the DC IN socket at the back of the
docking system, and
• the power supply.
Turn on
Press POWER.
» The docking system switches to the last
selected source.
Switch to standby mode
Press POWER again to switch the docking
system to standby mode.
» The clock (if set) is displayed.
Select a source
Press SOURCE/SET repeatedly to select a
source: FM preset, FM, Bluetooth, or AUX in.
Note
When an android-powered device is docked, the
system automatically switches to Bluetooth mode.
Set time
1 Press and hold SOURCE/SET for two
seconds.
» [24H] or [12H] begins to blink.
2 Press - TUNE/TIME or TUNE/TIME+ to
select [24H] or[12H] for 12 or 24 hour
format.
3 Press SOURCE/SETtoconrm.
» The hour and minute digits begin to
blink.
4 Press - TUNE/TIME or TUNE/TIME+
repeatedly to set the hour.
ON Standby
POWER
7EN
5 Press SOURCE/SETtoconrm.
» Minute digits begin to blink.
6 Press - TUNE/TIME or TUNE/TIME+
repeatedly to set the minute.
7 Press SOURCE/SETtoconrm.
» The set time is displayed.
8 EN
4 Play through
Bluetooth
With AS170, you can enjoy audio in two ways:
• through manual Bluetooth connection;
• through automatic Bluetooth connection
with Philips Bluetooth Audio Connect
app.
Compatible with Android™
To make full use of your docking system, your
Android-powered device should satisfy the
following requirements:
• With Android operation system
(Version 2.1 or above);
• With Bluetooth software (Version 2.1
or above); and
• With a micro USB connector.
For other devices with micro USB connector
and Bluetooth function, you can still use the
docking system to do the the following:
• Charge your device through the USB
connector;
• Enjoy audio through Bluetooth.
Play audio through manual
Bluetooth connection
The docking speaker uses Bluetooth wireless
technology to stream music from your portable
device to the speaker.
Note
Philips does not guarantee the compatibility with all
Bluetooth devices.
Before pairing a device with this docking speaker, read
its user manual for Bluetooth compatibility. Make sure
that the connected Bluetooth device supports the
AdvancedAudioDistributionProle(A2DP)andthe
AudioVideoRemoteControlProle(AVRCP).
The product can memorize a maximum of 4 paired
devices.
Make sure that Bluetooth function is enabled on your
device, and your device is set as visible to all other
Bluetooth devices.
The operational range between this docking speaker
and a Bluetooth device is approximately 10 meters
(30 feet).
Any obstacle between this docking speaker and a
Bluetooth device can reduce the operational range.
Keep away from any other electronic device that may
cause interference.
Pair with Bluetooth devices
1 Press POWER to turn on the docking
system.
2 Press SOURCE/SET to select Bluetooth
mode.
» The Bluetooth indicator blinks on the
display panel.
3 On your Android-powered devices,
activate the Bluetooth feature and search
for AS170.
4 In the device list, tap PHILIPSAS170.
» After a successful connection, AS170
beeps twice and the Bluetooth
indicator turns steadily on.
9EN
5 Play audio on your Bluetooth device.
» Audio comes out through the docking
system.
Tip
To clear paired devices from AS170, press and hold
POWERforveseconds.
Play audio through auto
Bluetooth connection with
Philips Bluetooth Audio
Connect
Philips Bluetooth Audio Connect establishes
automatic Bluetooth connection by adding a
shortcut of your docking system to the Home
screen of your Android-powered device. To
enjoy the feature, you are recommended to
download and install this free app.
Install Philips Bluetooth Audio
Connect app
You can search Philips Bluetooth Audio
Connect from Google Play directly, and then
install the app.
Note
Make sure that your Android device is connected to
the Internet.
Make sure that Google Play is available on your
Android device.
1 Search for Philips Bluetooth Audio
Connect app on the Play Store of your
device.
2 Fromthesearchresultlist,ndandtap
Philips Bluetooth Audio Connect to start
downloading.
3 Follow the onscreen instructions to install
the Philips Bluetooth Audio Connect.
4 When installation is complete, tap Done.
» Two Philips Bluetooth Audio Connect
widgets are installed and saved at the
widgets screen.
Add the Philips widget to your Home
screen
Apps
10 EN
Add one or both of the widgets to the Home
screen of your Android device (refer to the
user manual of your device).
• Philips Bluetooth Audio Connect 2 X 1:
add one of your favorite Bluetooth devices
• Philips Bluetooth Audio Connect 4 X
1: add three of your favorite Bluetooth
devices
Activate Bluetooth with Philips
Bluetooth Audio Connect
Add AS170 to your Home screen
Note
Make sure that AS170 is switched on.
1 Press SOURCE/SET to select Bluetooth
mode.
2 On the Home screen of your Android
device, tap the widget to search and
connect other Bluetooth devices.
Add device
Add device
Add device Add device
» The widget starts to search and
connect Bluetooth devices that can be
paired automatically.
» The Bluetooth feature of your device is
activated automatically.
• If necessary, select AS170 from the
Available Philips BT devices list to
continue the connection.
» It may take a few seconds to complete
the connection.
» After a successful connection, AS170 is
added to the Home screen, a different
Searching ...
Connecting...
11EN
Bluetooth icon is displayed on the top
of the screen.
» AS170 beeps twice.
3 If necessary, tap on the top of the
widget to rename or change the icon of
AS170.
• Tap AS170 and input the new name.
• Tap the check box to change the icon
of your device.
4 Play audio on your Android device.
» The audio comes out through the
docking system.
Next-time launch
1 Next time you switch on AS170,the
docking system connects to the last paired
device automatically.
• If two or three paired devices are
switched on, tap AS170 on your
Android device to pair.
» After a successful connection, a
different Bluetooth icon is displayed
on the top of the screen and AS170
beeps twice.
7
AS170
Remove
2 Play audio on your Android device.
» The audio comes out through the
docking system.
Remove AS170 from Home screen
1 Tap on the top of the widget.
» A list of Available Philips BT devices is
displayed.
2 Select AS170.
3 Tap Remove.
Disconnect a device
To disconnect a Bluetooth device,
• Press SOURCE/SET to select another
source.
• Deactivate Bluetooth function on your
device; or
• Move it beyond the communication range.
AS170
Remove
12 EN
» The Bluetooth indicator turns off.
13EN
5 Dock and
charge Android-
powered phone
Charge through Micro USB
connector
Dock your Android device to the Micro USB
connector for charging.
1 Check the orientation of the micro USB
socket on your Android device.
• If necessary, rotate the USB connector
on the docking system.
2 Connect your Android device to the micro
USB connector.
3 Rotate the wheel to adjust the height of
micro USB connector.
4 Slide the connector to place your Android
device on the dock stably.
» When the docking system is
connected to the power, your docked
device starts charging automatically.
Charge through USB socket
Connect a USB cable to AS170 and your
Android device for charging.
14 EN
1 Connect a USB cable (not supplied) to:
• the USB socket on the back of AS170.
• the USB socket on your device.
2 Connect AS170 to power.
» Once the device is recognized, the
charging starts.
Note
The USB socket is used for charging only.
15EN
6 Listen to FM
radio
Tune to FM radio stations
Tip
Position the antenna as far as possible from TV, VCR, or
other radiation source.
For better reception, fully extend and adjust the
position of the antenna.
1 Press SOURCE/SET repeatedly to select
FM preset/FM mode.
In FM preset mode:
2 Press and hold - TUNE/TIME or TUNE/
TIME + for two seconds.
» The docking system tunes to a station
with strong reception automatically.
3 Repeat step 2 to tune to more radio
stations.
In FM mode:
To tune to a radio station automatically,
• Press and hold - TUNE/TIME or
TUNE/TIME + for two seconds.
To tune to a radio station manually,
• Press - TUNE/TIME or TUNE/TIME
+repeatedlyuntilyoundoptimal
reception.
Store FM radio stations
automatically
Note
You can store a maximum of 20 FM radio stations.
In FM preset mode:
ThersttimeyouturntoFMpresetmode,
press an hold SOURCE/SET for two seconds.
» The docking system stores all the available
FMradiostationsandbroadcaststherst
available station automatically.
To store FM radio stations automatically
afterwards,
• In FM mode, press and hold SOURCE/SET
for two seconds.
Store FM radio stations
manually
1 Tune to an FM radio station.
2 Press and hold SOURCE/SET for two
seconds.
» The preset number begins to blink.
3 Press - TUNE/TIME or TUNE/TIME +
repeatedly to select a number.
4 Press SOURCE/SET for two seconds again
toconrm.
5 Repeat steps 1 to 4 to store other stations.
Note
To remove a pre-stored station, store another station
in its place.
Select a preset radio station
In FM preset mode, press - TUNE/TIME or
TUNE/TIME + repeatedly to select a preset
number.
16 EN
7 Play through
audio cable
Through an MP3 link cable, you can also play on
AS170 from an external audio device, such as
an MP3 player.
1 Connect an audio input cable with a 3.5
mm connector on both ends between
• the AUDIO IN socket on this docking
system, and
• the headphone socket of an external
device.
2 Press SOURCE/SET to select AUDIO IN
mode.
3 Play audio on the external device (refer to
its user manual).
AUDIO IN
17EN
8 Other features
Set alarm timer
Note
Make sure that you have set the clock correctly.
1 Press and hold AL1/AL2 for 2 seconds to
activate alarm setting.
» The hour digits blink.
2 Press - TUNE/TIME or TUNE/TIME+
repeatedly to adjust hour.
3 Press SOURCE/SETtoconrm.
» The minute digits blink.
4 Repeat steps 2-3 to set the minute.
5 Repeat steps 2-3 to select an alarm source.
• TUNE: select your last listened FM
channel as alarm sound.
• BUZ: select buzzer as alarm sound.
6 Repeat steps 2-3 to set the alarm volume.
» The alarm time and icon are displayed.
Activate/deactivate alarm timer
1 Press AL1/AL2 to view alarm settings.
2 Press AL1/AL2 again to activate or
deactivate the alarm timer.
» The alarm icon appears if alarm timer
is on and disappears if it is off.
• To stop the ringing alarm, press the
corresponding AL1/AL2.
» The alarm repeats ringing for the next
day.
Snooze alarm
When alarm sounds, press SNOOZE.
» The alarm snoozes and repeats ringing
nine minutes later.
Set sleep timer
This docking system can switch to standby
mode automatically after a preset period.
Press SLEEP repeatedly to select the sleep
timer period (in minutes).
» When the sleep timer is activated,
appears.
To deactivate the sleep timer
Press SLEEP repeatedly until [OFF] (off)
appears.
Adjust display brightness
Press BRIGHTNESS repeatedly to select
different brightness levels.
15 30 60 90 120
OFF
18 EN
9 Product
information
Note
Product information is subject to change without prior
notice.
General information
AC Power Model: AS100-050-
AE200
Input: 100-240 V ~,
50/60 Hz, 0.5 A
Output: 5 V
2.0 A
Operation Power
Consumption
< 15 W
Standby Power
Consumption
< 1 W
Max. load of Android
output
5 V 1 A
Max. load of USB output 5 V 1.6 A
Dimensions
- Main Unit (W x H
x D)
137 x 98 x 141 mm
Weight
- With Packing
- Main Unit
1.0 kg
0.56 kg
Note
Maximum current is 1.6 A when the Micro USB
connector and USB socket are used for charging
simultaneously or separately.
Bluetooth
Bluetoothspecication V3.0 + EDR
Supportedproles A2DP 1.0/AVRCP 1.0
Range 10 m (Free space)
Tuner (FM)
Tuning Range 87.5 - 108
MHz
Sensitivity
- Mono, 26dB S/N Ratio
< 22 dBf
Search Selectivity > 28 dBf
Total Harmonic Distortion < 3%
Signal to Noise Ratio > 50 dB
Amplier
Rated Output Power 2 X 2.5W RMS
Speakers
Speaker impedance 4 Ohm
Speaker driver 1.5'' full range
/