Page is loading ...

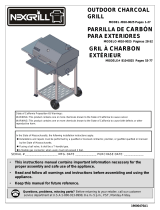
OUTDOOR CHARCOAL GRILL
MODEL #810-0018
• This instruction manual contains important information necessary for the proper
assembly and safe use of the appliance.
• Read and follow all warnings and instructions before assembling and using the
appliance.
• Keep this manual for future reference.
Questions, problems, missing parts? Before returning to your retailer, call our customer service
department at UK:02392-322880, 8 a.m.-5 p.m. Monday - Friday.
SERIAL # ____________________ MFG. DATE _____________ PURCHASE DATE: ____________
19000401A0

WARNING
Do not burn more than 10lbs of charcoal in this unit at one time.
Keep a fire extinguisher nearby at all times.
This grill is for outdoor use only, in well-ventilated areas.
The use of alcohol, prescription or non-prescription drugs may impair the user’s ability
to properly assemble and safely operate this unit.
Use caution when lifting and moving the unit to avoid back strain or back injury. Two
people are recommended to lift or move the unit. Do not move the unit while it is in use.
DO NOT operate the unit near or under flammable or combustible materials such as
decks, porches or carports. A minimum clearance of 36 in. (92cm) is required from all
combustible materials. DO NOT operate the unit under overhead construction or
combustible materials.
2
Table of Contents
Assembly Instructions . . . . . . . . . . . . . . . . . .
Lighting instruction . . . . . . . . . . . . . .. . . . . .
Operating and cooking instructions. . . . . . . .
Proper care & maintenance . . .. . . . . . . . . . .
Ordering parts . . . . . . . . . . . . . . . . . . .
Limited warranty . . . . . . . . . . . . . . . .
10-21
22
23-24
25
25
26
Safety Instruction . . . . . . . . . . . . . . . . . . . . .
Hardware Contents . . . . . . . . . . . . . . . . .
Preparation . . . . . . . . . . . . . . . . . . . .
Packaging Contents ………………………..
Exploded View . . . . . . . . . . . . . . . . . . . . . . . .
Part List . . . . . . . . . . . . . . . . . . . . . . . . . . . .
2-3
4
4
5-6
7
8-9
Safety Instruction
ATTENTION: This barbecue will
become very hot while in use. Do not
move it during operation.
Do not use indoors.
CAUTION: Do not use spirit, petrol or
comparable fluids for lighting or re-lighting!
WARNING: Keep children and pets away.

WARNING
This product is not to be used as a heater.
Operate the unit on a stable, level, non-flammable surface such as asphalt, concrete or
solid ground. DO NOT operate the unit on flammable material such as carpet or a wood
deck.
Use caution when assembling and operating this unit to avoid cuts and scrapes from
edges.
DO NOT use this product in a manner other than its intended purpose. It is NOT
intended for commercial use. It is not intended to be installed or used in or on a
recreational vehicle and/or boats.
DO NOT Store this unit near gasoline or other combustible liquids or where other
combustible vapors may be present.
DO NOT store or operate this product in an area accessible to children or pets. Store
this unit in a dry, protected location.
DO NOT leave the unit unattended while in use.
DO NOT leave hot ashes unattended until the grill cools completely.
DO NOT move the unit while in use or while ashes are still hot. Allow the unit to cool
completely before moving or storing.
NEVER use gasoline or other highly volatile fluids as a starter.
Always wait for any charcoal flames to subside before placing food on cooking grid.
Dispose of cold ashes by wrapping them in a heavy-duty aluminum foil and placing in a
noncombustible container. Make sure that there are no other combustible materials in
or near the container.
Allow the unit to cool completely before conducting any routine cleaning or
maintenance.
3
Safety Instruction
Failure to comply with these instructions could result in a fire or explosion that
could cause serious bodily injury, death, or property damage.
Combustion by products produced when using this product contain chemicals
known to the States of California to cause cancer, birth defects, or other reproductive
harm.
Your grill will be very hot. Never lean over the cooking area while using your grill.
Do not touch cooking surfaces, grill housing, lid or any other grill parts while the grill
is in operation, or until the gas grill has cooled down after use.

Preparation
Before beginning assembly, make sure all parts are present. Compare parts with package contents list and
diagram above. If any part is missing or damaged, do not attempt to assemble the product. Contact customer
service for replacement parts.
•Tools required for assembly (not included).
-Phillips Screwdriver
-Wrench
• Note: The grill right and left sides are on your right and left as you face the front of the grill.
Phillips Screwdriver Wrench
Hardware Contents
101
Chimney lid springHH
514
Flat washer for utensil hooks
GG
514
ST4.2 x 10-mm Self-tapping screws
II
Item Description Size Extra hardware Quantity
AA
1/4-in. x 15-mm Truss head screws with locking
washers
28 2 30
BB
5/32-in. x 10-mm Truss head screws with locking
washers
16 2 18
CC
1/4 –in. nuts
51 6
DD
1/4- in. x 15-mm stage screws
41 5
EE
5/32-in. x 10-mm
Flat Head Screws
4
15
FF
¼-in. Flat washers
25
227
4

Package Contents
A. Bottom panel-1 pc
B. Right cart leg, front-1pc C. Right cart leg, back--
---1 pc
D. Left cart leg, front--1
pc
E. Left Cart leg, back-1 pc F. Door iron piece-1 pc
G. Swivel caster-1 pc
H. Swivel caster
with brake-1 pc
I. Stationary caster-2 pcs J. Side panel, left -1 pc K. Side panel, right -1 pc L. Back panel - 2 pcs
M. Cart frame - 1 pc N. Cart central panel – 1 pc O. Cart top panel – 1 pc
P. Door, left – 1 pc
Q. Door, right – 1 pc R. Door hinge plate, left-
1pc
5
S. Door hinge plate, right
–1 pc
T. Charcoal ash tray- 1
pc

Package Contents
V. Side shelf support
bracket A -2pcs
W. Side shelf support
bracket B -2pcs
X. Side shelf trim piece,
left-1 pc
Y. Side shelf trim piece,
right-1 pc
Z. Side shelf hook-4pcs AB. Side shelf, left-1 pc AC. Side shelf, right-1 pc
AD. Charcoal Chimney -1 pc AE. Chimney lid -1 pc AF. Warming rack -1 pc AG. Charcoal pan
control knob -1 pc
AH. Cooking grid with hole -
3 pcs
AI. Cooking grid lifter -1 pc AJ. Firebox assembly ----
---1 pc
U. Charcoal ash tray
handle assembly– 1 pc
6

7
Explode view
01
02
03
04
05
06
07
08
09
10
12
13
14
14
17
18
20
19
21
22
23
24
20
25
26
27
28
29
30
31
34
34
35
36
38
39
27
25
28
29
28
28
16
51
50
49
15
43
44
45
46
47
48
42
40
41
57
56
53
52
33
54
02
32
32
11
37
37
55

8
Part List
No. Part (Description)
Warranty
coverage
QTY No. Part (Description)
Warranty
coverage
QTY
1 Main lid 1 1 27 Side shelf support bracket B 1 2
2 Main lid hinge 1 2 28 Side shelf stage screw 1 8
3 Chimney lid 1 1 29
Side shelf hook 1 4
4
Charcoal Chimney 1 130Side shelf, left 1 1
5 Temperature gauge 1 1 31 Charcoal pan 1 1
6
Temperature gauge
housing
1132
Charcoal pan support
bracket
12
7
Charcoal ash tray handle
assembly
1 1 33 Charcoal pan support 1 2
8 Main lid handle seat, left 1 1 34
Charcoal pan control knob
pin assembly
12
9 Main lid handle tube 1 1 35
Charcoal pan adjustment
assembly
11
10 Main lid handle seat, right 1 1 36 Charcoal ash tray 1 1
11 Warming rack 1 1 37 Door handle assembly 1 2
12 Cooking grid lifter 1 1 38 Back panel 1 2
13 Cooking grid with hole 1 3 39 Cart top panel 1 1
14
Charcoal pan support
bracket with pin
1 2 40 Swivel caster with brake 1 1
15 Side shelf trim piece, right 1 1 41 Swivel caster 1 1
16 Side shelf, right 1 1 42 Bottom panel 1 1
17 Charcoal bowl assembly
Non-
replaceable
1 43 Left cart leg, back 1 1
18 Main control panel 1 1 44 Side panel, left 1 1
19
Ventilation adjustment
bracket
1 1 45 Left cart leg, front 1 1
20
Ventilation door screw pin
assembly
1246
Right cart leg, back
11
21 Logo 1 1 47 Side panel, right 1 1
22
Ventilation door control
knob
1 1 48 Right cart leg, front 1 1
23 Ventilation panel 1 1 49 Door magnet 1 2
24 Charcoal pan control knob 1 1 50 Cart frame 1 1
25
Side shelf support bracket
A
1 2 51 Cart central panel 1 1
26 Side shelf trim piece, left 1 1 52 Stationary caster 1 2

9
Part List
11Grill cover11Door hinge plate, left56
No. Part (Description)
Warranty
coverage
QTY No. Part (Description)
Warranty
coverage
QTY
53 Door, left 1 1 57
Door iron piece
11
54 Door, right 1 1 KD assembly hardware pack 1 1
55 Door hinge plate, right 1 1 Manual 1 1

10
Assembly Instructions
Fig.1
I
H
G
16x AA
Fig. 2
A
A
E
D
A
F
Step 2. L shape bracket assembly
a). Loosen, but do not remove the screws that are
pre-assembled on the bottom panel (A), align
the holes on the bottom panel (A), then attach
the L shape bracket (F) onto the bottom panel
(A) by aligning the holes.
b). Tighten the two screws that were
loosened above. As shown in Fig. 2.
Step 3. Cart leg assembly
Note: The back legs are the two that have 4 side
screws on the inside of each leg and the front legs
have two screws the face to the back of the grill
for attaching the side panels.
a). Loosen, but do not remove the 4 screws that
are pre-assembled on the bottom panel (A),
align the holes on the left cart leg, front (D) and
left cart leg, back (E), then place the cart legs
onto the bottom panel by aligning the screws
that were loosened in the bottom panel (A) as
shown in Fig. 3.
b). Tighten the screws that were loosened above.
Fig. 3
Tool Required: Philips Screwdriver
1. Caster Assembly
a). Mount the casters onto the bottom panel (A) using
sixteen 1/4-in. x 15-mm truss head screws with
locking washers (AA) and sixteen ¼-in flat washers
(FF).
b). The swivel caster with brake (H) should be
positioned under the left rear of the cart bottom
and the swivel caster (G) should be positioned
under left front as shown in Fig. 1.
d). The two stationary casters (I) should be positioned
under the right side.
e). Turn over the bottom panel for assembling casters.
16x FF

11
Assembly Instructions
B
C
A
Fig. 4
c). Loosen, but do not remove the 4 screws that
are pre-assembled on the bottom panel (A),
align the holes on the right cart leg, front
(B) and right cart leg, back (C), then
place the cart legs onto bottom panel (A) by
aligning the screws that were loosened on the
bottom panel as shown in Fig. 4.
d). Tighten the screws that were loosened above.
J
K
Step 4: Side panel assembly
a). Loosen the 12 screws which are pre-
assembled on the left and right side legs,
toward to inside (6 screws on each side).
b). Attach the side panel, left (J) by aligning the
holes on the side panel with the loosened
screws on the inner side of cart leg. Tighten
the six screws that were loosened to secure
the panel as shown in Fig. 5.
c). Repeat step a) and b) for the side panel,
right (K) assembly.
Fig. 5
D
E
B
C
D
E

12
Assembly Instructions
Step 5. Back panel assembly
a). Loosen, but do not remove 7 screws
which are pre-assembled on the bottom cart
legs and bottom panel(4 screws on the left
and right back cart legs and 3 screws on the
bottom panel).
b). Attached back panel ( L) by aligning the
holes on the back panel with screws in the
leg, then tighten the 7 screws that were
loosened in step a). As shown in Fig. 6.
c). Loosen, but do not remove the 4 screws
which are pre-assembled on the upper cart
legs as shown in Fig. 7.
d). Attach the other piece of back panel ( L)
by aligning the holes in the back panel with
screws in the leg, then tighten the four screws
that were loosened in step c). As shown in Fig.
7.
Fig. 6
Fig. 7
L
L
C
B
A
D
E
D
E
C
B

13
Assembly Instructions
Fig. 8
2 x BB
Step 7. Cart central panel assembly
Place cart central panel (N) upon the four
lower brackets on the left and right side
panels as shown in Fig. 9.
Fig. 9
M
N
D
B
Step 6. Cart frame assembly
a). Loosen, but do not remove the four screws
which are pre-assembly on the left and right
cart leg, front (D/B), Attach the cart frame (M)
to the left cart leg, front ( D) and right cart leg,
front (B). then tighten the screws which
loosened above. As shown in Fig. 8.
b). Attach the left and right triangle brackets of
cart frame (M) by using two 5/32-in. x 10-mm
truss head screws with locking washers (BB) .
As shown in Fig. 8.

14
Assembly Instructions
Fig.10
Step 8. Door assembly
a). Insert the bottom hinge of door, left (P)
into the hole of bottom panel (A) and
insert the door hinge plate, left (R) into
the hole on the top of door, left top (P).
As shown in Fig.10.
b). Attach the door hinge plate, left (R) to
cart frame (M) by using two 5/32-in. x
10- mm flat head screws (EE) as
shown in Fig.11.
c). Repeat step a) and b) for the right
door (Q) and door hinge plate, right (S).
2 x EE
Fig. 11
P
A
P
R
M
R

15
Assembly Instructions
Fig.12Step 9. Cart top panel assembly
a). Place the cart top panel (O) upon upper
four brackets of the left and right side
panels. As shown in Fig. 12.
b). Attached the cart top panel (O) to the
side panel, left (J) by using and two
5/32-in. x10-mm truss head screws with
locking washers (BB) as shown in Fig.
13.
c). Repeat step b) to attach the side
panel, right (K).
Fig. 13
Note:
The screws should be screwed from
outside of left and right side panels to inside.
2x BB
O
O
J

16
Assembly Instructions
Fig. 14
1 x AA
Step 11. Side shelf assembly
a). Attach the side shelf support bracket A and B (V/W)
onto the firebox by using four 1/4-in. x 15-mm truss
head screws with locking washers (AA) and four
¼-in flat washers (FF) as shown in Fig 15.
Fig. 15
AJ
Grill cart
CAUTION The firebox assembly is heavy
and will require two or more people to lift
and position onto grill cart. Failure to do
so may result in injury.
Note: Take care when moving the firebox
assembly as the bottom flanges can be bent,
which would misalign the holes.
b). Then secure the firebox assembly (AJ) by
using four 1/4-in. x 15-mm truss head screws
with locking washers (AA) as shown in Fig. 14.
1 x AA
1 x AA
1 x AA
Note: Two screws for each side of cart as
shown in Fig. 14.
Step 10. Firebox Assembly
a). Remove the firebox assembly (AJ) from the
carton and carefully place onto the grill cart, at
the same time keeping the top door hinge in
place as shown in Fig. 14.
W
4 x AA
4x FF
V

17
Assembly Instructions
Fig. 16b). Attach the side shelf trim piece, right (Y) into the
side shelf bracket A and B (V/W) by using four
5/32-in. x 10-mm truss head screws with locking
washers (BB) as shown in Fig. 16.
Note: Two screws should be screwed at front and
back of trim piece from inside of the firebox to outside,
and two screws should be screwed front and back
from the bottom of side shelf trim piece to the top.
c). Attach the two side shelf hooks (Z) into the right
side shelf by using two ¼-in nuts (CC) and
two side shelf hook flat washers (GG). (The nuts
should be screwed at inside of side shelf. As shown
in Fig. 17.
d). Attach the right side shelf (AC) to the side shelf
support bracket A and B (V/W) by using two ¼-in x
15 mm stage screws (DD) as shown in Fig. 17.
e). Repeat step a), b), c) and d) to assemble the left
side shelf (AB).
Fig. 17
Y
AC
2 x CC
2 x DD
W
Z
2 x GG
4 x BB
V
V

18
Assembly Instructions
Step 12. Chimney Assembly
a). Insert the Charcoal Chimney (AD)
from lid inner to outside, the chimney seat is
closed to the lid inner, then attach it onto the
hood by using two 5/32-in. x 10-mm truss
head screws with locking washers (BB) as
shown in Fig. 18.
b). Attach the chimney lid (AE) onto the
Charcoal Chimney (AD) by using one chimney
lid spring (HH), one ¼-in flat washer (FF) and
one ¼-in nut (CC). As shown in Fig. 19.
2 x BB
Fig. 18
Fig. 19
AD
AE
1
× CC
1
× FF
AD
Note: ¼-in flat washer (FF) goes between ¼-in
nut (CC) and Chimney lid spring (HH).
1
× HH

19
Assembly Instructions
Step 13. Warming rack assembly
Insert 4 legs of the warming rack (AF) into the
firebox and lid’s hole as shown Fig. 20.
Step 14. Charcoal pan handle Assembly
Place the charcoal pan control knob (AG) into
charcoal pan control rod which located behind of
control panel and tighten the charcoal pan control
knob (AG) in clockwise to secure it as show in
Fig.21.
Fig. 20
Fig. 21
AF
Charcoal pan control rod
AG

20
Assembly Instructions
Step 15. Cooking grid and cooking grid lifter
installation
a). Place the cooking grid (AH) as shown in Fig. 22.
b). Place the cooking grid lifter (AI) onto the
cooking grid as shown in Fig. 23.
Fig. 22
Fig. 23
AI
AH
/