Using the Odometer
You can use the odometer to record the time and distance
traveled. The odometer automatically starts and stops when you
start or end a round, but you can also start and stop it manually.
1
Select > Odometer to view or start the odometer.
2
Select an option:
• Select > Turn Off to stop the odometer.
• Select > Reset to reset the time and distance to zero.
Customizing Your Device
Settings
Select > Setup to customize device settings and features.
Tones: Turns audible tones on or off.
Display: Sets the background color to black or white
(page 3).
Scoring: Sets the scoring method (page 2).
Time: Sets the time to automatic or manual (page 3).
Format: Sets the time format to 12- or 24-hour.
Language: Sets the language.
Units: Sets to measure distance in yards or meters.
Setting the Time Manually
By default, the time is set automatically when the device
acquires satellite signals.
1
Select > Setup > Time > Manual.
2
Select and to set the hour and minute.
3
Select AM or PM.
Setting the Alarm
1
Select > Setup Alarm.
2
Select and to set the hour and minute.
3
Select AM or PM.
4
Select Once, Daily, or Weekdays.
Changing the Display Color
You can change the background color on the device.
1
Select > Setup > Display.
2
Select an option:
• Select White to display black text on a white background.
• Select Black to display white text on a black background.
Appendix
Device Care
NOTICE
Do not store the device where prolonged exposure to extreme
temperatures can occur, because it can cause permanent
damage.
Never use a hard or sharp object to operate the touch screen,
or damage may result.
Avoid chemical cleaners and solvents that can damage plastic
components.
Cleaning the Device
1
Wipe the device with a cloth dampened with a mild detergent
solution.
2
Wipe it dry.
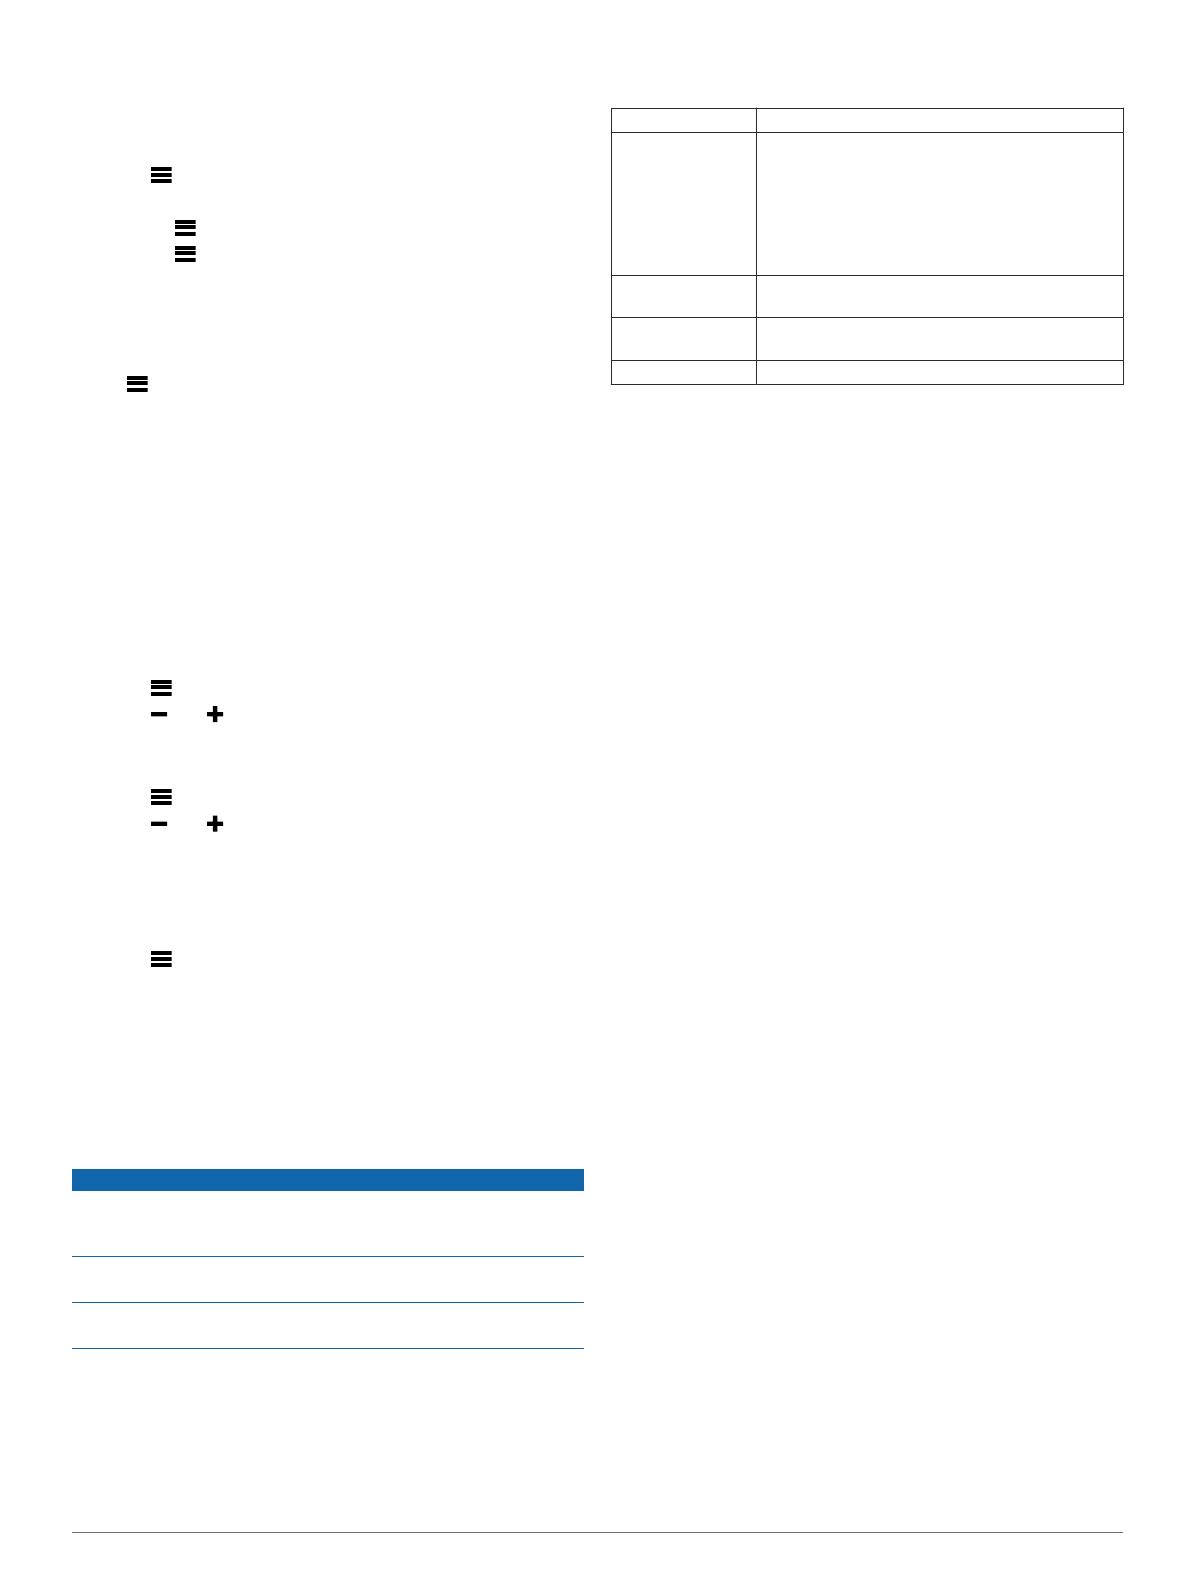
Specifications
Battery type Lithium-ion
Battery life Watch only: 4 weeks
Playing golf: 8 hours
NOTE: The actual battery life of a fully charged
battery depends on how much time you use GPS,
the backlight, and power save mode. Exposure to
extremely cold temperatures will also reduce
battery life.
Operating
temperature range
From -4º F to 140º F (from -20º C to 60º C)
Charging
temperature range
From 40º F to 104º F (from 5º C to 40º C)
Water resistance IPX7
Power Save
After a period of inactivity, the device goes into power save
mode. The device displays the time and date but does not use
GPS. The device will not enter power save mode if the
odometer is on. You can select any button or tap the screen,
then swipe left across the screen to exit power save mode.
Clearing User Data
NOTE: This deletes all user-entered data.
1
Hold POWER to turn off the device.
2
Hold SCORE, and select POWER.
3
Select Yes.
Getting More Information
You can find more information about this product on the
Garmin
®
website.
• Go to www.garmin.com/intosports.
• Go to www.garmin.com/learningcenter.
• Go to http://buy.garmin.com, or contact your Garmin dealer
for information about optional accessories and replacement
parts.
Registering Your Device
Help us better support you by completing our online registration
today.
• Go to http://my.garmin.com.
• Keep the original sales receipt, or a photocopy, in a safe
place.
Updating Software and Courses
Before you can update your device software, you must
download Garmin CourseView Updater. Go to www.garmin.com
/support/courseview_updater.html for more information.
1
Connect the device to a USB port on your computer using
the charging cradle (page 1).
2
Start CourseView Updater.
3
Follow the on-screen instructions.
Software License Agreement
BY USING THE DEVICE, YOU AGREE TO BE BOUND BY
THE TERMS AND CONDITIONS OF THE FOLLOWING
SOFTWARE LICENSE AGREEMENT. PLEASE READ THIS
AGREEMENT CAREFULLY.
Garmin Ltd. and its subsidiaries (“Garmin”) grant you a limited
license to use the software embedded in this device (the
“Software”) in binary executable form in the normal operation of
the product. Title, ownership rights, and intellectual property
rights in and to the Software remain in Garmin and/or its third-
party providers.
Customizing Your Device 3


