INSTALLATION
INSTRUCTIONS
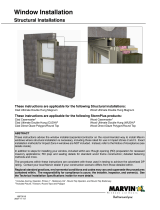
The following instructions are applicable for the following )URQWOLQH%OGJ3URGXFWV,QF
win
dows: Aluminum Clad Wood, Wood and Cellular PVC.
1. Check the rough opening to be sure it is plumb, square and level. Check dimensions in both
width and height.
2. Apply air barrier to the rough opening per ASTM E211201 section 8.1.1.3.3.
3. Apply a self sealing adhesive membrane on the sill of the rough opening. Cut the sill flashing
long enough to extend an equal distance beyond the jamb flashing.
4. Before setting the window into the rough opening, apply a 3/8” diameter continuous bead of
sealant around the perimeter of the nail fin for aluminum clad wood products or the brick mould
for wood or cellular PVC products. Sealant must be Grade NS Class 25 per ASTM C920.
5. Install the window, shimming and adjusting to square, plumb and level. Check the center width
to avoid bowing.
6. Fasten through the nail fin on aluminum clad wood products and through the brick mould and
sill nose on wood or cellular PVC products with galvanized nails long enough to penetrate the
frame by 1” minimum, spaced no closer than 3” from each corner, and 6” to 8” apart thereafter.
7. Lap vertical strips of self sealing adhesive membrane onto the unit or casing and out over the
air barrier. Make small cuts at the head jamb to allow the membrane to fit around the corner of
the window frame.
8. Lap strips of adhesive membrane at the head jamb or head jamb casing over the air barrier.
This flashing should extend past the vertical flashing.
9. Fold the head flap of air barrier down over the head jamb flashing. Apply seam seal tape over
the diagonal cut in the air barrier. Make sure the tape laps onto the window frame or casing.
Tape and seal any seams and fasteners directly above the unit.
10. Insulate from the home’s interior around the edge of the frame. Pack the insulation loosely.
Some building codes require foam type insulation to form an infiltration seal. Use only
low expansion type foam in combination with fiberglass insulation. Foam and foam application
must conform to ASTM E211201, sec. 5.9.2. Follow all instructions and warnings from the foam
manufacturer.
11. After the siding is installed, apply a continuous bead of sealant around the perimeter of the
window that meets Grade NS Class 25 per ASTM C920.
3
These instructions do not address all the possible installation situations that might exist. For
installations other than those referenced in these instructions, refer to ASTM E211201, Standard
Practice for Installation of Exterior Windows, Doors and Skylights. The installer is responsible for
consulting with a contractor, structural engineer, architect or consumer for proper installation
according to local standard practices or codes and/or ordinances, which may supersede these
instructions. Information for ASTM E2112 can be found on the ASTM website, www.astm.org.
To prevent water and air from entering the home, all windows must be properly flashed and /or
sealed at the exterior perimeter. Flashing and sealing materials must meet all codes and be
compatible with building exterior and window surfaces. Refer to ASTM E211201 for details.
Perimeter sealant must be Grade NS Class 25 per ASTM C920. Using improper sealant could
result in sealant failure causing water and air infiltration. Note: The nailing fin is not designed to
be a weatherproof flashing.


