The Sangean DT-400W is a versatile radio that combines AM/FM/Weather band reception with a compact and portable design, making it an excellent choice for staying informed and entertained while on the go. Its 19-station memory allows you to save your favorite stations for easy access, and the auto-tuning feature makes finding new stations a breeze.
The Sangean DT-400W is a versatile radio that combines AM/FM/Weather band reception with a compact and portable design, making it an excellent choice for staying informed and entertained while on the go. Its 19-station memory allows you to save your favorite stations for easy access, and the auto-tuning feature makes finding new stations a breeze.


-
 1
1
-
 2
2
-
 3
3
-
 4
4
-
 5
5
-
 6
6
-
 7
7
-
 8
8
-
 9
9
-
 10
10
-
 11
11


The Sangean DT-400W is a versatile radio that combines AM/FM/Weather band reception with a compact and portable design, making it an excellent choice for staying informed and entertained while on the go. Its 19-station memory allows you to save your favorite stations for easy access, and the auto-tuning feature makes finding new stations a breeze.
Ask a question and I''ll find the answer in the document
Finding information in a document is now easier with AI
Related papers
Other documents
-
Sytech SY1669BLACK Owner's manual
-
-
Sytech SY1669SILV Owner's manual
-
-
-
-
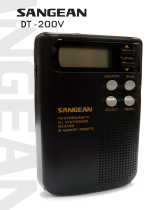 Sangean Electronics DT-200V User manual
-
COBY electronic CX-90 User manual
-
 Sangean Electronics Sangean DT400W User manual
-
 C. Crane CC Pocket User manual


