Page is loading ...

THANK YOU
We appreciate the trust and condence you have placed in Madison Avenue’s the purchase of this LED Bath Vanity. We strive to continually create
quality products designed to enhance your home. Visit us online to see our full line of products available for your home improvement needs. Thank
you for choosing Madison Avenue’s!
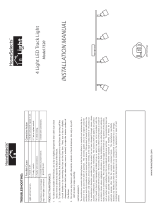
Item # 22701
22702
22703
USE AND CARE GUIDE
LED BATH VANITY
Questions, problems, missing parts? Before returning to the store,
call Madison Avenue’s Customer Service
8 a.m. – 7 p.m., EST, Monday – Friday, 9 a.m. – 6 p.m., EST, Saturday
800-527-0998

2 Please contact (800)527-0998 for further assistance.
Table of Contents
Table of Contents
.............................................................
2
Safety Information
............................................................
2
Limited Warranty
..............................................................
3
What is Covered .......................................................................3
What is Not Covered ................................................................3
Pre-installation
.................................................................
4
Tools Required .........................................................................4
Hardware Included ...................................................................4
Pre-installation
.................................................................
5
Package Contents ....................................................................5
Installation
.........................................................................
6
Installation ..................................................................... 7
Maintenance
.....................................................................
8
Care and Cleaning
...........................................................
8
Troubleshooting
...............................................................
8
Service Parts
.....................................................................
9
Model Type ..............................................................................9
Safety Information
□ Before you begin, make sure you carefully read and understand the instructions in this manual. Please follow the instructions in the
order presented in this manual and observe all warnings and cautions.
WARNING: CONSULT A QUALIFIED ELECTRICIAN IF YOU HAVE ANY ELECTRICAL QUESTIONS.
WARNING: Before beginning installation, turn off electricity at the circuit junction box or the main fuse box.
CAUTION:
1. Dimmable with ELV and/or LED compatible wall dimmer switches.
2. Keep your receipt and these Instructions for Proof of Purchase.
3. Before starting installation of this fixture or removal of a previous fixture, disconnect the power by turning off the circuit breaker or
by removing the fuse at the fuse box.
.

3 Please contact (800)527-0998 for further assistance.
Limited Warranty
WHAT IS COVERED
The manufacturer warrants this lighting fixture to be free from defects in materials for a period of three (3) years from date of purchase.
This warranty applies only to the original consumer purchaser and only to products used in normal use and service. If this product is
defective, the manufacturer’s only obligation, and your exclusive remedy, is the repair or replacement of the product at the
manufacturer’s discretion, as long as the product is not damaged through misuse, abuse, accident, modifications, alterations, neglect or
mishandling. This warranty shall not apply to any product found to have improper installation, set-up, or used in any way not in
accordance with the instructions supplied with the product. This warranty shall not apply to a failure of the product resulting from an
accident, misuse, abuse, negligence, alteration, or faulty installation, or any other failure not relating to faulty material or workmanship.
This warranty shall not apply to the finish on any portion of the product, such as surface and/or weathering, this is normal wear and tear
of the product.
WHAT IS NOT COVERED
The manufacturer does not warrant and specially disclaims any warranty, whether express or implied, of fitness for a particular purpose,
other than the warranty contained herein. The manufacturer specifically disclaims any liability and shall not be liable for any
consequential or incidental loss or damage, including but not limited to any labor / expense costs involved in the replacement or repair of
said product.
Contact the Customer Service Team at 800-527-0998.

4 Please contact (800)527-0998 for further assistance.
Pre-installation
TOOLS REQUIRED
Electrical
tape
Safety
goggles
Phillips
screwdriver
Flathead
screwdriver
Wire
strippers
Wire
cutters
HARDWARE INCLUDED
Part Description
Quantity
22701 22702 22703
AA Screw 4pcs 4pcs 4pcs
BB Screw 2pcs 2pcs 2pcs
CC Wire connector 3pcs 3pcs 3pcs
DD Screw 4pcs 4pcs 4pcs
EE Wood Screw 2pcs 2pcs 2pcs
FF Mounting Anchor 2pcs 2pcs 2pcs

5 Please contact (800)527-0998 for further assistance.
Pre-installation
PACKAGE CONTENTS
Part Description
Quantity
22701 22702 22703
A Glass Shade 1pc 1pc 1pc
B Fixture Back Plate 1pc 1pc 1pc
C Mounting Plate 1pc 1pc 1pc
B
A
C

6 Please contact (800)527-0998 for further assistance.
Installation
1
Separate back plate
2
Installing mounting anchor and
installing mounting plate
□
Remove screws (DD) from the xture to separate back plate
(C).
WARNING: Shut off the power at main circuit breaker.
□
Drill holes in the wall aligned with the key-hole location in the
mounting plate (C).Insert the mounting anchor (FF).
□ Pass the wires through the hole of the mounting plate
(C).Secure the mounting plate (C) to the junction box using
screw (BB).
□ Fasten the wood screw (EE) into the mounting anchor
(FF).Tighten the mounting plate (C) on the wall.
CAUTION: Be careful not to pinch any of the wires between
the back plate and the junction box.
3
Installing glass shade
□ Put the glass (A) onto the xture body (B).Screw the glass onto the xture body (B) using mounting screw (AA) from the side of the
canopy.
DD
C
BB
EE
FF
C
A
B
AA
AA
B

7 Please contact (800)527-0998 for further assistance.
Installation
4
Wire Connection
□
Hold the xture body (B).Connect the white wires with
neutral wire from junction box with wire connector (CC)
together, and the black wire with the hot wire from junction
box with wire connector (CC) together.
□ Connect both ground wires (green wire or bare wire)
together by wire connector (CC), if there is a ground wire in
the junction box. Otherwise, connect the copper wire from
xture to ground screw on the mounting p
late (C).
NOTE: If you have electrical questions, consult your local
electrical code for approved grounding methods.
5
Mounting the xture
□
Carefully push the wires into the junction box through the hole of mounting plate(C).
□ Place xture plate (B) over the mounting plate (C) and tighten it by screw (DD).
CC
A
B
C
DD
A
B
C

8 Please contact (800)527-0998 for further assistance.
Maintenance
□ Do not use any cleaners with chemicals, solvents or harsh abrasives. Use only a dry soft cloth to dust or wipe carefully.
Care and Cleaning
□ To clean the outside of the fixture, use a dry or slightly dampened clean cloth (use clean water, never use solvent) to wipe the
glass and surface of the fixture.
Troubleshooting
Problem Possible Cause Corrective Action
The fixture does not light.
1. The LED is burned out. 1. Replace the fixture.
2. The power is off. 2. Make sure the power supply turns on.
3. Faulty wire connection. 3. Check wiring.
4. Faulty switch. 4. Test or replace the switch.

9 Please contact (800)527-0998 for further assistance.
Service Parts
MODEL TYPE
Part Description
Quantity
22701 22702 22703
AA Screw 4pcs 4pcs 4pcs
BB Screw 2pcs 2pcs 2pcs
CC Wire connector 3pcs 3pcs 3pcs
DD Screw 4pcs 4pcs 4pcs
EE Wood Screw 2pcs 2pcs 2pcs
FF Mounting Anchor 2pcs 2pcs 2pcs

Questions, problems, missing parts? Before returning to the store,
call Madison Avenue’s Customer Service
8 a.m. – 7 p.m., EST, Monday – Friday, 9 a.m. – 6 p.m., EST, Saturday
800-527-0998
Retain this manual for future use.
/