Kichler Lighting 16022AZT30 User manual

Type
User manual

This manual is also suitable for

Kichler Lighting 16022AZT30 is a versatile landscape lighting solution that provides adjustable brightness levels to suit your outdoor lighting needs. With three distinct lumen settings (500lm, 700lm, and 900lm), you can customize the brightness of your landscape to create the perfect ambiance for any occasion. Installation is simple, with a stake for secure ground placement and a wireway slot for easy wire management. The fixture is also designed for durability, with a rust-resistant aluminum construction that can withstand various weather conditions.

Kichler Lighting 16022AZT30 is a versatile landscape lighting solution that provides adjustable brightness levels to suit your outdoor lighting needs. With three distinct lumen settings (500lm, 700lm, and 900lm), you can customize the brightness of your landscape to create the perfect ambiance for any occasion. Installation is simple, with a stake for secure ground placement and a wireway slot for easy wire management. The fixture is also designed for durability, with a rust-resistant aluminum construction that can withstand various weather conditions.

Customer Service: 866-558-5706
Technical Support: 844-452-4537
Hrs: M-F 9am to 5pm EST
IS-16022-CBDate Issued: 12/06/17
SAFETY INSTRUCTIONS
READ THIS FIRST
KEEP THESE INSTRUCTIONS
This xture is intended for installation in accordance with the National Electric Code (NEC) and Local code
specications. Failure to adhere to these codes and instructions may result in serious injury and/or property
damage and will void the warranty.
1) WARNING: This xture is not to be installed within 10 feet (3M) of a pool, spa or fountain.
2) According to the requirements of the National Electric Code (NEC), direct burial rated wire is to be buried a
minimum of 6” [152mm] beneath the surface of the ground.
NOTE: If additional Direct Burial wire is needed, contact your local Kichler
®
landscape distributor.
8 GA wire can be purchased in length of 250’ (76 M),15503-BK.
10 GA wire can be purchased in length of 250’ (76 M),15504-BK.
12 GA wire can be purchased in lengths of 100’ (30 M),15501-BK; 250’ (76 M), 15502-BK; 500’ (152M),
15505-BK; and 1000’ (304 M), 15506-BK.
3) Wiring connections must be made with approved/listed wire connection device(s) suitable for the application. Do
not exceed manufacturers’ wiring combination specications for size and quantity of conductors.
CAUTION
WHEN INSTALLING KICHLER LANDSCAPE LIGHTING (LINE VOLTAGE OR LOW VOLTAGE), CARE SHOULD BE
TAKEN TO KEEP CLEAR OF POTENTIALLY COMBUSTIBLE MATERIALS.
WHEN MAINTAINING THE FIXTURES, BE SURE TO REMOVE LEAVES, PINE NEEDLES, GRASS CLIPPINGS,
MULCH, OR ANY DEBRIS THAT HAS ACCUMULATED ON THE LIGHT BULB, LENS, OR BODY OF THE FIXTURE.
ASSEMBLY AND INSTALLATION
1) Determine desired location for mounting xture.
2) At desired location, hammer stake into ground. To avoid damage to stake, place a board on top of
stake while hammering. If ground is hard and stake is difcult to install, make a crosscut in ground
using a at shovel.
3) Clear away area in ground at wireway slot in top of stake.
4) Lay 12V cable into wireway slot and screw xture into stake. Aim xture in desired direction and
secure by tightening locknut. If necessary, use wrench or pliers for nal tightening of nut.
5) Adjust angle of xture by loosening hex head screw.
6) TURN OFF POWER.
7) Make wire connections using supplied wire connectors following instructions included, or using
other approved wiring connection method (not supplied).
TO CHANGE LIGHT OUTPUT SETTING:
NOTE: Fixure switches up in terms of lumen settings; it starts at low (500 lumens). If this level is
desired, no adjustment is needed.
Locate the dimple at the side of the xture. (This is called a lumen adjustment switch locator)
Hold magnet on lumen adjustment switch locator for 1.5 seconds to begin programming mode.
Remove magnet.
Fixture will blink continuously 4x’s at full brightness level and go dark for 2 seconds and then will
illuminate at original factory setting.
To switch lumen settings, magnet must be reapplied to lumen adjustment switch locator for 1.5
seconds and magnet must be removed for 1 second between switching.
NOTE: xture blinks 1x for the lowest lumen setting; 2x’s for the middle lumen setting, and 3x’s for
the highest lumen setting.
Once the xture is set and magnet removed, it stays in programming mode for 2 minutes.
After 2 minutes, the memory is set.
To change the output brightenss, return to programming mode by holding magnet on magnetic
locator for 1.5 seconds.
NOTE: Fixture reverts back to original factory setting when put back into programming mode.
NOTE: Once the desired setting is set, mark the level (1, 2, or 3) with a marker on xture under the
cowl.
For warranty information please visit: http://www.landscapelighting.com/portal/warranty_page
Pour de plus amples informations sur la garantie, veuillez visiter : http://www.landscapelighting.com/portal/warranty_page
LUMEN ADJUSTMENT
SWITCH LOCATOR
SWITCHING
MAGNET
LEVEL 1
LEVEL 2
LEVEL 3
NOTE: When sizing your transformer please use the highest VA you expect
to use depending on desired lumen level per xture to prevent potentially
overloading the transformer.
Best practice is to use VA/wattage buffer of 30% when sizing a transformer
to account for xture lumen adjustments. (ie. 210 VA on 300V transformer.)
IMPORTANT! PLEASE READ
WireGauge/Power/LengthChart
10 12 14 16
020 1860/567 1150/351 730/223 450/137
40 930/283 580/177 370/113 230/70
60 620/189 390/119 240/73 150/46
80 470/143 290/88 180/55 110/34
100 370/113 230/70 140/43 90/27
>100
ConsultTechnicalSupport
WATTS(VA)
WireGauge/Length(ft/m)perrun
* DENOTES FACTORY SETTING
PROGRAMMING MODE
Gen 3 Lumen Table for IS - 11302017.xlsx
Level 1 Level 2 Level 3
Lumen Level Table (For 2700K/3000K)
Single Flood LED
16022
*500 Lm 900 Lm700 Lm
Confidential 1Confidential 1
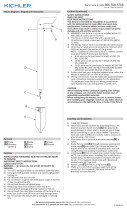
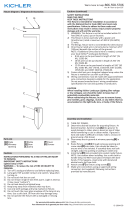
LUMEN ADJUSTMENT
SWITCH LOCATOR
FIXTURE
HEX HEAD SCREW TO
ADJUST ANGLE OF FIXTURE
LOCKNUT
STAKE
WIRE LEADS
SWITCHING
MAGNET
ORIGINAL
PROGRAMMING
MODE
Fixture Load Chart
Lumen Level
VA (AC Power
Supplies)
WATTS (DC Power
Supplies)
3 23 18.5
2 16 12.5
1 9 7
1 9 7
Customer Service: 866-558-5706
Technical Support: 844-452-4537
Hrs: M-F 9am to 5pm EST
IS-16022-CB
Date de publication : 12/06/17
LIRE D’ABORD LES INSTRUCTIONS DE SÉCURITÉ
CONSERVER CES INSTRUCTIONS
Ce luminaire doit être installé conformément aux codes d’électricité nationaux (NEC) et satisfaire toutes les
spécications des codes locaux. Si ni les codes ni les instructions ne sont respectés, un accident entraînant
des blessures graves et des dommages matériels pourrait survenir et la garantie serait annulée.
1) AVERTISSEMENT : ne pas installer le luminaire dans les 3 m de piscine, spa ou fontaine.
2) Conformément aux conditions du Code national d’électricité (NEC), un l destiné à une installation
souterraine doit être enterré à un minimum de 15 cm sous la surface du sol.
REMARQUE : si des ls supplémentaires sont nécessaires pour l’installation souterraine, contacter le
distributeur local des produits paysagistes Kichler®.
Un l 8 GA peut être acheté dans une longueur de 76 m (15503-BK).
Un l 10 GA peut être acheté dans une longueur de 76 m (15504-BK).
Un l 12 GA peut être acheté dans des longueurs de 30 m (15501BK), 76 m (15502BK), 152 m (15505BK) et
304 m (15506BK).
3) Les raccordements doivent être faits avec un dispositif de raccordement de ls approuvé/homologué
adapté à l’application. Ne pas dépasser les spécications de câblage du fabricant concernant le calibre et
la quantité des conducteurs.
ATTENTION
LORS DE L’INSATLLATION D’ÉCLAIRAGE DE PAYASGE KICHLER®, PRENDRE SOIN DE CHOISIR UN SITE À
L’ÉCART DE MATÉRIAUX POTENTIELLEMENT INFLAMMABLES.
LORS DE L’ENTRETIEN DES LUMINAIRES, PRENDRE SOIN D’ENLEVER FEUILLES, AIGUILLES DE PIN, TONTE
DE PELOUSE, PAILLIS OU TOUTE AUTRE SORTE DE DEBRIS QUI AURAIENT PU S’ACCUMULER SUR
L’AMPOULE, LA LENTILLE OU LE CORPS DU LUMINAIRE.
MONTAGE ET INSTALLATION
1) Déterminer l’emplacement pour l’installation du luminaire.
2) À l’endroit choisi, enfoncer le piquet dans le sol. Pour ne pas endommager le piquet, placer une planche en
haut du piquet et taper dessus. Si le sol est dur et le piquet est difcile à installer, creuser un trou en croisé
dans le sol à l’aide d’une pelle plate.
3) Nettoyer le sol autour de la fente du passe-l dans la section supérieure du piquet.
4) Acheminer un câble de 12V dans le trou du passe-l et visser le luminaire dans le piquet. Visser le luminaire
dans la direction souhaitée et le xer en serrant le contre-écrou. Si nécessaire, utiliser une clé ou des
pinces pour le serrage nal de l’écrou.
5) Ajuster l’angle de luminaire en desserrant la vis de réglage hexagonal.
6) COUPER LE COURANT.
7) Effectuer les connexions des ls à l’aide des connecteurs fournis en suivant les instructions incluses ou
selon une autre méthode de connexion de câblage approuvée (non fournie).
POUR CHANGER LE REGLAGE DE LA LUMINOSITÉ :
REMARQUE : Le luminaire change en fonction du réglage de la lumière; il commence à bas (500 lumens).
Si ce niveau est désiré, aucun ajustement n’est nécessaire.
Localisez la fossette sur le côté de l’appareil. (c’est ce qui s’appelle un localisateur de commutateur de
réglage de luminosité)
Tenir l’aimant sur le localisateur du commutateur de réglage de la luminosité pendant 1,5 seconde pour
commencer le mode de programmation. Retirer l’aimant.
Le luminaire clignotera en continu 4 fois au niveau maximum
de luminosité, s’assombrira pendant 2 secondes, et s’allumera au réglage par défaut.
Pour commuter les réglages de la luminosité, l’aimant doit être réappliqué au localisateur du commutateur
de réglage de la luminosité pendant 1,5 seconde et l’aimant doit être retiré pendant 1 seconde entre la
commutation.
REMARQUE : l’appareil clignote 1 fois pour le réglage de luminosité le plus faible ; 2 fois pour le réglage de
la luminosité moyenne et 3 fois pour le réglage de la luminosité la plus élevée.
Une fois que l’appareil est réglé et que l’aimant est enlevé, il reste en mode programmation pendant 2
minutes.
Après 2 minutes, la mémoire est réglée.
Pour changer la luminosité de la sortie, revenir au mode de programmation en maintenant l’aimant sur le
localisateur magnétique pendant 1,5 seconde.
REMARQUE : Le réglage par défaut est restauré au luminaire lorsqu’il est remis en mode de programma
tion.
REMARQUE: Une fois que le réglage de la lumière désiré est réglé, marquez le niveau (1, 2 ou 3) avec un
marqueur sur le luminaire sous le capot.
For warranty information please visit: http://www.landscapelighting.com/portal/warranty_page
Pour de plus amples informations sur la garantie, veuillez visiter : http://www.landscapelighting.com/portal/warranty_page
* INDIQUE LE RÉGLAGE D’USINE
MODE DE PROGRAMMATION
LOCALISATEUR DU COMMU-
TATEUR DE RÉGLAGE DE LA
LUMINOSITÉ
AIMANT DE
COMMUTATION
MODE DE
PROGRAMMATION
INITIALE
NIVEAU 1
NIVEAU 2
NIVEAU 3
TableauCalibredesfils/Alimentation/Longueur
10 12 14 16
020 1860/567 1150/351 730/223 450/137
40 930/283 580/177 370/113 230/70
60 620/189 390/119 240/73 150/46
80 470/143 290/88 180/55 110/34
100 370/113 230/70 140/43 90/27
>100
VATIOS(VA)
Calibredesfils/longueur(pi/m)parcourse
Gen 3 Lumen TableFRENCH for IS - 12012017.xlsx
Niveau 1 Niveau 2 Niveau 3
Tableau de niveau de luminosité (Pour 2700K/3000K)
Single Flood LED
16022
*500 Lm 900 Lm700 Lm
Confidential 1Confidential 1
Tableau de charge du luminaire
Niveau de
luminosité
VA (AC
Alimentation
secteur)
WATTS (DC
Alimentation
secteur)
3 23 18.5
2 16 12.5
1 9 7
1 9 7
LOCALISATEUR DU COMMU-
TATEUR DE RÉGLAGE DE LA
LUMINOSITÉ
LUMINAIRE
VIS À TÊTE HEXAGONAL POUR
RÉGLER L’ANGLE DU LUMINAIRE
CONTRE-ÉCROU
CONNECTEUR DE FIL
PIQUET
AIMANT DE
COMMUTATION
REMARQUE: Lorsque vous dimensionnez votre transformateur, utilisez
le VA le plus élevé que vous prévoyez utiliser en fonction du niveau de
lumière désiré pour éviter de surcharger le transformateur.
Important! Lisez s’il vous plait
  • Page 1 1
  • Page 2 2

Kichler Lighting 16022AZT30 User manual

Type
User manual
This manual is also suitable for

Kichler Lighting 16022AZT30 is a versatile landscape lighting solution that provides adjustable brightness levels to suit your outdoor lighting needs. With three distinct lumen settings (500lm, 700lm, and 900lm), you can customize the brightness of your landscape to create the perfect ambiance for any occasion. Installation is simple, with a stake for secure ground placement and a wireway slot for easy wire management. The fixture is also designed for durability, with a rust-resistant aluminum construction that can withstand various weather conditions.

Ask a question and I''ll find the answer in the document

Finding information in a document is now easier with AI

in other languages