Page is loading ...

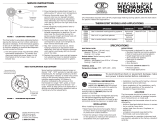
TABLE 1—THERMOSTAT MODELS AND APPLICATIONS.
Heat
Model Switching Anticipator See
Number Application System Fan Range Comments Fig.
T834C1137 For use in standard HEAT-OFF- ON-AUTO 0.18 to 1.0A TRADELINE; Beige. 3
heating-cooling COOL
systems.
T834C1541 For use in gas- or SUPER TRADELINE; 4
oil-fired, or central Beige.
electric heat
a
systems.
T834C2267 For use in gas- or SUPER TRADELINE; 5
oil-fired, single-stage Premier White.
heat pump or central (Jumper included.)
electric heat
a
systems.
T834C2309 For use in standard 0.3 to 1.2A TRADELINE; Beige. 3
heating-cooling
systems.
a
In electric heat applications without fan sequencers, jumper terminals 1 and 2 to control the fan from the thermostat during
heating.
tion.
3. Installer must be a trained, experienced service tech-
nician.
4. After installation is complete, check out product op-
eration as provided in these Instructions.
CAUTION
Disconnect power supply before beginning instal-
lation to prevent electrical shock or equipment
damage.
Contact your local waste management authority for in-
structions regarding recycling and the proper disposal of this
control, or of an old control containing mercury in a sealed
tube.
If you have questions, call Honeywell Inc. at 1-800-468-
1502.
J. H. • Rev. 2-93 • • ©Honeywell Inc. 1993 • Form Number 69-0434—5
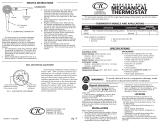
T834C
Heating-Cooling Thermostat
TRADELINE
Application
T834C Thermostats control 24 to 30 Vac single-stage heating-cooling systems. See Table 1 for specific models and
applications. An spdt mercury switch makes R to W on a temperature fall for heating, and R to Y on a temperature rise for cooling.
See Fig. 1.
Recycling Notice
This control contains mercury in a sealed tube. Do not
place control in the trash at the end of its useful life.
If this control is replacing a control that contains mercury
in a sealed tube, do not place your old control in
the trash.
M3375
M3375
Installation
WHEN INSTALLING THIS PRODUCT...
1. Read these instructions carefully. Failure to follow
them could damage the product or cause a hazardous condi-
tion.
2. Check the ratings given in the Instructions and on the
product to make sure the product is suitable for your applica-
Fig. 1—Internal view of T834C.

2
LOCATION
Locate the thermostat about 5 ft. [1.5 m] above the floor
on an inside wall in an area with good air circulation at
average temperature.
Do not mount the thermostat where it can be affected by:
— drafts or dead spots behind doors or in corners.
— hot or cold air from ducts.
— radiant heat from the sun, fireplaces, or appliances.
— unheated (uncooled) areas behind the thermostat, such
as outside walls.
This thermostat is a precision instrument and was care-
fully adjusted at the factory. Handle it carefully.
MOUNTING AND WIRING
Disconnect power supply before beginning installation to
prevent electrical shock or equipment damage.
All wiring must comply with local codes and ordinances.
The T834C can be mounted directly to a wall or vertical
outlet box. Use Honeywell part no. 193121A (beige) or
202689A (gray) Mounting Plate Assembly (order sepa-
rately) to mount on horizontal outlet box or cover marks left
by old thermostat. If mounting plate assembly is used, review
instructions provided with assembly before wiring and mount-
ing thermostat. To wire and mount thermostat:
1. In replacement applications, check the existing ther-
mostat wires for cracked or frayed insulation. Replace any
wires in poor condition. If the wire is plastered into the wall,
make a hole next to the wires and loosen the wires so that they
can be pushed back into the wall later.
2. In new installations, run wiring (if necessary) to the
thermostat location.
3. Set the adjustable heat anticipator indicator to match
the current draw of the primary heating control or as recom-
mended by the equipment manufacturer (see Heat Anticipa-
tor Setting).
4. Connect the wires to the terminals on the back of the
thermostat. See Figs. 3-5 for internal schematic and typical
hookup diagrams. If using electric heat-compatible thermo-
stat in central electric heat applications, jumper terminals 1
and 2 to control fan operation from the thermostat during
heating. See Fig. 2.
Fig. 2—Jumpering thermostat terminals to control
fan operation.
5. Remove thermostat cover by pulling outward on bot-
tom edge until it snaps free of the thermostat base. Carefully
remove and discard the foam plastic shipping insert. This
insert protects the switch and bimetal assembly during ship-
ping.
6. Push excess wire back through the hole and plug any
opening with insulation to prevent drafts that may affect
thermostat performance.
7. Fasten the thermostat to the wall or outlet box with a
screw through the top mounting hole. Adjust the thermostat
so that it is approximately level and fasten the second screw
through the bottom mounting hole. Do not tighten.
8. Exactly level the thermostat using a spirit level or
plumb line. Tighten the mounting screws.
Fig. 3—Internal schematic and typical hookup for T834C1137 and T834C2308 in a standard heating-cooling
system.
H1
TEMP. FALL
C1
L1
(HOT)
L2
1
1
POWER SUPPLY. PROVIDE DISCONNECT MEANS AND OVERLOAD PROTECTION AS REQUIRED.
HEAT RELAY
COMPRESSOR
CONTACTOR
FAN RELAY
FAN SWITCH
ON
AUTO
COOL
OFF
HEAT
COOL
OFF
HEAT
SYSTEM
SWITCH
C1
ANTICIPATOR
H1
ANTICIPATOR
M1119A
W
Y
G
R

M2323B
POWER SUPPLY. PROVIDE DISCONNECT MEANS AND OVERLOAD PROTECTION AS REQUIRED.
JUMPER 1-2 FOR AUTO FAN IN HEATING AND COOLING (ELECTRIC HEAT AND SINGLE STAGE HEAT PUMP SYSTEMS).
JUMPER 1-Y FOR AUTO FAN IN COOLING ONLY.
JUMPER W-Y FOR SINGLE-STAGE HEAT PUMP APPLICATIONS.
CHANGEOVER
RELAY (HEAT)
HEAT RELAY
SYSTEM
SWITCH
HEAT
OFF
COOL
FAN
SWITCH
AUTO
ON
H1
TEMP. FALL
C1
ANTICIPATOR
FAN RELAY
HEAT
OFF
COOL
C1
H1
ANTICIPATOR
W
B
L1
(HOT)
L2
1
1
Y
3
2
COMPRESSOR
RELAY
O
2
G
R
1
2
CHANGEOVER
RELAY (COOL)
3
4
4
Fig. 4—Internal schematic and typical hookup for T834C1541 in gas- or oil-fired, or central electric heat system.
Fig. 5—Internal schematic and typical hookup for T834C2267 in gas- or oil-fired, single-stage heat pump or
central electric heat system.
M2690
POWER SUPPLY. PROVIDE DISCONNECT MEANS AND OVERLOAD PROTECTION AS REQUIRED.
IN ELECTRIC HEAT OR SINGLE-STAGE HEAT PUMP APPLICATION, JUMPER 1 AND 2 FOR AUTO FAN IN HEATING AND COOLING.
HEAT RELAY
COMPRESSOR
CONTACTOR
SYSTEM
SWITCH
HEAT
OFF
COOL
FAN
SWITCH
AUTO
ON
H1
TEMP. FALL
C1
ANTICIPATOR
FAN RELAY
HEAT
OFF
COOL
C1
H1
ANTICIPATOR
G
R
Y
W
L1
(HOT)
L2
1
1
1
2
2
2
369-0434—5

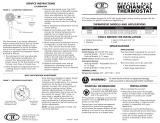
Checkout
CAUTION
Do not check operation by shorting across termi-
nals of system controls. This will damage the heat
anticipator.
IMPORTANT: To assure accurate temperature control, do
not touch or breathe on bimetal of thermometer.
HEATING
With system switch set at HEAT and fan switch at AUTO,
move the temperature setting lever about 10° F
[6° C] above room temperature.
Gas- or oil-fired systems—heating should start; fan
should start after a short delay.
Single-stage heat pump or central electric heat sys-
tems—both heating and fan should start immediately.
Move temperature setting lever 10° F [6° C] below room
temperature.
Gas- or oil-fired systems—heating should shut off and
fan should shut off after a short delay.
Single-stage heat pump or central electric heat sys-
tems—heating and fan should shut off immediately.
8. With the system operating through the ammeter, wait
one minute, then read the ammeter.
9. Turn the system switch to OFF, and turn off power.
10. Adjust the heat anticipator to match the reading on the
ammeter.
11. Disconnect the ammeter, reconnect the W wire, and
mount the thermostat. Continue with system checkout.
NOTE: The heat anticipator may require further adjustment
for best performance. To lengthen burner-on time, move
the indicator in the direction of the longer arrows—not
more than a half scale marking at a time. To shorten
burner-on time, move indicator in opposite direction.
HEAT ANTICIPATOR SETTINGS (Fig. 4 only)
Heat Pump Systems (for about 3 cycles per hour)
Using ‘B’ Terminal
Set adjustable anticipator to 140 percent of combined
current draw of compressor and fan relays.
Using ‘O’ Terminal
Set adjustable anticipator to maximum scale setting. Limit
combined load current of compressor and fan relays to 0.8
amp, because cooling anticipator provides anticipation dur-
ing heat cycle in this hookup.
Electric Systems (with auto fan in heating and cooling)
Set adjustable anticipator to combined current draw of
heating and fan relays.
Gas- and Oil- Fired Systems
(without auto fan in heating)
Set adjustable anticipator to current draw of heat relay or
valve.
4
9. Adjust temperature setting lever so mercury bulb is in
horizontal position. See Fig. 1.
10. Carefully replace thermostat cover.
IMPORTANT: An incorrectly leveled thermostat will cause
the temperature control to deviate from setpoint.
Setting and Adjustment
TEMPERATURE SETTING
Push the temperature setting lever to the desired control
point on the temperature scale. The same lever controls both
heating and cooling.
SYSTEM AND FAN SWITCHING
The T834C features SYSTEM and FAN switches for
control of the heating-cooling and fan systems.
The SYSTEM switch controls system operation as fol-
lows:
HEAT: Heating system only operates.
OFF: Both heating and cooling control systems are dis-
connected.
COOL: Cooling system only operates.
The FAN switch controls fan operation as follows:
AUTO: For gas- or oil-fired systems, the fan operates in
response to the thermostat in cooling; fan operates in
response to the plenum fan control in heating. For
single-stage heat pump and electric heat systems, the
fan operates in response to the thermostat in both
heating and cooling.
ON: The fan runs continuously.
To switch positions, use thumb and index finger to slide
lever to desired position. Switch lever must stop directly over
desired function indicator mark for proper circuit operation.
HEAT ANTICIPATOR SETTING
IMPORTANT: The T834C Thermostat has an adjustable
heat anticipator and equipment will cycle properly
ONLY IF THE ANTICIPATOR IS ADJUSTED TO
MATCH THE CURRENT DRAW OF THE ENTIRE
SYSTEM or as recommended by the equipment
manufacturer. Use this thermostat only on systems
with current draws that fall within the range of the
heat anticipator. Do not use this device on Powerpile
(millivolt) Systems.
A current rating is usually stamped in the nameplate of the
primary control. Set the adjustable heat anticipator indicator
to match the value given on the nameplate, except on thermo-
stats used in systems as shown in Figs. 2-4. See Heat
Anticipator Settings (Figs. 2-4).
If current rating is not available, proceed as follows to
determine the rating:
1. Turn off power.
2. Wire thermostat, but do not mount it on the wall.
3. Connect ammeter between W wire and W terminal on
the thermostat.
4. Prepare the system for operation.
5. Turn on power.
6. Turn system switch to heat.
7. Increase thermostat setpoint as necessary to get system
operating.

If recalibration appears necessary, proceed as
follows:
1. Place the temperature setting lever at the same setting
as the thermometer. Remove cover.
2. Insert 104994A Calibration Wrench (order separately)
onto the hex nut under the coil. See Fig. 6. Holding the setting
lever so it does not move, turn the wrench clockwise until
the mercury drops to the right end of the tube. Remove
wrench and replace cover.
To ensure accurate temperature control, do not touch or
breathe on bimetal or thermometer.
3. Move the setting lever to a low setting. Wait at least
five minutes for temperature to stabilize.
4. Slowly move the setting lever until it reads the same as
the thermometer.
5. Remove cover. Holding the setting lever so it does not
move, reinsert wrench and carefully turn
counterclockwise until the mercury drops to the left
of the tube, but no farther.
6. Recheck calibration. Set the thermostat system switch
for desired operation and replace cover.
7. Adjust temperature setting lever so mercury bulb is in
position. See Fig. 1
8. Carefully replace thermostat cover.
Fig. 6—Recalibration procedure.
569-0434—5
COOLING
CAUTION
Do not operate cooling if outdoor temperature is
below 50° F [10° C]. Refer to manufacturer’s
recommendations.
NOTE: To prevent compressor short cycling, some manufac-
turers’ equipment includes a minimum off-timer to pro-
vide a five-minute time delay before activating the com-
pressor when the thermostat last turned the compressor
off, or from when the system first received power. This
delay protects the compressor.
With the system switch set at COOL and the fan switch set
at AUTO, move the temperature setting lever about
10° F [6° C] below room temperature. Cooling and fan should
start (see NOTE above). Move the temperature setting lever
about 10° F [6° C] above room temperature. Cooling and fan
should shut off.
FAN
With the system switch set at OFF, and the fan switch at
ON, the fan should run continuously. Move the fan switch to
AUTO. In gas- or oil-fired systems, fan operation is con-
trolled by the thermostat in cooling and by the plenum fan
control in heating. In single-stage heat pump and central
electric heat systems, fan operation is controlled by the
thermostat in both heating and cooling.
RECALIBRATION
These thermostats are calibrated at the factory and should
not need recalibration. If the thermostat seems out of adjust-
ment, first check for accurate leveling. To check calibration,
proceed as follows.
1. Move the temperature setting lever to the left end (low
end) of the temperature scale. System switch must be placed
at OFF. Wait at least five minutes.
2. Remove the thermostat cover. Move the setting lever
until the switch just makes contact. The mercury in the switch
will drop to the left end of the tube.
3. Replace cover and wait five minutes for the cover
and the thermostat to lose the heat it has gained from your
hands. If the thermometer pointer and the setting lever
indicator read approximately the same, no recalibration
is needed.
CALIBRATION
WRENCH
COIL SHOWN WITHOUT
HEAT ANTICIPATOR
M2044

Automation and Control Solutions
Honeywell Internationals Inc. Honeywell Limited—Honeywell Limitée
1985 Douglas Drive North 35 Dynamic Drive
Golden Valley, Minnesota 55422 Scarborough, Ontario M1V 4Z9
/