Page is loading ...

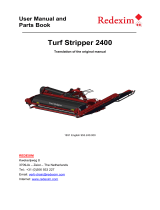
Operating Instructions and
Spare Parts Book
Rink DS550SP
Serial Number
Translation of the original operating instructions
Kwekerijweg 8
3709JA Zeist
The Netherlands
T: (31)306933227
F: (31)306933228
www.redexim.com
Attention:
TO ENSURE A SAFE USE OF THE MACHINE AND THE BEST RESULTS, IT IS OF UTMOST
IMPORTANCE TO CAREFULLY READ THIS OPERATING MANUAL BEFORE USING THE RINK
DS550SP.
1712 English 933.120.418

- 2 - DS550PB
SAFETY REGULATIONS
The RINK DS550SP Disc Spreader is built exclusively for spreading small-grained
materials, such as sand, gravel, granules and so on.
Figure S1
The RINK DS550SP is purposely designed for
safe operation. However, the prerequisite for this
is full compliance with all the safety regulations
contained in this operating manual.
Read and understand (Fig. S1) the operating
instructions before you start using the RINK DS550SP.
Any use of the machine other than what is
described in this operating manual can result in
injury and/or damage to the RINK DS550SP.
Any other type of use is not considered suitable. The manufacturer is not liable for any
resulting damage; the risk lies entirely with the user.
The intended use also includes adherence with the manufacturer book's operating,
maintenance and repair requirements.
The RINK DS550SP Disc Spreader is reliable in operation and is built according to the
latest technology; unless it is well maintained and used by individuals who are familiar
with it and are informed of possible dangers, the RINK DS550SP Disc Spreader may
constitute a hazard to the lives of the user and other persons.
Every person who is responsible for the operation, maintenance and repair of the
spreader, must have read the operating instructions and especially understood the
chapter about safety regulations.
For any repairs, only original spare parts produced by the manufacturer must be
used.
Beside the advice in this operating manual, the general safety and accident prevention
regulations must be observed.
The RINK DS550SP Disc Spreader may not be used on public roads.
It is not acceptable to use it as a means of transportation for people!
Access to the loading bridge is prohibited while the scattering device is running.
On both sides of the RINK DS550SP Disc Spreader a corresponding message is affixed.
This notice must be always legible and must be replaced if damaged.

DS550SP - 3 -
Before using the RINK DS550SP Disc Spreader, the user is obliged to check for any
visible damage and defects. Changes in the RINK DS550SP Disc Spreader (including
its operation) that can have a negative impact on safety must be corrected immediately.
For safety reasons it is prohibited to make changes or additions to the RINK DS550SP
Disc Spreader (except changes/additions approved by the manufacturer). If
modifications are done to the RINK DS550SP Disc Spreader, CE-Marking currently
applicable to the machine becomes invalid and must be replaced, independently of the
person who carried out these changes.
Before starting, check surrounding and ensure adequate visibility.
Pay attention to appropriate clothing. Wear safety shoes and long trousers. Long hair
must be tied. Do not wear loose clothing. Use appropriate personal protective equipment
in accordance with the existing workplace safety and general safety regulations.
A noise of about 74 dB (a) at the RINK DS550SP Disc Spreader accrued in the
immediate vicinity to the spreading discs.
When working with the machine, wear certified hearing protection equipment (Fig. S2).
Figure S2
On both sides of the RINK DS550SP container and the engine there are safety labels
(Fig. S2, S3, S4) with appropriate warning signs. These safety signs must always be
clearly visible, legible and in case of damage, must be replaced immediately.

- 4 - DS550PB
When carrying out maintenance, adjustments and repair work always switch off the
engine and remove the key from the ignition. (Fig. S3)
Figure S3
During operation, NO persons without the appropriate personal protective
equipment may stay in the danger area of the RINK DS5550SP, as there is risk of
injury by projected material (Fig. S4)
Figure S4
Figure
S5
Keep at least a 4-metre distance! (Fig. S5)
Adjustment and repair work may only be performed by authorized personnel. Before
doing any repair work on the hydraulic system release the pressure completely. Check
Hydraulic connectors regularly and replace if damaged or worn and torn. The hydraulic
connector must meet the technical requirements of the manufacturer.
Oil endangers the environment; please make sure of
environmentally safe disposal

DS550SP - 5 -
T A B L E O F C O N T E N T S
Operating Instructions and ...................................................................................... 1
Spare Parts Book ...................................................................................................... 1
SAFETY REGULATIONS .......................................................................................... 2
1.0 BRIEF DESCRIPTION ......................................................................................... 6
2.0 SPECIFICATIONS ............................................................................................... 6
3.0 GETTING STARTED ............................................................................................ 7
Start the engine .................................................................................................................................... 7
4.0 OPERATING ........................................................................................................ 7
Before every trip ................................................................................................................................... 7
Loading ................................................................................................................................................ 7
5.0 Driving ................................................................................................................. 8
Controls ................................................................................................................................................ 8
Control system ..................................................................................................................................... 9
6.0 SPREADING .......................................................................................................10
Controls .............................................................................................................................................. 10
Adjust spread thickness ..................................................................................................................... 11
Spreading Chart ................................................................................................................................. 11
Spreading different scatter materials ................................................................................................. 12
Disc setting with the irregular spread pattern .................................................................................... 12
7.0 CARE and MAINTENANCE ................................................................................13
Bearings with multi-purpose grease (every 50 hours) ....................................................................... 13
Change the oil on conveyor belt transmission (every 100 hours) ..................................................... 14
Adjust the pressure and throttle valve ............................................................................................... 14
Conveyor belt tightening (if there is slippage) ................................................................................... 15
Install the conveyor belt ..................................................................................................................... 16
Conveyor belt tightening after installation .......................................................................................... 16
Oil tank ............................................................................................................................................... 17
8.0 TROUBLESHOOTING ........................................................................................18
9.0 SPECIAL FEATURES .........................................................................................19
Subject to technical changes.
The equipment marked with # is only available as special equipment.

- 6 - DS550PB
1.0 BRIEF DESCRIPTION
The RINK DS550SP Disc Spreader is used for spreading small-grained materials, such as
sand, gravel and so on. The disc spreader of the conveyor belt is driven by a gear with a
hydraulic motor. The two disc spreaders are each driven by one hydraulic motor. The speed
sensor of the hydraulic motors for the conveyor belt and the disc spreaders are connected
through an adjustable flow regulator. The spreading material can therefore be accurately
regulated. Spreading width and rate can be determined by vehicle speed, spreading disc and
belt conveyor speed.
2.0 SPECIFICATIONS
RINK DS500PB Disc Spreader Dimensions
Length ........................................................................................ 3,000 mm
Width .......................................................................................... 1,400 mm
Height ......................................................................................... 1,700 mm
Maximum charge quantity ...................................................... 0.55 m3
Weight
Permitted total weight ................................................................ 1,000 kg
Net weight .............................................................................. ... 590 kg
Spread width (adjustable) ........................................................ up to 12 m
Hydraulic connector values
Minimum oil flow ........................................................................ 25 l/min
Minimum oil pressure ................................................................. 140 bar
Tyre pressure ............................................................................. 0.8 bar
Noise emissions *
(A-weighted measurement in
accordance ISO 4781 and
EN 13684: 2004 + A3: 2010)
A-weighted emission sound pressure level LpAd
measured in working position re. 20 µPa: 86 dB
Uncertainty K
p
A: 2 dB
A-weighted sound power level measured in working
position LWAd re. 1pW: 100 dB
Uncertainty KWA: 2 dB
Emission of hand-arm vibration *
(Measurement according to EN
12069 and EN 13684: 2004 + A3:
2010)
Hand-arm-Vibration ahv: 2.1 m/s2
Uncertainty K: 0.2 m/s2
*Remark: emission values for both sound and vibrations are determined under reference
conditions as described in EN 13684. In practice the emission (or better: the partial
exposure) maybe different due to specific conditions and circumstances. Emission data are
primarily intended for comparison between different machines and may be used as an
indication for partial exposure, but with limited validity.

DS550SP - 7 -
3.0 GETTING STARTED
- Tighten the wheel nuts.
- Check the tyre pressure.
Check these points again after the first laden journey!
Start the engine
- Fill the fuel tank with unleaded gasoline.
- Move the throttle control to FAST position.
- Press the engine button ON and move the choke control to the left.
- Start the engine, repeat if necessary and slightly close choke.
- As soon as engine starts, move the choke control back, and with the throttle control set
the desired speed.
Before starting the motor, it is absolutely necessary that any user must
have read and understood the included operating instructions of the
engine manufacturer.
4.0 OPERATING
Before every trip
- Check the RINK DS550SP Disc Spreader for visible damage, and repair any damage.
- Check tyre pressure.
- Check run marks of the conveyor belt, since the conveyor belt must not rub at the side
adjust if necessary (see page 15).
Loading
- Note desired maximum ground pressure.
- When loading note permitted total weight.

- 8 - DS550PB
5.0 Driving
Controls
(1) Gear lever forward - backward
(2) Conveyor belt controller
(3) Disc spreader control
(4) Flow regulator (speed)
(5) Brake lever (parking brake)
3
4
5
2
1
Fig. 1: Controls

DS550SP - 9 -
Control system
The RINK DS550SP Disc Spreader is controlled as follows.
- Start the motor (see page 7)
- By pulling the Disc Spreader controller (3), the oil circuit will be activated and the Disc
Spreader will begin to spin. To move around the RINK DS550SP Disc Spreader and to
turn on the belt, this controller must be pressed.
- With the help of the brake lever (5), the RINK DS550SP Disc Spreader can be
prevented from rolling away.
- The controller (1) allows you to determine the direction of the RINK DS550SP Disc
Spreader. For driving forward, it has to be pulled up. When in the centre position, the
engine is idling. For reverse, completely push down the controller (1).
- In order to increase or reduce the running speed, the Flow regulator (4) must be rotated
in the clockwise or anticlockwise direction.
- If the conveyor belt controller (2) is pulled up to the front final position, the valve will open
(see page 11) and the conveyor belt is turned on. If switched back to the starting position,
the conveyor belt will stop. Pressing the conveyor belt controller (2) in the front final
position, the valve is closed.

- 10 - DS550PB
6.0 SPREADING
When operating the Disc Spreader controller (3), the disc spreader is automatically activated.
The conveyor belt and the valve (3) are activated by operating the conveyor controller (2),
first the valve (3) is activated and then with a small delay, the conveyor belt is activated.
Before starting work, select valve position A-D. (See page 8 - Fig. 1 and page 11 - Fig. 3)
Controls
(1) Controller to adjust the speed of the conveyor belt
(2) Controller to adjust the speed of the disc spreader
(3) Valve (see page 11 - Fig. 3)
(4) Deflector (see page 12 - Fig. 4)
Fig. 2: Controls

DS550SP - 11 -
Adjust spread thickness
The spread thickness depends on:
- the driving speed
- the speed of the conveyor belt - controller (1)
- the speed of the disc spreader - controller (2)
- the opening (A-G) of the automatic valve (3)
Spreading Chart
Spread Rate Disc
Spreader Conveyor Belt Valve Position Spread
Range
Controller (2) Controller (1) Valve
Light 8-10 8-10 A-B 10 m
Medium 6-7 8-10 C-E 8 m
Thick 4 8-10 F-G 4 m
E
G
B
D
6
F
A
C
Fig. 3: Controls

- 12 - DS550PB
Spreading different scatter materials
Different scattering materials require different types of settings. The RINK DS550SP Disc
Spreader can be adjusted by the following material scattering.
- Rotation of the throw shovel loader (see disc setting with the irregular spread pattern - Fig 5)
- Regulating the conveyor belt speed with the controller (1) (see page 10 - Fig.2)
- Regulating the disc spreader speed with the controller (2) (see page 10 - Fig.2)
- Adjusting the opening of the A-D automatic valve (3) (see page 11 - Figure 3)
- Increasing or restricting the vehicle speed
- For very wet material and large thick debris, the deflector (4) can be removed from the
spreading system (by means of a locknut M8) (Fig. 4).
Fig. 4: Spreading Mechanism
Disc setting with the irregular spread pattern
Rotation of the throw shovel loader
The throw shovel loader (8) can be adjusted as required within the slotted holes (Fig. 5).
External concentration of material - Place every second blade (8) in the direction X
Internal concentration of material - Place every second blade (8) in the direction Y
Fig. 5: Spreading Disc

DS550SP - 13 -
7.0 CARE and MAINTENANCE
Bearings with multi-purpose grease (every 50 hours)
(1) Bearings on both sides of the spreading disc
(2) Bearings on both sides of the rear transportation shaft
(3) Bearings on both sides of the front transportation shaft
(4) Bearings on both sides of the wheel hub
(5) Bearings on both sides of the drive shafts
(6) Bush on the front fork
Bearings without grease fittings are maintenance free.
2
5
3
6
4
1
Fig. 6: Grease Points

- 14 - DS550PB
Change the oil on conveyor belt transmission (every 100 hours)
- Remove filler plug (11).
- Remove drain plug (12) on the inside bottom and drain the oil.
- Screw the drain plug (12) back with a new gasket.
- 0.6 l of SAE85-W140 oil to fill
- Screw filler plug with a new gasket.
Oil endangers the environment; please make sure of
environmentally safe disposal
Fig. 7: Carriage gear
Adjust the pressure and throttle valve
- Pressure relief valve (10) can be adjusted exactly to the inner hexagon (Fig. 7).
- Throttle valve (9) (Fig. 7) for the regulation of the valve (3) (see page 11 - Fig. 3).

DS550SP - 15 -
Conveyor belt tightening (if there is slippage)
- Loosen locknuts (13) on both sides.
- Screw nuts (14) evenly on both sides, each in clockwise direction.
Tighten gradually one-half turn.
- Tighten locknuts (13) on both sides again.
Tightening excessively shortens the life of the conveyor belt!
13 14
Fig. 8: Tighten conveyor belt

- 16 - DS550PB
Install the conveyor belt
- Remove RINK DS550SP Disc Spreader from the chassis.
- Disconnect the hydraulic connectors and spreading system (1) by loosening the screws
(2).
- Remove the protective (3) and rubber (4) covers to the right.
- Loosen the conveyor belt (7) on both sides by loosening the screw-nuts (8)
- Remove the connecting bolts (9) on the hopper (10).
- Loosen and remove clamping rings of the bearing (11) (in right direction).
- Loosen the screws (13) on the side (12) and pull off completely with bearing (11).
- Remove the conveyor belt (7).
Installation is in the reverse order.
Fig. 9: Install the conveyor belt
Conveyor belt tightening after installation
- During the loosened condition of the conveyor belt, on both sides mark a length of 1,000
mm from the conveyor belt.
- Tighten the conveyor belt on both sides and evenly with the two tension bolts (see page
13), until the marked length is stretched to a maximum of 1,003 mm.
- Let the conveyor belt run for about 30 minutes until it is centred and running between the
directional control valves, adjust if necessary.
The conveyor belt must not touch the sides, otherwise it will be damaged.
During readjustment of the belt, gradually tighten the strips of the belt on
the side.
Tightening too much shortens the life of the conveyor belt!

DS550SP - 17 -
Oil tank
2
4
1
6
5
3
Fig. 10: Oil tank
Oil change at the hydraulic tank (every 100 operating hours)
- Loosen suction hose (1) and drain oil.
- Replace the suction hose (1).
- Remove cover (2) from filler neck.
- Fill Plantosyn 3268 ECO as far as the eyeglass center (3).
- Close the cover (2).
Filter change at the hydraulic tank (when changing oil or as required)
- Remove the cover (6) by loosening the screws (5).
- Replace filter cartridge (4).
- Refit the cover (6) with screws (5).
This is a closed hydraulic circuit. However, to prevent possible
contamination, the return pipe (1) must be replaced every 100 hours.
Oil endangers the environment; please make sure of
environmentally safe disposal

- 18 - DS550PB
8.0 TROUBLESHOOTING
Problem Cause Solution
Valve does not open No material in the hopper
Throttle valve set too low
Fill in material
Open throttle valve (9) to adjust
valve (fig 7)
Scattering width is too
narrow Disc spreader turns too slow Increase disc spreader speed (2)
(fig 2)
Scattering thickness is
too thin Insufficient material is being
conveyed
Disc spreader speed is too high
Conveyor belt speed is too slow
Enlarge valve opening
Reduce disc spreader speed (2)
(fig. 2)
Increase conveyor belt speed (1)
(fig. 2)
Scattering thickness
too thick Too much material is being
conveyed
Disc spreader speed too
slow
Conveyor belt speed is too high
Reduce valve opening
Increase disc spreader speed (2)
(fig 2)
Reduce belt conveyor speed (1)
(fig. 2)
Irregular scatter
pattern Settings of the throw shovel
loader are incorrect Correct the settings of the throw
shovel loader (8)
(5)
Output is irregular Conveyor belt speed is too slow Increase belt conveyor speed (1)
(fig. 2)
Belt conveyor will not
start Conveyor belt slips
Rear drive roller and conveyor
belt do not rotate
Tighten conveyor belt
Increase pressure control valve
(10) by turning a quarter of a turn
clockwise (fig. 7)
Problematic driving
behavior on slopes Weight of front axle too low
Mount the weight plate assembly
(Fig. 11) Problem Analysis

DS550SP - 19 -
9.0 SPECIAL FEATURES
Weight plate assembly
(To improve driving on slopes)
By mounting the weight plate assembly (order no .: RGS 17203), the mass of the
RINK plate spreader DS550SP in the front area increases.
This improves the driving behavior of the machine, especially on slopes and on steep terrain.
- Drill pre-drilled holes Ø 2mm to Ø 11mm.
- Fit the weight plates (1) with the supplied screws and nuts.
The removal takes place in the reverse order.
ø2mm auf ø11mm beidseitig aufbohren
1
Fig. 12 Weight plate assembly
Drill pre-drilled holes Ø 2mm to Ø 11mm

Parts manual
/