Page is loading ...

1

2
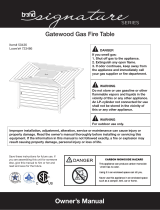
• Read the Owner’s Manual thoroughly before using.
• Do not leave unattended, must be watched at all times!
Part A: Safety Information
Before you assemble or operate this unit, please read carefully this entire Owner’s Manual. Failure to do so may
result in a fire, explosion, injury or death.
The installation of this unit must adhere to local codes or either the National Fuel Gas Code,
ANSIZ223.1/NFPA54, ORCCAN/CGA-B149.1, Natural Gas and Propane Installation Code.
1. This unit is not intended indoor use. Please use outdoor.
2. This unit is to be used with LP Gas/Propane Gas only! (Propane gas tank is not attached and not delivered
with this unit, sold separately.)
3. Do not attach a remote gas supply to this unit.
4. This unit is not intended for Natural gas.

3
5. Converting this unit to natural gas is dangerous and not recommended. (Altering/changing this unit, in any
way, will void the manufacturer’s warranty.)
6. Do not use any solid fuel or charcoal for this unit.
7. When igniting this unit, exercise caution as some gas pooling from the burner may cause the flame to flare
that may cause injury or property damage.
8. LP gas warning: Lave Rocks/Pumice stones not to exceed ¼ inch in depth above the burner holes- excessive
use of the lava/pumice rock could suffocate the flame.
9. If the propane gas tank is leaking, or can smell, hear a hiss or sense a leak is at the source please do the
following:
• Disconnect the propane gas tank.
• NO NOT attempt to fix the problem yourself.
• Move yourself and all persons/animals away from the immediate area.
• Only when everyone is at a safe distance away from the fire table/column contact your gas supplier or fire
dept. for help.
10. Applying to much propane gas may result in pooling and will not burn. Allow fresh air into then unit so that
the gas may escape.
11. DO NOT use flame to check for gas leaks. This may cause serious harm or injury, or loss of life.
12. The maximum inlet supply pressure: 11” w.c. (2.74kPa)
13. Use LP propane tanks with the following dimensions: diameter 12”, height 18”- capacity 20lbs.
14. You must use a propane gas tank that has collar to protect the gas valve.
15. DO NOT fill tank over 80% full.
16. The tank system must be set up for vapor withdrawal.
17. STOP using if any part of the propane gas tank is damaged. Rust and dents in tank may be hazardous and
should be inspected by a gas supplier.
18. DO NOT burn anything other than the provided materials for this fire table.
19. Keep away from the unit for the first 20 minutes after igniting your unit for the first time, as lave
rocks/pumice stones could pop out and cause injury. Should any rocks pop out, please discard them.
20. Always ensure that lava rocks/pumice stones are completely dry before use. Failure to do so could cause then
to crack or pop.
21. DO NOT operate unit until all parts are fully assembled.
22. DO NOT paint or color any part of this fire table/column.
23. Unit may be hot while in use, DO NOT attempt to move it with flame lit.
24. This unit is not intended for cooking.
25. Keep all flammable items away and DO NOT use any other fire place cover for this unit.
26. Keep a safe distance to avoid burning skin, clothing, or property.
27. DO NOT sit or rest hands/feet on this fire table/column.
28. Never place hands or fingers onto upper portion of this unit while in use.
29. Keep all electrical cords and fuel supply hoses away from heated surfaces.
30. Combustible material should NOT be within 72” inches of the top of the unit, and within 48” inches around
the entire unit. Combustible materials could be and are not limited to any items that may catch fire;
examples: dry vegetation, wood, branches, leaves, plants, buildings, fabrics, sawdust, all chemicals and any
other items not listed here.

4
31. Please supervise all children while unit is in use. This can cause burns or serious injury.
32. DO NOT hang clothing from unit.
33. Installation and repairs should be done by a qualified service technician. The appliance should be inspected
before use. IF you suspect that there are issues please contact a qualified service person.
34. Unit must be kept clean for future use.
35. When APPLICABLE:
• Keep gas tank at least 5 feet away from unit when lit (if external tank).
• Allow fire burner/column to cool down completely before placing on lid.
• Keep hose away from any pathways to eliminate any accidental damage (if external tank).
• DO NOT use fire table/column while lid is installed. ALWAYS remove the lid before use and while
flame is lit.
36. Use only the regulator and hose assembly provided with this unit.
37. Replacement parts must be supplied directly by manufacturer.
38. Inspect the burner before use of this unit.
39. If the burner shows any kind of damage, DO NOT attempt to operate the appliance. For assistance with repair
or replacement parts of this appliance please contact the retail manufacturer directly.
NOTE: You must follow all steps to properly assemble this fire table/column. Make sure the gas valve is
turned “OFF” before assembling. DO NOT attempt to assemble without proper tools.
PART B: IGNITOR CONTROL BOARD
Read carefully before using.

5
Lighting:
1. Read the instructions before using.
2. Control knob must be in the “OFF” position.
3. Connect propane cylinder (see manual).
4. Push and turn control knob counter clockwise to low.
5. Press the igniter button repeatedly to light burner
6. Release control knob after 45 seconds.
7. If ignition does not occur in 45 seconds, push and turn burner control knob to “OFF”, wait 5 minutes, fan
with newspaper or magazine, and repeat lighting procedure.
8. If ignite does not light burner, use a long match or lighter.
9. Adjust the flame to desired flame height with the control knob. CAUTION: The gas supply must be turned off
at the table. LP gas supply cylinder when this appliance is not in use.
Turning off:
1. Turn and push the control knob clockwise to the “OFF” position.
2. Turn the cylinder valve on the gas tank clockwise to close.
PART C: User’s Guide to Connecting the Gas tank to the Fire table/Column
This safety information section contains information concerning the regulator, and the charge valve of the gas tank
and its relevant valves. NOTE: There are fire tables/columns that hold gas tanks internally and externally.
1. Picture A: shows the charge valve of the cylinder with the different valves and
coupling nut, this forms the top of the gas cylinder.
2. Picture B: shows the regulator pre-connected to a hose. This regulator is pre-
connected to the fire table/column.
There are two types of fire tables/columns:
1. Fire table/column that has an internal housing for gas tank cylinders, where
the tank is held inside the table/column.
2. Fire table/column that has the tank externally visible, whereby the hose shall
be NO SHORTER than 5 feet. This table may or may not be accompanied by a
matching tank holder.
Part D: Connecting the Fire Table to the Gas Cylinder.
1. Plug the black coupling nut on the regulator cylinder valve.
2. Turn the black coupling nut clockwise until fully locked into the position.
3. Check all connections for leaks.
Note: Turn the gas supply on. If any extra-large bubbles form on any connection there may be a leak. If you
smell gas or a leak is discovered IMMEDIATELY turn the gas valve off, disconnect the propane gas tank. DO
NOT use the appliance until the leak is repaired.

6
Part E: Fire Table/Column PARTS INTRODUCTION
Fire table/column is delivered pre-assembled. No assembly is needed. Here is a review of the parts used in
this product. Do not attempt to change and /or remove any part(s). Removal or modifying of any parts voids
all warranty of product. Seek a qualified service professional in the event that service of this appliance is
needed.
Part F: Parts and Accessories of the Fire Table/Column

7
Before any needed assembly is started, please make sure that all parts are present. Compare parts in package with
user guide and package contents list. If any parts are missing or damaged, DO NOT attempt to assemble the
product.

8
Part H: User’s Instructions Here are the basic steps to help you light and use your fire table/column.
1. Check that the control knob for the gas supply system is turned in the
“OFF” position before starting any assembly.
2. Please the 20lb propane gas tank (not included) into the metal stand. Make
sure the propane gas tank is placed completely into the metal stand to
prevent leaking.
3. Turn the preassembled wing screw in a clockwise
direction in to the nut to secure the propane gas tank
tightly.
4. Turn the cylinder valve on the tank in a clockwise direction to turn “OFF” supply of the LP gas supply.

9
Tighten by hand only.
Remove the electronic ignition cap by unscrewing and slide the battery into the battery slot. Make sure that the
positive side of the battery faces towards the outside. Screw the electronic ignition cap over the battery, tightly, but
by hand only.
5. At this time if you wish to place the lava rocks over the burner
ring (optional). The guard must not be blocked!
• DO NOT place more than ¼ inch depth of lava rocks
above the burner holes. Doing so will suffocate the
flame.
• DO NOT place more than 13.2lb of lava rocks about the
burner holes. Doing so will suffocate the flame.
WARNING: Fire table and LP cylinder must be at a
minimum of 60” inches apart.
KEEP GUARD CLEAR! DO NOT BLOCK FLAME!

10
PART I: SAFETY INFORMATION- OPERATIONS
Before preforming a leak test, be sure that:
• You DO NOT press the ignition button.
• You ARE in a spacious outdoor area.
-
1. Connect the propane tank to the regulator and turn the valve on the unit to the “OFF” position.
2. Brush soap and water mixture onto all the connection ends.
3. Turn the gas supply on; if extra-large bubble form on any connection there may be a leak.
4. ****If you smell gas or a leak is discovered, IMMEDIATELY turn off the gas valve, disconnect the gas tank. DO
NOT use the appliance until the leak is repaired by a certified serviceperson.
5. Remove the fire door and inspect the gas hose before and after every use. DO NOT use if cracked or does not
have a good seal. Replace by ordering a new part directly from the manufacturer.
Fire Observation:
1. Flame color should be yellow/blue.
2. Flame height burns at 2-10 inches high.
3. Wait 10 mins after extinguishing flame prior to replacing the lid (if applicable) or protective cover.
PART K: SAFETY INFORMATION- SHUTTING DOWN YOUR FIRE TABLE/COLUMN
Please follow the following steps:
1. Turn control knob clockwise to the “OFF” position.
2. Close the cylinder on the propane tank if you DO NOT intend to use for an extended period of time.
PART L: MAINTENANCE OF FIRE TABE/COLUMN
** Before performing any maintenance work on unit, please ensure the control knob is in the “OFF” position;
and ALWAYS disconnect the propane tank. **
*** Table has a sealant treatment that prevents staining and moisture absorption, and for product longevity
this appliance would still require proper care and maintenance to ensure the integrity of the surface. ***
1. Keep the table free and clear from all combustible materials.
2. Visually inspect the burner for obstructions and keep tank enclosure free and clear from debris.

11
3. Use a soft brush to remove the mild stains, loose dirt, soil, and other debris from the rocks after the rocks are
completely cooled down.
4. Harsh weather conditions may cause stubborn stains, discoloration and possibly rust pitting.
5. Permanent damage may occur if powder or solvent comes in contact with painted or plastic components on
this table.
6. Keep the table stored away from direct sunlight.
7. If storing this unit inside, disconnect the propane tank from the gas valve. *** Leave the gas tank in a cool,
dry storage area, outside the home. *** (Emits dangerous fumes)
8. Not using manufacturer approved or supplied parts or accessories may result in a defective condition and
shall void the warranty of fire table/column.
9. Before preforming any maintenance work always:
• Ensure the control knob is in the “OFF” position
• Disconnected from the propane gas tank
10. Keep the fire table/column free and clear from all combustible materials.
11. Place lid (if applicable) and protective cover.
12. Clean any spills immediately to prevent permanent surface(s) staining or damage.
13. Blot any liquids with a clean, dry cloth to avoid spreading the spill to the rest of the table/column.
*** Use mild soap and warm water with a soft clean cloth or sponge. *** Rinse thoroughly***
14. Regularly cleaning unit will aid in a longer lasting product.
15. DO NOT use petroleum-based or abrasive cleaning products.
16. DO NOT use any harsh brushes/rough sponges when cleaning the table/column surface(s).
17. DO NOT slide products across the unit surface(s to avoid permanent scratching and or damage(s).
18. DO NOT place food or drink of the surface of the unit.
19. DO NOT eat from the unit- not for human consumption.
20. Must be covered at all times when not in use.
21. Store indoors during winter months, away from harsh in climate weather. ***Extreme cold temperatures
may cause cracking of the surface(s). ***
PART M: WARRANTY
The manufacturer warranty shall be voided, and manufacturer disclaims any responsibility for the following actions
where by the consumer/customer/owner has:
1. Made modification(s) to the unit and/or components including the gas valve assembly. The user shall contact
the local supplier and/or qualified service person to repair these parts.
2. Use any component part/change to parts that are NOT manufactured or approved by the manufacturer.
3. Use and/or install other than what is listed in this owner’s manual.
*** Please contact retailer for any/all replacement parts. ***
/