Page is loading ...

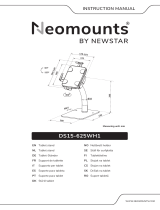
FL15-650WH1
WWW.NEOMOUNTS.COM
INSTRUCTION MANUAL
IT
EN
NL
DE
FR
ES
PT
DK
Tablet stand
Tablet stand
Tablet-Ständer
Support de tablette
Supporto per tablet
Soporte para tableta
Suporte para tablet
Stå til tablet
NO
SE
FI
PL
CS
SK
RO
Nettbrett holder
Ställ för surfplatta
Tablettiteline
Stojak na tablet
Stojan na tablet
Držiak na tablet
Suport tabletă
400mm
300mm
62mm
43mm
1086mm
226mm
339mm
22.5mm
+75°
+90°
0°
0°
5mm
min1111~max1260mm

PARTS
FL15-650WH1
Attach the adhesive pads to the bottom of the base
Breng de zelfklevende pads aan op de onderzijde van
de voet
Befestigen Sie die Klebepads an der Unterseite
Fixez les pieds adhésifs sous la base du support
Attaccare i cuscinetti adesivi sul fondo della base
Coloque las almohadillas adhesivas en la parte inferior
de la base
Anexe as pastilhas adesivas ao fundo da base
Przymocuj podkładki samoprzylepne do dolnej części
podstawy
EN
NL
DE
FR
IT
ES
PT
PL
A. (x1) B. (x1) C. (x1) D. (x1) E. (x1)
F. (x1) G. (x1) H. (x1) I. (x1)
J. (x1)
Q. (x1) R. 4mm
(x1)
S. 5mm
(x1)
K. (x4) L. M4x12
(x4)
M. M5x6
(x4)
N. M8x20
(x4)
O. (x2)
STEP 1
P. (x2)
K
J
Tool Drill

Route the cable and attach the pole to the base
Geleid de kabel en bevestig de stang aan de voet
Verlegen Sie das Kabel und befestigen Sie die Stange
an der Basis
Positionnez le câble et vissez le tube sur la base
Far passare il cavo e fissare il palo alla base
Pase el cable y adjunte el poste a la base
Passe o cabo e anexe o poste à base
Przeprowadź kabel i przymocuj słupek do podstawy
EN
NL
DE
FR
IT
ES
PT
PL
STEP 2
I
N
S

Install the mount on a wooden floor
Installeer de steun op een houten vloer
Montieren Sie die Halterung auf einem Holzfußboden
Installation du support sur un plancher en bois
Installa il supporto su un pavimento di legno
Instalar el soporte sobre un suelo de madera
Instale o suporte em um piso de madeira
Zainstaluj uchwyt na drewnianej podłodze
EN
NL
DE
FR
IT
ES
PT
PL
Install the mount on a concrete brick floor
Installeer de steun op een betonnen of stenen vloer
Montieren Sie die Halterung auf einem Beton- oder
Steinboden
Installation du support sur un sol en béton
Installare il supporto su un pavimento di cemento o
di mattoni pieni
Instale el soporte en un piso de concreto o de ladrillo
sólido
Instale o suporte em um piso de concreto ou sólido
Zainstaluj uchwyt na betonowej lub solidnej ceglanej
posadzce
EN
NL
DE
FR
IT
ES
PT
PL
STEP 3A
55mm
(2.2") Ø4.5mm
(Ø3/16")
O
STEP 3B
60mm
(2.4")
Ø10mm
(Ø3/8")
O
P

* Not Included
Attach the holder to the pole and unlock the holder
Bevestig de houder aan de stang en ontgrendel de
houder
Befestigen Sie die Halterung an der Stange und ent-
riegeln Sie die Halterung
Fixez le support au poteau et déverrouillez le support
Collegare il supporto all'asta e sbloccare il supporto
Fije el soporte en el poste y desbloquea el soporte
Anexar o suporte ao poste e desbloqueie o suporte
Przymocuj uchwyt do wspornika i odblokuj uchwyt
EN
NL
DE
FR
IT
ES
PT
PL
STEP 4
Q

* Not Included
Remove the cover and place the tablet in the holder
Verwijder de afdekkap en plaats de tablet in de houder
Entfernen Sie die Abdeckung und legen Sie das Tablet
in die Halterung
Retirez le capuchon et placez la tablette dans le support
Rimuovere le coperte e posiziona il tablet nel supporto
Retire la tapa de la cubierta y coloque la tableta en el
soporte
Remova a tampa e coloque o tablet no suporte
Zdejmij osłonę i umieść tablet w uchwycie
EN
NL
DE
FR
IT
ES
PT
PL
STEP 5
L
Note: Remove foam parts
before installation.
B C D E F G
Attach the panel to the holder with 4 screws (L).
Adjust the two clamps for solid placement and
correct alignment of the tablet before fully
tightening the screws.
Choose the corresponding panel according to the tablet:
Panel 1: For 9,7” iPad 5/6, iPad Air 1/2 & iPad Pro (Gen 1)
Panel 2: For 10,2” iPad 7/8/9 & 10,5” iPad Air 3, iPad Pro (Gen 2)
Panel 3: For 11” iPad Pro (Gen 3/4/5) & 10,9” iPad Air 4
Panel 4: For 10,4” Samsung Galaxy Tab A7
Panel 5: For 10,1” Samsung Galaxy Tab A
Panel 6: For 10,4” Samsung Galaxy Tab S6
The panel
number is
indicated
on the
panel
itself.

Adjust the torque
Stel het koppel in
Einstellen des Drehmoments
Réglagez les couples
Regolazione della coppia
Ajuste el tornillo
Ajustar os parafusos
Dostosuj siłę docisku regulacji
EN
NL
DE
FR
IT
ES
PT
PL
Adjust the mount to the desired position
Stel de steun in op de gewenste positie
Positionieren die Halterung in der gewünschten
Position
Ajustez le support à la position souhaitée
Regolare il supporto nella posizione desiderata
Ajuste el soporte a la posición deseada
Ajuste o suporte na posição desejada
Dostosuj pozycję uchwytu do twoich wymagań
EN
NL
DE
FR
IT
ES
PT
PL
STEP 6
STEP 7
R

/