Page is loading ...

Ascon Tecnologic - W09D - OPERATING INSTRUCTIONS - PAG. 1
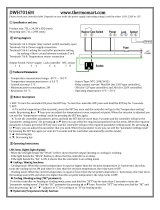
W09D
DIFFERENTIAL
CONTROLLER
OPERATING INSTRUCTIONS
17/07 - code: ISTR_M_W09D_E_02_--
ASCON TECNOLOGIC S.r.l.
Viale Indipendenza 56, 27029 - VIGEVANO (PV) ITALY
Tel.: +39 0381 69871 - Fax: +39 0381 698730
http:\\www.ascontecnologic.com
PREFACE
m
This manual contains the information necessary
for the product to be installed correctly and also
instructions for its maintenance and use; we there-
fore recommend that the utmost attention is paid to
the following instructions and to save it.
This document is the exclusive property of
Ascon Tecnologic
S.r.l. which forbids any reproduction and divulgation, even
partially, of the document, unless expressly authorized.
Ascon Tecnologic
S.r.l. reserves the right to make any formal
or functional changes at any moment and without any notice.
Ascon Tecnologic
S.r.l. and its legal representatives do not
assume any responsibility for any damage to people, things
or animals deriving from violation, wrong or improper use or
in any case not in compliance with the instrument features.
m
Whenever a failure or a malfunction of the device
may cause dangerous situations for persons, thing
or animals, please remember that the plant has
to be equipped with additional electromechanical
devices which will guarantee safety.
1. INSTRUMENT DESCRIPTION
1.1 General description
The W09D is an microprocessor-based electronic differ-
ential temperature-controller and is typically used to con-
trol thermal solar panel plants, but can also be used in all
applications that require a control function for temperature
differences between two different environments as for exam-
ple fluid coolers (chiller), natural climatization systems for en-
vironments by air recirculation and many other applications.
The instrument has up to 3 relay outputs, 3 inputs for PTC,
NTC or Pt100 temperature probes and a digital input (as an
alternative of Pr3 input), that can all be configured.
Index
1. Instrument description ............................................... 1
1.1 General description ........................................................... 1
1.2 Front panel pescription ..................................................... 2
2. Programming ............................................................... 2
2.1 Fast Set point programming .............................................. 2
2.2 Standard mode parameters programming ........................ 2
2.3 Parameter protection using the password ......................... 3
2.4 Customized mode parameter programming
(parameters programming levels) .....................................3
2.5 Reset parameters to default value .................................... 3
2.6 Keyboard lock function ......................................................3
2.7 Setting the current time and date ...................................... 3
2.8 Programming events at set times ...................................... 4
3. Use warnings ............................................................... 4
3.1 Admitted use ..................................................................... 4
4. Installation warnings ................................................... 4
4.1 Mechanical mounting ........................................................ 4
4.1.1 Outline dimensions ............................................................... 4
4.1.2 Mounting dimensions ............................................................ 5
4.2 Electrical connections ....................................................... 5
4.2.1 Electrical wiring diagram ....................................................... 5
5. Functions ..................................................................... 5
5.1 ON/Stand-by function ........................................................5
5.2 Measure and display configuration ................................... 5
5.3 Digital input configuration .................................................. 6
5.4 Output and Buzzer Configuration ......................................6
5.5 Differential and auxiliary temperature controller ...............6
5.6 Control outputs delay function and Power ON delay ......... 7
5.7 Temperature Alarm functions ............................................ 8
5.8 General description of some typical applications
of differential thermal control ............................................. 9
5.8.1 Solar collectors (solar thermal panels) ................................. 9
5.8.2 Chillers (fluid coolers) ......................................................... 10
5.8.3 Climatizzazione naturale degli ambienti ............................. 11
5.9 Alarm conditions ............................................................. 11
5.10 Operation of keys , and ..................................... 11
5.11 Clock programmable events ............................................ 12
6. Programmable parameters table .............................. 13
7. Problems, maintenance and warranty ..................... 15
7.1 Notifications .................................................................... 15
7.1.1 Error messages .................................................................. 15
7.1.2 Other messages ................................................................. 15
7.2 Cleaning .......................................................................... 15
7.3 Warranty and Repairs ..................................................... 15
7.4 Disposal .......................................................................... 15
8. Technical data ............................................................ 15
8.1 Electrical characteristics ................................................. 15
8.2 Mechanical characteristics .............................................. 15
8.3 Functional features ......................................................... 15
9. Instrument ordering code ......................................... 16

Ascon Tecnologic - W09D - OPERATING INSTRUCTIONS - PAG. 2
The instrument can be equipped with an internal buzzer to
acoustically report the alarms and an internal clock that al-
lows programming of various events at scheduled times.
The 3 outputs can be used to manage the temperature control
device according to the differential value, to manage the tem-
perature control device by an absolute value (auxiliary control-
ler), to operate according to the programmable alarm thresh-
olds and related to the probes measurements (AL1, AL2)
or still to operate as auxiliary outputs in function of manual
controls or automatically at programmed times.
1.2 Front panel pescription
P
U
A2
A1
2
11
3
5
7
1
8
12
9
4
10
6
1. : Used for setting the Set point (press and release) and
for programming the function parameters (hold pressed
for 5 s). In programming mode is used to enter in pa-
rameters edit mode and confirm the values. In program-
ming mode can be used together with key to change
parameters level. Pressed together with the key for
5 s allows the keyboard unlock.
2. :
In programming mode is used for decreasing the values
to be set and for selecting the parameters.
If programmed
using the t.Fb parameter, pressed and hold for 1 s in
normal operation mode, turns ON/OFF the Auxiliary
output or other functions.
3. : In programming mode is used for increasing the values
to be set and for selecting the parameters. In programming
mode can be used together with key to change parame-
ters level. Pressed together with the key for 5 s allows the
keyboard unlock. If programmed using the t.Fa parameter,
pressed and hold for 1 s in normal operation mode, turns
ON/OFF the differential control output or other functions.
4. : Pressed and released causes the display of the in-
strument variables (measured temperatures etc.). In pro-
gramming mode can be used to return in normal mode
(pressed for 2 s).
If programmed using the t.UF parameter,
pressed and hold for 1 s in normal operation mode, turns
ON/OFF (Stand by) the control output or other functions
.
5. LED SET: In normal mode it flashes when a key is pressed.
In programming mode is used to report the parameter
programming level.
6. LED : Indicates the differential control output status:
active (ON), not active (OFF) or inhibited (flashing).
7. LED
A1
: Indicates the AL1 alarm status: active (ON),
not active (OFF).
8. LED
A2
: Indicates the AL2 alarm status: active (ON),
not active (OFF).
9. LED : Indicates the differential control output status:
active (ON), not active (OFF) or inhibited (flashing).
10. LED : Indicates the Auxiliary output status: active
(ON), not active (OFF) or inhibited (flashing).
11. LED Stand-By: When the instrument is placed in stand-
by mode remains the only LED ON.
12. LED : Reports the internal Clock status (ON).
When lit, indicates that, after the clock has been enabled,
the power supply has always been supplied to the instru-
ment and therefore the current time is presumably correct.
When blinks is reporting that, after the clock has been
enabled, the power had an interruption and therefore the
current time may also be incorrect.
2. PROGRAMMING
2.1 Fast Set point programming
The normal mode to program the Set Points (differental and
auxiliary) is done by momentarily pressing the key, how-
ever, through the t.Ed parameter it is possible to determine if
and which Set Points can be set using the key shortcut.
The t.Ed parameter can assume a value between 0... 3:
oF No Set Points can be set using the key shortcut.
The fast key pressure has no effetct.
1 Only the SPd (Differential SP) can be set using the
key shortcut;
2 Only the SPa (Auxiliary SP) can be set using the
key shortcut;
3
Both SPd and SPa can be set using the
key shortcut.
For example, in the case the parameter t.ed = 1 or 3, the
changing procedure is as follows:
Press and release the key the display shows SPd alter-
nated to the programmed value. To change it press the
key to increase the value or to decrease it.
These keys increase or decrease the value one digit at a
time, but if the button is pressed for more than one sec-
ond the value increase or decreases rapidly and after two
seconds the speed increases even more in order to quickly
reach the desired value.
If only SPd is present (T.Ed = 1), once the desired value is
set, press the key to exit the fast programming mode.
If also the Auxiliary Set Point (T.Ed = 3) can be set, press-
ing and releasing again the button the display shows SPa
alternated to its programmed value. To change the value
use the and keys as for the SPd Set Point value. Once
the desired value is correctly set, press the key to exit the
fast set point change.
To exit the fast Setpoint programming mode push the
key after the last Set Point has been displayed or pressing
no buttons for about 10 s, after which the display returns to
normal operation.
The SPd Set Point can be set to a value that is between the
value programmed for parameter S.Ld and the one of param-
eter SHd while the SPA Set Point can be set to a value that is
between the value programmed for parameter S.LS and the
one of parameter S.Hs.
2.2 Standard mode parameters programming
To access the instrument function parameters when pass-
word protection is disabled, press the key and keep it
pressed for about 5 seconds, after which the display shows
the code that identifies the first programmable parameter.
Use the / keys to select the parameter to be edited, then
access it by pressing the key, press the key, the param-
eter code and its setting will be displayed alternately, the
parameter value can be modified with the / keys.
Once the desired value has been set, press the key again:
the new value is stored and the display return showing only

Ascon Tecnologic - W09D - OPERATING INSTRUCTIONS - PAG. 3
the code of the selected parameter.
Pressing the and keys, it is possible to select another
parameter and change it as described.
To exit the programming mode, press no keys for about 30 s
or keep the key pressed for 2 s.
Previous
Param.
Normal
mode
Parameter select
(Program mode)
Parameter set
Next
Param.
2
s
5 s Increase
value
Decrease
value
20.8
20.8
s.Ld
s.Ld
37.5
37.5
2.3 Parameter protection using the password
The instrument has a parameter protection function using a
password that can be personalised, through the t.PP param-
eter.
To protect the parameters, set the desired password
number in the parameter t.PP.
When the protection is active, press the key to access the
parameters and keep it pressed for about 5 s, after which the
display shows r.P, now press the key again, the display
shows 0, now using the and keys, set the programmed
password number and press the key again.
If the password is correct the instrument displays the code of
the first parameter and it will be possible to program the in-
strument in the same way described in the previous section.
The password protection can be disabled by setting the
parameter t.PP = oF.
Normal
mode
2
s
5 s Increase
value
Decrease
value
20.5
20.5
r.p.
r.p.
0.
0.
s.ls
s.ls
Note: If the Password gets lost, just switch OFF and ON the
instrument, push key during the initial test keeping it
pressed for 5 s. In this way it is possible to access the
pprotected parameters, in this way the user can verify
and modify the t.PP parameter.
2.4 Customized mode parameter programming
(parameters programming levels)
The password hides all the configuration parameters behind a
factory set password to avoid unwanted changes to the con-
troller parameters.
To make a parameter accessible without
having to enter the password when t.PP password protection
is active, use the procedure that follows:
Enter the program mode using the t.PP Password and select
the parameter that must be user accessible (no password
protection).
Once a parameter is selected, if the SET LED flashes the
parameter is programmable by entering the password (is
“protected”). If the SET LED is steady ON the parameter is
programmable without password (is “unprotected”).
To change the parameter visibility, press the key and
keeping it pressed also press the button.
The SET LED changes its state indicating the new level of
parameter accessibility (ON = not protected;
flashing = password protected).
When the password is enabled and some parameters are
not protected, accessing the the programming mode the
display first shows the not protected parameters, then the
r.P parameter (through which will be possible to access the
“protected” parameters).
Normal
mode
2
s
5 s
Increase
value
Decrease
value
20.5
20.5
r.p.
r.p.
Previous
Param.
Not protected
parameter
Parameter set
Password
request
Insert
password
Password OK,
Program Mode
Next
Param.
Increase
value
Decrease
value
A.HA.
A.HA.
35.0
35.0
0.
0.
s.ls
s.ls
2.5 Reset parameters to default value
The instrument allows the reset of all parameters to those
values programmed in factory as default. To restore the de-
fault parameters value set value -48 at r.p password request.
Therefore, in order to reset all parameteres to the default
value, enable the Password using the t.PP parameter so that
the r.p setting is requested, at this point insert -48 instead of
the programmed access password.
Once confirmed the password with the
key the display shows
“---” for 2 s and the instrument resets all the parameters.
2.6 Keyboard lock function
On the instrument it is possible to completely lock the keyboard.
This function is useful when the controller is in an accessible
area and the changes must be avoided.
To activate the keyboard lock it is enough program the pa-
rameter t.Lo to a value different from oF.
The
t.Lo
value is the keys inactivity time after which the key-
board will be automatically locked.
Therefore, pressing no buttons for the time set at t.Lo, the in-
strument automatically disable the normal functions of the keys.
When the keyboard is locked, if any of the key is pressed,
the display showss Ln to indicate that the lock is active.
To unlock the keyboard it is enough to contemporarily push
and keys and keep them pushed for 5 s, after which the
label LF appears on the display and all the key functions will
be available again.
2.7 Setting the current time and date
If the instrument is supplied with the internal Real Time
Clock, this must be enabled and programmed to the current
time and day of the week using the C.CL parameter.
Previous
Param.
Next
Param.
Increase
value
Decrease
value
c.CL
c.CL
h.13
h.13
Increase
value
Decrease
value
n.45
n.45
Increase
value
Decrease
value
d. 1
d. 1
Parameters Set hour Set minute Set day

Ascon Tecnologic - W09D - OPERATING INSTRUCTIONS - PAG. 4
After selecting the c.CL parameter, press the key repeat-
edly to cycle through the following in the order shown:
h. + 2 digits for the hour of day in 24h format (e.g. h.14);
n. + 2 digits for the minutes (e.g. n.52);
d. + 1 digit for the day of the week (e.g. d.1).
The days are numbered as follows:
d. 1 Monday;
d. 2 Tuesday;
d. 3 Wednesday;
d. 4 Thursday;
d. 5 Friday;
d. 6 Saturday;
d. 7 Sunday;
oF Clock to be disabled.
When the internal clock is running the LED is lit. When
is steady ON means that, since the time the clock was ena-
bled, the power supply to the instrument has never failed and
therefore the current time is presumably correct.
If flashes the power supply has certainly failed and there-
fore the current time may not be correct.
In this condition, pressing any key cancels the signal and the
LED returns to solid (ON and not flashing).
2.8 Programming events at set times
The events can be programmed through the parameters con-
tained in the group ]cE (appears enabling the clock).
As for the current time setting, the parameters concerning the
time-related functions require multiple values to be entered,
the programming of these parameters occurs as follows.
Prev.
Par.
Next
Par.
Incr.
value
Decr.
value
c.CL
c.CL
h.13
h.13
Prev.
Par.
Next
Par.
Incr.
value
Decr.
value
n.40
n.40
Incr.
value
Decr.
value
d. 5
d. 5
Group ]cE
Parameters
Set hour Set minute Set day
Incr.
value
Decr.
value
t. 1
t. 1
Set event
Group
Label
cE
cE
After selecting the ]cE group, press the key to access the
group parameters, then select the desired parameter and
press the key several times will appear in the order:
h. + 2 digits for the hour of day in 24h format (e.g. h.13);
n. + 2 digits for the minutes (e.g. n.40);
d. + 1 digit for the day of the week (e.g. d.5);
t. + 2 digits for type of event you want to run at the pro-
grammed time (e.g. t.1).
Days are considered:
d. 1 Monday;
d. 2 Tuesday;
d. 3 Wednesday;
d. 4 Thursday;
d. 5 Friday;
d. 6 Saturday;
d. 7 Sunday;
d. 8 Every day;
d. 9 Monday, Tuesday, Wednesday, Thursday, Friday;
D.10
Monday, Tuesday, Wednesday, Thursday, Friday, Saturday;
D.11 Saturday and Sunday;
D.oF No day (event disabled).
For the types of programmable events, see the relevant
paragraph.
3. USE WARNINGS
3.1 Admitted use
m
The instrument has been projected and manufactu-
red as a measuring and control device to be used
according to EN61010-1 at altitudes operation
below 2000 m.
Using the instrument for applications not expressly permitted
by the above mentioned rule must adopt all the necessary
protective measures.
The instrument must not be used in dangerous environ-
ments (flammable or explosive) without adequate protections.
m
The installer must ensure that the EMC rules are
respected, also after the instrument installation, if
necessary using proper filters.
4. INSTALLATION WARNINGS
4.1 Mechanical mounting
The instrument, in case 75 x 122 mm, is designed for inde-
pendently wall mounting by screws.
Once installed the instrument remember to close the frontal
part and fixing it with the 2 provided screws so that the open-
ing is possible only using a tool.
–Avoid installing the instrument in places where high humidity
can generate condensation or where dirt could lead to the
introduction of conductive substances into the instrument.
–Ensure the adequate ventilation to the instrument and
avoid the installation within boxes where are placed de-
vices which may overheat or have, as a consequence, the
instrument functioning at temperature higher than allowed
and declared.
–Connect the instrument as far as possible from source of
electromagnetic disturbances so as motors, power relays,
relays, electrovalves, etc..
4.1.1 Outline dimensions
75
122
34
16
W09D
W09D
A2
A1

Ascon Tecnologic - W09D - OPERATING INSTRUCTIONS - PAG. 5
4.1.2 Mounting dimensions
60
55
75
122
34
16
W09D
D
W09D
D
W09D
4.2 Electrical connections
Carry out the electrical wiring by connecting only one wire to
each terminal, according to the following diagram, checking
that the power supply is the same as that indicated on the
instrument and that the load current absorption is no higher
than the maximum electricity current permitted.
As the instrument is built-in equipment with permanent con-
nection inside housing, it is not equipped with either switches
or internal devices to protect against current overloads: the
installation will include an overload protection and a two-
phase circuit-breaker, placed as near as possible to the in-
strument and located in a position that can easily be reached
by the user and marked as instrument disconnecting
device which interrupts the power supply to the equipment.
Further recommendations:
–The supply of all the electrical circuits connected to the
instrument must be properly protected using devices (ex.
fuses) proportionate to the circulating currents;
–Use cables with proper insulation, according to the working
voltages and temperatures;
–Make sure that the input sensor cables are kept separate
from line voltage wiring in order to avoid induction of elec-
tromagnetic disturbances;
–If some cables are shielded, the protection shield must be
connected to ground at only one side;
–Whether the instrument is a12/12 ÷ 24 V supply version
(Order Code a = F/G), it is recommended to use an ex-
ternal Power supply/transformer with a Class II Insulation
and to use a power supply/transformer for each instrument
because there is no insulation between supply and input.
m
Before connecting the outputs to the actuators
we strongly recommend that a check should be made
that the parameters are those desired and that the
application functions correctly so as to avoid malfun-
ctioning that may cause irregularities in the plant that
could cause damage to people, things or animals.
4.2.1 Electrical wiring diagram
Out1 14A-AC1 (6A-AC3)/250 VAC,
1HP 250VAC, 1/2HP 125VAC
Out2 8A-AC1 (3A-AC3) / 250 VAC,
1/2HP 250VAC,1/3HP 125VAC
Out3 4A-AC1 (2A-AC3) / 250 VAC,
1/8HP 250/125 VAC
Common (C): 16 A max.
Internal
buzzer
Pr1Pr2Pr3
Digital input
INPUT SUPPLY
100... 240 VAC
Power supply
NC CNO
NO NO
LN OUTPUT
1234 6 789101112
W09D
OUT2OUT3 OUT1
C (12): 16A max.
5. FUNCTIONS
5.1 ON/Stand-by function
Once powered up the instrument can assume 2 different
conditions:
ON Means that the controller uses the control functions.
STAND-BY
Means that the controller uses no control function and
the display is turned OFF except for the Stand-by LED.
The transition between Standby and ON is equivalent to
power ON the instrument providing the electrical power.
In case of power failure, the system always sets itself in the
condition it was in before the black-out.
–The ON/Stand-by function can be selected using the key
if the parameter t.UF = 1.
–By programming a programmable event through the clock
(if present).
5.2 Measure and display configuration
With the i.se parameter is possible to select the type of
probe that is to be used: PTC thermistors KTY81-121 (Pt),
NTC 103AT-2 (nt) or Pt1000 (P1).
With the i.uP parameter is possible to select the tempera-
ture engineering unit and the desired measure resolution
(C0 = °C/1°; C1 = °C/0.1°; F0 = °F/1°; F1 = °F/0.1°).
The instrument allows the measure calibration, which can
be used to recalibrate the instrument according to applica-
tion needs, The calibration is made by using parameters i.C1
(input Pr1), i.C2 (input Pr2) and i.C3 (Pr3 input).
Parameter i.P3 allows to select the instrument usage of Pr3
measure as:
Au Auxiliary probe;
DG Digital Input (see the Digital input functions).
If Pr3 input is not used to set the parameter i.P3 = oF.
Using i.Ft parameter can be set a software filter for the meas-
uring the input values in order to decrease the sensibility to
rapid temperature changes (increasing the time). Through the
i.dS parameter is possible to set the value normally displayed:

Ascon Tecnologic - W09D - OPERATING INSTRUCTIONS - PAG. 6
P1 Pr1 probe measurement;
P2 Pr2 probe measurement;
P3 Pr3 probe measurement;
P1.2 The difference between the temperatures of probes
Pr1 - Pr2;
SPd The differential setting point;
SPA The Auxiliary Adjustment Set Point;
oF OFF if the numerical display must be switched OFF.
Regardless of what is set in parameter I.dS the user can view,
sequentially, all the measurement variables by pressing and
releasing the key.
The display alternately shows the label that identifies the
variable and its value. The variables are:
Pr1 Probe 1 measurement;
Pr2 Probe 2 measurement;
P1.2 Difference between Pr1 - Pr2;
Pr3
Probe 3 measurement (ON/OFF if Pr3 is a Digital Input).
If the Clock is enabled:
h. The actual hour;
n. The actual minutes;
d. The actual day;
The instrument automatically exits the variables display
mode about 15 seconds after the last pressure on the
key.
5.3 Digital input configuration
As an alternative to the Pr3 measurement input the instru-
ment can have a digital input for free of voltage contacts.
In order to use this digital input, set: i.p3 = dG.
The digital input function is defined using the i.Fi parameter
and the action is delayed for the time programmed with pa-
rameter i.ti. The i.Fi parameter can be configured for the
following functions:
0. Digital input not active;
1. AL1 Alarm signalling with NO contact.
When AL1 is triggered (the input contact is closed and
after the time indicated on the i.ti parameter) on the
display are shown alternately the label AL and the vari-
able set at i.dS parameter while the instrument switches
the alarm output AL1 (if configured).
2. AL2 Alarm signalling with NO contact.
When AL2 is triggered on the display are shown alter-
nately the label AL and the variable set at i.dS param-
eter while the instrument switches the alarm output AL2
(if configured).
3. AL1 and AL2 Alarms signalling with NO contact.
When the alarm is triggered on the display are shown
alternately the label AL and the variable set at i.dS pa-
rameter while the instrument switches both AL1 and AL2
alarm outputs (if configured).
4. AL1 Alarm signalling and rd + rA control outputs disa-
bling with NO contact.
When the alarm is triggered, the instrument disables the
control outputs (rd and rA), on the display are shown
alternately the label AL and the variable set at i.dS
parameter while the instrument switches the AL1 alarm
output (if configured).
5. AL2 Alarm signalling and rd + rA control outputs disa-
bling with NO contact.
When the alarm is triggered, the instrument disables the
control outputs (rd and rA), on the display are shown
alternately the label AL and the variable set at i.dS
parameter while the instrument switches the AL2 alarm
output (if configured).
6. AL1 and AL2 Alarms signalling and rd + rA control out-
puts disabling with NO contact.
When the alarm is triggered, the instrument disables the
control outputs (rd and rA), on the display are shown
alternately the label AL and the variable set at i.dS pa-
rameter while the instrument switches both the AL1 and
AL2 alarm outputs (if configured).
-1, -2, -3, etc. - Features identical to the above but obtained
through a NC contact and a reversed logic operation.
When Pr3 is configured as digital input, it is possible to verify
its status in variables display mode using the key or config-
uring the normal display with parameter I.dS for the Pr3 input.
The display shows oF if the external contact of the digital
input is open and on when closed.rd
5.4 Output and Buzzer Configuration
The instrument outputs can be configured by the relative
parameters o.o1, o.o2 and o.o3.
The outputs can be configured for the following functions:
rd To control the Differential control device;
rA To control the Auxiliary control device;
A1 To control a device activated by AL1 alarm through a
Normally Open contact that is closed in alarm status;
A2 To control a device activated by AL2 alarm through a
Normally Open contact that is closed in alarm status;
-A1 To control a device activated by AL1 alarm through a
Normally Closed contact that is open in alarm status;
-A2 To control a device activated by AL2 alarm through a
Normally Closed contact that is open in alarm status;
Au To control an Auxiliary Output activated manually us-
ing a key or by the programmable events at set time;
At
To control a Silenceable alarm (like the internal buzzer)
through an NO contact that is closed in alarm status;
oF No function (output disabled)
The internal buzzer (if present) can be configured by param-
eter o.bu for the following functions:
oF Buzzer always disable;
1 Buzzer signal active alarms only;
2 Buzzer signal key pressed only (no alarm);
3 Buzzer signal active alarms and key pressed.
5.5 Differential and auxiliary temperature
controller
The instrument Differential Control mode is ON/OFF and
acts on the output configured as rd depending on:
–The temperature difference between Pr1 and Pr2 probes,
–SPd Set Point,
–The actuator R.dd hysteresis;
–The r.Fd operating mode.
Regarding the operating mode programmed at parameter
r.Fd, the hysteresis is automatically considered by the
controller with positive values for a r.Fd = C control or with
negative values for the control r.Fd = H.
The controller will modify the power of the rd output in order
to maintain the SPd value equal to the Pr1 - Pr2 difference.

Ascon Tecnologic - W09D - OPERATING INSTRUCTIONS - PAG. 7
The r.Fd = C operating mode is used for those applications
where the actuator action decreases the Pr1 - Pr2 difference
(thus contrasting the Pr1 - Pr2 difference that naturally tends
to increase).
r.dd
r.Fd = C
offoffoff
ON ON ON
T
emp.
time
Pr1
Pr1- Pr2
Pr2
SPd
SPd + r.dd
SPd
rd
The r.Fd = H mode, however, is used for applications where the
actuator action increases the Pr1 - Pr2 difference (thus contrast-
ing the Pr1 - Pr2 difference that naturally tends to decrease).
r.dd
r.Fd = C
offoffoff
ON ON ON
T
emp.
time
Pr1
Pr1- Pr2
Pr2
SPd
SPd + r.dd
SPd
rd
The Auxiliary control mode is also ON/OFF and acts on the
output configured as rA depending on:
–The temperature of Pr3 probe;
–SPA Set Point;
–The R.d hysteresis;
–The r.HC operating mode.
Regarding the operating mode programmed at parameter
rHC, the hysteresis is automatically considered by the
controller with positive values for a r.HC = C control or with
negative values for the control r.HC = H.
r.HC = C
rA rA
SP
A
Temp. Pr3 Temp. Pr3
r.d
time
r.HC = H
offoff
SPA r.d
ON ON ON offoff
ON ON ON
time
If appropriately programmed, the controller functions can be
manually enabled/disabled using the or keys or auto-
matically through the programmable events at set times.
While the controller is enabled/disabled, the display shows
for a few seconds r.on or r.oF.
During normal operation, if the controller is disabled and
the output should turn ON, the LED related to the disabled
controller function will blink to indicate its inhibition.
5.6 Control outputs delay function and
Power ON delay
As the normally-used actuators are pumps or compressors,
the instrument is equipped with time control functions to drive
the control outputs in order to avoid frequent and repeated
starts that can cause overheating of the actuators. These
functions provide 2 time-controlled checks on the power ON
of the rd output and 2 similar time controls on the rA output
associated with the request for differential and auxiliary tem-
perature controllers.
The protection features consist of preventing an output activa-
tion during the count of the protection times set and that any
activation occurs only at the expiration of all protection times.
The first type of control consists of a delay in output rd
activation as set at parameter P.d1 and a similar delay in the
activation of output rA according to the parameter P.P1 set-
ting (power ON delay).
The second control inhibits the activation of rd output if, since
the output has been switched OFF, the time set at parameter
P.d2 has not elapsed and a similar delay to activate rA output
according to the parameter P.P2 setting (delay after power-
OFF or minimum power-OFF time).
SPd
Pr1 - Pr2
of
fo
ffoff
P.d1
off
ON ONON
Temperature
time
P.d1 P.d1
r.d
rd
SPA
Pr3
of
fo
ffoff
P.P1
off
ON ONON
Temperature
time
P.P1 P.P1
r.d
rA
SPA
rd
Pr1-Pr2
of
fo
ffoff
ON ONON
Temperature
time
P.d2
r.d
P.d2 P.d2
SPA
rA
Pr3
of
fo
ffoff
ON ON
Temperature
time
P.P2 P.P2
r.d
P.P2
ON
Example with cooling function
During all the inhibitory steps caused by the protections, the LED
that reports the control outputs activation (rd or rA) flashes.
It is also possible to prevent the outputs activation at power
ON for the time set at parameter P.od. During the power ON
delay phase, the display shows the label od or alternated to
the normal display.
The described timer functions are deactivated by program-
ming their parameters to oF.

Ascon Tecnologic - W09D - OPERATING INSTRUCTIONS - PAG. 8
5.7 Temperature Alarm functions
Some temperature conditions on probes Pr1, Pr2 and Pr3
(if used) can occur during the operation in plants with dif-
ferential control, these cause the instrument tio operate in a
particular way.
For these reasons, the instrument has 2 absolute (max. and
min.) alarm thresholds related to each of the probes and
some parameters through which it is possible to determine
the behavior of the outputs when these alarms are activated.
When the temperature alarms are triggered, the instrument
shows the normal display alternated to the variable set at
paragraph I.dS:
Hi1 AL1 max. alarm;
Lo1 AL1 min. alarm;
Hi2 AL2 max. alarm;
Lo2 AL2 min. alarm;
Hi3 AL3 max. alarm;
Lo3 AL3 min. alarm.
As multiple alarms can be concomitant, if this occurs, the
display will alternately report the alarm conditions present
and the normal display.
The alarm thresholds can be set to parameters:
1.HA Pr1 max. alarm;
1.LA Pr1 min. alarm;
2.HA Pr2 max. alarm;
2.LA Pr2 min. alarm;
3.HA Pr3 max. alarm;
3.LA Pr3 min. alarm.
And the relative intervention hysteresis at paragraphs:
1.Ad For the alarms referred to Pr1;
2.Ad For the alarms referred to Pr2;
3.Ad For the alarms referred to Pr3.
In order to obtain a greater operational versatility, the tem-
perature alarms intervention can delayed by the time set at
parameters:
1.At For the alarms referred to Pr1;
2.At For the alarms referred to Pr2;
3.At For the alarms referred to Pr3.
And are only active after the A.PA time has elapsed after the
instrument has been powered ON when there are alarm con-
ditions at power ON.
In addition, temperature alarms have a timed activation func-
tion programmable through parameters:
1.Ao For the alarms referred to Pr1;
2.Ao For the alarms referred to Pr2;
3.Ao For the alarms referred to Pr3.
This function allows to establish the minimum and maximum
time for switching the alarm output.
In practice, when the alarm is triggered, the configured
outputs are switched ON and remain ON for the programmed
time regardless of the alarm status while counting.
Therefore, if the alarm remains active while counting, the
programmed time will be the maximum switching time, but if
the alarm disappears during counting, the configured alarm
outputs will not be activated and the programmed time will
therefore be the minimum switching time.
The activation timer is triggered by the alarm, the timer
remains active regardless of the alarm status, but the timer
reset happens when the time expires and the alarm is no
longer present or when the alarm ceases and the activation
timer has finished counting.
The function is disabled by setting oF the parameters.
The instrument allows to configure 2 alarm outputs operating
with closing logic (A1, A2) or opening logic (-A1, -A2).
In practice, the output must be triggered when the alarm is
triggered or the instrument is turned ON or turned OFF when
the alarm is triggered so that it can also be used to detect the
the instrument power failures.
Through parameters 1.Ar, 2.Ar and 3.Ar it is possible to
establish the operating mode of the rd differential control
output when an alarm occurs, while through parameters
1.AH, 1.AL, 2.AH, 2.AL, 3.AH, 3.AL it is possible to establish the
behavior of the other two alarm outputs AL1 and AL2 (if
Present and configured).
Since simultaneous alarms for different probes are possible,
it may be verified that the instrument is programmed to oper-
ate discordant actions on differential rd control output (e.g.
An alarm on Pr1 probe disengages the output and an alarm
on Probe Pr2 activates it).
In this cases is possible to establish, through parameter A.Pr,
which is the alarm (1, 2 or 3) that has the action priority ans
also establish which action must be done before the others.
The alarm outputs can operate according to the temperature
alarms (can be used to automatically operate on the plant
performing the function established by the designer) but can
also intervene to report the probes errors.
Through the parameter A.EA it is possible to establish the
behavior of the two alarm outputs (AL1 and AL2) in case of
probe error (so that a system malfunction can be reported).

Ascon Tecnologic - W09D - OPERATING INSTRUCTIONS - PAG. 9
5.8 General description of some typical
applications of differential thermal control
5.8.1 Solar collectors (solar thermal panels)
The most common application for differential controllers is
the managing of solar collector systems with a forced circu-
lation heat exchanger. These systems consist of a hydraulic
circuit composed by solar panels and a heat exchanger
placed in a water storage tank.
The control can be carried out with cooling action (r.Fd = C),
in fact, provides for the activation of the output when the
temperature difference is higher than a certain value (in
practice the action involves cooling the collector fluid ).
The instrument measures the temperature reached by the
liquid coming out of the solar panels (probe Pr1) and that of
the liquid at the end of the exchanger (probe Pr2).
If the liquid in the panels (Pr1) is warmer than the one in
the tank (Pr2), there is a temperature difference (Pr1 - Pr2)
greater than the value [SPd + r.dd], the instrument activates
the output configured as rd which, by controlling a pump,
circulates the liquid in the exchanger circuit.
During the operation of the pump, when the heat exchange
occurs, obviously the temperature difference will decrease
with a tendency of 0.
When the temperature difference set with parameter SPd is
reached, the output rd is then switched off.
Such Set Point will therefore be a user estimated tempera-
ture difference that allows the heat to be transferred from the
exchanger fluid to the storage water tank and thus to exploit
the available thermal energy produced by the solar panel.
Probe Pr1
Water IN
Water OUT
Pump (OUT)
Solar panel
Probe Pr2
Using the Auxiliary Control, it is possible to command,
through the output dA, an Additional Heater if the energy
coming from the solar collector is not enough.
Probe
Pr1
Water IN
Water OUT
Pump (OUT)
Solar panel
Probe Pr2
Probe
Pr3
Internal
heater (rA)
In this case, the Probe Pr3 is used as the process value for
the Auxiliary Control which operates with heating action.
SPA Set Point will be the desired temperature of the water
inside the storage tank.
As regards the use of alarms, the diagram below illustrates
a typical application for which, for example, can be used the
AL1 alarm output (the diagram can be used, for example, in
cases A3, B2, C2).
Water IN
Water OU
T
Pump (rd)
Solar panel
Probe
Pr2
Electrovalve (AL1)Probe Pr1
Unidir.
valve
Thanks to the possibility of having AL2 alarm output, the
system designer can still achieve more complex and com-
plete applications.
Through the above mentioned parameters, it is possible to
configure the operation of the alarm outputs as desired, with
virtually all possible combinations.
Without any claim of completeness, some of the particular
cases that may occur (although the most frequent are only
some of the cases mentioned below) are listed below and for
which the alarm functions (also combined) can be used fol-
lowed by the perameters programming necessary to obtain
the desired the Behavior of the outputs.
Case A - Minimum Alarm on Probe Pr1
(Solar Collector Antifreeze)
Since on the solar collector it is possible that during the
winter period the temperature of the liquid may drop too low,
it is possible to use the minimum alarm as a function of the
temperature measured by Probe Pr1 whose threshold is
adjustable in parameter 1.LA.
At the intervention of this alarm the instrument can:
1. Activate circulation pump output independently of the dif-
ferential controller until the Pr1 temperature rises above
the [1.LA + 1.Ad] value. In this case the heat transfer will
come from the tank heat exchanger to the solar panel.
(1.Ar = 3);
2. Disconnect the circulation pump independently of the dif-
ferential controller (because it is believed that the liquid
is too cold to be injected into the exchanger) until the Pr1
temperature rises above [LAL1 + ALd1].
(1.Ar = 4);
3. Activate the circulation pump output independently of
the differential controller and the alarm output (e.g. AL1)
that will be used to switch a 3-way valve that will divert
the fluid flow to an external heat exchanger instead of
Towards the tank exchanger until the Pr1 temperature
rises above the [1.LA + 1.Ad] value.
In this case, the alarm output can also be used to control
any heating actuator (electric resistors or other).
(1.Ar = 3; 1.AL = 1).

Ascon Tecnologic - W09D - OPERATING INSTRUCTIONS - PAG. 10
Case B - High alarm on probe Pr2
(Overheating water exchanger)
Since during the summer it may happen that the liquid temper-
ature in the heat exchanger rises too high and consequently
the water temperature in the tank is too high, it is possible to
use the high alarm as a function of the temperature measured
by the Pr2 probe whose threshold can be set parameter 2.HA.
At the intervention of this alarm the instrument can:
1. Stop the circulation pump independently of the differen-
tial controller (interrupting the heat exchange) until the
Pr2 temperature drops below the [2.HA - 2.Ad] value.
(1.Ar = 2).
2. Activate the circulation pump output independently of the
differential controller and the alarm output (e.g. AL1) that
can be used to switch a 3-way valve that will divert the
fluid flow to an external cooling exchanger towards the
tank exchanger until the Pr2 temperature drops below the
[2.HA - 2.Ad] value. In this case, the alarm output can also
be used to control any cooling actuator (fan or other).
(2.Ar = 1; 2.AH = 1).
Case C - High alarm on probe Pr1
(Overheating solar collector)
Since in the solar collector it is possible that, during the sum-
mer period, the temperature of the liquid can rise excessive-
ly, the high alarm can be used depending on the temperature
measured by Probe Pr1 whose threshold is adjustable with
parameter 1.HA.
At the intervention of this alarm the instrument can:
1. Stop the circulation pump independently of the differen-
tial controller (because it is considered that the liquid is
too hot to be injected into the exchanger) until the Pr1
temperature drops below the [1.HA - 1.Ad] value.
(1.Ar = 2).
2. Activate the circulation pump output independently of the
differential controller and the alarm output (e.g. AL1) that
can be used to switch a 3-way valve that will divert the
fluid flow to an external cooling exchanger towards the
tank exchanger until the temperature drops below the
[1.HA - 1.Ad] value (similar to case B2 for the exchanger
overheating).
(1.Ar = 1; 1.AH = 1).
Case D - Low Alarm on Probe Pr2
(Water Exchanger Antifreeze)
This is a rather rare case as usually the water tank in forced
circulation systems is placed inside the building and is, in
most cases, equipped with an actuator for post-heating
water (in practice the supplementary heater to the solar
energy that can be achieved by the same instrument with the
auxiliary regulator).
For these reasons the temperature measured by Pr2 Probe
in the water heater exchanger should never drop at tempera-
tures close to 0°C.
However, if the system involves post-heating in another
reservoir or in special cases (such as failure of parts of the
plant during the winter), the low alarm threshold can be used
depending on the temperature measured by Pr2 probe. The
AL2 theshold can be set at parameter 2.LA.
At the intervention of this alarm the instrument can:
1. Stop the circulation pump independently of the differen-
tial controller (because the fluid coming from the solar
panel is too cold) until the Pr2 temperature rises above
the value [2.LA + 2.Ad].
(2.Ar = 4).
2. Stop circulation pump independently of the differential
controller and activate the alarm output (e.g. AL1) to acti-
vate a heating actuator (electrical resistance or other) until
the Pr2 temperature rises above the value [2.LA + 2.Ad].
(2.Ar = 4; 2.Al = 1)
3. Activate circulation pump and the alarm output
(e.g. AL1)
which can be used to switch a 3-way valve that will divert
the fluid flow to an external heat exchanger instead of
the solar collector until the Pr2 temperature rises above
the [2.LA + 2.Ad] value.
In this case, the alarm output can also be used to control
any heating actuator (electric resistors or other).
(2.Ar = 3; 2.Al = 1).
Note: In this latter case, the application scheme will look
similar to the one illustrated but with the three-way valve
placed on the tube that exits the pump and the non-
return valve on the tube that exits the solar collector.
Case E - High alarm on probe Pr3
(Overheating output water)
During summer happens that the heat input from the solar
collector is excessive and therefore the temperature of the
liquid in the storage tank or any other part of the plant (e.g.
if the plant serves a swimming pool inside the pool buiding)
rises up too.
In this case the high alarm can be used according to the
temperature measured by Probe Pr3 whose threshold is
adjustable in parameter 3.HA.
At the intervention of this alarm the instrument can:
1. Stop the circulation pump independently of the differen-
tial controller (interrupting the heat exchange) until the
Pr3 temperature drops below the [3.HA - 3.Ad] value.
(3.Ar = 2).
2. Activate the circulation pump and the alarm output
(e.g. AL1) that can be used to switch a 3-way valve to
divert the fluid flow to a second excess heat accumulator
up to the Pr3 temperature will not be lowered below the
[3.HA - 3.Ad] value.
(3.Ar = 1; 3.AL = 1).
5.8.2 Chillers (fluid coolers)
The action r.Fd = C, can also be used to control a cool-
ing circuit with a cooling actuator such as a Chiller through
which the water exiting the chiller colder than the one that
enters the chiller while maintaining a negative temperature
difference (SPd will be set to negative values).
In this application, the Pr1 probe must be placed in such
a way that it measures temperature of the water that exits
the chiller and the Pr2 positioned to measure the water that
enters the chiller.
CHILLER
Compressor
(rd)
Pump Pr2 PumpPr1
If the output water temperature (Pr1) is equal to or greater
than the input water (Pr2), there is a temperature difference
(Pr1 - Pr2) greater than the value [SPd + r.dd] the instrument
activates the rd output which, by controlling a refrigeration

Ascon Tecnologic - W09D - OPERATING INSTRUCTIONS - PAG. 11
system, will cool the water that exits the chiller.
During the refrigerator operation, the temperature measured
by the Pr1 probe will therefore decrease.
When the difference set by the SPd Set Point is reached, the
output rd is then switched OFF.
The alarm thresholds must be set in order to perform any
action on the plant such as interrupting the rd output if the
inlet water is too cold or enable differential control only within
a set temperature range or other any combinations.
5.8.3 Climatizzazione naturale degli ambienti
Using the r.Fd = C action, the controller can also be used to
manage the rooms air conditioning through air recirculation.
In the example, the controller is used to cool an indoor envi-
ronment using the outside air.
In this application you will need to place Pr1 probe to meas-
ure the internal temperature and Pr2 probe to measure the
external temperature.
If the external temperature (Pr2) is lower than the internal
(Pr1), there is a temperature difference (Pr1 - Pr2) greater
than the value [SPd + r.dd], the instrument activates the out-
put rd which controls a fan (or a damper or fan + damper)
to cool down the interior.
During operation of the system fan, the temperature meas-
ured by the Probe Pr1 should decrease.
When the difference set in SPd Set Point (e.g. 0 when the
internal temperature is equal to the external one), the output
rd is then switched OFF.
Pr2 Pr1
FAN (rd)
By means of the alarm thresholds it will then be possible to
perform any action on the system such as to interrupt the
control output rd if the outside temperature is too cold or
enable the differential adjustment only within a temperature
band established or still other possible combinations.
5.9 Alarm conditions
The alarm conditions of the instrument are:
- Probe Errors: E1, -E1, E2, -E2, E3, -E3;
- Temperature alarms: Hi1, Lo1, Hi2, Lo2, Hi3, Lo3;
- External alarm: AL.
If one of the probes Pr1 or Pr2 fails, the instrument deactivates
the output configured as rd.
In the event of a fault of Pr3 probe, the instrument deacti-
vates the output configured as rA.
In case of sensor error, the instrument switches the indi-
cated output(s) as programmed at parameter A.EA (0 = no
action; 1 = Switch output AL1; 2 = Switch output AL2; 3
= Switches both outputs AL1 and AL2).
Alarm functions act on the internal buzzer, if present and
configured with parameter O.bu and the desired outputs, if
configured with parameters o.o1, o.o2 and o.o3 as set to the
above mentioned parameters.
The buzzer (if present) can be configured to report the alarms
by programming parameter O.bu = 1 or 3 and always acts as a
silent alarm signal.
This means that, when activated, it can be switched OFF by
briefly pressing any key.
Outputs can, however, operate to signal alarms such as the
following programming of the output configuration parameters:
A1 For the control of a device that can be activated in
function of alarm AL1 through a Normally Open and
closed alarm contact.
A2 For the control of a device that can be activated in
function of alarm AL2 through a Normally Open and
closed alarm contact.
-A1 For the control of a device that can be activated in re-
sponse to alarm AL1 through a Normally Closed and
open alarm contact.
-A2 For the control of a device that can be activated in
function of alarm AL2 through a Normally Closed and
open alarm contact.
At To command a silent alarm device through a Normally
Open and closed alarm contact.
5.10 Operation of keys , and
Three of the instrument buttons, in addition to their normal
functions, can be configured to operate other commands.
The function of the key can be defined by the parameter
t.UF while that of the and keys through parameter T.FA
and t.Fb.
The t.UF parameter can be programmed for the following
operations:
OF The key performs no function.
1
Standby - Pressing the key for at least 1 s the user can
switch the instrument from ON to Stand-by state and
vice-versa. If ON/Standby events were programmed
with the clock, the key action has the priority on the clock
programmed action
.
2 Programmed Event Forcing Standby - Pressing the
button for at least 1 s
the user can
switch the instru-
ment from
ON to stand-by state and vice-versa
.
If ON/
Standby events were programmed with the clock, the
key action forces
the output to the next switching event
otherwise the mode is identical to 1.
The t.Fa and t.Fb parameters can be programmed for the
following operations:
OF The key performs no function.
1 Activating/deactivating the differential rd output -
Pressing the key for at least 1 s the user can manually
force the status of the differential rd output. At the first
key pression, the output passes in ON, at the second
key pression in OFF state and at the third key pression
the output returns to be managed by the controller.
The current status is reported on the display with the
messages on (forced ON) and oF (forced OFF) alter-
nated to the normal display.
If
activation/deactivation
events were programmed with the clock, the key action
has the priority on the clock programmed action
.
2 Activating/deactivating rA Auxiliary output - Press-
ing the key for at least 1 s user can manually activate/
deactivate the Auxiliary output (if configured).
If
activation/deactivation
events were programmed with
the clock, the key action forces
the output to the next
switching event
3 Activating/deactivating “rA” auxiliary controller -
Pressing the key for at least 1 s the user can manually
force the Auxiliary controller to be switched on/off.
The command is reported on the display with the mes-

Ascon Tecnologic - W09D - OPERATING INSTRUCTIONS - PAG. 12
sages r.on (switch-on) and r.oF (switch-off) alternated
with the normal display. If a scheduled activation/deac-
tivation timer events are programmed, the action with
this mode forces the output to the next switch event.
4
Activating/deactivating “rd” differential controller -
Pressing the key for at least 1 s the user can force the
differential controller to ON/OFF status. The com-
mand is reported by the display with the messages
r.on (switch-on) and r.oF (switch-off) alternated with
the normal display. If a scheduled activation/deactiva-
tion timer events are programmed, the action with this
mode forces the output to the next switch event.
5 Activating/deactivating both the controllers
(“rd” and “rA”) - Pressing the key for at least 1 s it
is possible to force the ON/OFF status the differential
and auxiliary controllers. The command is reported
by the display with the messages r.on (switch-on) and
r.oF (switch-off) alternated with the normal display. If a
scheduled activation/deactivation timer events are pro-
grammed, the action with this mode forces the output
to the next switch event.
Note: In all cases also if the controllers are deactivated, the
alarms are always operating. Alarms are disabled
only when the instrument is in stand-by. During the
normal operation, if a controller is disabled and the
output switches to ON, the LED related to the disabled
controller blinks to indicate its inhibition.
5.11 Clock programmable events
The instrument provides 14 event scheduling parameters
that allows the user to schedule up to 14 x 7 = 98 weekly
events (using d. 8). In any case, events can also be pro-
grammed daily according to the following settings:
d. 1 = Monday... d. 7 = Sunday;
d. 8 = Every day
d. 9 = Monday, Tuesday, Wednesday, Thursday, Friday;
D.10 =
Monday, Tuesday, Wednesday, Thursday, Friday, Saturday;
D.11 = Saturday and Sunday;
D.oF = No one.
The programmable events are:
T.1 = Power on instrument;
T.2 = Stand-by instrument;
T.3 = Auxiliary output power on;
T.4 = Switch off auxiliary output;
T.5 = Auxiliary controller activation (rA);
T.6 = Auxiliary controller deactivation (rA);
T.7 = Differential controller activation (rd);
T.8 = Differential controller deactivation (rd);
T.9 = Controller activation (rd and rA);
T.10 = Controller deactivation (rd and rA).
Example of event scheduling:
The auxiliary controller must be activated every working day
(Monday... Friday) from 11 am to 7 pm and on public holidays
(Saturday) from 9 am to 9 pm.
It is also necessary to program the auxiliary output activa-
tion every day from 8.00 to 12.00, from 14.00 to 18.00, from
20.00 to 0.00, from 2.00 to 6.00.
Event Par. hour minute day Event
type
Weekday auxiliary controller activation c.01 h.11 n.00 d.09 t.05
Weekday auxiliary controller deactivation
c.02 h.09 n.00 d.09 t.06
Holidays auxiliary controller activation c.03 h.09 n.00 d.11 t.05
Holidays auxiliary controller deactivation
c.04 h.21 n.00 d.11 t.06
Auxiliary output activation (1) c.05 h.08 n.00 d.08 t.03
Auxiliary output deactivation (1) c.06 h.12 n.00 d.08 t.04
Auxiliary output activation (2) c.07 h.14 n.00 d.08 t.03
Auxiliary output deactivation (2) c.08 h.18 n.00 d.08 t.04
Auxiliary output activation (3) c.09 h.20 n.00 d.08 t.03
Auxiliary output deactivation (4) c.10 h.00 n.00 d.08 t.04
Auxiliary output activation (4) c.11 h.02 n.00 d.08 t.03
Auxiliary output deactivation (4) c.12 h.06 n.00 d.08 t.04
c.13 h.00 n.00 d.oF t.oF
c.14 h.00 n.00 d.oF t.oF

Ascon Tecnologic - W09D - OPERATING INSTRUCTIONS - PAG. 13
6. PROGRAMMABLE PARAMETERS TABLE
Here below is a description of all the parameters available on
the instrument. Some of them may not be present due to the
fact that they depend on the type of instrument.
S. - Set Point parameters
Par. Description Range Def. Note
1 S.Ld Min. Differential Control Setpoint -99.9 ÷ S.Hd -50.0
2 S.Hd Max. Differential Control Setpoint S.Ld ÷ 999 99.9
3 S.LS Min. Auxiliary Control Setpoint -99.9 ÷ S.HS 0.0
4 S.HS Max. Auxiliary Control Setpoint S.LS ÷ 999
5 SPd Differential Control Setpoint S.Ld ÷ S.Hd
6 SPA Auxiliary Control Setpoint S.LS ÷ S.HS 0.0
i. - Measuring inputs parameters
Par. Description Range Def. Note
7 i.SE Probe type
Pt PTC;
nt NTC;
P1 Pt1000.
nt
8 i.uP Unit of measurement and
resolution (decimal point)
C0 °C, resolution 1°;
F0 °F, resolution 1°;
C1 °C, resolution 0.1°;
F1 °F, resolution 0.1°.
C1
9 i.Ft Measurement filter oF ÷ 20.0 s 2.0
10 i.C1 Pr1 Probe Calibration -30.0 ÷ 30.0°C/°F 0.0
11 i.C2 Pr2 Probe Calibration -30.0 ÷ 30.0°C/°F 0.0
12 i.C3 Pr3 Probe Calibration -30.0 ÷ 30.0°C/°F 0.0
13 i.P3 Pr3 Input
usage
oF Not used;
Au Auxliary probe;
dG Digital Input.
oF
14 i.Fi
Function and logic function-
ing of the Digital Input
0 No function;
1 AL alarm signal with AL1 output
switching;
2 AL alarm signal with AL2 output
switching;
3 AL alarm signal with output switch-
ing AL1 and AL2;
4 AL alarm signaling with AL1 output
switching and rd output;
5 AL alarm signaling with AL2 output
switching and rd output off;
6 AL alarm signaling with output
switching AL1, AL2 and rd output.
0
15 i.ti Digital Input Delay
oF Function disabled;
0.01 ÷ 9.59 (min.s) ÷ 99.5 (min.s x 10) oF
16 i.dS Variable normally displayed
OF Display Off;
Pr1 Probe measurement Pr1;
Pr2 Probe measurement Pr2;
Pr3 Probe measurement Pr3;
P1.2 Pr1-Pr2 difference;
SPd Differential Set Point;
SPA Set Point Auxiliary Controller.
P1.2
r. - Temperature control parameters
Par. Description Range Def. Note
17 r.dd Differential Controller
Hysteresis 0.1 ÷ 30.0°C/°F 2.0
18 r.d Auxiliary Controller
Hysteresis 0.1 ÷ 30.0°C/°F oF
19 r.Fd Differential Control
operating mode
H Heating (reverse action);
C Cooling (direct action).
C
20 r.HC Auxiliary Control
operating mode
H Heating (reverse action);
C Cooling (direct action).
H
P. - Control Output delay and
Power ON delay parameters
Par. Description Range Def. Note
21 P.d1 Differential controller output
activation delay (rd)
oF
Disabled;
0.01 ÷ 9.59 (min.s) ÷ 99.5 (min.s x 10).
oF
22 P.d2
Activation delay after switch OFF
differential controller output (rd)
oF
Disabled;
0.01 ÷ 9.59 (min.s) ÷ 99.5 (min.s x 10).
oF
23 P.P1 Auxiliary controller output
delay (rA)
oF
Disabled;
0.01 ÷ 9.59 (min.s) ÷ 99.5 (min.s x 10).
oF
24 P.P2
Activation delay after switch OFF
Auxiliary controller output (rA)
oF
Disabled;
0.01 ÷ 9.59 (min.s) ÷ 99.5 (min.s x 10).
oF
25 P.od Outputs delay at power ON oF
Disabled;
0.01 ÷ 9.59 (min.s) ÷ 99.5 (min.s x 10).
oF
1. - Probe Pr1 Alarm parameters
Par. Description Range Def. Note
26 1.HA Pr1 High temperature Alarm
threshold
oF Disabled;
-99.9 ÷ +999°C/°F. oF
27 1.LA Pr1 Low temperature Alarm
threshold
oF Disabled;
-99.9 ÷ +999°C/°F oF
28 1.Ad 1.HA and 1.LA Temperature
Alarms Histeresys 0.0 ÷ 30.0°C/°F 1.0
29 1.At 1.HA and 1.LA Temperature
Alarms Delay
oF Disabled;
0.01 ÷ 9.59 (min.s ) ÷ 99.5 (min.s x 10).
oF
30 1.Ao 1.HA and 1.LA Temperature
Alarms Activation time
oF Disabled;
0.01 ÷ 9.59 (h.min) ÷ 99.5 (h.min x 10). 2.00
31 1.Ar
1.HA and 1.LA alarms action
on the rd differential control
output
0 No action;
1 1.HA enables output (1.LA no action);
2 1.HA disables output (1.LA no action);
3 1.LA enables output (1.HA no action);
4 1.LA disables output (1.HA no action);
5 1.HA and 1.LA enables output;
6 1.HA and 1.LA disables output;
7 1.HA enables output and
1.LA disables output;
8 1.HA disables output and
1.LA enables output.
1.00
32 1.AH 1.HA alarm action on the
alarm outputs
0 No action;
1 Switches only AL1 output;
2 Switches only AL2 output;
3 Switches both AL1 and AL2 outputs
0
33 1.AL 1.LA alarm action on the
alarm outputs
0 No action;
1 Switches only AL1 output;
2 Switches only AL2 output;
3 Switches both AL1 and AL2 outputs.
0
2. - Probe Pr2 Alarm parameters
Par. Description Range Def. Note
34 2.HA Pr1 High temperature Alarm
threshold
oF Disabled;
-99.9 ÷ +999°C/°F. oF
35 2.LA Pr1 Low temperature Alarm
threshold
oF Disabled;
-99.9 ÷ +999°C/°F oF
36 2.Ad 2.HA and 2.LA Temperature
Alarms Histeresys 0.0 ÷ 30.0°C/°F 2.0
37 2.At 2.HA and 2.LA Temperature
Alarms Delay
oF Disabled;
0.01 ÷ 9.59 (min.s ) ÷ 99.5 (min.s x 10).
oF
38 2.Ao 2.HA and 2.LA Temperature
Alarms Activation time
oF Disabled;
0.01 ÷ 9.59 (h.min) ÷ 99.5 (h.min x 10). 2.00
39 2.Ar
2.HA and 2.LA alarms action
on the rd differential control
output
0 No action;
1 2.HA enables output (2.LA no action);
2 2.HA disables output (2.LA no action);
3 2.LA enables output (2.HA no action);
4 2.LA disables output (2.HA no action);
5 2.HA and 2.LA enables output;
6 2.HA and 2.LA disables output;
7 2.HA enables output and
2.LA disables output;
8 2.HA disables output and
2.LA enables output.
2.00
40 2.AH 2.HA alarm action on the
alarm outputs
0 No action;
1 Switches only AL1 output;
2 Switches only AL2 output;
3 Switches both AL1 and AL2 outputs
0
41 2.AL 2.LA alarm action on the
alarm outputs
0 No action;
1 Switches only AL1 output;
2 Switches only AL2 output;
3 Switches both AL1 and AL2 outputs.
0
3. - Probe Pr3 Alarm parameters
Par. Description Range Def. Note
42 3.HA Pr1 High temperature Alarm
threshold
oF Disabled;
-99.9 ÷ +999°C/°F. oF
43 3.LA Pr1 Low temperature Alarm
threshold
oF Disabled;
-99.9 ÷ +999°C/°F oF
44 3.Ad 3.HA and 3.LA Temperature
Alarms Histeresys 0.0 ÷ 30.0°C/°F 3.0
45 3.At 3.HA and 3.LA Temperature
Alarms Delay
oF Disabled;
0.01 ÷ 9.59 (min.s ) ÷ 99.5 (min.s x 10).
oF
46 3.Ao 3.HA and 3.LA Temperature
Alarms Activation time
oF Disabled;
0.01 ÷ 9.59 (h.min) ÷ 99.5 (h.min x 10). 2.00

Ascon Tecnologic - W09D - OPERATING INSTRUCTIONS - PAG. 14
Par. Description Range Def. Note
47 3.Ar
3.HA and 3.LA alarms action
on the rd differential control
output
0 No action;
1 3.HA enables output (3.LA no action);
2 3.HA disables output (3.LA no action);
3 3.LA enables output (3.HA no action);
4 3.LA disables output (3.HA no action);
5 3.HA and 3.LA enables output;
6 3.HA and 3.LA disables output;
7 3.HA enables output and
3.LA disables output;
8 3.HA disables output and
3.LA enables output.
3.00
48 3.AH 3.HA alarm action on the
alarm outputs
0 No action;
1 Switches only AL1 output;
2 Switches only AL2 output;
3 Switches both AL1 and AL2 outputs
0
49 3.AL 3.LA alarm action on the
alarm outputs
0 No action;
1 Switches only AL1 output;
2 Switches only AL2 output;
3 Switches both AL1 and AL2 outputs.
0
A. - Parameters common to all the alarms
Par. Description Range Def. Note
50 A.Pr Alarm priority 1/2/3 1
51 A.EA Probe error action on alarm
outputs
oF Function
disabled;
1 Switches only AL1 output;
2 Switches only AL2 output;
3 Switches both AL1 and AL2 outputs.
0
52 A.PA Alarms disable at power ON oF Function
disabled;
0.01 ÷ 9.59 (h.min) ÷ 99.5 (h.min x 10) oF
O. - Outputs configuration and Buzzer Parameters
Par. Description Range Def. Note
53 o.o1 Output 1 Function OF Not Used;
Rd Differential Controller;
RA Auxiliary Controller;
A1 Alarm AL1;
A2 Alarm AL2;
-A1 Alarm AL1 NC;
-A2 Alarm AL2 NC;
Au Auxiliary alarm;
At Acknowledgeable Alarm;
rd
54 o.o2 Output 1 Function A1
55 o.o3 Output 1 Function A2
56 o.bu Buzzer Function
oF Disable;
1 Active alarms only;
2 Key pressed only;
3 Active for alarms and key pressed.
2
t. - Keyboard configuration parameter
(and serial communications)
Par. Description Range Def. Note
57 t.UF Key Function
oF No function;
1 Switch ON/Switch OFF (Stand-by);
2 Event Forcing ON/OFF (Stand-by).
oF
58 t.FA Key Function OF No Functions;
1 Activating/deactivating the dif-
ferential output;
2 Activating/deactivating the Auxil-
iary output;
3 Activating/deactivating of auxiliary
controller (rA);
4 Differential controller activating/
deactivating (rd);
5 Controllers activating/deactivating
(both rd and rA)
oF
59 t.Fb Key Function oF
60 t.Lo Keyboard lock function delay oF Disabled;
0.01 ÷ 9.59 (min.s) ÷ 30.0 (min.s x 10).
oF
61 t.Ed Set Point visibility with
key fast procedure
0 None;
1 SPd;
2 SPA;
3 SPd and SPA.
1
62 t.PP Password to Access
Parameter functions
oF Disabled;
001 ÷ 999. oF
63 t.ad Device address for serial
communications
0 Disabled;
1 ÷ 255. 1
]cE Group - Parameter for events programmable
through the clock
Par. Description Range Def. Note
64 c.01 1st programmable event H Hour (0 ÷ 23);
N Minutes (0 ÷ 50);
D Day of the week
(d.1 = Monday... d.7 = Sunday);
d. 8 Every day;
d. 9 Monday, Tuesday, Wednesday,
Thursday, Friday;
D.10 Monday, Tuesday, Wednesday,
Thursday, Friday, Saturday;
D.11 Saturday and Sunday;
D.oF No one;
T Scheduled event;
T.1 Power on instrument;
T.2 Stand-by instrument;
T.3 Auxiliary output power on;
T.4 Switch off auxiliary output;
T.5 Auxiliary Control activation (“rA”);
T.6 Auxiliary Control deactivation (“rA”);
T.7 Differential Control activation (“rd”);
T.8
Differential
Control
deactivation (“rd”);
T.9 Controls activation (“rd” and “rA”);
T.10 Controls deactivation (“rd” and “rA”)
h.0
n.0
d.oF
t.oF
65 c.02 2nd programmable event
66 c.03 3rd programmable event
67 c.04 4rd programmable event
68 c.05 5rd programmable event
69 c.06 6rd programmable event
70 c.07 7rd programmable event
71 c.08 8rd programmable event
72 c.09 9rd programmable event
73 c.10 10rd programmable event
74 c.11 11rd programmable event
75 c.12 12rd programmable event
76 c.13 13rd programmable event
77 c.14 14rd programmable event
C. - Clock Parameters
Par. Description Range Def. Note
78 C.CL Time and current day of
the week
H Hour (0 ÷ 23);
N Minutes (0 ÷ 50);
D Day of the week
(d.1 = Monday... d.7 = Sunday);
D.oF Clock disabled;

Ascon Tecnologic - W09D - OPERATING INSTRUCTIONS - PAG. 15
7. PROBLEMS, MAINTENANCE AND WARRANTY
7.1 Notifications
7.1.1 Error messages
Error Reason Action
E1 -E1
E2 -E2
E3 -E3
The probe may be interrupted
(E) or in short circuit (-E) or
may measure a value outside
the range allowed
Check the probe con-
nection with the instru-
ment and check that the
probe works correctly
epr
Internal EEPROM memory error
Press key
7.1.2 Other messages
Message Reason
od Delay at power-on in progress
Ln Keyboard locked
Hi1 Pr1 Maximum temperature alarm in progress
Lo1 Pr1 Minimum temperature alarm in progress
Hi2 Pr2 Maximum temperature alarm in progress
Lo2 Pr2 Minimum temperature alarm in progress
Hi3 Pr3 Maximum temperature alarm in progress
Lo3 Pr3 Minimum temperature alarm in progress
AL Digital Input (external) alarm in progress
on rd controller output forced to ON
oF rd controller output forced to OFF
r.on Controller Automatic/Manual activation
r.oF Controller Automatic/Manual deactivation
7.2 Cleaning
We recommend cleaning of the instrument only with a slightly
wet cloth using water and not abrasive cleaners or solvents.
7.3 Warranty and Repairs
The instrument is under warranty against manufacturing flaws
or faulty material, that are found within 12 months from deliv-
ery date. The warranty is limited to repairs or to the replace-
ment of the instrument.
The eventual opening of the housing, the violation of the instru-
ment or the improper use and installation of the product will
bring about the immediate withdrawal of the warranty effects.
In the event of a faulty instrument, either within the period
of warranty, or further to its expiry, please contact our sales
department to obtain authorisation for sending the instrument
to our company.
The faulty product must be shipped to Ascon Tecnologic with
a detailed description of the faults found, without any fees or
charge for Ascon Tecnologic, except in the event of alternative
agreements.
7.4 Disposal
The appliance (or the product) must be
disposed of separately in compliance
with the local standards in force on
waste disposal.
8. TECHNICAL DATA
8.1 Electrical characteristics
Power supply: 100/240 VAC ±10%;
AC frequency: 50/60 Hz;
Power consumption: about 4 VA;
Inputs: 3 inputs for temperature probes:
NTC (103AT-2, 10 kW @ 25°C);
PTC (KTY 81-121, 990W @ 25°C);
Pt1000 (1000W @ 0°C);
1 free of voltage digital input alternatively to input Pr3;
Output: Up to 3 relay output SPST-NO;
Output UL 60730
Output 1: SPST- NO 14A-AC1, 6A-AC3 250 VAC, 1 HP 250 VAC,
1/2 HP 125 VAC
Output 2: SPDT 8A-AC1, 3A-AC3 250 VAC, 1/2 HP 250 VAC,
1/3 HP 125 VAC
Output 3: SPST- NO 4A-AC1, 2A-AC3 250 VAC,
1/8 HP 250-125 VA
Max. curent for the output common terminal (12): 16 (A);
Relay output Electrical life: 100000 operations (EN60730);
Action type: Type 1.B (EN 60730-1);
Overvoltage category: II;
Protection class: Class II;
Isolation: Reinforced insulation between the low voltage
parts (115/240 V and relays output) and front panel; Rein-
forced insulation between the low voltage parts (115/240 V
and relays output) and the extra low voltage section (inputs),
Reinforced between Power sully and relays..
8.2 Mechanical characteristics
Housing: Self-extinguishing plastic, UL 94 V0;
Heat and fire resistance category: D;
Dimensions: 75 x 122 mm, depth 34 mm;
Weight: about 135 g;
Mounting: Wall mounting;
Connections: Screw terminals for 2.5 mm2 (AWG 14) cables;
Protection degree: IP40;
Pollution degree: 2;
Operating temperature: 0... 50°C;
Operating humidity: < 95 RH% with no condensation;
Storage temperature: -25... +60°C.
8.3 Functional features
Temperature Control: ON/OFF mode;
Defrost control: Interval cycles by stopping compressor;
Measurement range:
NTC: -50... +109°C/-58... +228°F;
PTC: -50... 150°C/-58... 302°F;
Pt1000: -99.9... 500°C/-148... 932°F;
Display resolution: 1° or 0.1° (range -99.9... +99.9°);
Overall accuracy: ±(0.5% fs + 1 digit);
Sampling rate: 130 ms;
Display: 3 Digit Red or Blue (optional), height 15.5 mm;
Software class and structure: Class A;
Internal clock time retention: about 4 ours;
Compliance: Directive 2004/108/EU (EN55022: class B;
EN61000-4-2: 8kV air, 4kV cont.; EN61000-4-3: 10V/m;
EN61000-4-4: 2kV supply, inputs, outputs; EN61000-4-5: supply
2kV com. mode, 1 kV\diff. mode; EN61000-4-6: 3V),
Directive 2006/95/EU (EN 60730-1, EN 60730-2-7, EN 60730-2-9).

Ascon Tecnologic - W09D - OPERATING INSTRUCTIONS - PAG. 16
9. INSTRUMENT ORDERING CODE
A: Power supply
H = 100... 240 VAC
b: Output 1
R = Relay SPST-NO 16A-AC1 (resistive load)
c: Output 2
R = Relay SPDT 8A-AC1 (resistive load)
- = Not present
e: Buzzer
B = Buzzer
- = Not present
f: Connection type
- = Standard (screw terminals)
g: Display
- = Red (standard)
B = Blue
h: Clock
C = Clock
- = Not present
d: Output 3
R = Relay SPST-NA 5A-AC1 (resistive load)
- = Not present
Model
W09D - = Wall Mount Differential Controller
i, j, k: Reserved codes
ll, mm: Special codes
abcdefghW09D
/