Page is loading ...

21A7475
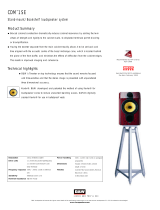
TFE100 / TFE200 OWNER'S MANUAL
1 Mitek Plaza
Winslow, IL 61089
Phone (877)DCM-LOUD
Visit our Internet web site at: www.dcmspeakers.com
DCM is a registered trademark of Mitek Corporation.
Due to our policy of continuous improvement, specifications are subject to change without notice.

INTRODUCTION
Congratulations on your purchase of DCM Time Frame Evolution Series Loudspeakers. Your new
speakers represent the latest technologies in loudspeaker design and manufacturing. They will provide
outstanding performance and years of listening enjoyment. Please take time to read through this manual
thoroughly to insure you get maximum performance out of your new loudspeakers.
FEATURES
• Video shielding for placement near a TV or monitor
• 35 mm soft dome tweeter
• Kevlar cone midrange in a separate sealed enclosure.
• Glass fiber cone woofer
• Internally braced Medium Density Fiberboard (MDF) cabinets, 1" thick front baffle
• Bi-ampable
• Nickel-plated 5-way binding posts
• Rich Harmony Teak finish to blend in with any decor
• Perforated, radiused steel grille
• Feet with adjustable or removable carpet spikes
• DCM 10 year warranty
SPEAKER PLACEMENT
All DCM Time Frame Evolution Series Loudspeakers have been engineered to combine deep, powerful
bass with crisp, natural high frequency performance. Because there are many factors that affect loud
-
speaker performance, there is no universal rule for speaker location. Best results will be obtained with
some experimentation using the following guidelines.
HOME THEATER SYSTEM
FRONT LEFT AND RIGHT CHANNELS
To achieve the most realistic front image, position the speakers so that an equilateral triangle is formed
between the front left and right speakers and the listening position (Figure 1). Turning the speakers
slightly inward towards the listening position can improve the image focus. Set the surround processor or
receiver to the "large" setting on the "front speaker size" (or similar description) control.
Bass loudness can be increased by moving the speakers closer to the rear wall. This sometimes can
degrade the front image. Use your judgement as to what location best fits your preference. We recom
-
mend that the speakers be kept at least 24" from the rear wall and 36" from the side walls for optimal
imaging.
SURROUND LEFT AND RIGHT CHANNELS
If you are using the TFE100 or TFE200 for rear channel speakers, they should be placed along the side
walls and slightly behind the listening position (Figure 1). If this is not practical, they can be placed along
the rear wall to either side of the listening position (Figure 2). For best results, the surround speakers
should be spaced equal distances from the listening position.
MULTI-CHANNEL AUDIO SYSTEM
The TFE100 and TFE200 are engineered to deliver all the definition, bandwidth and dynamic range of
5.1 channel audio (whether SACD or DVD-Audio) with astonishing realism. In fact both models have
sufficient low frequency extension that the user has the option of eliminating the subwoofer and just use
five TFE100's or TFE200's for the complete system. Be sure that your surround processor or receiver
has sufficient bass management capability to direct full range signals to the five main speakers if you are
not using a subwoofer (See Figure 3). Both models are identically timbre-matched so that a combination
of TFE100's and TFE200's can be used in a five channel system with the result being a seamless three
dimensional image and total musical en
velopment. For example, three TFE200's could be used for the
front left, right and center channel speakers, and two TFE100's for the left and right rear speakers.
TWO CHANNEL STEREO SYSTEM
When using the TFE100 or TFE200 in a two channel stereo system, to achieve the most realistic stereo
image, position the speakers so that an equilateral triangle is formed between the speakers and the lis-
tening position (Figure 4). Turning the speakers slightly inward towards the listening position can improve
the stereo image focus.
Bass loudness can be increased by moving the speakers closer to the rear wall. This sometimes can
degrade the stereo image. Use your judgement as to what location best fits your preferences. We rec
-
ommend that the speakers be kept at least 24" from the rear wall and 36" from the side wall for optimal
imaging.
NOTES

RIGHT
FRONT
LEFT
FRONT
CENTER
CHANNEL
LEFT
REAR
RIGHT
REAR
LISTENING AREA
45
RIGHT
FRONT
LEFT
FRONT
CENTER
CHANNEL
LEFT
REAR
RIGHT
REAR
LISTENING AREA
LEFT
REAR
RIGHT
REAR
LISTENING AREA
LEFT
FRON
T
RIGHT
FRON
T
CENTER
FRON
T
SUBWOOFER
(OPTIONAL)
RIGHT
FRONT
LEFT
FRONT
LISTENING AREA
45
HOOK UP
Use 16 gauge or heavier speaker wire for connecting to your amplifier or receiver. Cut wire lengths leav-
ing an extra 12” to 24” at each end to allow for moving the speaker or receiver.
Using a wire cutter or a sharp knife, strip 1/2” of insulation off each end of the wire to expose the conduc
-
tor. Twist wire ends to prevent from fraying. Connect the conductors to the binding posts on the bottom
or back of the speaker by unscrewing the post enough to expose the hole in the terminal post. Slip the
exposed conductor in the hole and tighten the post. Repeat this step for connecting to your amplifier or
receiver. Refer to the owner’s manual supplied with your electronics to assist with proper hook up.
Note: To ensure proper performance, make sure that the wire from the red (+) terminal on
the speaker is connected to the red (+) terminal on your amplifier or receiver. Likewise, make
sure the wire from the black (-) terminal on the speaker is connected to the black (-) terminal
on the amplifier or receiver. (Figure 5)
POWER AMPLIFIER
FRONT
R L
-
-
++
+
+
+
Once your speakers are hooked up, turn on your electronics and test to make sure they are functioning
properly. If your speakers sound “thin” with little bass and have a poor center image, one of the speaker
wires is probably hooked up backwards. Double check all connections for proper polarity.
Figure 1- Typical Home Theater Loudspeaker Placement
Figure 2- Alternate Home Theater Loudspeaker Placement
Figure 3- Typical Multi-Channel Audio Loudspeaker Placement
Figure 4- Typical 2 channel Stereo Loudspeaker Placement
Figure 5
NOTES

BI-WIRING AND BI-AMPING
If you decide to bi-wire or bi-amp, you must remove the flat metal jumpers between terminal posts.
Failure to do this could result in damage to your amplifier and loudspeakers.
Bi-Wiring (Figure 6) can provide noticeable improvements in the overall transparency of your loud-
speakers. Run separate speaker wires to the low and high frequency drivers from a single amplifier: after
removing the jumpers, connect one set of speaker wires to the upper terminals on each speaker and one
set (usually heavier gauge) wires to the lower terminals. Connect the other ends of both wire sets to the
corresponding amplifier outputs.
Bi-amping (Figure 7) allows you to use separate amplifiers for the high and low frequency sections of
your loudspeaker for greater dynamic range and lower distortion. After removing the jumpers, connect
the speaker wires from the high frequency amplifier outputs to the upper set of terminal posts on each
speaker. Follow the same procedure for connecting the low frequency amplifier outputs to the lower set
of terminals. Remember to maintain correct wiring polarity (+ to +, - to -) in all connections.
FRONT
R L
- -+ +
++
R L
- -+ +
-
-
+ +
R
L
++
SPECIFICATIONS
TFE100
Driver Complement
Woofer- 6-1/2” Glass Fiber cone, NBR rubber surround
Midrange- 6-1/2" Kevlar cone, NBR rubber surround
Tweeter- 35mm cloth dome with 1" voice coil
Frequency Response: 35Hz - 20kHz (+/- 3dB)
Impedance: 6 ohms nominal
Power Handling: 150 watts RMS / 300 watts peak music
Sensitivity: 88dB 2.83V/1m
Dimensions: 37-3/4” H x 8” W (9-1/2" w/feet) x 16” D
TFE200
Driver Complement
Woofer- (2) 6-1/2” Glass Fiber cone, NBR rubber surround
Midrange- 6-1/2" Kevlar cone, NBR rubber surround
Tweeter- 35mm cloth dome with 1" voice coil
Frequency Response: 30Hz - 20kHz (+/- 3dB)
Impedance: 6 ohms nominal
Power Handling: 200 watts RMS /400 watts peak music
Sensitivity: 89dB 2.83V/1m
Dimensions: 45-11/16” H x 8” W (9-1/2" w/feet) x 20-7/8” D
RETRAIT DE LA GRILLE
Pour retirer la grille d’acier, desserrez à l’aide d’une clé Allen de 3/16” les quatre vis des agrafes en
plastique maintenant la grille. Une fois les vis retirées, les agrafes sont libérées et la grille peut être
enlevée.
POINTES DE DÉCOUPLAGE
Les enceintes TFE100 et TFE200 sont équipées de pointes de découplage réglables permettant
d’immobiliser l’enceinte sur les sols revêtus de moquette. Avant l’expédition, les pointes sont rentrées
dans les pieds en plastique. Laissez les enceintes dans cette configuration si vous voulez qu’elles repo
-
sent sur leurs pieds sans utiliser les pointes. Pour faire reposer les enceintes sur les pointes, abaissez-
les pour les faire dépasser sous la base des pieds en procédant comme suit :
1) Inclinez avec précaution l’enceinte vers l’arrière ou l’un des côtés.
2) Desserrez à l’aide d’une clé l’écrou de l’axe de la pointe.
3) Dévissez la pointe jusqu’au niveau voulu sous la base du pied.
4) Serrez fermement l’écrou contre la base de l’enceinte.
5) Procédez de la même façon avec les trois autres pieds.
6) Remettez avec précaution l’enceinte debout.
ENTRETIEN ET MAINTENANCE
Ces enceintes ont été conçues pour fonctionner avec une large gamme de composants électroniques.
Dans la plupart des applications, 30 watts par canal suffisent pour obtenir une puissance adéquate. Pour
une grande pièce ou des niveaux sonores élevés, une puissance supérieure peut être requise.
Attention : N’utilisez pas un amplificateur de puissance supérieure à la puissance
nominale de l’enceinte. Si vous entendez une distorsion très importante, c’est que vous
dépassez la capacité du système. Une telle distorsion peut provoquer des dommages.
Réduisez le volume jusqu’à disparition de la distorsion.
Suivez les directives suivantes pour conserver leur aspect aux enceintes. Utilisez un chiffon doux et
humide pour nettoyer le coffret de l’enceinte. Évitez d’utiliser des détergents ou des liquides de nettoyage
puissants. Ne passez pas l’aspirateur sur les composants de l’enceinte car cela pourrait les endommager
de façon irréversible.
ASSISTANCE TECHNIQUE
Pour obtenir d’autres informations d’assistance technique, visitez notre site dcmspeakers.com. Vous
pouvez également contacter nos spécialistes d’assistance technique par téléphone au 1-877-DCM-
LOUD ou par courrier électronique :
POWER AMPLIFIER
Figure 6
LOW FREQUENCY
AMPLIFIER
Figure 7
HIGH FREQUENCY
AMPLIFIER

REMOVING THE GRILLE
The steel grille can be removed by loosening the four screws in the plastic clips that hold the grille,
using 3/16" Allen wrench. When the screws are removed the clips will come loose, and then the grille
will re
lease.
SPIKE FEET
The TFE100 and TFE200 have adjustable carpet spikes that can be used to anchor the speaker securely
to the floor on carpeted surfaces. The speakers are shipped with the spikes recessed up into the plastic
feet. Use the speakers in this configuration if you do not intend to use the spikes, but instead want the
speakers to rest on the feet. If you desire the speakers to rest on the spikes, follow these steps to lower
the spikes to a position below th
e bottom of the feet:
1) Carefully tip the speaker over on the rear or one of the sides.
2) With a wrench, loosen the nut on the shaft of the spike.
3) Unscrew the spike to the desired level below the bottom of the foot.
4) Tighten the nut firmly against the bottom of the speaker.
5) Repeat this process for the other three feet.
6) Carefully raise the speaker back to the upright position.
CARE AND MAINTENANCE
Your speakers are designed to work with a wide range of electronic components. As little as 30 watts
per channel can provide enough power for most applications. If you have a large room or prefer louder
listening levels, more power may be required
.
Caution: When choosing an amplifier, do not exceed the power rating of the speaker.
If you hear very high levels of audible distortion you are exceeding the capabilities of
the system. Damage can occur from this distortion, turn the volume back down until
the distortion disappears.
Use the following guidelines to maintain the appearance of your speakers. Use a soft, damp cloth to clean
the speaker cabinet. Avoid using harsh detergents or cleaning fluids. Do not vacuum any of the speaker
components, permanent damage could occur.
TECHNICAL ASSISTANCE
For additional technical assistance you can visit our website at dcmspeakers.com. Otherwise,
our technical service representatives can be reached by phone: 1-877-DCM-LOUD or by e-mail:
DCM WARRANTY INFORMATION
All Time Frame Evolution Series Loudspeakers purchased in the United States from an authorized DCM
dealer are guaranteed against defects in material and workmanship for a period of ten years from the date
purchased by the end user, and limited to the original retail purchaser of the product. Product found to be
defective during that period will be repaired or replaced by DCM at no charge. This warranty is void if it is
determined that unauthorized parties have attempted repairs or alterations of any nature. Warranty does
not extend to cosmetics or finish. Before presuming a defect is present in the product, be certain that all
related equipment and wiring is functioning properly. DCM disclaims any liability for other incurred dam
-
ages resulting from product defects. Any expenses incurred in the removal and reinstallation of product
is not covered by this warranty. DCM's total liability will not exceed the purchase price of the product. If a
defect is present, your authorized DCM dealer may be able to effect repairs.
Proof of purchase is required when requesting service. so please retain your sales receipt and take a
moment to register your product on line at
dcmspeakers.com.
BI-CÂBLAGE ET BI-AMPLIFICATION
Si vous décidez d’effectuer un bi-câblage ou une bi-amplification, retirez les cavaliers métalliques plats
placés entre les bornes afin de ne pas endommager l’amplificateur et les enceintes.
Le bi-câblage (figure 6) permet des améliorations notables de la transparence d’ensemble des
enceintes. Acheminez des fils de haut-parleur distincts vers les haut-parleurs basse fréquence et haute
fréquence à partir d’un même amplificateur : après avoir retiré les cavaliers, raccordez un jeu de fils de
haut-parleur aux bornes supérieures de chaque enceinte et un jeu (en général de plus gros calibre) aux
bornes inférieures. Raccordez les autres extrémités des deux jeux de fils aux sorties d’amplificateur cor
-
respondantes.
La bi-amplification (figure 7) permet d’utiliser des amplificateurs distincts pour les sections haute et
basse fréquence de l’enceinte afin de permettre une plage dynamique plus large et une distorsion plus
faible. Après avoir retiré les cavaliers, raccordez les fils de haut-parleur des sorties d’amplificateur haute
fréquence aux bornes supérieures de chaque enceinte. Procédez de la même façon pour le raccorde
-
ment des sorties d’amplificateur basse fréquence aux bornes inférieures. Pensez à respecter les polarités
de tous les raccordements (+ au +, - au -).
FRONT
R L
- -+ +
++
R L
- -+ +
-
-
+ +
R
L
++
CARACTÉRISTIQUES TECHNIQUES
TFE100
Complément haut-parleur
Haut-parleur de graves 165 mm à cône en fibre de verre, suspension caoutchouc nitrile
Haut-parleur de médiums 165 mm à cône en Kevlar, suspension caoutchouc nitrile
Haut-parleur d’aigus à cône toile de 35 mm avec bobine acoustique de 25 mm
Réponse en fréquence : 35 Hz – 20 kHz (+/- 3 dB)
Impédance : 6 ohms, valeur nominale
Puissance admissible : 150 watts efficaces / 300 watts crête dynamique
Sensibilité : 88 dB pour 2,83 V/1 m
Dimensions : 959 mm H x 203 mm L (241 mm avec pieds) x 406 mm P
TFE200
Complément haut-parleur
Haut-parleur de graves (2) 165 mm à cône en fibre de verre, suspension caoutchouc nitrile
Haut-parleur de médiums 165 mm à cône en Kevlar, suspension caoutchouc nitrile
Haut-parleur d’aigus à cône toile de 35 mm avec bobine acoustique de 25 mm
Réponse en fréquence : 30 Hz – 20 kHz (+/- 3 dB)
Impédance : 6 ohms, valeur nominale
Puissance admissible : 200 watts efficaces / 400 watts crête dynamique
Sensibilité : 89 dB pour 2,83 V/1 m
Dimensions : 1160 mm H x 203 mm L (241 mm avec pieds) x 530 mm P
Figure 6
Figure 7
Amplificateur de puissance
Amplificateur basse
fréquence
Amplificateur haute
fréquence
/