Page is loading ...

HO Scale
Concrete Coal Dock
Instruction Manual
List of parts:
1 set of laser cut acrylic parts
1 sheet of photoetched brass parts (labeled s heet C)
1 Eight inch long, 0.015 inch diameter phosphor bronze rod
Recommended tools and supplies
• XActo knife with sharp number 11 blade
• Plastruct Bondene ABS, Weld or other acrylic glue
• CAA glue (Gap Filling Superglue)
• Fine wet sandpaper (400 or 600 grit)
• Tweezers
• Lycra or fuzz free thread
• Primer- white or grey
• Paints - acrylic or enamels: Concrete, Flat Black, Medium Gray,
Steel and weathering colors such as burnt sienna and burnt um-
ber
• Masking Tape
• Optional Solder iron, flux and silver solder.
1. General Overview
This kit combines precision laser cut acrylic and photo etched
brass parts to make a highly detailed model of the Roberts and
Schaefer Cinder Hoist.
Roberts and Schaefer Cinder Conveyor
Figure 1: Assemble the main truss tow-
er of the cinder conveyor.
Insert the floor using tabs to locate it
properly. When assemble the main truss,
make sure the gusset plates face in with
the raised detail facing out.
Figure 2: Add the
side shed to the head
house
Bend the walls, floor
and roof on the side
shed. Insert the tabs
into the slots on the
head house of the
main truss cinder con-
veyor.
Bend
An experienced modeler should expect to spend about 3 to
4 enjoyable hours for assembly and painting. If you have any
questions please contact us at [email protected]
Figure 3: Add the roof and guide
rails
Bend the roof slightly and add to
the top of the cinder conveyor. In-
sert the guide rails to the inside of
the main truss. The vertical portion
of the guide should be centered on
the side of the truss.
Center guide rails on these sides
Guide
rails
Gusset Plates

Figure 8: Add the main truss assem-
bly to the foundation
Insert the main truss into the founda-
tion. The foundation has grooves cut
for the brass legs and guide rails.
Add rigging for the hoist and chutes.
See photo 9 and 10 for placement.
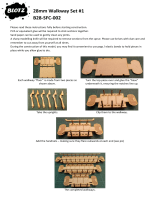
Figure 4 Add upper chute and walkway
Bend part C12 of the upper chute. Add C12A and C11 as shown
in the figure 4. Add the upper chute assembly to the main truss.
Bend the ends of the walkway along the half etched lines. Insert
the walkway into the slots on the head house of the main truss.
Bend
Bend
Figure 6: Assem-
ble cinder convey-
or foundation
Assemble the acryl-
ic parts for the foun-
dation. Once the
parts are assembled,
paint the assembly
a concrete color.
C11
Bend
Add 0.015” wire
through holes
Figure 7: Add the cinder hopper
Parts C15 and two parts C16 form the cinder hopper. Paint the
parts and add it the hopper.
Figure 5: Assemble the lower chute
Bend the sides of the lower chute, C10. Add
the deflector plate, C13, to the lower chute.
Add the lower chute to the main truss using
a piece of 0.015 inch wire.
Add the ladder
and handrails.
Paint the com-
pleted assem-
bly.

Figure 9 and 10: Finished photos of the cinder conveyor
painyed and weathered
Note the kit does not include the loading bucket.
The kit comes with a one track cinder pit. This same type tower
could support a two track pit as shown in the accompanying
page from the R&S Catalog form the 1930s. Feel free to modify
the kit to accomodate a two track application.

Photos of Prototype Structure
/