Page is loading ...

Practical
Guide to the
edirol r-09hr
Amazing 24 bit/96 kHz super sound quality!
Ultra-lightweight recorder. Fits in your pocket!
Functional! Fun! Record anywhere!
Detailed explanation of practical techniques.
R-09HR_guide_e1.indd 1 07.12.27 11:30:12 AM

Welcome to the World of Live Recording.
Record band performances. Record bird songs. Record children singing.
Record trains. Record realistically. Record the air around you.
Record in uncompressed 24 bit/96 kHz.
Record, record, and record some more.
Everyone wants to record the sounds of their lives.
This book is written for those who are new to the world
of Live Recording using the EDIROL R-09HR.
It’s a practical how-to book lled with hints and explanations for every recording
situation. (For speci c operating instructions, please see the owner’s manual that
cames with the R-09HR.)
So, let’s begin live recording with the R-09HR.
R-09HR_guide_e1.indd 2 07.12.27 11:30:13 AM

3
The outstanding
features of the R-09HR
Chapter
1
Situation practical
use technique
Chapter
2
Chapter
3
Applied technique
Chapter
4
Appendix
Practical
Guide to the
edirol r-09hr
Chapter 1 :
The outstanding features of the R-09HR
The outstanding features of the R-09HR. ....................................................... p. 4
Chapter 2 : Situation practical use technique
Situation 1 : Recording acoustic instruments ............................................... p. 6
Situation 2 : Recording band performances .................................................. p. 8
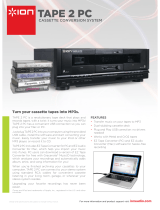
Situation 3 : Recording from cassettes or MD ............................................... p. 10
Situation 4 : Recording vocals ............................................................................. p. 12
Situation 5 : Recording outdoors ....................................................................... p. 14
Situation 6 : Recording meetings ...................................................................... p. 16
Chapter 3 : Applied technique
Application 1 : Techniques for recording specic instruments ............... p. 18
Application 2 : Save to a PC!! ............................................................................... p. 20
Application 3 : Deleting unnecessary data on a PC .................................... p. 21
Application 4 : Creating CDs on a PC ............................................................... p. 22
Application 5 : Techniques for applying le names .................................... p. 23
Chapter 4 : Appendix
Options for recording on the R-09HR .............................................................. p. 24
Examples of connecting accessories to the R-09HR ................................... p. 26
Specications ............................................................................................................ p. 27
R-09HR_guide_e1.indd 3 07.12.27 11:30:13 AM

4
Chapter
1
Situation practical
use technique
Chapter
2
Chapter
3
Applied technique
Chapter
4
Appendix
The outstanding
features of the R-09HR
Compact, with high sound quality.
Unbelievable high quality
The R-09HR’s 24 bit/96 kHz quality is suitable
for professional recording studios and sur-
passes the 16 bit/44.1 kHz standard for CDs.
You can capture the dynamics and details of
recorded sound.
Reduce operation noise with the remote control!!
You can adjust recording levels or start
playback using the remote control.
You can also eliminate worry about record-
ing noise from button operations by using
the remote control even when recording
nearby.
No searching!! Start recording immediately by
pressing a button!! Immediately playback!!
Unlike tapes, you don’t need to search for
the beginning of a recording. And you
can check the recording on-site with the
internal monitor speaker!!
pressing a button!! Immediately playback!!
Unlike tapes, you don’t need to search for
Unlike tapes, you don’t need to search for
the beginning of a recording. And you
can check the recording on-site with the
Unlike tapes, you don’t need to search for
the beginning of a recording. And you
can check the recording on-site with the
Ultra-light. Take it anywhere, anytime.
A heavy recorder is just another burden when
you’re carrying a lot of luggage. The ultra-light,
compact R-09HR ts in your pocket or a corner
of your bag.
R-09HR_guide_e1.indd 4 07.12.27 11:30:22 AM

Note: The actual speci cations, appearance, or display screen of the product may be subject to change without notice.
5
The outstanding
features of the R-09HR
Chapter
1
Situation practical
use technique
Chapter
2
Chapter
3
Applied technique
Chapter
4
Appendix
Practical
Guide to the
edirol r-09hr
High-visibility OLED display.
The R-09HR supports a wide-angle
view, energy-effi cient OLED (Organic
Light-Emitting Diode) display that can
be used outdoors or onstage. The level
meters respond quickly, and the display
has a separate peak indicator. These
features allow you to precisely set your
recording level.
No mechanical noise. Convenient built-in mic.
The R-09HR uses an SD card as its recording
media. Recording doesn’t involve moving
parts, so you don’t have to worry about
recording the mechanical noises associated
with tape- and disc-based recorders.
The built-in stereo mic is both practical and
powerful.
Includes “pyro Audio Creator LE” from Cakewalk!!
Includes “pyro Audio Creator LE” software for
waveform editing. You can freely edit recorded
sounds on a PC and create CDs!
Compact, with high sound quality. The outstanding features of the R-09HR.
R-09HR_guide_e1.indd 5 07.12.27 11:30:30 AM

6
Chapter
1
Situation practical
use technique
Chapter
2
Chapter
3
Applied technique
Chapter
4
Appendix
Situation
The outstanding
features of the R-09HR
Setting
the recording level
First, set the recording volume. Play a phrase
that has the highest volume, and then adjust the
recording level so that the R-09HR level meter
reaches the highest level without the PEAK
indicator, shown in red below, turning on.
When the PEAK
indicator turns on,
the input volume is
too high.
If the level is set too low, delity is lost. If the
sound level is set too high, pops and snaps may
be produced.
See p. 45 in the Owner’s Manual for setting the
recording level.
☞
Positioning
the R-09HR
The left and right microphones on the R-09HR
record sound that the left and right ear, respec-
tively, would hear. So, aim the R-09HR to directly
at what you want to record.
Also, moving closer to the sound source creates
a more distinct recording, while moving further
away softens the sound by recording the ambi-
ent sound of the room.
Aim directly
at the sound
source.
See “Techniques for recording speci c instru-
ments” on p. 18 in this guide for recording
di erent instruments.
☞
Recording acoustic instruments
Point
1
Point
2
1
R-09HR_guide_e1.indd 6 07.12.27 11:30:33 AM

7
Chapter
1
Situation practical
use technique
Chapter
2
Chapter
3
Applied technique
Chapter
4
Appendix
Practical
Guide to the
edirol r-09hr
The outstanding
features of the R-09HR
Setting
sound quality
We recommend recording instruments in WAV format. However, because MP3 recordings are compact
in le size, they can be useful for recording instrument practice.
Record Mode Description
WAV
Get professional recording quality for digital audio by recording in 24 bit/96 kHz.
Recording in 16 bit/44.1 kHz allows you to transfer data to the PC and burn a CD
without any conversion.
MP3
The MP3 data format was created to preserve the quality of WAV data while
compressing the le size. Until now, you had to convert WAV le to an MP3 on a
PC, but the R-09HR allows you to record in MP3 format directly. Not only can you
transfer data to a PC and distribute it directly on the internet, you can also record
hours of practice, taking advantage of the smaller le size.
See p. 38-39 in the Owner’s Manual for setting the recording mode.
☞
Music Format Examples
Application Recording Mode Description Capacity
1. Pro Quality
WAV
24 bit/96 kHz
Professional recording
quality
quality
5 minutes
about
200 MB
2. CD Quality
WAV
16 bit/44.1 kHz
Creating CDs on the PC
5 minutes
about
50 MB
3. Internet music distri-
bution quality
MP3
128 kbps/44.1 kHz
Internet distribution
of music
5 minutes
about
5 MB
Recording acoustic instruments
Point
3
R-09HR_guide_e1.indd 7 07.12.27 11:30:35 AM

8
Chapter
1
Situation practical
use technique
Chapter
2
Chapter
3
Applied technique
Chapter
4
Appendix
Situation
The outstanding
features of the R-09HR
What is a
good level?
Bands are louder than normal everyday sounds.
Set the mic gain in the back of the R-09HR to
LOW.
Set to HIGH for quieter sounds
Set to LOW for louder sounds
Set LIMITER/AGC to ON
Also, you should turn on the limiter. The limiter is
a feature that suppresses noise by lowering the
volume level when the sound input is too high.
Placing
the R-09HR
When instruments are placed in various locations
in a room, like a rehearsal studio, you should
position the R-09HR in the middle of the studio
to record the sound of each instrument equally.
The microphone should be placed at about
table height.
If the mic is placed on the fl oor, the sound is
muffl ed and unclear; if it is placed too high, you
lose the bass range and the sound becomes tinny.
Drums
Bass Amp
Guitar Amp
PA Speakers for Vocals
and Keyboard
and Keyboard
Remote
PA Speakers for Vocals
Place
in the middle
Of course, once the R-09HR is setup, you can use
the remote to adjust the recording level or to
start/stop the recording.
Recording band performances
Point
1
Point
2
2
R-09HR_guide_e1.indd 8 07.12.27 11:30:38 AM

9
Chapter
1
Situation practical
use technique
Chapter
2
Chapter
3
Applied technique
Chapter
4
Appendix
Practical
Guide to the
edirol r-09hr
The outstanding
features of the R-09HR
Optimizing
recording levels
Before recording the band, nd where the loud-
est sound occurs. Adjust the recording level so
that the R-09HR level meter reaches its highest
level without the PEAK indicator, shown in red
below, turning on.
Adjust so the PEAK
indicator light does
not turn on when the
loudest sound occurs
When you are using a remote control, you can use
the remote indicator to determine the recording
level. Adjust the level so that the remote indicator
does not blink fast.
See p. 45 in the Owner’s Manual for setting the
recording level.
☞
Setting
sound quality
Choose the sound quality according to the purpose.
If sound quality is important:
WAV
If long recording time is important:
MP3
For example, we recommend recording in WAV
format when you want to archive material or
when you’ll use the recording as the master
for making a CD. WAV format maximizes the
features of the R-09HR, so it’s appropriate for
recordings you want to keep.
On the other hand, we recommend recording
in MP3 format when reviewing practices at re-
hearsal studios or when making long recordings.
You can leave the R-09HR recording for an entire
session for later review.
See p. 38-39 in the Owner’s Manual for setting
the recording mode.
☞
The optional Cover/Stand Set is not just a simple protective cover.
The optional cover/stand set (OP-R09HR-C) is not just a
protective cover—it connects to the included stand. The
cover can also attach to commercially available tripods
for cameras or video cameras. So if you need the extra
stability, you can use a tripod in place of the stand.
In addition, you can use the mic stand adaptor
(OP-R09M) to attach the R-09HR to a mic stand. With
a single mic stand, you can place the R-09HR in the
optimal position and the optimal height in the studio.
Convenient stand
attachment!
optimal position and the optimal height in the studio.
The R-09HR cover attaches
directly to camera tripods
The R-09HR cover attaches directly
to microphone stands when using
the mic stand adaptor (OP-R09M)
The R-09HR cover attaches
The R-09HR cover attaches
directly to camera tripods
The R-09HR cover attaches directly
The R-09HR cover attaches directly
to microphone stands when using
the mic stand adaptor (OP-R09M)
Point
3
Point
4
R-09HR_guide_e1.indd 9 07.12.27 11:30:42 AM

10
Chapter
1
Situation practical
use technique
Chapter
2
Chapter
3
Applied technique
Chapter
4
Appendix
Situation
The outstanding
features of the R-09HR
Setting
the recording level
First, check the volume setting on the playback
device. If the volume is set too low, then the
volume of the recording will be too low no
matter how high the R-09HR input level is set.
Conversely, if the volume is too high, the sound
will be distorted no matter how you adjust the
level on the R-09HR.
If the recording level is too low, the
level meter doesn’t move much.
If the recording is made with these
settings, then the sound at play-
back will be unsatisfactory.
Next, nd the loudest point of the song to be re-
corded. Every song has its loudest and quietest
points. Set the level so that PEAK light doesn’t
quite turn on when the loudest section is played.
See p. 45 in the Owner’s Manual for setting the
recording level.
☞
Selecting
the cables to use
The R-09HR’s audio input uses a stereo mini-
plug. Select a cable that’s compatible with the
output jack(s) on the playback machine. Most
combo or radio-cassette units use an RCA plug;
most compact players use a stereo mini-plug.
Verify the type of plug used by the playback
device in its owner’s manual.
The R-09HR uses a stereo mini-plug.
Most compact cassette players and
digital audio players also use this
plug type.
RCA connectors are often used for
sound input to mini component stereo
sets and video decks.
Recording from cassettes
Note: The actual speci cations, appearance, or display screen of the product may be subject to change without notice.
Point
1
Point
2
3
R-09HR_guide_e1.indd 10 07.12.27 11:30:44 AM

11
Chapter
1
Situation practical
use technique
Chapter
2
Chapter
3
Applied technique
Chapter
4
Appendix
Practical
Guide to the
edirol r-09hr
The outstanding
features of the R-09HR
Setting
sound quality
Use WAV format to preserve important recordings that are faithful to the source.
If creating CD
WAV 16 bit/44.1 kHz
For professional quality
WAV 24 bit/96 kHz
For professional quality
WAV
Because 16 bit/44.1 kHz is the same setting used on audio CDs, it’s ideal for burning to CD for playback
on a CD player. This format is great for making CDs to pass out to friends, or to keep.
If the sound source is high quality, it may be preferable to use the best quality 24 bit/96 kHz setting.
However, be aware that the 24 bit/96 kHz setting takes up a lot of memory (in other words, the record-
ing time on the SD card is shorter). Also, when making a CD on a PC, you’ll need software capable of
handling a 24 bit/96 kHz sound recording.
See p. 38-39 in the Owner’s Manual for setting the recording mode.
☞
Checking the playback settings is also important!
Portable cassette players and MD players often have built-in features such as equalizers or bass
boosters to intensify the sound. These features are important when listening outdoors so you
can enjoy the music. However, we recommend turning these features o when recording on the
R-09HR for your archives.
Mini component stereo sets and cassettes players also use features such as bass boosting or loud-
ness to intensify the sound from the compact speakers. These features should also be turned o .
If these features are left on, then the lower frequencies will be louder than the other frequencies.
If recorded in this state, the original sound will not be recorded faithfully. Also, it’s diffi cult to edit
or process these recording later on so that they resemble the original sound.
The best method is to faithfully record the original sound, and then use editing software on a
PC to do any additional processing. Doing so allows you to preserve a faithful recording of the
original sound. Using a copy of the recording, you can then edit or process the sound as much as
you like.
See p. 20 in this guide for PC applications
☞
Recording from cassettes
Point
3
R-09HR_guide_e1.indd 11 07.12.27 11:30:46 AM

12
Chapter
1
Situation practical
use technique
Chapter
2
Chapter
3
Applied technique
Chapter
4
Appendix
Situation
The outstanding
features of the R-09HR
Setting
recording levels
Have the singer sing the loudest section of the
song. Since the singer may quickly tire of singing
just for setting a recording level, try to deter-
mine the level quickly.
Remember that body temperature rises after
singing for a while, and the voice can get louder.
It may be a good idea to set the level a little
lower to compensate for this.
See p. 45 in the Owner’s Manual for setting the
recording level.
☞
Placing
the R-09HR
When using the R-09HR internal mic, use the
R-09HR as if it’s a microphone.
You can place the R-09HR as
you would a microphone by
using the optional cover/
stand set (OP-R09HR-C)
and the mic stand adaptor
(OP-R09M).
Unlike other types of recording, when recording
vocals, you should be aware that the singer’s
breaths may be captured by the mic. You can
prevent this by using a pop guard (see photo on
left).
Recording vocals
Point
1
Point
2
4
using the optional cover/
stand set (OP-R09HR-C)
and the mic stand adaptor
(OP-R09M).
R-09HR_guide_e1.indd 12 07.12.27 11:30:48 AM

13
Chapter
1
Situation practical
use technique
Chapter
2
Chapter
3
Applied technique
Chapter
4
Appendix
Practical
Guide to the
edirol r-09hr
The outstanding
features of the R-09HR
Using the Reverb function to add ambience
Often when recording for CD, a reverb e ect is added to vocals and acoustic instruments. Reverb
is an e ect that adds an aesthetic ambience to a song like one might hear in a concert hall.
The R-09HR has a feature to add a reverb e ect during playback.
This feature is convenient for listening to a recording to hear
how it sounds with reverb applied.
When using the reverb feature, record about 4 inch (10 cm)
from the mic to cut out unnecessary natural ambience. If ambi-
ence is recorded, it will interfere with the reverb and the sound
will become garbled.
Setting
the recording quality
Using for vocal training and checking vocals
Sounds like vocals have subtleties that are best
captured by high sound quality. Since long
recordings are not likely, use 16 bit/44.1 kHz or
better high-quality WAV format.
Keep in mind that if you use the 16 bit/44.1 kHz
WAV format, you won’t need to do any conver-
sions on your PC when using the recording to
make a CD.
Using as a voice memo recorder
If you’re using the R-09HR to record ideas for
songs or melodies, use the MP3 format. The
sound quality is suffi cient to jog your memory
for melodies. Because the data is compressed,
you have the additional bonus of being able to
record for longer periods of time.
See p. 38-39 in the Owner’s Manual for setting
the recording mode.
☞
Precautions
when singing
The R-09HR internal microphone records in ste-
reo, so sound is recorded realistically. However, if
the vocalist’s head moves during the recording,
the sound will move from side to side during
playback.
The playback of such a record-
ing results in minute fl uc-
tuations that don’t sound very
good.
The R-09HR internal mic is
omni-directional, so these
fl uctuations are less noticeable.
Consequently, this caution does
not have to be strictly observed,
but with a little e ort, a steady
recording can easily be made.
Don't move
your head
Press the REVERB button to
apply four types of reverb
e ects during playback on
the R-09HR!
Point
3
Point
4
R-09HR_guide_e1.indd 13 07.12.27 11:30:50 AM

14
Chapter
1
Situation practical
use technique
Chapter
2
Chapter
3
Applied technique
Chapter
4
Appendix
Situation
The outstanding
features of the R-09HR
Setting
the recording level
Set the R-09HR mic gain to HIGH when record-
ing bird songs or other quiet sounds. This setting
makes the microphone very sensitive so that
even the smallest sounds are captured.
Conversely, set the mic gain to LOW when
recording nearby loud noises such as trains for
proper mic sensitivity.
Set to HIGH for quieter sounds
Set to LOW for louder sounds
After setting the mic gain, check the input level.
Remember to check the PEAK indicator when
the loudest sound is heard!
See p. 45 in the Owner’s Manual for setting the
recording level.
☞
Using the Limiter
E ectively
The limiter is a feature that reduces the re-
cording level when the sound being recorded
becomes too high. When the limiter is on and a
loud sound is suddenly played, the noise is
moderated.
But, if the sound being recorded often goes over
the set input level, then a sound that you want
may be moderated. When you listen to the re-
cording later, the overall sound may be muffl ed.
In the end, setting the input level to the correct
level is a major point.
Set LIMITER/AGC to ON
Recording outdoors
Point
1
Point
2
5
R-09HR_guide_e1.indd 14 07.12.27 11:30:52 AM

15
Chapter
1
Situation practical
use technique
Chapter
2
Chapter
3
Applied technique
Chapter
4
Appendix
Practical
Guide to the
edirol r-09hr
The outstanding
features of the R-09HR
Positioning
the R-09HR
It is best to plan where to point the mic by imag-
ining listening to the recording later. For exam-
ple, you can create a realistic feel by recording
the murmuring of a brook on the right and the
twittering of the birds on the left.
Increase realism with
stereo recording
When the wind is strong, try changing the mic
direction or to use some wind break, such as a
handkerchief or urethane sponge, so that the
wind doesn’t directly blow into the mic.
You can determine the right
direction by recording while
monitoring with head-
phones to keep noise from
being recorded.
Setting
sound quality
In normal situations, when you want even just
a little better quality, it’s best to record in WAV
format. However, if you’re recording outside, you
will probably want to record for an extended
time. For this situation, MP3 may be best. MP3
recordings are about 1/10 the size of WAV re-
cordings (at 128 kpbs).
Recording time for 256 MB
300 minutes
250 minutes
200 minutes
150 minutes
100 minutes
50 minutes
minutes
WAV (44.1 kHz/16 bit) MP3 (44.1 kHz/128 kbps)
When an external mic is convenient
Whenever you record outside, there’s always the
chance that you may not be able to get to the place
you want to record from. With an external mic, you can
sometimes reach those hard-to-get-to spots.
Use the optional stereo mic (CS-15), sold separately.
This mic can capture sound from a speci c location,
allowing you to target the sound you want. So you
can target the sound you want. And since the R-09HR
operates independently of the mic position, you can
move more freely in the outdoors.
Using LOW CUT to block wind noise
If a strong wind blows into the mic, other sounds will be
a ected by the sound of the wind.
Sometimes the wind is louder than the sound you’re
trying to record, making it impossible to get the
recording you want. If this happens, try turning on
LOW CUT located on the back of the R-09HR. Because
the wind sounds produce low frequencies, you can
reduce the noise by cutting out the lower frequencies
during recording.
Turn LOW CUT on
to cut out lower
frequency sounds
Point
3
Point
4
wind doesn’t directly blow into the mic.
wind doesn’t directly blow into the mic.
R-09HR_guide_e1.indd 15 07.12.27 11:30:55 AM

16
Chapter
1
Situation practical
use technique
Chapter
2
Chapter
3
Applied technique
Chapter
4
Appendix
Situation
The outstanding
features of the R-09HR
Setting the recording
level for meetings
First, set the mic gain to HIGH. For normal every-
day volumes, such as meetings, setting the mic
sensitivity to HIGH is best. You can do level checks
by putting the R-09HR into recording standby
during the pre-meeting chatter.
You can also turn AGC (Auto Gain Control) on. It
automatically raises or lowers the recording level
to match the loudness of the sound. When you
listen later, you will have a record that has a bal-
anced volume.
Because the same switch is used for the limiter,
set the switch function to AGC on/o .
Set LIMITER/AGC to ON
SET MIC GAIN to HIGH
See p. 102 of the Owner’s manual to set the
function of the LIMITER/AGC switch.
☞
What mic should I use?
Where should I point it?
The R-09HR mic is omnidirectional, so if you
want to record all participants equally in order
to clearly record conversation, place it in the
middle of the table. When placing it on the table,
you can eliminate noise from the table by using
a cover stand set (OP-R09HR-C), sold separately.
You should exercise some caution because a loud
noise for even a short time can interfere with
recording the conversation.
Also, when recording a distant single speaker
or sound source, such as a lecture, it is advan-
tageous to use the separately sold stereo mic
(CS-15). This mic records only the sound from the
targeted point, so you can reduce the sounds
from the audiences, such as talking or coughing.
Recording meetings
The R-09HR with the optional
cover/stand set. The R-09HR looks
quite stylish on the tripod.
Point
1
Point
2
6
The external microphone
can also be setup as shown.
R-09HR_guide_e1.indd 16 07.12.27 11:30:58 AM

17
Chapter
1
Situation practical
use technique
Chapter
2
Chapter
3
Applied technique
Chapter
4
Appendix
Practical
Guide to the
edirol r-09hr
The outstanding
features of the R-09HR
Setting
sound quality
Since the purpose of recording a meeting is to
be able to hear what is being said, there is no
strict requirement for good sound quality. More
importantly, the recording will often be for an
extended time, so MP3 is probably the best
format.
MP3 is recommended
for extended recordings
If you need to record for a longer time, set the
bit rate to 64 kpbs. Although this level of com-
pression will degrade the quality, it’s suffi cient
for recording conversations during meetings.
See p. 38-39 in the Owner’s Manual for setting
the recording mode.
☞
Playback Feature can
also be used for transcribing
You can change the R-09HR playback speed by
pressing the SPEED button during playback. So
you can slow down playback when the lecturer
speaks too quickly to understand.
You can also use the AB repeat buttons during
playback to de ne a section to play over several
times.
The R-09HR can become a valuable assistant for
transcription if you freely use the “slow playback”
and “repeat playback” features.
See p. 64 in the Owner’s Manual about setting
playback speeds.
See p. 56 in the Owner’s Manual about using
the AB repeat buttons.
☞
☞
Using Auto Gain Control (AGC)
The AGC automatically changes the recording level according to the volume of the sound being
recorded. You may think that this convenient feature should be left on all the time.
However, there are times when using AGC is not
appropriate. This is especially the case when you’re
trying to capture the true nature of a sound.
For example, if you record a piano recital with AGC on,
you would lose all the infl ection and dynamism of the
piano because the sound would be recorded at the
same volume throughout. Also, the recording level is
constantly being increased and decreased, giving the
recording a less natural sound.
For meetings and lectures, it’s best to keep the volume
even so that you can capture what’s being said. This is
when the AGC feature can be best put to use.
Turning AGC on causes
the recording level
to be automatically
adjusted
Point
3
Point
4
R-09HR_guide_e1.indd 17 07.12.27 11:30:59 AM

18
Chapter
1
Situation practical
use technique
Chapter
2
Chapter
3
Applied technique
Chapter
4
Appendix
Application
The outstanding
features of the R-09HR
Techniques for recording
speci c instruments
Avoid recording breaths
(when breathing is loud)
Record
from
the front
Sound
hole
Capture the strumming
sound
Clear sound
Mued sound
Loud output 3m
Emphasize
high frequencies
Emphasize
low frequencies
Quiet output 1m
Standard
phone plug
Stereo
mini plug
LINE IN
OUT PUT
STEREO
The acoustic guitar provides rich mid and low frequency
sounds. However, if these sounds are too loud, the
music may sound muffl ed. In this case, don’t change the
position of the mic (which should be around the 15th or
17th fret), but change its angle so that the mic is at an
angle from the neck of the guitar. This should make the
sound clearer.
When you want to record the sharp sound of strum-
ming the guitar, place the microphone away from the
body near the point where neck is attached, in order to
record the string vibration while reducing the level of
the low and mid frequencies.
Ideally, recording occurs in a studio or other enclosed
space that excludes outside noises. If you’re recording
in a room, choose a room where there is little environ-
mental noise (street noise or city noise) and that doesn’t
echo much.
The mic should be placed directly in front of the singer.
However, you can place the mic a little below the mouth
to reduce the sound of breathing. By doing this, a more
rounded sound, with more lower frequencies, can be
recorded, depending on the voice quality or the settings.
To prevent this e ect, set LOWCUT to ON. Doing so will
make the sound more crisp.
When playing the guitar or bass in a studio, the volume and
settings are the same as for performances, in general. If you
want to give the feeling of recording in a room, place the
microphone 10 feet (3 m) or more away. Be aware however,
that if you place the microphone too far away, the sound
may become less clear because there’s too much room
ambience. On the other hand, to create the impression of
the instrument playing directly in front of the listener, place
the microphone about 3 feet (1 m) away or less.
If you’re recording in a room, it’s best to directly connect
an e ect processor with an amp modeling feature, or an
amp to the R-09HR via cables. Devices with internal amp
modeling can provide realistic sounds when connected
via cables.
Connect digital instruments such as synthesizers,
organs, samplers, or rhythm machines directly to the
R-09HR LINE IN jack. In particular, digital synthesizers
may have e ects or mastering features that allow the
faithful recording of their sounds through cable con-
nections.
For instruments using an amp, use the same distance
rules as for an electric guitar using an amp, as shown
above.
Synthesizers and organs
Vocals
Acoustic Guitar
Electric guitar or bass
1
R-09HR_guide_e1.indd 18 07.12.27 11:31:00 AM

19
Chapter
1
Situation practical
use technique
Chapter
2
Chapter
3
Applied technique
Chapter
4
Appendix
Practical
Guide to the
edirol r-09hr
The outstanding
features of the R-09HR
Capture everything
from behind
Capture BD and SD
in a direct line
Adjust for
brightness
and softness
Adjust the attack and
reverberations with the
strings and soundboard
Strings
(emphasize
attack)
Soundboard
(rich, broad
sounds)
Bright
Soft
Avoid pointing directly
at the sound but aim
for the bell
Record
everything
Emphasize
the bow
Emphasize
the body
Unlike small instruments, a piano produces sound from
its entirety. Since the internal microphone is an omni-
directional microphone, it’s especially good at recording
a piano’s stereo sound.
Position the microphone to maintain a balance between
the strings and the soundboard. Adjust the balance
between the attack and sustain using distance. Try dif-
ferent con gurations to obtain the cleanest recording.
Piano
If the mic is pointed toward the bass drum, the snare
drum is o -center and its sound becomes weak.
Therefore, direct the mic so that the bass drum and
snare drum are in a direct line, and they will then be
heard in the center during playback as a clear rhythm.
This placement also helps reduce air pu s into the mic
from the bass drum because the mic is not directly in
the front of the bass drum.
Another idea to consider when the attack is strong but
quiet is to move the microphone 10 feet (3 m) or more
away, or to place the mic in the back of the drum set.
Doing so produces a more rounded sound, and a clear
recording is achieved, making level adjustment easier.
Drums
When recording a horn section with room sounds, set the
mic at least 10 feet (3 m) away. Don’t point the mic directly
at the bell, but point it slightly upwards toward the bell
to soften the direct sound of the horn and to capture the
refl ected sound. Also, to create a stereo e ect, leave the
mic where it’s and have the players move apart.
On the other hand, when recording a solo performance up
close, woodwinds, like the saxophone, don’t produce sound
solely from the bell but also from the keys. Also, when all the
keys are pressed, the sound from the bell changes suddenly.
For these cases, place the mic slightly down and slightly to
the right or left for a smooth recording.
Wind instruments
Stringed instruments, such as the violin or contrabass,
are similar to the acoustic guitar. The secret is to have
a balance between the string vibrations and the sound
from the body. The R-09HR internal stereo condenser
mic should be placed about 6 feet (2 m) away, facing
the instrument to capture the room sounds.
Bringing the mic in to about 3 feet (1 m) produces a
clear, contoured sound. Taking the mic out to 12 feet
(3 – 4 m) produces a full sound. Adjust the mic height
and sound quality (low to increase the low frequencies
and high to have a clearer sound) while monitoring the
sound.
Stringed instruments
R-09HR_guide_e1.indd 19 07.12.27 11:31:01 AM

20
Chapter
1
Situation practical
use technique
Chapter
2
Chapter
3
Applied technique
Chapter
4
Appendix
Application
The outstanding
features of the R-09HR
Application
Save to a PC!!
2
No problem when your SD card becomes full! You can easily save to a PC using a USB cable.
Transfer the sound les (WAV or MP3)
stored on the SD card to the PC via a
USB connection.
Just connect the R-09HR to a PC with a USB cable, then drag and drop your les. You can take songs you’
ve just recorded and mail them to your friends or release them on your website or blog as you like.
You should record in MP3 if you plan to e-mail your music. If you record in WAV, the le may be too large
to attach to an e-mail.
You can easily edit the le name after saving to a PC. You should use a suitable le name here for future
reference.
Also, you’ll notice that the date and time of the recording
is saved when you look at the le properties of the song
recorded with the R-09HR. This date is taken from the
R-09HR internal clock. However, the internal clock resets if
power is not turned on for several days. Be sure to set the
R-09HR internal clock before recording.
R-09HR_guide_e1.indd 20 07.12.27 11:31:03 AM
/