Page is loading ...

Copyright © 2010 GIGABYTE TECHNOLOGY CO., LTD.
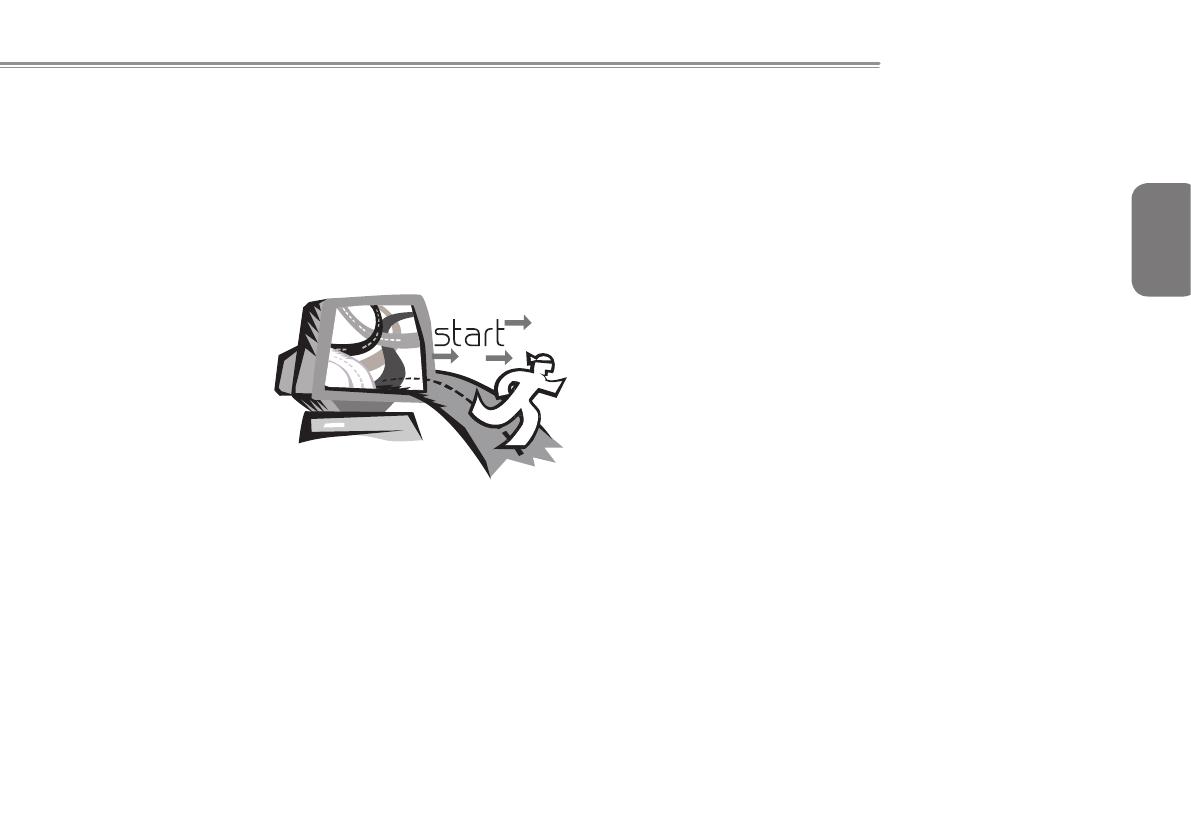
All Rights Reserved
GIGABYTE i1520 Series Notebooks User’s Manual
Date Issued: 2010/04
This manual takes you, step by step, through setting up and using your new Notebook PC. Information in this manual has been carefully
checked for accuracy and is subject to change without prior notice.
No part or parts of this manual may be reproduced, stored in a retrieval system, or transmitted, in any form or by any means, electronic,
mechanical, by photocopy, recording, or otherwise, without prior written consent.
Trademarks
Product names used herein are for identication purposes only and may be the trademarks of their respective companies.
Microsoft
®
, MS-DOS, Windows
®
, and Windows
®
Sound System are trademarks of the Microsoft Corporation.
Intel
®
& Atom™. are registered trademarks of Intel Corporation.
Sound Blaster & Sound Blaster Pro are trademarks of Creative Technology.
All other brands or product names mentioned in this manual are trademarks or registered trademarks of their respective companies.

English
I
General Safety Precautions
In order to ensure your safety and the safety of you notebook, we ask
that your carefully follow these safety precautions.
CAUTION: Using your notebook for long periods of time, with
the base resting directly on exposed skin, can cause injury,
burns or discomfort from the heat buildup that is generated from
the base of your portable computer.
● After removing the notebook from the box, please ensure that all
packaging materials are kept out of the reach of small children as
they can cause a potential choking hazard. The packaging
materials should be safely stored away in the event that it may be
used again for safe transportation of the notebook.
● Ensure that the AC Adapter and power cable are placed in a safe
area where it cannot be tripped over or stepped on. The AC
Adapter should be situated in a well ventilated area and should
have nothing resting on or covering it.
● Before turning on the notebook, ensure that it is placed on a level
surface with at least 10 cm of clearance around the air vents, which
will aid in proper cooling.
● Do not obstruct the air vents of the notebook and do not insert any
foreign objects into this space. Doing this may cause a short circuit or
may cause the CPU fan to malfunction, resulting in the risk of a re
or electric shock. This may eventually render permanent damage to
the notebook.
● Do not press or touch the display panel.
● Only use the AC Adapter that is provided with the notebook or
that which is recommended by the manufacturer. Using non-
recommended or non-approved parts may cause damage or increase
the risk of a re or explosion. In the event that another AC Adapter is
required, advice should be sought from a GIGABYTE service agent,
in order to make sure that the correct part is recommended.
● Please follow the battery installation guidelines. Incorrect
installation of batteries may increase the risk of a re or explosion.
● Only replace old batteries with the same or an alternative
compatible battery that is recommended by GIGABYTE or an
authorized GIGABYTE Service Centre.
● Before connecting the notebook to the power outlet, make sure
that the voltage rating of the AC Adapter is compatible with the
power specication in the country where you are located. A
detailed list of the power specication for different countries can
be found on page 39.
● When using an extension cord, please make sure that the total
sum of ampere ratings for all connected devices does not exceed
the total ampere capacity for the circuit.
● Before removing the battery from the notebook, make sure rstly
that the notebook is switched off and secondly that the AC
Adapter is disconnected from the electrical wall socket. Once this
is done, it would be safe to remove the battery.
Do not carry the notebook battery, loose, in your handbag,
backpack or pocket where loose metal objects (money, keys,
chains, pens, etc) may be present. The metal objects can short
circuit the terminals of the battery resulting in overheating
that could cause a re hazard. In the event that you need to
transport the battery separately from the notebook, please place
it inside an anti-static bag.

English
II
i1520 SERIES USER’S MANUAL
● Discard old worn out batteries according to the instructions on
Page VI. Never throw batteries into a re as this can cause an
explosion.
● Never attempt to repair or service the notebook yourself. Please
refer all repairs and servicing to qualied service personnel at a
GIGABYTE Authorized Service Centre.
Travel Tips
Although notebooks are designed to be as robust as possible to cater
for a mobile lifestyle, extreme care and caution should be taken when
travelling. When travelling by land, sea or air, every precaution should
be taken to make sure that the notebook is well secured when it is not in
use.
● The most essential accessory you should have when travelling is a
good carry case for your notebook. The case should be well
padded to protect your notebook from drops and bumps, etc and
should be big enough to hold the size of notebook.
● Make sure there is enough room to carry your AC Adapter and
spare battery etc. Only carry the necessary items in your carry
case, as the weight can become tedious especially when walking
long distances or waiting in long queue’s.
● When travelling by air, never book your notebook with checked
baggage. Always declare it as hand baggage so that you can carry
it into the airplane cabin with you. Most airlines allow two pieces of
hand baggage with one of them being a bag or carry case with a
portable notebook. Please consult your local airline for more details.
● When placing your notebook on an X-Ray, make sure that you keep
a close eye on it when it is on the conveyor belt. Hold on to your
notebook until the last minute before placing it on the conveyor.
In some airports it could be stolen while you are stuck in a queue
waiting to pass through the metal detector.
● Notebooks and hard drives can pass through X-Ray machines but
never allow these to pass through a metal detector. This can cause
data loss to the hard drive.
● Never place your notebook in the overhead storage compartment as
this can make it susceptible to damage caused by turbulence that
may be experienced during the ight or in other case theft. You can
store your notebook under your seat, where it is always in sight.
● You should take every precaution to protect your notebook from dust,
dirt, liquid spillage, food droppings, extreme weather conditions and
direct exposure to sunlight.
● When travelling between different climates, from one extreme to
another, condensation may occur inside the notebook. If this does
happen, please allow sufcient time for the moisture to evaporate
completely, before attempting to switch on.
● When travelling from extremely colder to extremely warmer climates
in a short space of time, and vice versa, please allow the notebook
some time to adapt to the change in environment.
Usage Tips
●
When unplugging the power connector from the notebook,
please hold and pull on the connector or the strain relief loop to
disconnect. Do not pull the power cord itself as this can cause
damage to the cable or the notebook.
●
In the event of an electrical storm, please disconnect the
notebook from the power source and unplug any network or

English
III
telephone cables that may be connected to the notebook.
●
Do not use the notebook near water sources, like bathtubs,
washing basins, kitchen or laundry sinks or swimming pools.
Liquid that can spill onto the notebook by accident can cause
electric shock to you and damage to the notebook.
Cleaning Tips
When cleaning the notebook, please make sure that the notebook
is switched off and disconnected from the power source and that the
battery is removed.
Notebook Cover:
Use a microber or lint free soft cotton cloth and kitchen detergent (mix 5
parts water to 1 part detergent).
● Wet the cloth and wring out all excess liquid and wipe the surfaces
clean.
● Take extra care to make sure that the cloth is damp and not very wet,
especially when cleaning around the air vents and other openings as
too much liquid in the cloth could drip onto the external components
causing damage to the notebook.
● Do not clean the keyboard with this liquid.
Keyboard:
● It is advisable to use a can of compressed air to clean debris that
maybe caught underneath the keys.
● Isopropyl alcohol can be used to clean the keys by dipping a lint-
free soft cloth into it, wringing out the excess liquid and wiping the
keys.
● Allow to dry for at least 5 minutes.

English
IV
i1520 SERIES USER’S MANUAL
LCD:
● It is best to use a microber cloth to clean the surface of the LCD.
● If there are any marks or stains present, it would be wise to use
commercially available LCD cleaning kit. When using a commercially
available LCD cleaning kit, never spray the liquid directly onto the
screen. You must spray it onto the cleaning cloth and then wipe the
screen clean.
● If this is not available then you can mix 50% isopropyl alcohol and
50% distilled water to clean the surface of the LCD screen.
● Dip the lint free soft cotton cloth into the solution, wringing out excess
liquid.
● The cloth must be damp but not dripping with liquid.
● Take care not to let any excess liquid drip into the notebook.
● Start from the top of the LCD surface and wipe from side to side.
● Continue with this until the entire LCD surface has been cleaned.
● Wipe the display with a clean, dry lint free soft cotton or microber
cloth.
● Wait for the LCD surface to dry completely and then close the lid.
Be careful when using Isopropyl Alcohol as this is a
ammable liquid. Please keep away from children,
naked ames or a notebook that is switched on.
Warranty Guidelines
All warranty repairs and service must be carried out by a GIGABYTE
Authorized Repair Centre.
GIGABYTE Limited Warranty
GIGABYTE warrants, that the GIGABYTE branded Notebook/Netbook
is free of any defects in materials and workmanship under normal use
during the warranty period.
● All GIGABYTE supplied AC adapters and batteries carry a 1 year
limited warranty.
● The warranty is effective from date of purchase.
● If proof of purchase cannot be shown, then the warranty will be
determined based on the date of manufacture.
● The limited warranty is only valid for GIGABYTE branded or supplied
hardware.
● In the event that a defect arises in materials or workmanship and
proof is shown of this defect, GIGABYTE will, through its authorized
service provider or partner, repair the product at no extra charge,
using new or refurbished replacement parts in order to fulll the
warranty obligations.
● If, during the warranty period, GIGABYTE or its service provider is
unable to repair the product, the product will be replaced with a
comparable product that is new or refurbished.

English
V
Warranty Limitations
The GIGABYTE Limited Warranty does not cover the following…
● Software, including the operating system and applications supplied
with the product. This also includes third party software that may be
installed after purchase.
● Third party hardware, products and accessories not supplied by
GIGABYTE. This also includes third party hardware that may be
bundled with the notebook or netbook.
● Products with missing or defaced labels and/or serial numbers
● Products damaged by environmental factors, which include oxidation
● Products damaged by natural disasters or acts of God.
● Physical Damages which include, but not limited to, the following:
►
Unauthorized modications, repairs or servicing
►
Misuse, abuse, neglect or failure to follow instructions in the user
manual.
►
Improper assembly
►
Damages caused by transport due to improper packaging or
mishandling by the courier company unless transport is part
of the warranty conditions in certain countries.
►
Electric damage resulting from faulty or failed electric power
or power surges.
►
Damaged or cracked components
►
Liquid damage
Regulatory Notices
Federal Communications Commission Notice
This equipment has been tested and found to comply with the limits for
a Class B digital service, pursuant to Part 15 of the FCC rules. These
limits are designed to provide reasonable protection against harmful
interference in a residential installation.
Any changes or modications made to this equipment may void the
user’s authority to operate this equipment. This equipment generates,
uses, and can radiate radio frequency energy. If not installed and used
in accordance with the instructions, may cause harmful interference to
radio communications. However, there is no guarantee that interference
will not occur in a particular installation. If this
equipment does cause harmful interference to radio or television
reception, which can be determined by turning the equipment off and
on, the user is encouraged to try to correct the interference by one or
more of the following measures:
● Reorient or relocate the receiving antenna.
● Increase the separation between the equipment and receiver.
● Connect the equipment into an outlet on a circuit different from that
towhich the receiver is connected.
● Consult the dealer or an experienced radio/TV technician for help.
● All external cables connecting to this basic unit must be shielded.
For cables connecting to PCMCIA cards, see the option manual
or nstallation instructions.

English
VI
i1520 SERIES USER’S MANUAL
RF Exposure
This equipment must be installed and operated in accordance with
provided instructions and must not be co-located or operating in
conjunction with any other antenna or transmitter. End-users and
installers must be provide with antenna installation instructions
and transmitter operating conditions for satisfying RF exposure
compliance.
CE Notice (European Union)
This symbol indicates this Booktop i1520 notebook complies with
the EMC Directive and the European Union’s Low Voltage Directive. This
symbol also indicates that i1520 meets the following technical standards:
● EN 55022 — “Limitations and Methods of Measurement for the Radio
Interferences of Information Technology Equipment.”
● EN 55024 — “Information technology equipment - Immunity character-
istics - Limits and methods of measurement.”
● EN 61000-3-2 — “Electromagnetic compatibility (EMC) - Chapter 3:
Limits - Section 2: Limits on the harmonic current emissions (Equip-
ment input current up to and including 16 A per phase).”
● EN 61000-3-3 — “Electromagnetic compatibility (EMC) - Chapter 3:
Limits - Section 3: Limits on the voltage uctuations and icker in low-
voltage power supply systems for equipment with rate current up to
and including 16 A.”
NOTE: EN 55022 emissions requirements provide for two clas-
sications
● Class A governs commercial use
● Class B is governs residential use
For CB:
● Only use batteries designed for this computer. The wrong battery type
may explode, leak or damage the computer
●
Do not remove any batteries from the computer while it is powered on
●
Do not continue to use a battery that has been dropped, or that appears
damaged (e.g. bent or twisted) in any way. Even if the computer continues
to work with a damaged battery in place, it may cause circuit damage, which
may possibly result in re.
●
Recharge the batteries using the notebook’s system. Incorrect recharg-
ing may make the battery explode.
●
Do not try to repair a battery pack. Refer any battery pack repair or
replacement to your service representative or qualied service person-
nel.
●
Keep children away from, and promptly dispose of a damaged battery.
Always dispose of batteries carefully. Batteries may explode or leak if
exposed to re, or improperly handled or discarded.
●
Keep the battery away from metal appliances.
●
Afx tape to the battery contacts before disposing of the battery.
●
Do not touch the battery contacts with your hands or metal objects.

English
VII
Battery Disposal & Caution
The product that you have purchased contains a rechargeable bat-
tery. The battery is recyclable. At the end of its useful life, under
various state and local laws. It may be illegal to dispose of this bat-
tery into the municipal waste stream. Check with your local solid
waste officials for details in your area for recycling options or proper
disposal.
Danger of explosion if battery is incorrectly replaced. Replace only
with the same or equivalent type recommended by the manufacturer.
Discard used battery according to the manufacturer’s instructions.
BSMI Notice (Taiwan Only)
Most i1520 computers are classied by the Bureau of Standards,
Meteorology and Inspection (BSMI) as Class B information
technology equipment (ITE).
The symbol above must be attached to the product indicating
compliance with the BSMI standard.
Replaceable Batteries
If any equipment is provided with a replaceable battery, and if
replacement by an incorrect type could result in an explosion (for
example, with some lithium batteries), the following applies:
● if the battery is placed in an operator access area, there shall be
a marking close to the battery or a statement in boththe operating
and the servicing instructions;
● if the battery is placed elsewhere in the equipment, there shall
be a marking close to the battery or a statement in the servicing
instructions.
This marking or statement shall include the following or similar text:
CAUTION
RISK OF EXPLOSION IF BATTERY IS REPLACED
WITH AN INCOMPATIBLE BATTERY TYPE.
DISPOSE OF USED BATTERIES
ACCORDING TO THE INSTRUCTIONS
English
VIII
i1520 SERIES USER’S MANUAL
Introduction
Congratulations and thank you for purchasing the GIGABYTE
notebook computer. This portable notebook computer provides
excellent multimedia functionality and is designed to provide you
reliable, no fuss computing.
This manual will explain to you, step by step, how to setup and
begin using your i1520. It provides basic configuring, operation,
care and troubleshooting guidelines.

English
IX
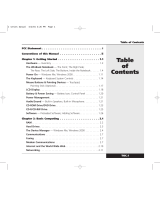
Content
General Safety Precautions...............................................................I
Travel Tips ........................................................................................II
Usage Tips ....................................................................................... II
Cleaning Tips...................................................................................III
Warranty Guidelines ........................................................................IV
Regulatory Notices & Certications ..................................................V
Battery Disposal & Caution.............................................................VII
Introduction ....................................................................................VIII
Chapter 1 Before You Start
1.1 Make Sure You Have Everything .............................................4
1.2 Familiarize Yourself with the Computer ...................................4
1.3 Turning on the Unit ..................................................................5
1.4 Turning off the Power ...............................................................5
1.5 Top View .................................................................................. 6
1.6 Left View ..................................................................................7
1.7 Right View ................................................................................8
1.8 Bottom View .............................................................................8
Chapter 2 Getting Started
2.1 Power Sources .......................................................................10
2.2 Recharging the Battery ..........................................................11
2.3 Starting Your Notebook ..........................................................12
2.4 Switch and Status Indicators ..................................................12
2.5 Using Function Keys .............................................................. 14
2.6 Using the Touchpad ...............................................................15
Chapter 3 Connecting Peripherals and Upgrade
3.1 How To Connect USB Devices .............................................. 18
3.2 How To Connect Displays ......................................................18
3.3 How to Connect an HDMI Display .........................................19
3.4 Ethernet LAN Connection ......................................................19
3.5 How To Secure the Notebook ................................................20
3.6 Upgrade the Memory .............................................................20
3.7 WWAN 3G Connection ..........................................................21
Chapter 4 i1520 Utility
4.1 Conguration Center utility .....................................................24
4.2 Always-Aware applications ....................................................25
Chapter 5 GIGABYTE Smart Recovery
5.1 GIGABYTE Smart Recovery ..................................................28

English
1
i1520 SERIES USER’S MANUAL
Chapter 6 Troubleshooting
6.1 Troubleshooting .....................................................................30
6.2 Frequently Asked Questions ..................................................33
6.3 Questions And Answers .........................................................35
6.4 The Notebook Care ................................................................36
6.5 GIGABYTE Service Information .............................................36
Appendix
i1520 Specications ............................................................... 38
International Country Voltage ................................................39
Plug Type ...............................................................................43

English
2

English
3
i1520 SERIES USER’S MANUAL
Chapter 1 Before You Start
This chapter provides basic information to help you get started and
to use the i1520 notebook.
Some of the features described herein may not function properly
or at all unless used in conjunction with the pre-installed operating
system. Any change to the operating system may cause improper
function.
English
4
1.1 Make Sure You Have Everything
When you receive your notebook PC, unpack it carefully and
check to make sure you have all the items listed below. For a pre-
congured model you should have the following:
● GIGABYTE Notebook Computer
● Lithium-Ion Battery
● AC Adapter with Power Cord
● Driver Disc
● Quick Start Guide
Once you have checked and conrmed that your notebook system
is complete, read through the following pages to learn about all of
your notebook components.
NOTE: Depending on the model you purchased, the actual
appearance of your notebook may vary from that shown in this
manual.These images are for illustration purposes.
To install the battery please follow these steps:
1. Slide the battery into the slot until both latches (Shown as A & B)
“click” into place.
2. You may hear a “clicking” sound, once the battery is secure.
Slide latch 2 to the left to lock the battery in place.
2
A
B
1
1.2 Familiarize Yourself with the Computer
Opening the Display Panel
To open the display panel, simply lift the lid up. Use one hand to
keep the base of the notebook down rmly, and use the other hand
to open the display.The hinges are designed to keep the notebook
screen closed without the need for a latch.
When closing it, be sure not to slam the display shut as this can
damage the display and notebook.

English
5
i1520 SERIES USER’S MANUAL
1.3 Turning on the Unit
Switching on the Power
The power indicator will be illuminated when the power is switched
on. After you turn on the i1520 for the very rst time, do not turn it
off until the operating system has been congured. Please note that
the volume for the audio will not function until Windows Setup has
completed.
Booting Up the i1520 for the First Time
Depending on your configuration, the Microsoft Windows Boot
Screen will be the first screen that you will see as the notebook
starts up. Follow the on-screen prompts and instructions and enter
your personal information to complete the setup of the Windows
Operating
1.4 Turning off the Power
System Shut Down
When you turn off the power (Shut Down), the system is fully
powered off. The notebook will boot normally when switched on
again.
●
If you have unsaved work or are busy, ensure that you save it to
the hard disk drive or any other storage device.
●
Make sure that the storage device or media are not in use before
you remove the media or device. If not done, data loss may occur.
●
Make sure that the hard disk indicator light is off. If you turn off
the system while is being accessed, data loss can occur and disk
damage may occur.
●
Never turn off the notebook will any program is running, as doing
so may result in data loss or the program no longer working as
intended.
●
The Shut Down Method is slightly different for each operating
system.
For Windows 7, use the Start Menu to shut down the system. Under
Windows 7, choose the “Shut Down” icon.
English
6
1.5 Top View
The following is an overview of the front of the notebook.
1
6
5
2
3
5
4
8
7
NO. Item Function
1 Webcam
The built-in 1.3 megapixel camera with 2
digital microphones allows you to snap
a photo or create a video or hold a video
conference or chat with just a click.
2 LCD Display
The display panel is a color LCD panel
with back lighting for the display of text and
graphics.
3
Stereo
Speakers
The built-in speaker system features an
integrated digital audio controller that
produces rich, vibrant sound.
4
Power On
Button
This button turns your notebook on and off
or puts it to sleep. (See Suspend/Power On
Button in the Power On section for more
information.)
5 Keyboard
A full-size keyboard with dedicated
Windows
®
keys. The layout will depend on
the region you live in.
6
Touchpad &
Buttons
The touchpad pointing device is a mouse
like cursor control with two buttons and a
touch sensitive movement pad. The left and
right buttons function like the left and right
mouse buttons.
7
Wireless
Switch
This switch allows you to toggle the
notebook PC’s wireless connection.
8
Status
Indicator
Lights
The Status indicator lights correspond to
specic operating modes. These modes
are: The Caps Lock / Bluetooth
Transmission / Hard Disk Drive Activity /
Wireless Transmision / Battery / Number
Lock.
English
7
i1520 SERIES USER’S MANUAL
1.6 Left View
i1520N
The following is a brief description of the left side of the notebook.
1 2 3 4 5 76
NO. Item Function
1
External
Monitor Port
The external monitor port allows you to
connect an external monitor.
2 HDMI Port
The HDMI port allows you to connect a
video device to your computer for outputing
a high denition signal.
3
LAN (RJ-45)
Port
The LAN port is designed to support a
10/100/1000 Base-T standard RJ-45 plug.
4
e-SATA/USB
combo port
The e-SATA/USB combo port allows you
to connect an external device as well as
any type of USB device.
5 USB 2.0 Port
The USB port allows you to connect a
Universal Serial Bus device. It supports
v2.0 of the USB standard, which allows
data exchange rates as high as 480 Mb/s.
6
Express Card
Slot
The Express Card Slot allows you to install
one Type-II Express Card Slot.
7
Multi Card
Reader
The memory card reader offers the fastest
and most convenient method to transfer
pictures, music and data between your
notebook and ash compatible devices.
i1520M
The following is a brief description of the left side of the notebook.
1 2
4
53
NO. Item Function
1
External
Monitor Port
The external monitor port allows you to
connect an external monitor.
2
LAN (RJ-45)
Port
The LAN port is designed to support a
10/100/1000 Base-T standard RJ-45 plug.
3 USB 2.0 port
The USB port allows you to connect a
Universal Serial Bus device. It supports
v2.0 of the USB standard, which allows
data exchange rates as high as 480 Mb/s.
4
Express Card
Slot
The Express Card Slot allows you to install
one Type-II Express Card Slot.
5
Multi Card
Reader
The memory card reader offers the fastest
and most convenient method to transfer
pictures, music and data between your
notebook and ash compatible devices
such as digital cameras, MP3 players,
mobile phones, and PDAs.

English
8
1.7 Right View
The following is a brief description of the right side of the notebook.
1 2 3 4
5
6
NO. Item Function
1
Headphone
Jack
The headphone jack allows you to connect
headphones or external speakers and
ampliers.
2
Microphone
Jack
The microphone jack allows you to connect
an external microphone.
3 USB 2.0 Port
The USB port allows you to connect universal
serial bus devices. It supports v2.0 of the
USB standard, which allows data exchange
rates as high as 480 Mb/s.
4
Optical Disc
Drive
The optical drive allows you to play back and
write media discs such as CDs & DVDs.
5
Power
Adapter
Port
The power adapter port allows you to plug
in the AC adapter to power your notebook
and charge the internal Lithium-Ion battery.
Only use certied AC adaptors.
6
Kensington
Lock Slot
The Kensington
®
lock port allows the
notebook PC to be secured using
Kensington
®
compatible notebook PC security
products, which includes a metal cable and
lock that prevent the notebook PC to be
removed.
1.8 Bottom View
The following is an overview of the bottom of the notebook.
1
2
3
NO. Item Function
1 Battery Bay
The battery bay contains the internal
Lithium-Ion battery. It can be unlatched
for the removal of the battery when stored
over a long period of time or for swapping
a discharged battery with a charged
Lithium-Ion battery, and latched in place
again.
2
HDD
Compartment
Cover
The HDD compartment contains the
computer's hard disk drive.
3
RAM
Compartment
Cover
The memory compartment contains the
computer's memory modules.
English
9
i1520 SERIES USER’S MANUAL
Chapter 2 Getting Started
This chapter will show you the various ports and components of the
i1520 and familiarizes you with the notebook. Certain parts of the
notebook can be user upgraded while others are xed and cannot
be changed.

English
10
2.1 Power Sources
Your computer has two types of power sources: a Lithium-Ion
battery and an AC adapter.
Connecting the Power Adapters
The AC adapter provides power for operating your notebook PC as
well as charging the battery.
Connecting the AC Adapter
1. Plug the DC output cable into the DC power jack of your.
2. Plug the AC adapter into an AC electrical outlet.
Switching from AC Adapter Power to Battery Power
1. Be sure that you have at least one charged battery installed.
2. Remove the AC adapter. Your notebook will automatically switch
from DC power to battery power.
CAUTION: The Lithium-Ion battery does not ship with a pre-
charge initially. You will need to connect the AC adapter to
useyour notebook PC the rst time.
It is recommended that only the AC adapter supplied with the i1520
is used. Any other adapter could cause damage or malfunction and
might result in injury.
2
3
1
1. Connect the power cord to the AC adapter.
2. Connect the AC adapter to the DC power port of your computer.
3. Connect the AC adapter power cord to an AC outlet.
/