mothercare Philips Avent baby monitor 721_0711918 User manual
- Category
- Babyphones
- Type
- User manual
Page is loading ...
Page is loading ...

English
1
9 10 11 12
7
8
2 3 4 5 6
1
6
English

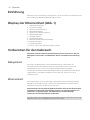
Introduction
Go to www.philips.com/welcome to register your product and to read the
detailed user manual.
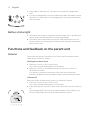
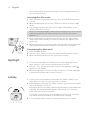
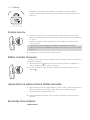
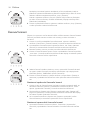
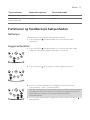
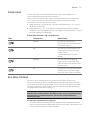
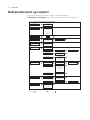
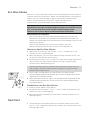
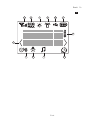
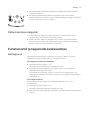
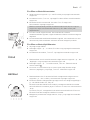
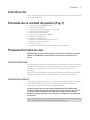
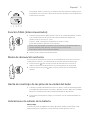
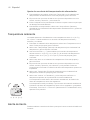
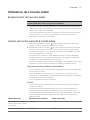
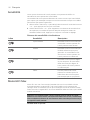
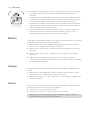
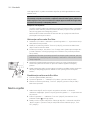
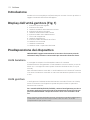
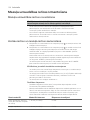
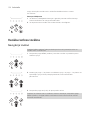
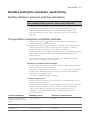
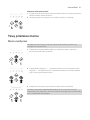
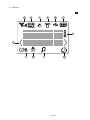
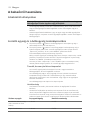
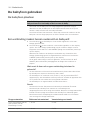
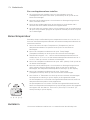
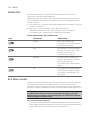
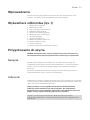
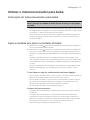
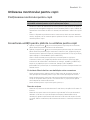
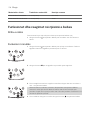
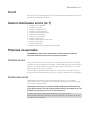
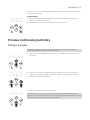
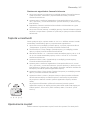
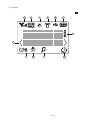
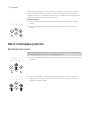
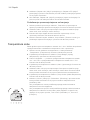
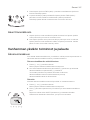
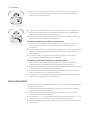
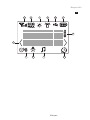
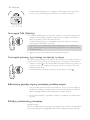
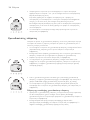
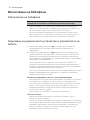
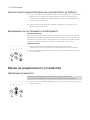
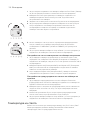
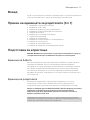
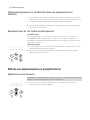
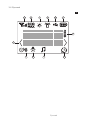
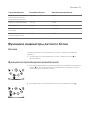
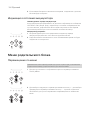
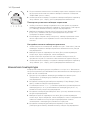
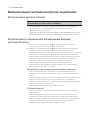
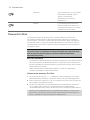
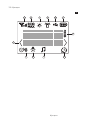
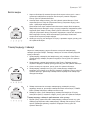
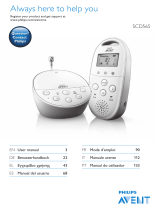
Display of the parent unit (Fig. 1)
1 Signal strength indicator
2 Eco Max indicator
3 Night dim mode symbol
4 Cry alert indicator
5 Mute symbol
6 Battery status indicator
7 Navigation arrow
8 Temperature symbol
9 Microphone sensitivity indicator
10 Nightlight symbol
11 Lullaby symbol
12 Timer or timer repeat symbol
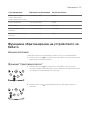
Preparing for use
IMPORTANT: Read the safety instructions carefully before you use the
baby monitor and keep them for future reference.
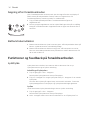
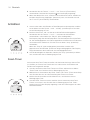
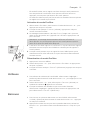
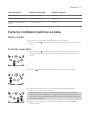
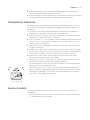
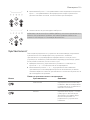
Baby unit
We advise you to use the baby unit connected to the mains. To guarantee
automatic power backup in case of mains failure, you can insert four 1.5V AA
alkaline batteries (not included).
Do not use rechargeable batteries. The baby unit does not have a charging
function and rechargeable batteries discharge slowly when they are not in
use.
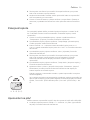
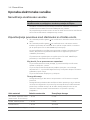
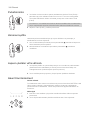
Parent unit
The parent unit runs on two rechargeable batteries that are supplied with
the baby monitor. Charge the parent unit before you use it for the first time
and when the batteries are low.
Please note that for the SCD720/SCD721/SCD723, you have to charge the
parent unit for the full 10 hours to have a cordless operating time of 18
hours. (For the SCD725: the charging time is 14 hours and the operating
time is 25 hours.
Note: When you start using the baby monitor, it takes 4 charge and
discharge cycles before the rechargeable batteries reach their full capacity.
7
English

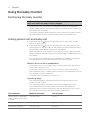
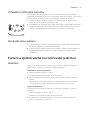
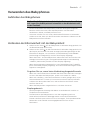
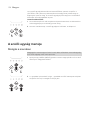
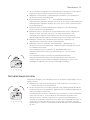
Using the baby monitor
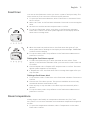
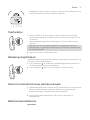
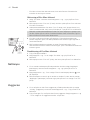
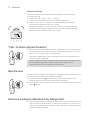
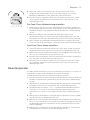
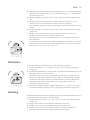
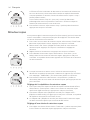
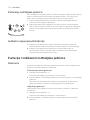
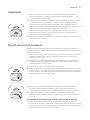
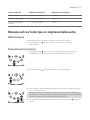
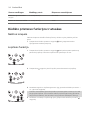
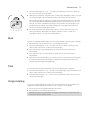
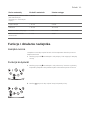
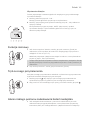
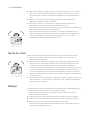
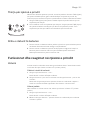
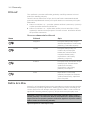
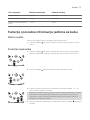
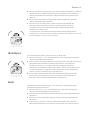
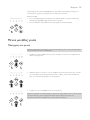
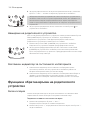
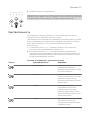
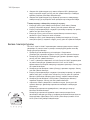
Positioning the baby monitor
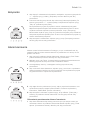
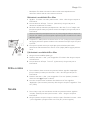
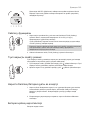
Keep the baby unit out of the reach of the baby. Never place the
baby unit inside the baby’s bed or playpen.
-
Because the cord of the baby unit presents a potential strangulation
hazard, make sure that the baby unit and its cord are at least 1 metre/3.5
feet away from your baby.
-
To prevent a high-pitched sound from one or both units, make sure that
the parent unit is at least 1 metre/3.5 feet away from the baby unit.
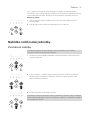
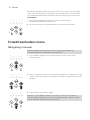
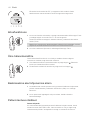
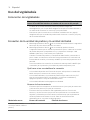
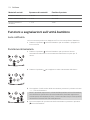
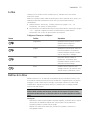
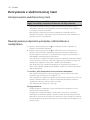
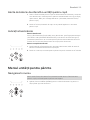
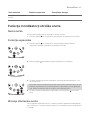
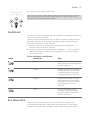
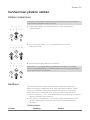
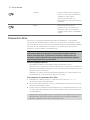
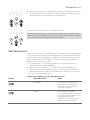
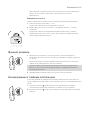
Linking parent unit and baby unit
1 Press and hold the button on the baby unit for 2 seconds until the
power-on light goes on.
2 Press and hold the button on the parent unit for 2 seconds until the
display lights up. The 'link' light on the parent unit starts flashing red and
the message 'I AM LINKING' appears on the display.
When the parent unit and baby unit are linked, the 'link' light turns solid
green. The signal strength indicator and the message 'LINKED' appear on
the display.
If no connection is established, the message 'NOT LINKED' is displayed
and the parent unit starts and the parent unit starts to beep.
What to do if no link is established
-
If the parent unit is out of range, place it closer to the baby unit, but not
closer than 1 metre/3.5 feet.
-
If the baby or parent unit is too close, <2 m/6.5 ft away from another
DECT appliance (e.g. a cordless phone), switch off this appliance or move
the unit away from this appliance.
-
If the baby unit is switched off, switch it on.
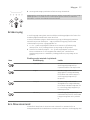
Operating range
-
The operating range is 330 metres/1000 feet outdoors and up to 50
metres/150 feet indoors.
-
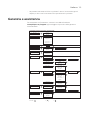
The operating range of the baby monitor varies depending on the
surroundings and factors that cause interference. Wet and moist
materials cause so much interference that the range loss is up to 100%.
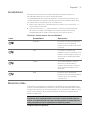
For interference from dry materials, see the table below.
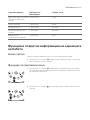
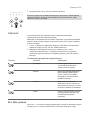
Dry materials Material thickness Loss of range
Wood, plaster, cardboard,
glass (without metal, wires
or lead)
< 30 cm (12 in) 0-10 %
Brick, plywood < 30 cm (12 in) 5-35 %
Reinforced concrete < 30 cm (12 in) 30-100 %
8
English

Dry materials Material thickness Loss of range
Metal grilles or bars < 1 cm (0.4 in) 90-100 %
Metal or aluminium sheets < 1 cm (0.4 in) 100 %
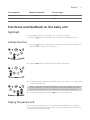
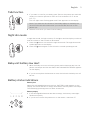
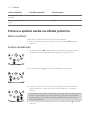
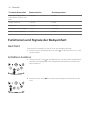
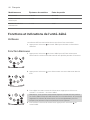
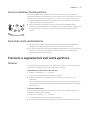
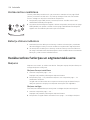
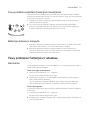
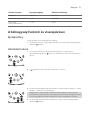
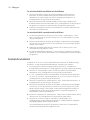
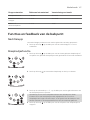
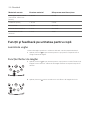
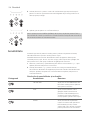
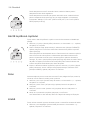
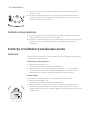
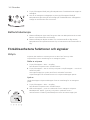
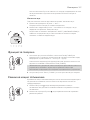
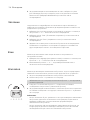
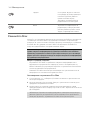
Functions and feedback on the baby unit
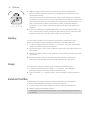
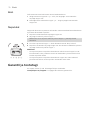
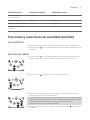
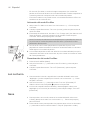
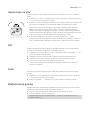
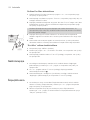
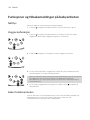
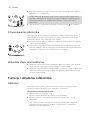
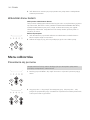
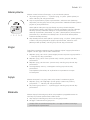
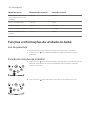
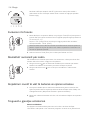
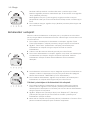
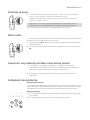
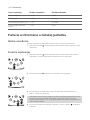
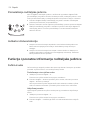
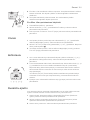
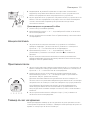
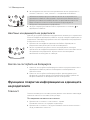
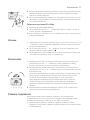
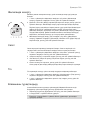
Nightlight
The nightlight produces a soft glow that comforts your baby.
1 Press the button on the baby unit to switch the nightlight on or off.
Lullaby function
1 Press the button on the baby unit to play the last selected lullaby. The
selected lullaby repeats for 15 minutes.
2 Press the button to select another lullaby from the list.
3 To adjust the sound level of the lullaby, press the volume + or the volume
– button the baby unit.
Note: You can only set the loudspeaker volume on the baby unit when a
lullaby is playing. If you set the volume for the lullaby higher, the sound
will also be louder when you use the talk function on the parent unit.
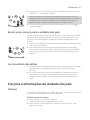
4 To stop lullaby playing, press the button on the baby unit.
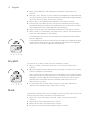
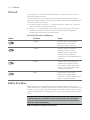
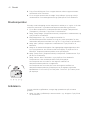
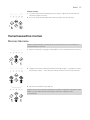
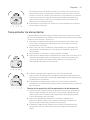
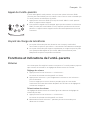
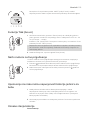
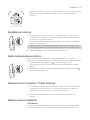
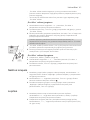
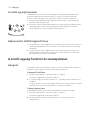
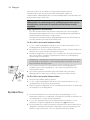
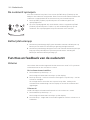
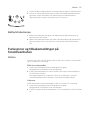
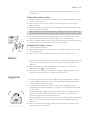
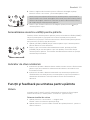
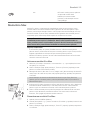
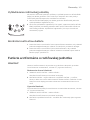
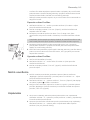
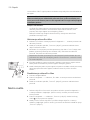
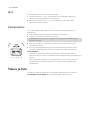
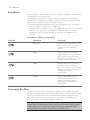
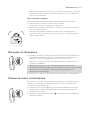
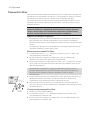
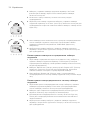
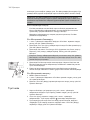
Paging the parent unit
If you have lost the parent unit, you can use the FIND button on the baby
unit to locate the parent unit. This function only works when the parent unit
is switched on and within range.
9
English

1 Press FIND on the baby unit. The parent unit produces a paging alert
tone.
2 To stop the paging alert tone, press FIND on the baby unit again or press
any button on the parent unit. The paging alert tone stops automatically
after 2 minutes.
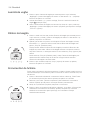
Battery status light
1 The battery status light is solid green when the baby unit is operating on
battery power and the batteries contain enough energy.
2 The battery status light flashes red quickly when the batteries run low
while the baby unit is operating on battery power. Replace the batteries
when they run low.
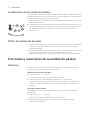
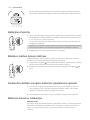
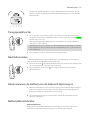
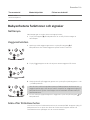
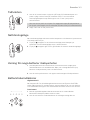
Functions and feedback on the parent unit
Volume
The volume can be set if the menu is not active. There are seven volume
levels and a 'volume off' setting.
Setting the volume level
1 Press the + button or the - button once.
The current volume level appears on the display.
2 Press the + button to increase the volume or press the - button to
decrease the volume.
If no button is pressed for more than 2 seconds, the volume level
indication disappears from the display and the volume setting is saved.
Volume off
Below the lowest volume setting, there is a 'volume off' setting.
1 Press the + button or the - button once.
The current volume level appears on the display.
2 Press and hold the - button for more than 2 seconds to set the volume to
off.
The message 'MUTE' and the mute symbol appear on the display. Only
the sound level lights show that the baby produces sounds.
10
English

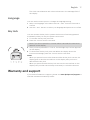
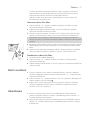
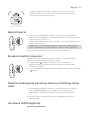
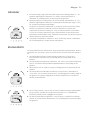
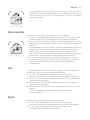
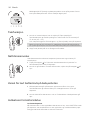
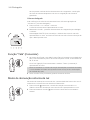
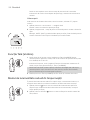
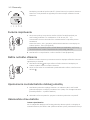
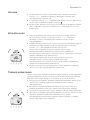
Talk function
1 If you want to comfort your baby, press TALK on the parent unit and talk
clearly into the microphone on the front from a distance of 15-30 cm
(0.5-1 ft).
The 'link' light starts flashing green and 'TALK' appears on the display.
Note: If you have set the volume of the lullaby higher on the baby unit,
the sound will also be louder when you use the talk function on the
parent unit.
2 Release TALK when you have finished talking.
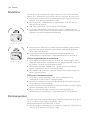
Night dim mode
In night dim mode, the light intensity of the lights and the display is reduced
and the volume of alert sounds is decreased.
1 Press the button to activate the night dim mode. The night dim mode
symbol appears on the display.
2 Press the button again to switch back to normal operating mode.
Baby unit battery low alert
1 When the baby unit runs on battery power and its batteries are low, the
parent unit beeps and the text ‘BABY UNIT CHANGE BATTERIES’ appears
on the display.
2 If you do not replace the batteries in time, the link with the baby unit will
be lost.
Battery status indications
Battery low
When the rechargeable batteries are low, 'BATTERY LOW' appears on the
display, the status indicator is empty and flashes, and the parent unit beeps.
The remaining operating time is at least 30 minutes.
Battery empty
1 If the rechargeable batteries are almost empty, the battery status light
flashes red quickly.
2 If you do not connect the parent unit to the mains, it switches off.
11
English

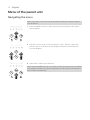
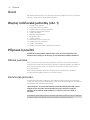
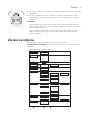
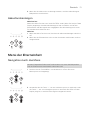
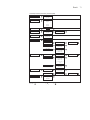
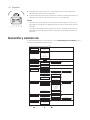
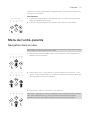
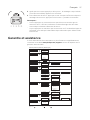
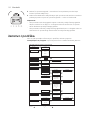
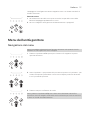
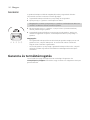
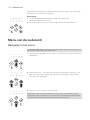
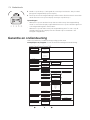
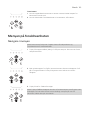
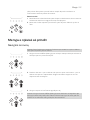
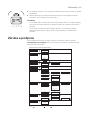
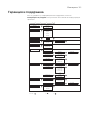
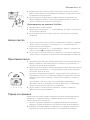
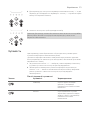
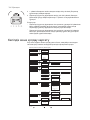
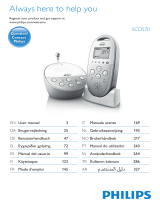
Menu of the parent unit
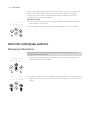
Navigating the menu
Note: Some menu functions only work when the baby unit and the parent
unit are linked.
1 Press the MENU button to open the menu and to make the first menu
option appear.
2 Use the + button to go to the next option or the - button to go to the
previous option. The arrow on the display indicates in which direction
you can navigate.
3 Press OK to confirm your selection.
Note: Press the MENU button if you want to leave the menu without making
any changes. If there is no input in the menu for more than 20 seconds, the
menu closes automatically.
12
English

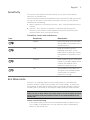
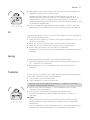
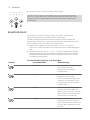
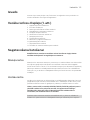
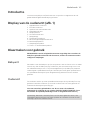
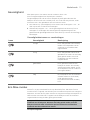
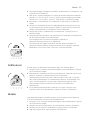
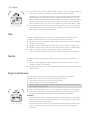
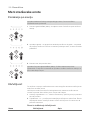
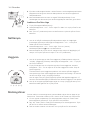
Sensitivity
This option in the parent unit menu allows you to set the microphone
sensitivity of the baby unit.
The microphone sensitivity determines what noise level the baby unit picks
up, e.g. you will want to hear when your baby cries, but you may be less
interested in its babbling.
1 Select ‘Sensitivity’ in the menu with the + and - buttons and press OK to
confirm.
2 Use the + and - buttons to increase or decrease the microphone
sensitivity. The number of filled segments shows the sensitivity level
selected. Press OK to confirm the setting.
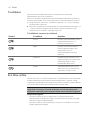
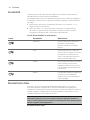
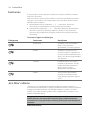
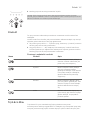
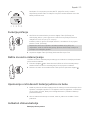
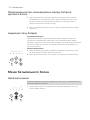
Sensitivity levels and indications
Icon Sensitivity Description
highest Hear everything from your baby.
The speaker of the parent unit is
continuously on.
high Hear all sounds from soft
babbling and louder. If your
baby does not make any sound,
the speaker of the parent unit is
off.
medium Hear sounds from soft cries and
louder. If your baby makes softer
sounds, the speaker of the
parent unit does not go on.
low The speaker of the parent unit
only goes on if the baby makes
loud sounds, for instance
because it is crying.
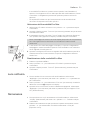
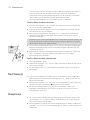
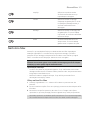
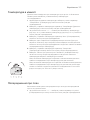
Eco Max mode
Smart Eco is a standard feature on this baby monitor. It automatically
reduces the DECT signal from the baby unit to save energy. To save even
more energy, activate the Eco Max mode. In this mode, the DECT signal of
the baby unit is switched off as long as the baby does not make a sound.
Caution: In Eco Max mode, the parent unit receives feedback from the
baby unit with a delay. When your baby makes a sound, the baby unit first
has to reactivate radio transmission before it can send feedback to the
parent unit.
Please note the following:
-
In Eco Max mode you do not receive feedback when the parent unit is
out of range of the baby unit. You can check the link by pressing any
button on the parent unit.
13
English

-
The Eco Max mode cannot be activated if the microphone sensitivity is
set to the highest level.
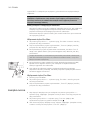
Activating Eco Max mode
1 Select 'Eco Max' in the menu with the + and - buttons and press OK to
confirm.
2 When the display shows 'Turn On', press OK to switch on the Eco Max
mode.
3 The warning message '!No alert if out of range, OK?' appears on the
display. Press OK to confirm.
Note: The warning message scrolls across the display twice. If you do not
press OK, the parent unit leaves the menu and the Eco Max mode
remains off.
4 The Eco Max indication flashes on the display. The 'link' light flashes
green slowly when the baby unit does not transmit any signals to the
parent unit.
5 When the parent unit receives a signal from the baby unit because radio
transmission has been reactivated, the 'link' light turns solid green.
Deactivating Eco Max mode
1 Press the MENU button.
2 Use the + and - buttons to select ‘Eco Max’ and press OK to confirm.
3 When the display shows ‘Turn Off’, press OK to confirm.
Nightlight
1 To switch the nightlight on the baby unit on, select 'Nightlight' in the
menu with the + and - buttons and press OK to confirm.
2 Use the + and - buttons to choose 'Turn On'. The nightlight symbol
appears on the display.
3 When the nightlight is on and you want to switch it off, select 'Nightlight'
in the menu and press OK to choose 'Turn Off'.
Lullaby
1 To play one or more lullabies on the baby unit, select 'Lullaby' in the
menu with the + and - buttons. Press OK to confirm.
2 Press OK again to play the first lullaby. Use the + and - buttons to select
one of the lullabies or 'Play all'.
The display shows the lullaby symbol and the number of the lullaby that
is playing. The selected lullaby repeats continuously for 15 minutes,
unless you select 'stop' in the menu.
If you select 'Play all', all pre-stored lullabies are played for 15 minutes.
The display shows the number of the lullaby that is playing.
3 To stop playing, select 'Stop' in the menu and press OK to confirm.
14
English

Feed timer
You can set the feed timer to alert you that it is time to feed your baby. The
timer can be set from 1 minute to 23 hours and 59 minutes.
1 To open the feed timer submenu, select 'Feed Timer' in the menu. Press
OK to confirm.
2 Select 'Set Timer' in the feed timer submenu. Press OK to start setting the
timer.
3 Set the hour and the minutes and press OK to confirm.
4 To start the feed timer, select 'xx:xx Start' in the feed timer submenu.
Press OK to confirm. The timer symbol appears on the display and the
timer starts counting down.
5 When the timer has reached 00:00, the feed timer alert goes off, the
timer symbol starts flashing on the display and the message 'TIMER END'
scrolls across the display.
6 To stop the timer, select 'Stop & Reset' in the feed timer submenu and
press OK to confirm.
Setting the feed timer repeat
1 To make the feed timer go off after the same set time, select ‘Timer
repeat’ in the feed timer submenu after you have set the timer. Press OK
to confirm.
2 Choose ‘Repeat ON’ or ‘Repeat OFF’ and press OK to confirm. The timer
repeat symbol appears on the display.
3 If ‘Repeat ON’ is set, the feed timer starts counting down again after you
stop the alert.
Setting a feed timer alert
1 To set an alert, select 'Timer Alert' in the feed timer submenu. Press OK to
confirm.
2 Choose one of the alert options. The options available are sound only,
sound and vibration and vibration only.
3 Press any key to stop the alert or the alert stops automatically after 2
minutes.
4 To stop the timer, select 'Stop & Reset' in the feed timer submenu and
press OK to confirm.
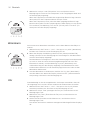
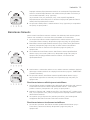
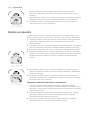
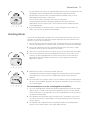
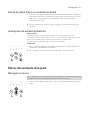
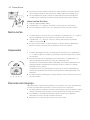
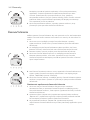
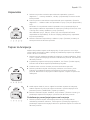
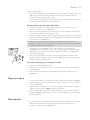
Room temperature
A baby sleeps comfortably at a temperature between 16°C/61°F and
20°C/68°F. You can set a minimum and a maximum temperature range and
an alert.
1 To open the temperature submenu, select 'Temperature' in the menu.
Press OK to confirm.
15
English

2 Select 'Temp Range' in the temperature submenu and press OK to
confirm.
3 Use the + and - buttons to set the minimum temperature range between
10°C/50°F and 19°C/66°F and the maximum temperature range between
22°C/72°F and 37°C/99°F. Press OK to confirm.
4 Select 'Alert' in the temperature submenu. Press OK to confirm.
5 Choose one of the alert options. The options available are sound only,
sound and vibration,vibration only and display only. Press OK to confirm.
The temperature alert symbol appears on the display.
6 Select 'Temp Scale' in the temperature submenu. Press OK to confirm.
7 Select 'Celsius' or 'Fahrenheit' and press OK to confirm. The temperature
in the set scale appears on the display.
If the temperature is within the set range, the temperature alert symbol
has two segments.
If the temperature is below or above the set range, the temperature alert
symbol on the display has only one segment and flashes. The message
'TOO COLD' or 'TOO HOT' appears on the display.
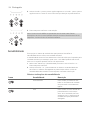
Cry alert
You can set a cry alert to warn you that the baby is crying.
1 Select 'Cry alert' in the menu with the + and - buttons. Press OK to
confirm.
2 When the display shows 'Vibration ON', press OK to confirm. The cry alert
indicator appears on the display.
The cry alert goes off when the sound in the baby room is loud enough to
make the fourth sound level light go on. The parent unit vibrates and the
message 'Cry alert' appears on the display for 4 seconds. The cry alert
repeats every 8 seconds until the sound becomes less loud or you
deactivate the cry alert.
3 To deactivate the cry alert, select 'Cry alert' in the menu. When the
display shows 'Vibration OFF', press OK to confirm.
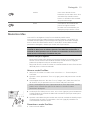
Clock
The default setting for the clock is hidden. You can choose to show the clock
and set the clock time in the menu of the parent unit.
1 Select 'Set clock' in the menu with the + and - buttons. Press OK to
confirm.
2 Select 'Show Time' and press OK to confirm.
3 Select 'Set the time' and press OK to confirm.
4 Set the hour and the minutes and press OK to confirm.
16
English

The clock time alternates with other indications in the message field of
the display.
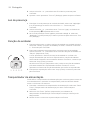
Language
You can use this menu option to change the language setting.
1 Select ‘Set language’ in the menu with the + and - buttons. Press OK to
confirm.
2 Use the + and - buttons to select your language and press OK to confirm.
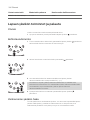
Key lock
You can activate the key lock to prevent the buttons from being pressed
accidentally while you carry the parent unit around.
1 To activate the key lock, press OK.
2 Press the + button within 2 seconds.
Note: If you do not press the + button within 2 seconds, the instruction
remains on the display.
3 After you have pressed the + button, the message 'Keys locked' appears
on the display.
4 To deactivate the key lock, press OK. When the display shows the
instruction message, press the + button within 2 seconds.
Notes:
-
When you press a button other than OK while the key lock is active, the
display goes on and the second line on the display tells you how to
deactivate the key lock.
-
When you press OK while the key lock is active, the second line on the
display tells you what second step is necessary to unlock the buttons.
Warranty and support
If you need information or support, please visit www.philips.com/support or
read the international warranty leaflet.
17
English

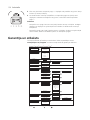
< >
< >
< >
< >
>
<
>
< >
<
< >
>
< >
< >
< >
<
>
<
< > >
<
<
Sensitivity
Eco Max
Cry Alert
Feed Timer
Temperature
Set Clock
Set Language >
Press OK = < =
Timer Alert
Turn On?
Turn O?
Vibrate On?
Vibrate O?
xx:yy Start?
Set Timer
Timer Repeat
Temp Range
Temp Alert
Temp Scale
Show/Hide
Set The Time
English
...
Русский
<
<
<
<
<
<
<
<
<
>
>
>
>
>
>
>
>
>
>
>
>
Minimum XXºC
!No alert if…
Hr 00:00
Hr 00:00
Repeat ON
Repeat OFF
Sound only
Sound & Vibe
Vibrate only
Sound only
Sound & Vibe
Vibrate only
Screen only
O
>
< >
<
<
>
< >
>
<
Play 1?
Play 2?
...
Play 5?
Play All?
Celsius
Fahrenheit
Hide Clock
Show Clock
Maximum YYºC
00:30 Min
00:00 Min
< >
< >
Nightlight
Lullaby
Turn On?
Turn O?<
>
SCD720
/
SCD721
/
SCD723
/
SCD725
(
EN
)
> =
18
English
Page is loading ...
Page is loading ...
Page is loading ...
Page is loading ...
Page is loading ...
Page is loading ...
Page is loading ...
Page is loading ...
Page is loading ...
Page is loading ...
Page is loading ...
Page is loading ...

3 Po stisknutí tlačítka + se zobrazí na displeji zpráva „Keys locked“ (Klávesy
uzamčeny).
4 Chcete-li deaktivovat funkci zamknutí tlačítek, stiskněte tlačítko OK.
Jakmile se na displeji zobrazí zpráva spokyny, stiskněte do 2 sekund
tlačítko +.
Poznámky:
-
Když stisknete jiné tlačítko než tlačítko OK a funkce zamknutí kláves je
aktivní, displej se rozsvítí a druhá řádka displeje vám poradí, jak vypnout
funkci zamknutí kláves.
-
Když stisknete tlačítko OK a funkce zamknutí kláves je aktivní, druhá
řádka na displeji vám poradí, jaký musíte udělat druhý krok, abyste
tlačítka odemkli.
Záruka a podpora
Potřebujete-li další informace či podporu, navštivte web
www.philips.com/support nebo si prostudujte záruční list s mezinárodní
platností.
< >
< >
< >
< >
>
<
>
< >
<
< >
>
< >
< >
< >
<
>
<
< > >
<
<
Sensitivity
Eco Max
Cry Alert
Feed Timer
Temperature
Set Clock
Set Language >
Press OK = < =
Timer Alert
Turn On?
Turn O?
Vibrate On?
Vibrate O?
xx:yy Start?
Set Timer
Timer Repeat
Temp Range
Temp Alert
Temp Scale
Show/Hide
Set The Time
English
...
Русский
<
<
<
<
<
<
<
<
<
>
>
>
>
>
>
>
>
>
>
>
>
Minimum XXºC
!No alert if…
Hr 00:00
Hr 00:00
Repeat ON
Repeat OFF
Sound only
Sound & Vibe
Vibrate only
Sound only
Sound & Vibe
Vibrate only
Screen only
O
>
< >
<
<
>
< >
>
<
Play 1?
Play 2?
...
Play 5?
Play All?
Celsius
Fahrenheit
Hide Clock
Show Clock
Maximum YYºC
00:30 Min
00:00 Min
< >
< >
Nightlight
Lullaby
Turn On?
Turn O?<
>
SCD720
/
SCD721
/
SCD723
/
SCD725
(
EN
)
> =
31
Čeština
Page is loading ...
Page is loading ...
Page is loading ...
Page is loading ...
Page is loading ...
Page is loading ...
Page is loading ...
Page is loading ...
Page is loading ...
Page is loading ...
Page is loading ...
Page is loading ...

Reklamationsret og support
Hvis du har brug for hjælp eller support, bedes du besøge
www.philips.com/support eller læse i folderen om international garanti.
< >
< >
< >
< >
>
<
>
< >
<
< >
>
< >
< >
< >
<
>
<
< > >
<
<
Sensitivity
Eco Max
Cry Alert
Feed Timer
Temperature
Set Clock
Set Language >
Press OK = < =
Timer Alert
Turn On?
Turn O?
Vibrate On?
Vibrate O?
xx:yy Start?
Set Timer
Timer Repeat
Temp Range
Temp Alert
Temp Scale
Show/Hide
Set The Time
English
...
Русский
<
<
<
<
<
<
<
<
<
>
>
>
>
>
>
>
>
>
>
>
>
Minimum XXºC
!No alert if…
Hr 00:00
Hr 00:00
Repeat ON
Repeat OFF
Sound only
Sound & Vibe
Vibrate only
Sound only
Sound & Vibe
Vibrate only
Screen only
O
>
< >
<
<
>
< >
>
<
Play 1?
Play 2?
...
Play 5?
Play All?
Celsius
Fahrenheit
Hide Clock
Show Clock
Maximum YYºC
00:30 Min
00:00 Min
< >
< >
Nightlight
Lullaby
Turn On?
Turn O?<
>
SCD720
/
SCD721
/
SCD723
/
SCD725
(
EN
)
> =
44
Dansk
Page is loading ...
Page is loading ...
Page is loading ...
Page is loading ...
Page is loading ...
Page is loading ...
Page is loading ...
Page is loading ...
Page is loading ...
Page is loading ...
Page is loading ...
Page is loading ...
Page is loading ...
Page is loading ...
Page is loading ...
Page is loading ...
Page is loading ...
Page is loading ...
Page is loading ...
Page is loading ...
Page is loading ...
Page is loading ...
Page is loading ...
Page is loading ...
Page is loading ...
Page is loading ...

< >
< >
< >
< >
>
<
>
< >
<
< >
>
< >
< >
< >
<
>
<
< > >
<
<
Sensitivity
Eco Max
Cry Alert
Feed Timer
Temperature
Set Clock
Set Language >
Press OK = < =
Timer Alert
Turn On?
Turn O?
Vibrate On?
Vibrate O?
xx:yy Start?
Set Timer
Timer Repeat
Temp Range
Temp Alert
Temp Scale
Show/Hide
Set The Time
English
...
Русский
<
<
<
<
<
<
<
<
<
>
>
>
>
>
>
>
>
>
>
>
>
Minimum XXºC
!No alert if…
Hr 00:00
Hr 00:00
Repeat ON
Repeat OFF
Sound only
Sound & Vibe
Vibrate only
Sound only
Sound & Vibe
Vibrate only
Screen only
O
>
< >
<
<
>
< >
>
<
Play 1?
Play 2?
...
Play 5?
Play All?
Celsius
Fahrenheit
Hide Clock
Show Clock
Maximum YYºC
00:30 Min
00:00 Min
< >
< >
Nightlight
Lullaby
Turn On?
Turn O?<
>
SCD720
/
SCD721
/
SCD723
/
SCD725
(
EN
)
> =
71
Eesti
Page is loading ...
Page is loading ...
Page is loading ...
Page is loading ...
Page is loading ...
Page is loading ...
Page is loading ...
Page is loading ...
Page is loading ...
Page is loading ...
Page is loading ...
Page is loading ...
Page is loading ...
Page is loading ...
Page is loading ...
Page is loading ...
Page is loading ...
Page is loading ...
Page is loading ...
Page is loading ...
Page is loading ...
Page is loading ...
Page is loading ...
Page is loading ...
Page is loading ...
Page is loading ...
Page is loading ...
Page is loading ...
Page is loading ...
Page is loading ...
Page is loading ...
Page is loading ...
Page is loading ...
Page is loading ...
Page is loading ...
Page is loading ...
Page is loading ...
Page is loading ...

3 Nakon što pritisnete gumb + na zaslonu će se prikazati poruka "Keys
locked" (Gumbi zaključani).
4 Kako biste deaktivirali zaključavanje tipki, pritisnite OK. Kad se na zaslonu
prikazuje poruka s uputom, pritisnite gumb + u roku od 2 sekunde.
Napomene:
-
Ako pritisnete neki drugi gumb umjesto OK dok je zaključavanje gumba
aktivno, zaslon će se uključiti i u drugom retku na zaslonu bit će opisan
način deaktivacije zaključavanja gumba.
-
Ako pritisnete OK dok je zaključavanje gumba aktivno, u drugom retku na
zaslonu bit će opisan drugi korak nužan za otključavanje gumba.
Jamstvo i podrška
Ako su Vam potrebne informacije ili podrška, molimo posjetite
www.philips.com/support ili pročitajte brošuru o međunarodnom jamstvu.
< >
< >
< >
< >
>
<
>
< >
<
< >
>
< >
< >
< >
<
>
<
< > >
<
<
Sensitivity
Eco Max
Cry Alert
Feed Timer
Temperature
Set Clock
Set Language >
Press OK = < =
Timer Alert
Turn On?
Turn O?
Vibrate On?
Vibrate O?
xx:yy Start?
Set Timer
Timer Repeat
Temp Range
Temp Alert
Temp Scale
Show/Hide
Set The Time
English
...
Русский
<
<
<
<
<
<
<
<
<
>
>
>
>
>
>
>
>
>
>
>
>
Minimum XXºC
!No alert if…
Hr 00:00
Hr 00:00
Repeat ON
Repeat OFF
Sound only
Sound & Vibe
Vibrate only
Sound only
Sound & Vibe
Vibrate only
Screen only
O
>
< >
<
<
>
< >
>
<
Play 1?
Play 2?
...
Play 5?
Play All?
Celsius
Fahrenheit
Hide Clock
Show Clock
Maximum YYºC
00:30 Min
00:00 Min
< >
< >
Nightlight
Lullaby
Turn On?
Turn O?<
>
SCD720
/
SCD721
/
SCD723
/
SCD725
(
EN
)
> =
110
Hrvatski
Page is loading ...
Page is loading ...
Page is loading ...
Page is loading ...
Page is loading ...
Page is loading ...
Page is loading ...
Page is loading ...
Page is loading ...
Page is loading ...
Page is loading ...
Page is loading ...
Page is loading ...
Page is loading ...
Page is loading ...
Page is loading ...
Page is loading ...
Page is loading ...
Page is loading ...
Page is loading ...
Page is loading ...
Page is loading ...
Page is loading ...
Page is loading ...
Page is loading ...

3 Pēc tam, kad esat nospiedis pogu+, displejā tiek parādīts ziņojums “Keys
locked” (Taustiņi bloķēti).
4 Lai deaktivizētu taustiņu bloķēšanu, nospiediet pogu OK (Labi). Kad
displejā ir redzams norādījumu ziņojums, 2sekunžu laikā nospiediet
pogu+.
Piezīmes.
-
Nospiežot citu pogu, kas nav OK (Labi), kamēr taustiņi ir bloķēti, iedegas
displejs un displeja otrajā rindiņā tiek norādīts, kā deaktivizēt taustiņu
bloķēšanu.
-
Nospiežot pogu OK (Labi), kamēr taustiņi ir bloķēti, displeja otrajā rindiņā
tiek norādīts, kāda otrā darbība jāveic, lai atbloķētu pogas.
Garantija un atbalsts
Ja nepieciešama informācija vai atbalsts, lūdzu, apmeklējiet vietni
www.philips.com/support vai lasiet starptautiskās garantijas bukletu.
< >
< >
< >
< >
>
<
>
< >
<
< >
>
< >
< >
< >
<
>
<
< > >
<
<
Sensitivity
Eco Max
Cry Alert
Feed Timer
Temperature
Set Clock
Set Language >
Press OK = < =
Timer Alert
Turn On?
Turn O?
Vibrate On?
Vibrate O?
xx:yy Start?
Set Timer
Timer Repeat
Temp Range
Temp Alert
Temp Scale
Show/Hide
Set The Time
English
...
Русский
<
<
<
<
<
<
<
<
<
>
>
>
>
>
>
>
>
>
>
>
>
Minimum XXºC
!No alert if…
Hr 00:00
Hr 00:00
Repeat ON
Repeat OFF
Sound only
Sound & Vibe
Vibrate only
Sound only
Sound & Vibe
Vibrate only
Screen only
O
>
< >
<
<
>
< >
>
<
Play 1?
Play 2?
...
Play 5?
Play All?
Celsius
Fahrenheit
Hide Clock
Show Clock
Maximum YYºC
00:30 Min
00:00 Min
< >
< >
Nightlight
Lullaby
Turn On?
Turn O?<
>
SCD720
/
SCD721
/
SCD723
/
SCD725
(
EN
)
> =
136
Latviešu
Page is loading ...
Page is loading ...
Page is loading ...
Page is loading ...
Page is loading ...
Page is loading ...
Page is loading ...
Page is loading ...
Page is loading ...
Page is loading ...
Page is loading ...
Page is loading ...

3 Paspaudus + mygtuką, ekrane bus rodomas pranešimas „Keys locked“
(Mygtukai užrakinti).
4 Norėdami išjungti užraktą paspauskite OK (Gerai). Kai ekrane parodomas
instrukcijos pranešimas, per 2 sekundes paspauskite mygtuką „+“.
Pastabos.
-
Jei paspausite ne OK (gerai) mygtuką esant įjungtam užrakto režimui,
įsijungs ekranas ir antroje eilutėje bus parašyta, kaip išjungti užraktą.
-
Jei paspausite OK (gerai) mygtuką esant įjungtam užrakto režimui, antroje
eilutėje bus parašyta, kokį kitą veiksmą reikia atlikti norint atrakinti
mygtukus.
Garantija ir pagalba
Jei reikia informacijos ar pagalbos, apsilankykite www.philips.com/support
arba perskaitykite tarptautinės garantijos lankstinuką.
< >
< >
< >
< >
>
<
>
< >
<
< >
>
< >
< >
< >
<
>
<
< > >
<
<
Sensitivity
Eco Max
Cry Alert
Feed Timer
Temperature
Set Clock
Set Language >
Press OK = < =
Timer Alert
Turn On?
Turn O?
Vibrate On?
Vibrate O?
xx:yy Start?
Set Timer
Timer Repeat
Temp Range
Temp Alert
Temp Scale
Show/Hide
Set The Time
English
...
Русский
<
<
<
<
<
<
<
<
<
>
>
>
>
>
>
>
>
>
>
>
>
Minimum XXºC
!No alert if…
Hr 00:00
Hr 00:00
Repeat ON
Repeat OFF
Sound only
Sound & Vibe
Vibrate only
Sound only
Sound & Vibe
Vibrate only
Screen only
O
>
< >
<
<
>
< >
>
<
Play 1?
Play 2?
...
Play 5?
Play All?
Celsius
Fahrenheit
Hide Clock
Show Clock
Maximum YYºC
00:30 Min
00:00 Min
< >
< >
Nightlight
Lullaby
Turn On?
Turn O?<
>
SCD720
/
SCD721
/
SCD723
/
SCD725
(
EN
)
> =
149
Lietuviškai
Page is loading ...
Page is loading ...
Page is loading ...
Page is loading ...
Page is loading ...
Page is loading ...
Page is loading ...
Page is loading ...
Page is loading ...
Page is loading ...
Page is loading ...
Page is loading ...
Page is loading ...

< >
< >
< >
< >
>
<
>
< >
<
< >
>
< >
< >
< >
<
>
<
< > >
<
<
Sensitivity
Eco Max
Cry Alert
Feed Timer
Temperature
Set Clock
Set Language >
Press OK = < =
Timer Alert
Turn On?
Turn O?
Vibrate On?
Vibrate O?
xx:yy Start?
Set Timer
Timer Repeat
Temp Range
Temp Alert
Temp Scale
Show/Hide
Set The Time
English
...
Русский
<
<
<
<
<
<
<
<
<
>
>
>
>
>
>
>
>
>
>
>
>
Minimum XXºC
!No alert if…
Hr 00:00
Hr 00:00
Repeat ON
Repeat OFF
Sound only
Sound & Vibe
Vibrate only
Sound only
Sound & Vibe
Vibrate only
Screen only
O
>
< >
<
<
>
< >
>
<
Play 1?
Play 2?
...
Play 5?
Play All?
Celsius
Fahrenheit
Hide Clock
Show Clock
Maximum YYºC
00:30 Min
00:00 Min
< >
< >
Nightlight
Lullaby
Turn On?
Turn O?<
>
SCD720
/
SCD721
/
SCD723
/
SCD725
(
EN
)
> =
163
Magyar
Page is loading ...
Page is loading ...
Page is loading ...
Page is loading ...
Page is loading ...
Page is loading ...
Page is loading ...
Page is loading ...
Page is loading ...
Page is loading ...
Page is loading ...
Page is loading ...
Page is loading ...
Page is loading ...
Page is loading ...
Page is loading ...
Page is loading ...
Page is loading ...
Page is loading ...
Page is loading ...
Page is loading ...
Page is loading ...
Page is loading ...
Page is loading ...
Page is loading ...
Page is loading ...
Page is loading ...
Page is loading ...
Page is loading ...
Page is loading ...
Page is loading ...
Page is loading ...
Page is loading ...
Page is loading ...
Page is loading ...
Page is loading ...
Page is loading ...
Page is loading ...
Page is loading ...
Page is loading ...
Page is loading ...
Page is loading ...
Page is loading ...
Page is loading ...
Page is loading ...
Page is loading ...
Page is loading ...
Page is loading ...
Page is loading ...
Page is loading ...
Page is loading ...
Page is loading ...
Page is loading ...
Page is loading ...
Page is loading ...
Page is loading ...
Page is loading ...
Page is loading ...
Page is loading ...
Page is loading ...
Page is loading ...
Page is loading ...
Page is loading ...
Page is loading ...
Page is loading ...
Page is loading ...
Page is loading ...
Page is loading ...
Page is loading ...
Page is loading ...
Page is loading ...
Page is loading ...
Page is loading ...
Page is loading ...
Page is loading ...
Page is loading ...
Page is loading ...
Page is loading ...
Page is loading ...
Page is loading ...
Page is loading ...
Page is loading ...
Page is loading ...
Page is loading ...
Page is loading ...
Page is loading ...
Page is loading ...
Page is loading ...
Page is loading ...
Page is loading ...
Page is loading ...
Page is loading ...
Page is loading ...
Page is loading ...
Page is loading ...
Page is loading ...
Page is loading ...
Page is loading ...
Page is loading ...
Page is loading ...
Page is loading ...
Page is loading ...
Page is loading ...
Page is loading ...
Page is loading ...
Page is loading ...
Page is loading ...
Page is loading ...
Page is loading ...
Page is loading ...
Page is loading ...
Page is loading ...
Page is loading ...
Page is loading ...
Page is loading ...
Page is loading ...
Page is loading ...
Page is loading ...
Page is loading ...
Page is loading ...
Page is loading ...
Page is loading ...
Page is loading ...
Page is loading ...
Page is loading ...
Page is loading ...
Page is loading ...
Page is loading ...
Page is loading ...
Page is loading ...
Page is loading ...
Page is loading ...
Page is loading ...
Page is loading ...
Page is loading ...
Page is loading ...
Page is loading ...
Page is loading ...
Page is loading ...
Page is loading ...
Page is loading ...
Page is loading ...
Page is loading ...
Page is loading ...
Page is loading ...
Page is loading ...
Page is loading ...
Page is loading ...
Page is loading ...
Page is loading ...
Page is loading ...
Page is loading ...
Page is loading ...
Page is loading ...
Page is loading ...
Page is loading ...
Page is loading ...
Page is loading ...
Page is loading ...
Page is loading ...
Page is loading ...
Page is loading ...
Page is loading ...
Page is loading ...
Page is loading ...
Page is loading ...
Page is loading ...
Page is loading ...
Page is loading ...
Page is loading ...
Page is loading ...
Page is loading ...
Page is loading ...
Page is loading ...
Page is loading ...
Page is loading ...
Page is loading ...
Page is loading ...
Page is loading ...
Page is loading ...
Page is loading ...
Page is loading ...
Page is loading ...
Page is loading ...
Page is loading ...
Page is loading ...
Page is loading ...
Page is loading ...
Page is loading ...
Page is loading ...
Page is loading ...
Page is loading ...
Page is loading ...
Page is loading ...
Page is loading ...
Page is loading ...
Page is loading ...
Page is loading ...
Page is loading ...
Page is loading ...
Page is loading ...
Page is loading ...
Page is loading ...
Page is loading ...
Page is loading ...
Page is loading ...
Page is loading ...
Page is loading ...
Page is loading ...
Page is loading ...
Page is loading ...
Page is loading ...
Page is loading ...
Page is loading ...
Page is loading ...
Page is loading ...
Page is loading ...
Page is loading ...
Page is loading ...
Page is loading ...
Page is loading ...
Page is loading ...
Page is loading ...
Page is loading ...
Page is loading ...
Page is loading ...
Page is loading ...
Page is loading ...
-
 1
1
-
 2
2
-
 3
3
-
 4
4
-
 5
5
-
 6
6
-
 7
7
-
 8
8
-
 9
9
-
 10
10
-
 11
11
-
 12
12
-
 13
13
-
 14
14
-
 15
15
-
 16
16
-
 17
17
-
 18
18
-
 19
19
-
 20
20
-
 21
21
-
 22
22
-
 23
23
-
 24
24
-
 25
25
-
 26
26
-
 27
27
-
 28
28
-
 29
29
-
 30
30
-
 31
31
-
 32
32
-
 33
33
-
 34
34
-
 35
35
-
 36
36
-
 37
37
-
 38
38
-
 39
39
-
 40
40
-
 41
41
-
 42
42
-
 43
43
-
 44
44
-
 45
45
-
 46
46
-
 47
47
-
 48
48
-
 49
49
-
 50
50
-
 51
51
-
 52
52
-
 53
53
-
 54
54
-
 55
55
-
 56
56
-
 57
57
-
 58
58
-
 59
59
-
 60
60
-
 61
61
-
 62
62
-
 63
63
-
 64
64
-
 65
65
-
 66
66
-
 67
67
-
 68
68
-
 69
69
-
 70
70
-
 71
71
-
 72
72
-
 73
73
-
 74
74
-
 75
75
-
 76
76
-
 77
77
-
 78
78
-
 79
79
-
 80
80
-
 81
81
-
 82
82
-
 83
83
-
 84
84
-
 85
85
-
 86
86
-
 87
87
-
 88
88
-
 89
89
-
 90
90
-
 91
91
-
 92
92
-
 93
93
-
 94
94
-
 95
95
-
 96
96
-
 97
97
-
 98
98
-
 99
99
-
 100
100
-
 101
101
-
 102
102
-
 103
103
-
 104
104
-
 105
105
-
 106
106
-
 107
107
-
 108
108
-
 109
109
-
 110
110
-
 111
111
-
 112
112
-
 113
113
-
 114
114
-
 115
115
-
 116
116
-
 117
117
-
 118
118
-
 119
119
-
 120
120
-
 121
121
-
 122
122
-
 123
123
-
 124
124
-
 125
125
-
 126
126
-
 127
127
-
 128
128
-
 129
129
-
 130
130
-
 131
131
-
 132
132
-
 133
133
-
 134
134
-
 135
135
-
 136
136
-
 137
137
-
 138
138
-
 139
139
-
 140
140
-
 141
141
-
 142
142
-
 143
143
-
 144
144
-
 145
145
-
 146
146
-
 147
147
-
 148
148
-
 149
149
-
 150
150
-
 151
151
-
 152
152
-
 153
153
-
 154
154
-
 155
155
-
 156
156
-
 157
157
-
 158
158
-
 159
159
-
 160
160
-
 161
161
-
 162
162
-
 163
163
-
 164
164
-
 165
165
-
 166
166
-
 167
167
-
 168
168
-
 169
169
-
 170
170
-
 171
171
-
 172
172
-
 173
173
-
 174
174
-
 175
175
-
 176
176
-
 177
177
-
 178
178
-
 179
179
-
 180
180
-
 181
181
-
 182
182
-
 183
183
-
 184
184
-
 185
185
-
 186
186
-
 187
187
-
 188
188
-
 189
189
-
 190
190
-
 191
191
-
 192
192
-
 193
193
-
 194
194
-
 195
195
-
 196
196
-
 197
197
-
 198
198
-
 199
199
-
 200
200
-
 201
201
-
 202
202
-
 203
203
-
 204
204
-
 205
205
-
 206
206
-
 207
207
-
 208
208
-
 209
209
-
 210
210
-
 211
211
-
 212
212
-
 213
213
-
 214
214
-
 215
215
-
 216
216
-
 217
217
-
 218
218
-
 219
219
-
 220
220
-
 221
221
-
 222
222
-
 223
223
-
 224
224
-
 225
225
-
 226
226
-
 227
227
-
 228
228
-
 229
229
-
 230
230
-
 231
231
-
 232
232
-
 233
233
-
 234
234
-
 235
235
-
 236
236
-
 237
237
-
 238
238
-
 239
239
-
 240
240
-
 241
241
-
 242
242
-
 243
243
-
 244
244
-
 245
245
-
 246
246
-
 247
247
-
 248
248
-
 249
249
-
 250
250
-
 251
251
-
 252
252
-
 253
253
-
 254
254
-
 255
255
-
 256
256
-
 257
257
-
 258
258
-
 259
259
-
 260
260
-
 261
261
-
 262
262
-
 263
263
-
 264
264
-
 265
265
-
 266
266
-
 267
267
-
 268
268
-
 269
269
-
 270
270
-
 271
271
-
 272
272
-
 273
273
-
 274
274
-
 275
275
-
 276
276
-
 277
277
-
 278
278
-
 279
279
-
 280
280
-
 281
281
-
 282
282
-
 283
283
-
 284
284
-
 285
285
-
 286
286
-
 287
287
-
 288
288
-
 289
289
-
 290
290
-
 291
291
-
 292
292
-
 293
293
-
 294
294
-
 295
295
-
 296
296
-
 297
297
-
 298
298
-
 299
299
-
 300
300
-
 301
301
-
 302
302
-
 303
303
-
 304
304
-
 305
305
-
 306
306
-
 307
307
-
 308
308
-
 309
309
-
 310
310
-
 311
311
-
 312
312
-
 313
313
-
 314
314
-
 315
315
-
 316
316
-
 317
317
-
 318
318
-
 319
319
-
 320
320
-
 321
321
-
 322
322
-
 323
323
-
 324
324
-
 325
325
-
 326
326
-
 327
327
-
 328
328
-
 329
329
-
 330
330
-
 331
331
-
 332
332
-
 333
333
-
 334
334
-
 335
335
-
 336
336
-
 337
337
-
 338
338
-
 339
339
-
 340
340
-
 341
341
-
 342
342
-
 343
343
-
 344
344
-
 345
345
-
 346
346
-
 347
347
-
 348
348
-
 349
349
-
 350
350
-
 351
351
-
 352
352
-
 353
353
-
 354
354
-
 355
355
-
 356
356
-
 357
357
-
 358
358
-
 359
359
-
 360
360
-
 361
361
-
 362
362
-
 363
363
-
 364
364
-
 365
365
-
 366
366
-
 367
367
-
 368
368
-
 369
369
-
 370
370
-
 371
371
-
 372
372
-
 373
373
-
 374
374
-
 375
375
-
 376
376
-
 377
377
-
 378
378
-
 379
379
-
 380
380
-
 381
381
-
 382
382
-
 383
383
-
 384
384
-
 385
385
-
 386
386
-
 387
387
-
 388
388


mothercare Philips Avent baby monitor 721_0711918 User manual
- Category
- Babyphones
- Type
- User manual
Ask a question and I''ll find the answer in the document
Finding information in a document is now easier with AI
in other languages
- italiano: mothercare Philips Avent baby monitor 721_0711918 Manuale utente
- français: mothercare Philips Avent baby monitor 721_0711918 Manuel utilisateur
- español: mothercare Philips Avent baby monitor 721_0711918 Manual de usuario
- Deutsch: mothercare Philips Avent baby monitor 721_0711918 Benutzerhandbuch
- русский: mothercare Philips Avent baby monitor 721_0711918 Руководство пользователя
- Nederlands: mothercare Philips Avent baby monitor 721_0711918 Handleiding
- português: mothercare Philips Avent baby monitor 721_0711918 Manual do usuário
- slovenčina: mothercare Philips Avent baby monitor 721_0711918 Používateľská príručka
- dansk: mothercare Philips Avent baby monitor 721_0711918 Brugermanual
- polski: mothercare Philips Avent baby monitor 721_0711918 Instrukcja obsługi
- čeština: mothercare Philips Avent baby monitor 721_0711918 Uživatelský manuál
- eesti: mothercare Philips Avent baby monitor 721_0711918 Kasutusjuhend
- svenska: mothercare Philips Avent baby monitor 721_0711918 Användarmanual
- suomi: mothercare Philips Avent baby monitor 721_0711918 Ohjekirja
- română: mothercare Philips Avent baby monitor 721_0711918 Manual de utilizare
Other documents
-
Philips SCD580/00 User manual
-
Philips SCD560/01 User manual
-
-
Avent SCD520/00 User manual
-
Avent SCD525/00 User manual
-
Avent SCD530/00 User manual
-
 Philips AVENT SCD535/00 User manual
-
 Philips AVENT BABYPHONE DECT 570/00 Owner's manual
-
 Avent SCD565/00 User manual
-
 Philips AVENT SCD570/10 User manual


