ENGLISH
20
USING THE MONITOR SET
Customizing PC display options
Customizeoptionsofeachimagemodeforthe
bestimagequality.
Thisfunctionworksinthefollowingmode:
RGB[PC]mode.
1
PressMENUtoaccessthemainmenus.
2
PresstheNavigationbuttonstoscrollto
PICTUREandpressOK.
3
PresstheNavigationbuttonstoscrollto
ScreenandpressOK.
4
Selectandadjustfollowingoptions,andthen
pressOK.
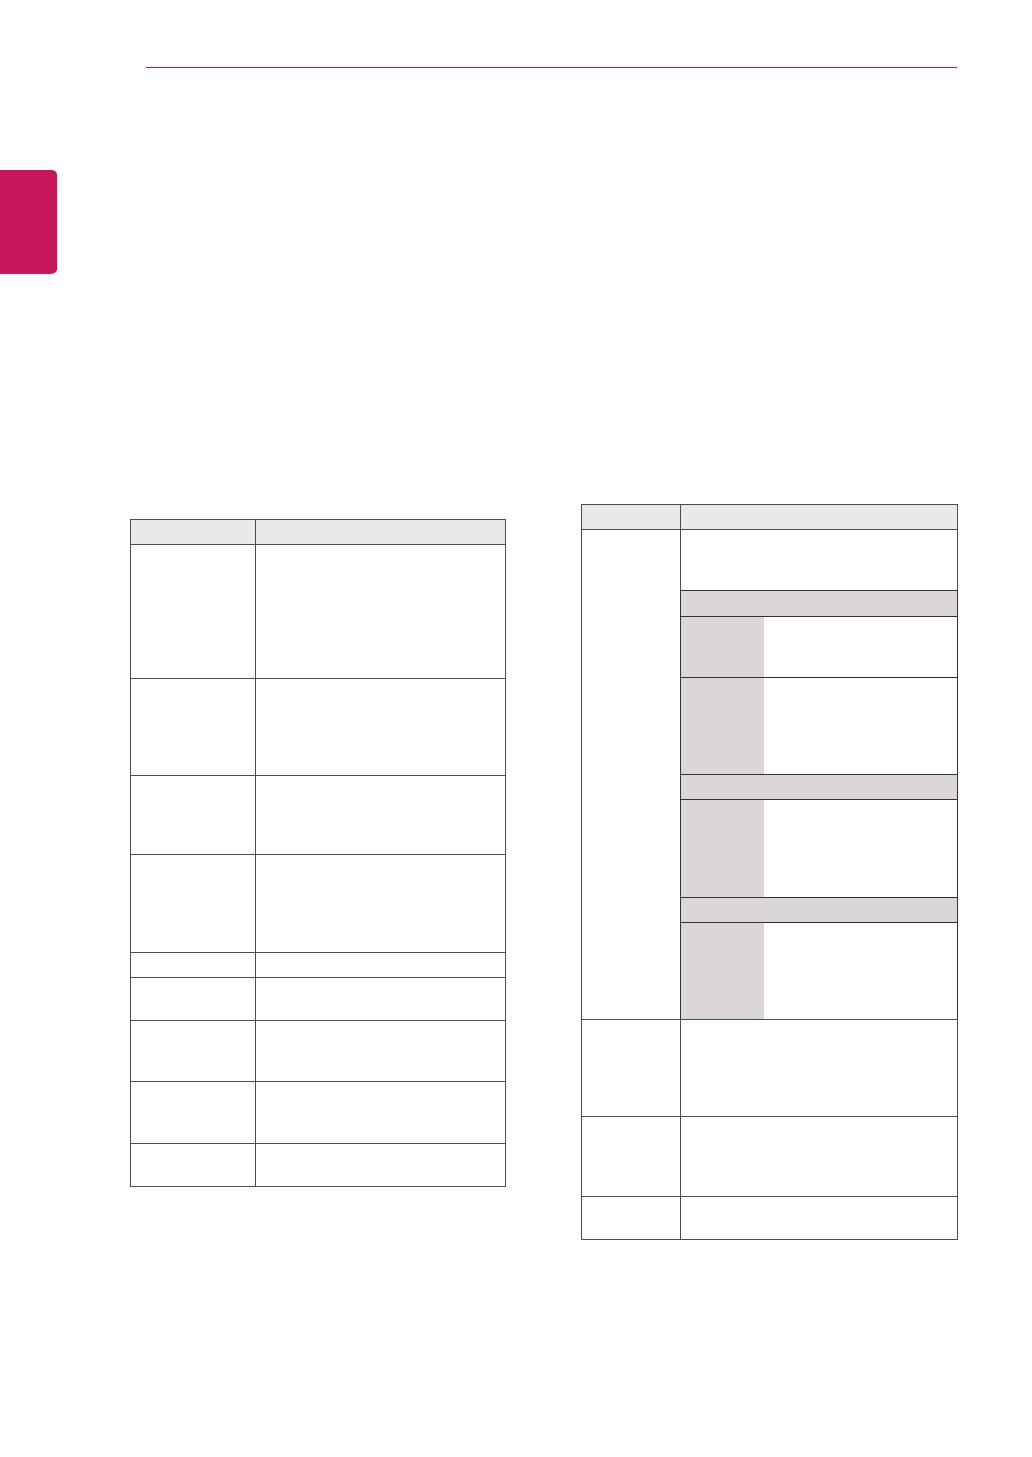
Option Description
Resolution MatchtheresolutionofRGBmode.
(ResolutionmenuisEnabledonlyfor
thefollowingresolutionwith60Hz.)
Vertical resolution : 768
M1950D 1024x768
1280x768
1360 x 768(Default)
M2250D
M2350D
M2450D
M2550D
DM2350D
1024 x 768(Default)
1280x768
1360x768
Vertical resolution : 1050
M2250D
M2350D
M2450D
M2550D
DM2350D
1400x1050
1680 x 1050(Default)
Vertical resolution : 900
M2250D
M2350D
M2450D
M2550D
DM2350D
1280x960
1440x900
1600 x 900(Default)
Auto
Configure
SetstoadjustthescreenPosition,
SizeandPhaseautomatically.The
displayedimagemaybeunstablefor
afewsecondswhiletheconfiguration
isinprogress.
Position/
Size/Phase
Adjuststheoptionswhenthe
imageisnotclear,especiallywhen
charactersareshaky,aftertheauto
configuration.
Reset Restorestheoptionstothedefault
setting.
5
Whenyouarefinished,pressEXIT.
Whenyoureturntothepreviousmenu,press
BACK.
Customizing image options
Customizebasicandadvancedoptionsofeach
imagemodeforthebestscreenperformance.
1
PressMENUtoaccessthemainmenus.
2
PresstheNavigationbuttonstoscrollto
PICTUREandpressOK.
3
PresstheNavigationbuttonstoscrollto
Picture ModeandpressOK.
4
PresstheNavigationbuttonstoscrolltoan
imagemodeyouwantandpressOK.
5
Selectandadjustfollowingoptions,andthen
pressOK.
Option Description
Backlight Adjuststhebrightnessofthe
screenbycontrollingtheLCD
backlight.Ifyoudecreasethe
brightnesslevel,thescreen
becomesdarkerandthepower
consumptionwillbereduced
withoutanyvideosignalloss.
Contrast Increasesordecreasesthe
gradientofthevideosignal.
YoumayuseContrastwhen
thebrightpartoftheimageis
saturated.
Brightness Adjuststhebaselevelofthe
signalintheimage.Youmayuse
Brightnesswhenthedarkpartof
theimageissaturated.
Sharpness Adjuststhelevelofcrispnessin
theedgesbetweenthelightand
darkareasofthepicture.The
lowerthelevel,thesofterthe
image.
Colour AdjustsintensityofallColours.
Tint AdjuststhebalancebetweenRed
andGreenlevels.
Color
Temperature
Settowarmtoenhancehotter
colourssuchasred,orsettocool
tomakepicturebluish.
Advanced
Control
Customizestheadvanced
options.Seemoreinformation
aboutadvancedoptionsSeep.62.
Picture
Reset
Restorestheoptionstothe
defaultsetting.
6
Whenyouarefinished,pressEXIT.
Whenyoureturntothepreviousmenu,press
BACK.


