Page is loading ...

GREEN BOTTLE
IMPORT LARGER
INSTRUCTIONS
1. DAY 1 IN ADVANCE
For beginner instructions on how to home brew,
please check out our guide by following this
This brew needs to be around 15c by the time you add the yeast. This is
often lower than some peoples tap water, so to overcome this, refrigerate
as much clean water as you can 1 day in advance. Alternatively, ice cubes
can be frozen or purchased from a gas station for �4 for 5kg. This is not
100% essential, but is recommended for the best possible beer since were
using a true lager yeast here.
2. CLEANING AND SANITISING
Clean and sanitise all brewing equipment that will come into contact with
your beer (including fermenter, spoons, can openers, thermometers, air
locks, etc.) with a quality no-rinse sanitiser, such as StellarSan.
KegLand Distribution Pty Ltd© - Green Bottle Import Larger – Extract kit
.
.
.
.
.
.
.
.
.
.
.
.
.
.
.
.
.
.
.
.
.
.
.
.
.
.
.
.
.
.
.
.
.
.
.
.
.
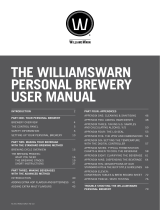
Brew Description:
A highly-attenuated pale lager without
strong flavors, typically well-balanced
and highly carbonated. Served cold, it is
refreshing and thirst-quenching. Pale
straw to gold color. White, frothy head.
Commercial examples include:
Heineken, Grolsch, Stellar Artois,
Bavaria, Lowenbrau and any other
European imported beer that comes in
a green bottle.
1 x Muntons Connoisseurs Continental Lager
(1.8kg) Ingredient Can
1 x Muntons Brew Enhancer Dry Malt Pack (1kg)
2 x SafLager S-189 Genuine Lager Yeast (23g)
WHAT IS IN THE KIT? BREW SPECIFICATION
19 liters
- 18
1.043-1.047
1.012
4.3-4.7% (+0.5%
if bottling with sugar)
7 EBC
Volume
IBU’s
OG
FG
ABV
Colour
C
U
T
T
H
I
S
O
U
T
F
O
R
Y
O
U
R
T
A
P
H
A
N
D
L
E
IMPORT LARGER
IMPORT LARGER
Green
BOTTLE
IMPORT LARGER
IMPORT LARGER
Green
BOTTLE

3. PREPARE INGREDIENT CANS
APPEARANCE
TASTE
OVERALL
AROMA
EMAIL US 24/7
BREW DAY QUESTION?
Our friendly staff are ready to help!
Fill your kitchen sink with water as hot as your tap water goes
and put your two cans of malt extract in to soften the syrup
contents inside to allow for easier pouring. Allow +10-minutes for
contents to soften.
4. ADDING EVERYTHING TO THE FERMENTER
Take your ingredient cans out of the hot water in the sink and open them
with your sanitized can opener. Make sure your can top is sanitized too.
Pour the syrupy contents of both cans into the fermenter. A sanitised
silicone spatula and some boiled water can be used to dissolve and get
the rest of the syrup out. Mix up the contents of the fermenter well with
your sanitised brewing spoon (avoid wood because it harbors bacteria).
Top up your fermenter to the 19-liter mark on your fermenter with cold
water. You want the beer to be below 15˚c by the time you get to 20-liters,
so if its too hot as you’re approaching 20L, you might want to add some
ice cubes or the chilled water you prepared a day in advance to get you to
‘lager’ temps.
6. FERMENTING YOUR BEER
This step is the most important to get great tasting finished lager. Lager yeasts require colder than normal
fermentation temperatures. Place the fermenter in a part of the house that will ensure the fermenting beer
stays between 10-15˚c (any higher and you will start to get undesirable off-flavours; any lower and the yeast
may go to sleep). In winter, this can be maintained by tucking the fermenter away in the cold garage. But,
absolute best way to ensure you get great lagers is to get a temperature-controlled fridge.
This can be done cheaply with a small cheap/free fridge off Gumtree and an inexpensive temperature
controller. You can make this even better by also adding a heat belt so that you can heat it up if it gets too
cold too. You just plug the fridge into the controller and put the fermenter in, dial in the temperature and
forget about it! This setup will get you the best tasting beer. Once your beer appears to be coming to the end
of fermentation (bubbling slows down after to only a few bubbles per minute), you can take it out of the cold
and let it come back up to room temperature for a ‘diacetyl rest’ (letting the yeast clean up after themselves
for better tasting beer).
7. KEG/BOTTLE YOUR FINISH BEER
A true lager will take approximately 3-4 weeks to fully ferment. Make sure you have a stable
hydrometer reading consecutively over 3 days to be sure its done. Once your beer has finished
fermenting, bottle or keg as usual. Please refer to our detailed beginners guide for tips on how to
do this. These sorts of beers can be enjoyed as soon as theyre carbonated, but they will really
benefit from an extended period of cold aging, called ‘lagering’ (meaning ‘to store’). During this
time, the yeast will settle out, creating a very clear beer and the flavours will meld together better
and smooth out.
5. PITCHING THE YEAST
Open your sachets of yeast with a sanitised pair of scissors.
Sprinkle the contents of the sachets evenly over the beer. Put the
sanitised lid on your full fermenter and wait 5-minutes for the
yeast to rehydrate, then cover the airlock hole with your sanitised
thumb and rock the fermenter back and forth vigorously to aerate
it so the yeast has plenty of oxygen to work well. Put the air lock
into your fermenter filled with a bit of sanitiser.
KegLand Distribution Pty Ltd© - Green Bottle Import Larger – Extract kit
RATE
ME!
/