RC64RB

Direct RC64RB User manual

  • Hello! I am an AI chatbot trained to assist you with the Direct RC64RB User manual. I’ve already reviewed the document and can help you find the information you need or explain it in simple terms. Just ask your questions, and providing more details will help me assist you more effectively!
DIRECTV
®
Universal Remote Control
User Guide
2
CONTENTS
Introduction . . . . . . . . . . . . . . . . . . . . . . . . . . . . . . . . . . . . . . . . . . . . 3
Features and Functions . . . . . . . . . . . . . . . . . . . . . . . . . . . . . . . . . . . 4
Key Charts. . . . . . . . . . . . . . . . . . . . . . . . . . . . . . . . . . . . . . . . . 4
Installing Batteries . . . . . . . . . . . . . . . . . . . . . . . . . . . . . . . . . . . . . . . 7
Controlling Your DIRECTV
®
Receiver. . . . . . . . . . . . . . . . . . . . . . . . . 7
Setting Up Your DIRECTV Remote . . . . . . . . . . . . . . . . . . . . . . 7
Onscreen Remote Setup . . . . . . . . . . . . . . . . . . . . . . . . . . . . . 8
Controlling Your TV . . . . . . . . . . . . . . . . . . . . . . . . . . . . . . . . . . . . . . . 8
Setting Up the TV Input Key . . . . . . . . . . . . . . . . . . . . . . . . . . . . . . . . 9
Deactivating the TV Input Select Key . . . . . . . . . . . . . . . . . . . 9
Controlling Other Components . . . . . . . . . . . . . . . . . . . . . . . . . . . . . . 9
Searching for TV, AV1 or AV2 Codes . . . . . . . . . . . . . . . . . . . . . . . . . 10
Verifying the Codes . . . . . . . . . . . . . . . . . . . . . . . . . . . . . . . . 11
Changing Volume Lock . . . . . . . . . . . . . . . . . . . . . . . . . . . . . . . . . . . 11
Locking Volume to AV1, AV2 or TV . . . . . . . . . . . . . . . . . . . . . 11
Activating and Deactivating the RF Transmitter . . . . . . . . . . . . . . . 12
Activating the RF Transmitter. . . . . . . . . . . . . . . . . . . . . . . . . 12
Deactivating the RF Transmitter . . . . . . . . . . . . . . . . . . . . . . 12
Restoring Factory Default Settings . . . . . . . . . . . . . . . . . . . . . . . . . 13
Troubleshooting . . . . . . . . . . . . . . . . . . . . . . . . . . . . . . . . . . . . . . . . 13
DIRECTV Setup Codes . . . . . . . . . . . . . . . . . . . . . . . . . . . . . . . . . . . . 14
Setup Codes for DIRECTV
®
Receivers. . . . . . . . . . . . . . . . . . 14
Setup Codes for DIRECTV HD Receivers. . . . . . . . . . . . . . . . . 14
Setup Codes for DIRECTV
®
DVRs. . . . . . . . . . . . . . . . . . . . . . 15
Setup Codes, Other Devices . . . . . . . . . . . . . . . . . . . . . . . . . . . . . . . 15
Setup Codes for TVs . . . . . . . . . . . . . . . . . . . . . . . . . . . . . . . . 15
Setup Codes for TVs (DLP) . . . . . . . . . . . . . . . . . . . . . . . . . . . 26
Setup Codes for TVs (Plasma) . . . . . . . . . . . . . . . . . . . . . . . . 26
Setup Codes for TV/DVD Combos . . . . . . . . . . . . . . . . . . . . . . 28
Setup Codes for TV/VCR Combos . . . . . . . . . . . . . . . . . . . . . . 29
Setup Codes for VCRs. . . . . . . . . . . . . . . . . . . . . . . . . . . . . . . 31
Setup Codes for PVRs . . . . . . . . . . . . . . . . . . . . . . . . . . . . . . . 41
Setup Codes for DVD Players . . . . . . . . . . . . . . . . . . . . . . . . . 36
Setup Codes for Audio Receivers. . . . . . . . . . . . . . . . . . . . . . 42
Setup Codes for Audio Amplifiers. . . . . . . . . . . . . . . . . . . . . . 45
Repair or Replacement Policy . . . . . . . . . . . . . . . . . . . . . . . . . . . . . 47
Additional Information . . . . . . . . . . . . . . . . . . . . . . . . . . . . . . . . . . . 47
Compliance with FCC Rules and Regulations. . . . . . . . . . . . . . . . . . 47
3
INTRODUCTION
Congratulations! You now have an exclusive DIRECTV
®
Universal Remote Control that will control four
components, including a DIRECTV Receiver, TV, and two
stereo or video components (for example, a DVD, stereo, or
second TV). Moreover, its sophisticated technology allows
you to consolidate the clutter of your original remote
controls into one easy-to-use unit that's packed with
features such as:
Four-position MODE slide switch for easy component
selection
Code library for popular video and stereo components
Code search to help program control of older or dis-
continued components
Memory protection to ensure you will not have to re-
program the remote when the batteries are replaced
Before using your DIRECTV Universal Remote Control, you
may need to program it to operate with your particular
component. Please follow the instructions detailed in this
guide to set up your DIRECTV Universal Remote Control so
you can start enjoying its features.
4
FEATURES AND FUNCTIONS
Key Charts
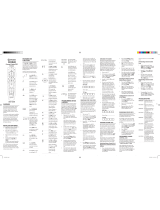
Press this key… To
Slide the MODE switch to the DIRECTV, AV1,
AV2 or TV positions to select the component
you want to control. A green LED under
each switch position indicates the
component being controlled.
Press TV INPUT to select the available inputs
on your TV.
NOTE: Additional setup is required to
activate the TV INPUT key. (See
instructions on page 9.)
Press FORMAT to cycle through the
resolution and screen formats. Each press
of the key cycles to the next available
format and /or resolution. (Not available on
all DIRECTV
®
Receivers.)
Press PWR to turn the selected component
on or off.
Press TV POWER ON/OFF to turn the TV and
DIRECTV Receiver on or off.
(NOTE: These keys are only active after the
remote has been setup for your TV. See
page 8.)
Use these keys to control your DIRECTV
DVR or your VCR, DVD, or CD/DVD player.
On a DIRECTV DVR, enables one-
touch record for any selected program.
On a DIRECTV DVR, jumps back 6
seconds and plays video from that location.
On a DIRECTV DVR, jumps ahead in
a recording.
Use GUIDE to display the DIRECTV
Program Guide.
Press ACTIVE to access special features,
services, and the DIRECTV Information
channel.
5
Press LIST to display your TO DO list of
programs. (Not available on all DIRECTV
®
Receivers.)
Press EXIT to exit menu screens and the
Program Guide and return to live TV.
Press SELECT to choose highlighted items
in menu screens or the Program Guide.
Use the ARROW keys to move around in the
Program Guide and menu screens.
Press BACK to return to the previously
displayed screen.
Press MENU to display the Quick Menu in
DIRECTV mode, or other menu for another
selected device.
Use INFO to display current channel and
program information when watching live
TV or in the Guide.
Press YELLOW in full-screen TV to cycle
through alternate audio tracks
Press BLUE in full-screen TV to display the
Mini-Guide.
Press RED in the Guide to jump 12 hours
back.
Press GREEN in the Guide to jump 12 hours
forward.
Other functions vary–look for onscreen
hints or refer to your DIRECTV
®
Receiver's
user guide. (Not available on all DIRECTV
Receivers.)
Press VOL to raise or lower the sound
volume. The volume key is only active
when the remote is set up for your TV.
Press this key… To
6
While watching TV, press CHANS (or
CHAN
T) to select the next higher (or
lower) channel.
While in the DIRECTV
Program Guide or
menu, press PAGE+ (or PAGE-) to page up
(or down) through available channels in
the Guide.
Press MUTE to turn the sound off or back
on.
Press PREV to return to the last channel
viewed.
Press the number keys to directly enter a
channel number (e.g. 207) while watching
TV or in the Guide.
Press DASH to separate main and sub-
channel numbers.
Press ENTER to activate number entries
quickly.
Use the LIGHT key, located on the right side
of your remote control, to turn backlighting
of all keys on or off.
Press this key… To
7
INSTALLING BATTERIES
1. On the back of the remote control, push down on the
door (as shown), slide the battery cover off, and
remove the used batteries.
2. Obtain two (2) new AA alkaline batteries. Match their
+and - marks to the + and - marks in the battery
case, then insert them.
3. Slide the cover back on until battery door clicks into
place.
CONTROLLING YOUR DIRECTV
®
RECEIVER
The DIRECTV
®
Universal Remote Control comes
programmed to work with most DIRECTV Receivers.
Should the remote control not work with your DIRECTV
Receiver, you will need to set up the remote control by
performing the following steps.
Setting Up Your DIRECTV Remote
1. Locate the DIRECTV Receiver's brand and model
number (on the back or bottom panel) and write it in
the spaces below.
BRAND:
......................................................................
MODEL: ......................................................................
8
2. Locate the 5-digit code for your DIRECTV
®
Receiver.
(See page 14.)
3. Power on the DIRECTV Receiver.
4. Slide the MODE switch to the DIRECTV position.
5. Press and hold the MUTE and SELECT keys until the
green light under the DIRECTV position flashes twice,
then release both keys.
6. Using the number keys, enter the 5-digit code. If
performed correctly, the green light under the
DIRECTV position flashes twice.
7. Aim the remote at your DIRECTV Receiver and press
the PWR key once. The DIRECTV Receiver should
turnoff; if it does not, repeat steps 3 and 4, trying each
code for your brand until you find the correct code.
8. For future reference, write down the working code for
your DIRECTV Receiver in the blocks below:
ONSCREEN REMOTE SETUP
Once your remote is setup to work with your DIRECTV
Receiver, you can set it up for your other equipment using
the steps detailed on the following pages, or you can set it
up onscreen by pressing MENU, then SELECT on Settings,
Setup in the Quick Menu, then selecting Remote from the
left menu.
CONTROLLING YOUR TV
Once you have successfully set up your DIRECTV Remote
to operate your DIRECTV Receiver, you can set it up to
control your TV. We recommend you use the on-screen
steps described on page 8, but you can also use the
manual method below:
1. Turn on the TV.
NOTE
: Please read steps 2-5 completely before proceed-
ing. Highlight or write down the codes and com-
ponent you wish to set up before moving on to
step 2.
2. Locate the 5-digit code for your TV. (See “Setup
Codes for TVs” on page 15.)
3. Slide the MODE switch to the TV position.
4. Press and hold the MUTE and SELECT keys at the same
time until the green light under the TV position
flashes twice, then release both keys.
5. Using the number keys enter the 5-digit code for your
brand of TV. If performed correctly, the green light
under TV flashed twice.
6. Aim the remote at your TV and press the PWR key
once. Your TV should turn off. If it does not turn off,
repeat steps 3 and 4, trying each code for your brand
until you find the correct code.
9
7. Slide the MODE switch to the DIRECTV position. Press
TV POWER. Your TV should turn on.
8. For future reference, write down the working code for
your TV in the blocks below:
SETTING UP THE TV INPUT KEY
Once you have setup the DIRECTV
®
Remote control for
your TV, you can activate the TV INPUT key so you can
change the “source”—the piece of equipment whose signal
is displayed on your TV:
1. Slide the MODE switch to the TV position.
2. Press and hold the MUTE and SELECT keys until the
green light under the TV position flashes twice, then
release both keys.
3. Using the number keys enter 9-6-0. (The green light
under the TV position flashes twice.)
You now can change the input for your TV.
Deactivating the TV Input Select Key
If you want to deactivate the TV INPUT key, repeat steps 1
through 3 from the previous section; the green light will
blink 4 times. Pressing the TV INPUT key will now do
nothing.
CONTROLLING OTHER COMPONENTS
The AV1 and AV2 switch positions can be setup to control a
VCR, DVD, STEREO, second DIRECTV Receiver or second
TV. We recommend you use the onscreen steps
described on page 8, but you can also use the manual
method below:
1. Turn on the component you wish to control (e.g. your
DVD Player).
2. Locate the 5-digit code for your component. (See
“Setup Codes, Other Devices” starting on page 15.)
3. Slide the MODE switch to the AV1 (or AV2) position.
4. Press and hold the MUTE and SELECT keys at the same
time until the green light under AV1 (or AV2) flashes
twice, then release both keys.
5. Using the NUMBER keys, enter the 5-digit code for the
brand of component being set up. If performed
correctly, the green light under the selected position
flashes twice.
6. Aim the remote at your component and press the PWR
key once. The component should turn off; if it does
not, repeat steps 3 and 4, trying each code for your
brand until you find the correct code.
10
7. Repeat steps 1 through 6 to set up a new component
under AV2 (or AV1).
8. For future reference write down the working code for
the component(s) set up under AV1 and AV2 below:
AV1:
COMPONENT: ___________________
AV2:
COMPONENT:___________________
SEARCHING FOR TV, AV1 OR AV2 CODES
If you were unable to find the code for your brand of TV or
component, you can try a code search. This process may
take up to 30 minutes.
1. Turn on the TV or component. Insert a tape or disk if
applicable.
2. Slide the MODE switch to the TV, AV1 or AV2 position,
as desired.
3. Press and hold the MUTE and SELECT keys at the same
time until the green light under the selected switch
position flashes twice, then release both keys.
4. Enter 9-9-1 followed by one of the following four-
digits:
5. Press PWR, or other functions (e.g. PLAY for VCR) you
want to use.
6. Point the remote at the TV or component and press
CHAN
S. Repeatedly press CHANS until the TV or
component turns off or performs the action you
selected in step 5.
NOTE: Every time CHAN
S is pressed the remote
advances to the next code and power is trans-
mitted to the component.
COMPONENT TYPE COMPONENT ID #
Satellite 0
TV 1
VCR/DVD/PVR 2
Stereo 3
11
7. Use the CHANT key to step back a code.
8. When the TV or component turns off turns off or
performs the action you selected in step 5, stop
pressing the CHAN
S key. Then, press and release the
SELECT key.
NOTE: If the light flashes 3 times before the TV or com-
ponent responds, you've cycled through all
codes and the code you need is not available. You
must use the remote that came with your TV or
component.
Verifying the Codes
Once you have set up the DIRECTV
®
Universal Remote
Control using the above steps, use the following
instructions to find out the 5-digit code to which your
component responded:
1. Slide the MODE switch to the appropriate position.
2. Press and hold the MUTE and SELECT keys at the same
time until the green light under the selected switch
position flashes twice, then release both keys.
3. Enter 9-9-0. (The green light under the selected
switch position flashes twice.)
4. To view the first digit in the code, Press and release
then number 1 key. Wait three seconds, and count the
number of times the green light flashes. Write this
number down in the leftmost TV, AV1 or AV2 code
box found on page 10.
5. Repeat step 4 four more times for the remaining
digits; i.e., press number 2 for the second digit, 3 for
the third digit, 4 for the fourth digit and 5 for the final
digit.
CHANGING VOLUME LOCK
Depending on how you set up your remote, the VOL and
MUTE may control the volume only on your TV, regardless
of the position of the MODE switch. This remote can be set
up so that the VOL and MUTE keys work only with the
component selected by the MODE switch. To enable this
feature, perform the following steps:
1. Press and hold the MUTE and SELECT keys until the
green light under the DIRECTV position flashes twice,
then release both keys.
2. Using the number keys, enter 9-9-3. (The green light
will flash twice after the 3.)
3. Press and release the VOL+ key. (The green light
flashes 4 times.)
Now the VOL and MUTE keys will work only for the
component selected by the MODE switch position.
Locking Volume to AV1, AV2 or TV
1. Slide the MODE switch to the AV1, AV2 or TV position to
lock the volume.
2. Press and hold the MUTE and SELECT keys until the
green light under the selected switch flashes twice and
release both keys.
12
3. Using the number keys, enter 9-9-3. (The green light
flashes twice.)
4. Press and release the SELECT key. (The green light
flashes twice.)
NOTE: DIRECTV
®
Receivers don’t have volume control,
so the remote will not allow the user to lock vol-
ume to the DIRECTV mode.
ACTIVATING AND DEACTIVATING THE RF
TRANSMITTER
Your DIRECTV Remote Control features RF (radio
frequency) capability. When you activate the RF feature of
your remote control, you can control your DIRECTV
Receiver from anywhere in your home. You do not need to
be within the line of sight of your receiver to control it.
NOTE: Not all DIRECTV Receivers are RF-capable.
Also, some RF-capable DIRECTV Receivers
include integrated RF antennas and do not
require an external antenna. If your receiver
requires the external RF antenna, before activat-
ing the RF transmitter, locate the RF antenna
included with your remote control and insert it
into the RF remote antenna coaxial connector on
the back of your DIRECTV Receiver.
Activating the RF Transmitter
To activate the RF transmitter on your DIRECTV Remote
Control, perform the following steps:
1. Locate the 12 digit Receiver ID (RID) number of your
DIRECTV Receiver. You can find the RID number on
the back panel of your receiver, or inside the CAM
access door next to the reset button.
2. Write down the last six digits of the RID number.
3. Slide the mode switch to DIRECTV, AV1, or AV2.
4. Press and hold the MUTE and SELECT keys until the
green light under the selected switch flashes twice and
release both keys.
5. Using the number keys, enter 9 6 1. (The green light
flashes twice.)
6. Press and release
CHANS. (The green light flashes
twice.)
7. Using the NUMBER keys, enter the the last six digits of
the RID number. (See step 2 above.)
8. Press and release the SELECT key. (The green light
flashes twice.)
Deactivating the RF Transmitter
To deactivate the RF transmitter on your DIRECTV Remote
Control, perform the following steps:
1. Slide the mode switch to DIRECTV, AV1, or AV2.
2. Press and hold the MUTE and SELECT keys until the
green light under the selected switch flashes twice and
release both keys.
3. Using the number keys, enter 9 6 1. (The green light
flashes twice.)
13
4. Press and release CHANT. (The green light flashes
twice.)
The RF transmitter on your remote control is now
deactivated. To reactivate the RF transmitter, See
Activating the RF Transmitter” above.
RESTORING FACTORY DEFAULT SETTINGS
To reset all the functions of the remote control to the
factory defaults (the original, out-of-the-box settings),
follow these steps:
1. Press and hold the MUTE and SELECT keys at the same
time until the green light flashes twice, then release
both keys.
2. Using the number keys, enter 9-8-1. (The green light
flashes 4 times.)
TROUBLESHOOTING
PROBLEM: Light at the top of the remote blinks when you
press a key, but the component does not respond.
SOLUTION 1: Try replacing the batteries (see page 7).
SOLUTION 2: Make sure you are aiming the DIRECTV
®
Universal Remote Control at your home entertainment
component and that you are within 15 feet of the
component you are trying to control.
PROBLEM: The DIRECTV Universal Remote Control does
not control component or commands are not recognized
properly.
SOLUTION: Try all listed codes for the device brand being
set up. Make sure all components can be operated with an
infrared remote control.
PROBLEM: TV/VCR combo does not respond properly.
SOLUTION: Use the VCR codes for your brand. Some combo
units may require both a TV code and a VCR code for full
operation (see page 8).
PROBLEM: CHAN
S, CHANT, and PREV do not work for
your RCA TV.
SOLUTION: Due to RCA design for certain models (1983-
1987), only the original remote control will operate these
functions.
PROBLEM: Changing channels does not work properly.
SOLUTION: If original remote control required pressing
ENTER to change channels, press ENTER on the DIRECTV
Universal remote control after entering a channel number.
PROBLEM: Remote control does not turn on Sony or Sharp
TV/VCR Combo.
SOLUTION: For power on, these products require setting up
TV codes on the remote control. For Sony, use TV code
10000 and VCR code 20032. For Sharp, use TV code 10093
and VCR code 20048. (See “Controlling Other
Components” on page 9.)
14
DIRECTV SETUP CODES
Setup Codes for DIRECTV
®
Receivers
Setup Codes for DIRECTV HD Receivers
DIRECTV all models 00001, 00002
Hughes Network Systems (most
models)
00749
Hughes Network Systems
models GAEB0, GAEB0A, GCB0,
GCEB0A, HBH-SA, HAH-SA
01749
GE models GRD33G2A and
GRD33G3A, GRD122GW
00566
Philips models DSX5500 and
DSX5400
00099
Proscan models PRD8630A and
PRD8650B
00566
RCA models DRD102RW,
DRD203RW, DRD301RA,
DRD302RA, DRD303RA,
DRD403RA, DRD703RA,
DRD502RB, DRD 503RB,
DRD505RB, DRD515RB,
DRD523RB, and DRD705RB
00566
DRD440RE, DRD460RE,
DRD480RE,DRD430RG,
DRD431RG, DRD450RG,
DRD451RG,
DRD485RG,DRD486RG,
DRD430RGA, DRD450RGA,
DRD485RGA, DRD435RH,
DRD455RH, and DRD486RH
00392
Samsung model SIR-S60W 01109
Samsung models SIR-S70, SIR-
S75, SIR-S300W, and SIR-
S310W
01108
Sony models (All models except
TiVo and Ultimate TV)
01639
DIRECTV all models 00001, 00002
Hitachi model 61HDX98B 00819
HNS models HIRD-E8, HTL-HD 01750
LG model LSS-3200A,
HTL-HD
01750
Mitsubishi model SR-HD5 01749, 00749
Philips model DSHD800R 01749
Proscan model PSHD105 00392
RCA models DTC-100, DTC-210 00392
Samsung model SIR-TS360 01609
Samsung models SIR-TS160 01276
15
Setup Codes for DIRECTV
®
DVRs
SETUP CODES, OTHER DEVICES
Setup Codes for TVs
Sony models SAT-HD100, 200,
300
01639
Toshiba models DST-3000,
DST-3100, DW65X91
01749, 01285
Zenith models DTV1080, HD-
SAT520
01856
DIRECTV all models 00001, 00002
HNS models SD-DVR80, SD-
DV40, SD-DVR120,
HDVR2, GXCEBOT, GXCEBOTD
01442
Philips models DSR704,
DSR708, DSR6000,
DSR600R, DRS700/17
01142, 01442
RCA models DWD490RE,
DWD496RG
01392
RCA models DVR39, 40, 80, 120 01442
Sony model SAT-T60 00639
Sony model SAT-W60 01640
Samsung models SIR-S4040R,
SIR-S4080R, SIR-S4120R
01442
3M 11616
A-Mark 10003
Abex 10032
Accurian 11803
Action 10873
Admiral 10093, 10463
Advent 10761, 10783, 10815, 10817,
10842, 11933
Adventura 10046
Aiko 10092, 11579
Aiwa 10701
Akai 10812, 10702, 10030, 10098,
10672, 11207, 11675, 11676,
11688, 11689, 11690, 11692,
11693, 11903, 11935
Akura 10264
Alaron 10179, 10183, 10216, 10208,
10208
Albatron 10700, 10843
Alfide 10672
Ambassador 10177
America Action 10180
Ampro 10751
16
Amstrad 10412
Anam 10180, 10004, 10009, 10068
Anam National 10055, 10161
AOC 10030, 10003, 10019, 10052,
10137, 10185, 11365
Apex Digital 10748, 10879, 10765, 10767,
10890, 11217, 11943
Archer 10003
Astar 11531, 11548
Audinac 10180, 10391
Audiovox 10451, 10180, 10092, 10003,
10623, 10710, 10802, 10846,
10875, 11284, 11937, 11951,
11952
Aventura 10171
Axion 11937
Bang & Olufsen 11620
Barco 10556
Baysonic 10180
Baur 10010, 10535
Belcor 10019
Bell & Howell 10154, 10016
BenQ 11032, 11212, 11315
Blue Sky 10556, 11254
Blaupunkt 10535
Boigle 11696
Boxlight 10752
BPL 10208
Bradford 10180
Brillian 11007, 11255, 11257, 11258
Brockwood 10019
Broksonic 10236, 10463, 10003, 10642,
11911, 11929, 11935, 11938
Byd:sign 11309, 11311
Cadia 11283
Candle 10030, 10046, 10056, 10186
Carnivale 10030
Carver 10054, 10170
Casio 11205
CCE 10037, 10217, 10329
Celebrity 10000
Celera 10765
Champion 11362
Changhong 10765
Cinego 11986
Cineral 10451, 10092
17
Citizen 10060, 10030, 10092, 10039,
10046, 10056, 10186, 10280,
11928, 11935
Clairtone 10185
Clarion 10180
Commercial Solutions 11447, 10047
Concerto 10056
Contec 10180, 10157, 10158, 10185
Craig 10180, 10161
Crosley 10054
Crown 10180, 10039, 10672, 11446
Crown Mustang 10672
Curtis Mathes 10047, 10054, 10154, 10451,
10093, 10060, 10702, 10030,
10145, 10166, 11919, 11347,
11147, 10747, 10466, 10056,
10039, 10016
CXC 10180
CyberHome 10794
Cytron 11326
Daewoo 10451, 10092, 11661, 10019,
10039, 10066, 10067, 10091,
10623, 10661, 10672, 11928
Daytron 10019
De Graaf 10208
Dell 11080, 11178, 11264, 11403
Delta 11369
Denon 10145, 10511
Denstar 10628
Diamond Vision 11996, 11997
Digital Projection Inc. 11482
Dumont 10017, 10019, 10070
Durabrand 10463, 10180, 10178, 10171,
11034, 10003
Dwin 10720, 10774
Dynatech 10049
Ectec 10391
Electroband 10000, 10185
Electrograph 11623, 11755
Electrohome 10463, 10381, 10389, 10409
Elektra 10017, 11661
Emerson 10154, 10236, 10463, 10180,
10178, 10171, 11963, 11944,
11929, 11928, 11911, 11394,
10623, 10282, 10280, 10270,
10185, 10183, 10182, 10181,
10179, 10177, 10158, 10039,
10038, 10019
Emprex 11422, 11546
18
Envision 10030, 10813, 11365
Epson 10833, 10840, 11122, 11290
Erres 10012
ESA 10812, 10171, 11944, 11963
Ferguson 10005
Fidelity 10082
Finlandia 10208
Finlux 10070, 10105
Fisher 10154, 10159, 10208
FlexVision 10710
Frontech 10264
Fujitsu 10179, 10186, 10683, 10809,
10853
Funai 10180, 10171, 10179, 11271,
11904, 11963
Futuretech 10180, 10264
Gateway 11001, 11002, 11003, 11004,
11755, 11756
GE 11447, 10047, 10051, 10451,
10178, 11922, 11919, 11917,
11347, 10747, 10282, 10279,
10251, 10174, 10138, 10135,
10055, 10029, 10027, 10021
Gibralter 10017, 10030, 10019
Go Video 10886
GoldStar 10178, 10030, 10001, 10002,
10019, 10032, 10106, 10409,
11926
Goodmans 10360
Gradiente 10053, 10056, 10170, 10392,
11804
Granada 10208, 10339
Grundig 10037, 10195, 10672, 10070,
10535
Grunpy 10180, 10179
H & B 11366
Haier 11034, 10768
Hallmark 10178
Hannspree 11348, 11351, 11352
Hantarex 11338
HCM 10412
Harley Davidson 10043, 10179, 11904
Harman/Kardon 10054, 10078
Harvard 10180, 10068
Havermy 10093
Helios 10865
Hello Kitty 10451
19
Hewlett Packard 11088, 11089, 11101, 11494,
11502, 11642
Himitsu 10180, 10628, 10779
Hisense 10748
Hitachi 11145, 10145, 11960, 11904,
11445, 11345, 11045, 10797,
10583, 10577, 10413, 10409,
10279, 10227, 10173, 10151,
10097, 10095, 10056, 10038,
10032, 10016, 10105
HP 11088, 11089, 11101, 11494,
11502, 11642
Humax 11501
Hyundai 10849, 11219, 11294
Hypson 10264
ICE 10264
Intervision 10264
iLo 11286, 11603, 11684, 11990
Infinity 10054
InFocus 10752, 11164, 11430, 11516
Initial 11603, 11990
Innova 10037
Insignia 10171, 11204, 11326, 11517,
11564, 11641, 11963, 12002
Inteq 10017
IRT 10451, 11661, 10628, 10698
IX 10877
Janeil 10046
JBL 10054
JCB 10000
Jensen 10761, 10050, 10815, 10817,
11299, 11933
JVC 10463, 10053, 10036, 10069,
10160, 10169, 10182, 10731,
11253, 11302, 11923, 10094
Kamp 10216
Kawasho 10158, 10216, 10308
Kaypani 10052
KDS 11498
KEC 10180
Ken Brown 11321
Kenwood 10030, 10019
Kioto 10054, 10706, 10556, 10785
KLH 10765, 10767, 11962
Kloss 10024, 10046, 10078
KMC 10106
Konka 10628, 10632, 10638, 10703,
10707, 11939, 11940
20
Kost 11262, 11483
Kreisen 10876
KTV 10180, 10030, 10039, 10183,
10185, 10217, 10280
Leyco 10264
Local India TV 10208
LG 11265, 10178, 10030, 10056,
10442, 10700, 10823, 10829,
10856, 11178, 11325, 11423,
11758, 11993
Lloyd's 11904
Loewe 10136, 10512
Logik 10016
Luxman 10056
LXI 10047, 10054, 10154, 10156,
10178, 10148, 10747
M & S 10054
MAG 11498
Magnasonic 11928
Magnavox 11454, 10054, 10030, 10706,
11990, 11963, 11944, 11931,
11904, 11525, 11365, 11254,
11198, 10802, 10386, 10230,
10187, 10186, 10179, 10096,
10036, 10028, 10024, 10020
M Electronic 10105
Manesth 10264
Matsui 10208
Mediator 10012
Metz 10535
Minerva 10070, 10535
Minoka 10412
Mitsubishi 10535
Majestic 10015, 10016
Marantz 10054, 10030, 10037, 10444,
10704, 10854, 10855, 11154,
11398
Matsushita 10250, 10650
Maxent 10762, 11211, 11755, 11757
Megapower 10700
Megatron 10178, 10145, 10003
MEI 10185
Memorex 10154, 10463, 10150, 10178,
10016, 10106, 10179, 10877,
11911, 11926
Mercury 10001
MGA 10150, 10178, 10030, 10019,
10155
Micro 11436
/