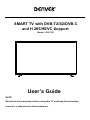
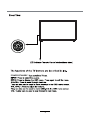
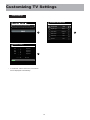
Denver LDS-7511 is a smart TV with DVB-T2/S2/DVB-C support, allowing you to enjoy digital terrestrial, satellite, and cable TV channels. It features an H.265/HEVC decoder for high-quality video streaming, and a variety of connectivity options including HDMI, USB, and VGA ports, enabling you to connect various external devices such as DVD players, gaming consoles, and computers.
Denver LDS-7511 is a smart TV with DVB-T2/S2/DVB-C support, allowing you to enjoy digital terrestrial, satellite, and cable TV channels. It features an H.265/HEVC decoder for high-quality video streaming, and a variety of connectivity options including HDMI, USB, and VGA ports, enabling you to connect various external devices such as DVD players, gaming consoles, and computers.


-
 1
1
-
 2
2
-
 3
3
-
 4
4
-
 5
5
-
 6
6
-
 7
7
-
 8
8
-
 9
9
-
 10
10
-
 11
11
-
 12
12
-
 13
13
-
 14
14
-
 15
15
-
 16
16
-
 17
17
-
 18
18
-
 19
19
-
 20
20
-
 21
21
-
 22
22
-
 23
23
-
 24
24
-
 25
25
-
 26
26
-
 27
27


Denver LDS-7511 is a smart TV with DVB-T2/S2/DVB-C support, allowing you to enjoy digital terrestrial, satellite, and cable TV channels. It features an H.265/HEVC decoder for high-quality video streaming, and a variety of connectivity options including HDMI, USB, and VGA ports, enabling you to connect various external devices such as DVD players, gaming consoles, and computers.
Ask a question and I''ll find the answer in the document
Finding information in a document is now easier with AI
Related papers
-
Denver LDS-3272 User manual
-
-
Denver LDS-4368 UK User manual
-
-
-
-
Denver LDS-5071 User manual
-
Denver TCP-39WHITE User manual
-
Denver LDS-5575 User manual
-
Denver LDS-4075 User manual
