Page is loading ...

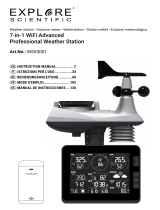
Weather station
7-in-1 Wifi Advanced Professional Weather Station
Art. No. WSX3001
EN To create an AWEKAS weather network account

CREATE AWEKAS ACCOUNT AND SET UP WI-FI CONNECTION
A Register your weather station
1. In an Internet browser of your choice, enter the address https://join.awekas.at to open the registration page.
Fill in all the required information in the form displayed. The fields marked in red are mandatory fields and must be
filled in.
Position the red marker on the map at the location of your weather station. The geographical position is displayed
above.
Make a note of the following information - you will need this when setting up your BRESSER weather station
• Selected user name
• Selected password
• Geographical latitude in decimal degrees (e.g. 48.261
• Longitude in decimal degrees (e.g. 14.3199

Please select the weather station type: Explore Scientific 7-in-1 WIFI professional weather station
Complete the information with the number of sensors used.
Complete the information by accepting the general conditions and clicking on "Save".
Note:
The Save button will only be activated when all mandatory fields marked in red are filled in.
2. You will now receive a confirmation e-mail to the e-mail address you entered to check the registration.
Click on the link below " or use the following link" to complete the registration and activate the account.
B Setup of the base station for the transmission of weather data to awekas.at
1. At first start-up or by pressing the WIFI / SENSOR button for 6 seconds, the station switches to AP mode. In this
mode the base station is ready for WIFI setup. (AP flashes in display)

2.
The station now creates its own WIFI network to which you can connect to with your smartphone or
computer. Search and connect to the SSID of the WIFI station (example: PWS-XXXXXX)
3. After connecting, open the Internet browser and enter http://192.168.1.1 in the URL field. Press Enter to
access the base station setup interface.
4. Fill in the connection information for the WIFI connection.
Select setup UI display language
Select router's security type (usually WPA2)
Select router (SSID) for the connection - manually enter the
SSID if not in the list
Enter your WIFI password here
In the URL field please enter: http://ws.awekas.at
Enter your AWEKAS user name from point A1 here
Enter your AWEKAS password from point A1 here

5.
The message "Setup completed" appears
6. After a moment the station should exit the access point mode and the flashing AP in the display will disappear.
Now the WIFI symbol flashes in the display.
As soon as the flashing is finished, the station is connected to the WIFI and will soon transmit the weather data to
the AWEKAS servers. The time is set automatically.
Note:
• Depending on the web browser, the layout of the setup interface differs slightly.
Select the time zone here. (+1 for Central Europe)
Enter your geographical latitude from point A1
Central Europe = North
Enter here your geographical longitude from point A1
Central Europe = East
Select here N for Europe or USA. For Australia S
Click on Set to save all data

C. Setting the air pressure
After commissioning, the relative air pressure must still be adjusted to your altitude. The air pressure is always
indicated reduced to sea level. Therefore a correction value must be set.
1. Open your instrument page on AWEKAS. You will find this address in
the welcome email you received after
registration.(https://www.awekas.at/de/instrument.php?id=....
)
2. Click on the link "to compare with neighboring stations" at the bottom
of the web page.
3. Select the air pressure parameter for the test and note the air pressure difference. (here 3.6hPa)
4.
Change to your AWEKAS user settings by selecting the menu item "My AWEKAS Change user data" from the
navigation
5. In the user settings you can now set a correction value for air pressure in the "Weather Station" tab. (in case of a
negative difference (-3.6) set a positive correction value (3.6))
6. Click on "Save" on the web page.

7. (optional) Correcting the console:
a Carry out points B1 -3 (Setting up the base station for transmitting weather data to awekas.at) again
b
On the setup page, click "Advanced setting"
c
You can now enter a correction value for the console under "Relative pressure compensation
d Afterwards please save the information by clicking on "Set"
WIFI requirements:
Supported devices
Supported devices: Smart devices with built-in WIFI AP (Access Point)
mode function, notebooks or PCs.
WIFI standard
802.11 b / g / n, supports AP mode
Web browser:
Internet browser that support HTML 5
Router requirements:
WIFI standard
802.11 b/g/n
Supported router security type
WEP, WPA, WPA2, open (for routers without password)
RETRIEVE LIVE WEATHER DATA
To view the live data from your BRESSER 6-in-1 weather station in a web browser, please visit
https://my.awekas.at and enter
Your AWEKAS user name,
Your AWEKAS password and
the answer to the security question.
You can activate the "Autologin" function to
prevent the user and password query in the
future.
After clicking on "Login" you will get to your
AWEKAS instrument page.
The instrument page is the central information platform for your weather station. From this page you can also access
all other pages that are automatically created for you.

You can also save the instrument page as a bookmark in your browser to
be able to access this page directly in the future.
At the bottom of the instrument page you will find links to detailed
information about your station and to compare your values with
neighbouring stations.
This is often very helpful to adjust the exact relative air pressure.
The instructions for adjusting the air pressure can be found in the main
manual of your BRESSER weather station.
You have a wide range of options to customize your instrument display or
to export or edit your data. Please use the
instructions in the AWEKAS Forum. Please
note that the AWEKAS Forum requires an
extra registration to write posts.
AWEKAS STATIONSWEB
The AWEKAS
Stationsweb offers all AWEKAS members the possibility
to easily access their own weather website on the
internet. As soon as the weather station sends data to
AWEKAS, the station web is automatically ready for
use and set up for you.
The website is equipped with a weather forecast,
picture gallery, statistics, graphics and much more.
Weather alerts, reports and e-mail notifications can be
defined.
There is also the possibility to use your own internet
domain or to integrate the station web into your own,
already existing website.
The page can be easily customized via your web
browser without any programming knowledge.
The station web is the easiest way to present weather
data of your BRESSER weather station professionally on
the internet.
The easiest way to access your AWEKAS station web is via the navigation bar on AWEKAS, under the menu item "My
AWEKAS".
The station web is activated for 1 month free of charge for each new user upon registration.
/


