KitchenAid KOTSP 60600 User manual

Category
Kitchen & houseware accessories
Type
User manual

This manual is also suitable for

Instructions for use
SAFETY INSTRUCTIONS 4
SAFEGUARDING THE ENVIRONMENT 7
ECO DESIGN DECLARATION 7
GENERAL RECOMMENDATIONS 8
Troubleshooting guide 8
After-Sales Service 9
Cleaning 9
Maintenance 10
Instructions for using the oven 12
Functions description table 25
Cooking table 27
Table of tested recipes 31
Recommended use and tips 32
4
SAFETY INSTRUCTIONS
IMPORTANT: TO BE READ AND
OBSERVED
Before using the appliance, read
these safety instructions.
Keep them for future reference.
These instructions and the appliance
itself provide important safety
warnings, to be observed at all times.
The manufacturer declines any
liability resulting from failure to
observe these safety instructions,
inappropriate use of the appliance or
incorrect setting of controls.
SAFETY WARNINGS
Infants (0-3 years) and young children
(3-8 years) should be kept away from
the appliance unless continuously
supervised.
Children aged 8 years and over,
and persons with reduced physical,
sensory or mental capabilities or
lack of experience and knowledge,
may use this appliance only if
they are supervised or have been
given instructions on safe use and
understand the hazards involved.
Children must not play with the
appliance. Cleaning and user
maintenance must not be carried out
by children without supervision.
WARNING: The appliance and
its accessible parts become hot
during use: children under 8 years
of age must be kept away, unless
continuously supervised.
WARNING: Avoid touching heating
elements or interior surface - risk of
burns.
Never leave the appliance
unattended during food drying.
If the appliance is suitable for probe
usage, only use a temperature probe
recommended for this oven.
Do not touch the oven during the
pyrolysis cycle. Keep children away
from the oven during the pyrolysis
cycle (until the room has been
completely ventilated).
Keep clothes or other ammable
materials away from the appliance,
until all the components have cooled
down completely.
Remove any excess spillage or objects
from the oven cavity before starting
the cleaning cycle.
Overheated oils and fats catch re
easily. Always be vigilant when
cooking foods rich in fat or oil, or
when adding alcohol (e.g. rum,
cognac, wine) - risk of re.
Use oven gloves to remove pans and
accessories, taking care not to touch
the heating elements.
At the end of cooking, exercise
caution when opening the door,
by letting the hot air or steam exit
gradually before accessing the
appliance.
Do not obstruct the hot air vents at
the front of the oven.
During and after the pyrolysis cycle,
animals must be kept away from the
area where the appliance is located.
PERMITTED USE
CAUTION: The appliance is not
intended to be operated by means of
an external timer or separate remote-
controlled system.
These instructions are also available on the website: docs.kitchenaid.eu
5
This appliance is solely for domestic,
not professional use.
Do not use the appliance outdoors.
Do not store explosive or ammable
substances, such as aerosol cans, and
do not place or use gasoline or other
ammable materials in or near the
appliance: a re may break out if the
appliance is inadvertently switched
on.
No other use is permitted (e.g.
heating rooms).
INSTALLATION
The appliance must be handled and
installed by two or more persons.
Use protective gloves to unpack and
install the appliance.
Installation and repairs must
be carried out by a qualied
technician, in compliance with the
manufacturers instructions and local
safety regulations. Do not repair or
replace any part of the appliance
unless specically stated in the user
manual.
Children should not perform
installation operations. Keep children
away during installation. Keep the
packaging materials (plastic bags,
polystyrene parts, etc.) out of the
reach of children, during and after the
installation.
After unpacking the appliance, make
sure that it has not been damaged
in transit. In the event of problems,
contact the dealer or your nearest
After-sales Service.
The appliance must be disconnected
from the power supply before any
installation operation.
During installation, make sure the
appliance does not damage the
power cable.
Only activate the appliance when the
installation has been completed.
After installation, the bottom of
the appliance must no longer be
accessible.
Carry out all cabinet cutting works
before tting the appliance in the
furniture and carefully remove all
wood chips and sawdust.
Do not obstruct the minimum gap
between the worktop and the upper
edge of the oven.
Only remove the oven from its
polystyrene foam base at the time of
installation.
Do not install the appliance behind a
decorative door - Risk of re.
ELECTRICAL WARNINGS
For installation to comply with
current safety regulations, an omni-
polar switch with minimum contact
gap of 3 mm is required and the
appliance must be earthed.
If the power cable is damaged,
replace with an identical one. The
power cable must only be replaced by
a qualied technician in compliance
with the manufacturer's instructions
and current safety regulations.
Contact an authorised After-Sales
Service.
It must be possible to disconnect the
appliance from the power supply by
unplugging it if the plug is accessible,
or by means of an accessible multi-
pole switch installed upstream of the
socket in conformity with national
electrical safety standards.
The rating plate is on the front edge
of the oven (visible when the door is
open).
In case of replacement of the power
cable, contact an authorised service
6
centre.
If the tted plug is not suitable for
your socket outlet, contact a qualied
technician.
The power cable must be long
enough to connect the appliance,
once tted in its housing, to the main
power supply. Do not pull the power
supply cable.
Do not use extension leads, multiple
sockets or adapters.
Do not operate this appliance if it has
a damaged mains cord or plug, if it is
not working properly, or if it has been
damaged or dropped. Keep the cord
away from hot surfaces.
The electrical components must
not be accessible to the user after
installation.
Do not touch the appliance with
any wet part of the body and do not
operate it when barefoot.
CLEANING AND MAINTENANCE
Never use steam cleaning equipment.
WARNING: Ensure that the appliance
is switched o before replacing
the lamp to avoid the possibility of
electric shock.
Do not use harsh abrasive cleaners
or sharp metal scrapers to clean the
appliance door glass, since these can
scratch the surface, which may result
in shattering of the glass.
Remove all accessories before
running the pyrolysis function (also
the lateral grids).
Wear protective gloves for cleaning
and maintenance.
The appliance must be disconnected
from the power supply before any
maintenance operation.
Ensure the appliance has cooled
down before carrying out any
cleaning or maintenance operation.
If the oven is installed below a hob,
make sure that all burners or electric
hotplates are switched o during the
self-cleaning (pyrolysis) function.
SAFEGUARDING THE
ENVIRONMENT
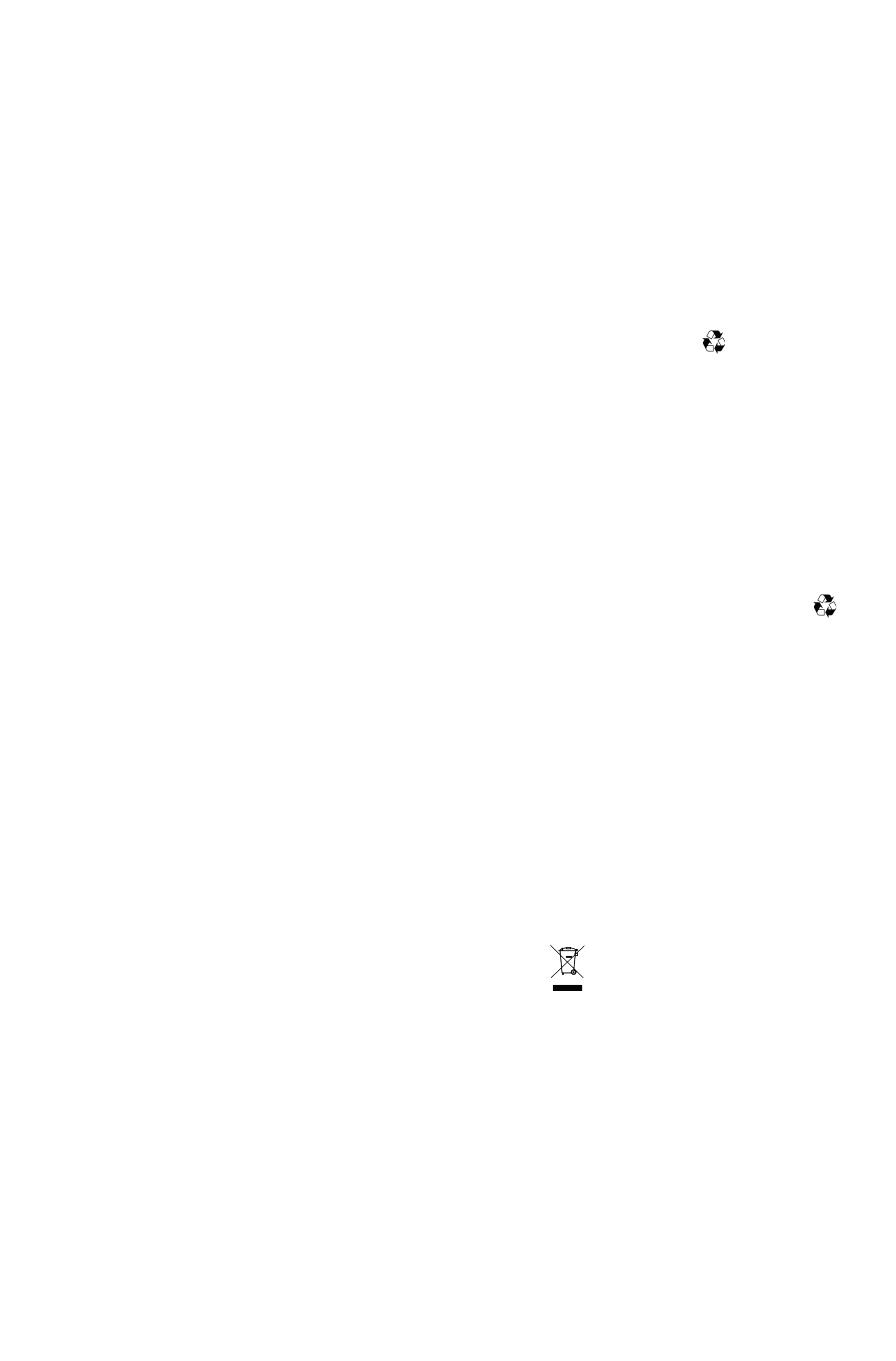
DISPOSAL OF PACKAGING MATERIALS
The packaging material is 100% recyclable and is
marked with the recycle symbol
. The various
parts of the packaging must therefore be disposed
of responsibly and in full compliance with local
authority regulations governing waste disposal.
SCRAPPING OF HOUSEHOLD
APPLIANCES
When scrapping the appliance, make it unusable
by cutting o the power cable and removing the
doors and shelves (if present) so that children
cannot easily climb inside and become trapped.
This appliance is manufactured with recyclable
or reusable materials. Dispose of it in accordance
with local waste disposal regulations.
For further information on the treatment, recovery
and recycling of household electrical appliances,
contact your competent local authority, the
collection service for household waste or the store
where you purchased the appliance.
This appliance is marked in compliance with
European Directive 2012/19/EU, Waste Electrical
and Electronic Equipment (WEEE).
By ensuring this product is disposed of correctly,
you will help prevent potential negative
consequences for the environment and human
health, which could otherwise be caused by
inappropriate waste handling of this product.
The symbol
on the product or on the
accompanying documentation indicates that it
should not be treated as domestic waste but must
be taken to an appropriate collection centre for
the recycling of electrical and electronic
equipment.
ENERGY-SAVING TIPS
Only preheat the oven if specied in the cooking
table or your recipe.
Use dark-lacquered or enamelled baking moulds
as they absorb heat far better.
1. Energy-saving cycle (PYRO EXPRESS/ECO):
which consumes approximately 25% less energy
7
than the standard cycle. Select it at regular
intervals (after cooking meat on 2 or 3 consecutive
occasions).
2. Standard cycle (PYRO): which is suitable for
cleaning a very dirty oven.
ECO DESIGN DECLARATION
This Appliance meets the eco design requirements
of European regulations no. 65/2014, and no.
66/2014 in conformity with European standard EN
60350-1.
8
The oven is programmed to operate with power
absorption above 2.5 kW (indicated by “HIGH” in
the settings, as shown in the gure below) which
is compatible with a domestic power supply
above 3 kW. If the household has a lower power
supply, the setting must be lowered (“LOW”
in the settings). The table below details the
recommended electrical power settings for the
various countries.
COUNTRY ELECTRICAL POWER
SETTING
GERMANY HIGH
SPAIN LOW
FINLAND HIGH
FRANCE HIGH
ITALY LOW
NETHERLANDS HIGH
NORWAY HIGH
SWEDEN HIGH
U.K. LOW
BELGIUM HIGH
1. To lower the power absorption setting, turn
the “Functions” knob to “SETTINGS” and select.
2. Conrm with button
3. Select "power" on the menu
4. Conrm with button
5. Select "LOW"
6. Press button ; a message appears on the
display conrming your selection.
Settings
Cleaning
Traditional
Appliance and display settings
Power
Language
Time
Appliance and display settings
High
Low
Over 2.5 kW
Before use:
Remove any protective pieces of cardboard,
protective lm and adhesive labels from the
oven and the accessories.
Remove the accessories from the oven and
heat it at 200°C for about an hour to eliminate
the smell and fumes from the protective
grease and insulating materials.
During use:
Do not place heavy objects on the door as
they could damage it.
Do not cling to the door or hang anything
from the handle.
Do not cover the inside of the oven with
aluminium foil.
Do not pour water into the inside of a hot
oven; this could damage the enamel coating.
Do not drag pots or pans across the bottom
of the oven as this could damage the enamel
coating.
Make sure that the electrical cables of other
appliances do not touch hot parts of the oven
or become trapped in the door.
Do not expose the oven to atmospheric
agents.
Troubleshooting guide
The oven does not work:
Check the mains electrical power and ascertain whether the oven is connected to the electrical
supply.
Switch the oven o and then on again to see whether this eliminates the fault.
The electronic programmer does not work:
If the display shows the letter “ F” followed by a number, contact your nearest After-Sales Service.
In this case, specify the number after the letter “ F”.
GENERAL RECOMMENDATIONS
9
After-Sales Service
Before contacting the After-Sales Service:
See if you can solve the problem yourself
with the help of the suggestions given in the
Troubleshooting guide.
Switch the appliance o and then on again
it to see whether the problem has been
eliminated.
If the fault persists after the above checks,
contact the nearest After-Sales Service.
Always specify:
a brief description of the fault;
the type and exact model of the oven;
the service number (number after the word
”Service” on the rating plate), located on the
right-hand edge of the oven cavity (visible
when the oven door is open). The service
number is also indicated on the guarantee
booklet;
your full address;
your telephone number.
If any repairs are required, contact an authorised
After-Sales Service (to guarantee use of original
spare parts and correct repair).
Cleaning
WARNING
Do not use steam cleaners.
Do not clean the oven until it is cool to the
touch.
Disconnect the appliance from the mains
power supply.
Oven exterior
IMPORTANT: do not use corrosive or abrasive
detergents. If any of these products comes into
contact with the appliance, clean immediately
with a damp microbre cloth.
Clean the surfaces with a damp microbre
cloth. If it is very dirty, add a few drops of
washing up detergent to the water. Finish o
with a dry cloth.
Oven interior
IMPORTANT: do not use abrasive sponges or
metallic scrapers or scourers. Over time, these
can ruin enamelled surfaces and the oven door
glass.
After every use, allow the oven to cool and
then clean it, preferably while it is still warm
in order to remove built-up dirt and stains
caused by food residues (e.g. food with a high
sugar content).
Do not use corrosive or abrasive detergents.
Clean the door glass with a suitable liquid
detergent. The oven door can be removed to
facilitate cleaning (see MAINTENANCE).
Observe the following recommendations
when cleaning the round stainless steel
cover of the fan (Twelix Disc):
use a soft cloth (microbre is best)
dampened with water or glass detergent.
do not use absorbent kitchen paper, which
can leave traces of paper and streaks on
the disc.
N.B: during prolonged cooking of foods with
a high water content (e.g. pizza, vegetables,
etc.) condensation may form on the inside of
the door and around the seal. When the oven is
cold, dry the inside of the door with a cloth or
sponge.
Accessories:
Soak the accessories in water with washing
up detergent immediately after use, handling
them with oven gloves if still hot.
Food residues can be easily removed using a
washing-up brush or sponge.
Cleaning cycle of ovens with pyrolysis function
(if present):
WARNING
Do not touch the oven during the pyrolysis
cycle.
Keep children away from the oven during
the pyrolysis cycle.
Keep animals away during and after the
pyrolysis cycle.
10
Cleaning
This function burns o spatters produced inside
the oven during cooking at a temperature of
approx. 500°C. At this high temperature, the
deposits turn into a light ash which can be easily
wiped away with a damp cloth, once the oven is
cool.
Do not select the pyrolysis function after every
use, only when the oven is very dirty or produces
smoke or fumes while preheating or cooking.
If the oven is installed below a hob, make
sure that all burners or electric hotplates
are switched o during the self-cleaning
(pyrolysis) function.
Remove all accessories before running the
pyrolysis function (also the lateral grids).
Before selecting the pyrolysis function, use
a damp sponge to remove any marks on the
round stainless steel cover of the fan (Twelix
Disc) and from the inside glass of the oven
door.
The appliance is equipped with 2 pyrolysis
functions:
1. Energy-saving cycle (PYRO EXPRESS/ECO):
which consumes approximately 25% less
energy than the standard cycle. Select it at
regular intervals (after cooking meat on 2 or 3
consecutive occasions).
2. Standard cycle (PYRO): which is suitable for
cleaning a very dirty oven.
In all cases, after a certain number of uses
and depending on how dirty the oven is, a
message on the oven display advises you
to run a self-cleaning cycle.
N.B: during the pyrolysis function, the oven
door will not open; it will remain locked until
the temperature inside the oven has returned
to an acceptably safe level.
Use protective gloves.
Ensure that the oven is cold before carrying out the following
operations.
Disconnect the appliance from the mains power supply.
WARNING
REMOVING THE DOOR
To remove the door:
1. Open the door fully.
2. Lift the catches and push them forwards as far as they will go (g. 1).
3. Close the door as far as it will go (A), lift it up (B) and turn it (C) until it is
released (D) (g. 2).
To ret the door:
1. Insert the hinges in their seats.
2. Open the door fully.
3. Lower the two catches.
4. Close the door.
Fig. 1
Fig. 2
Maintenance
11
Maintenance
REMOVING THE SIDE GRILLES
The side accessory-holder grilles are equipped with two xing screws
(g. 3) for optimum stability.
1. Remove the screws and corresponding plates on the right and
left with the aid of a coin or tool (g. 4).
2. To remove the grilles, lift them up (1) and turn them (2) as shown
in g.5.
REPLACING THE LAMP
To replace the rear lamp (if present):
1. Disconnect the oven from the mains power supply.
2. Unscrew the lamp cover, replace the lamp (see note for lamp
type) and screw the lamp cover back on.
3. Reconnect the oven to the power supply.
N.B:
Only use 25-40 W/230 V type E-14, T300°C incandescent lamps, or
20-40 W/230 V type G9, T300°C halogen lamps.
The lamp used in the appliance is specically designed for
electrical appliances and is not suitable for household room
illumination (Commission Regulation (EC) No 244/2009).
Lamps are available from our After-Sales Service.
IMPORTANT:
If using halogen lamps, do not handle with bare hands as
ngerprints can damage them.
Do not use the oven until the lamp cover has been
repositioned.
(Fig. 3)
(Fig. 4)
(Fig. 5)
12
Instructions for using the oven
FOR ELECTRICAL CONNECTION, SEE THE PARAGRAPH ON INSTALLATION
1. Control panel
2. Upper heating element/grill
3. Cooling fan (not visible)
4. Rating plate (not to be removed)
5. Lamps
6. Circular heating element (not visible)
7. Fan
8. Rotisserie (if supplied)
9. Bottom heating element (not visible)
10. Door
11. Position of shelves (the number of shelves is indicated on the front of the oven)
12. Rear wall
13. Meat probe connection
14. Twelix disc
N.B:
During cooking, the cooling fan may switch on at intervals in order to minimise energy consumption.
At the end of cooking, after the oven has been switched o, the cooling fan may continue to run for
a while.
When the oven door is opened during cooking, the heating elements switch o.
1
12
5
2
4
13
8
9
11
10
7
6
3
14
13
Instructions for using the oven
ACCESSORIES SUPPLIED
A. WIRE SHELF: the wire shelf can be used to grill food or as a support for
pans, cake tins and other oven-proof cookware.
(Fig. A)
B. DRIP TRAY: the drip tray is designed to be positioned under the wire
shelf in order to collect fat or as an oven tray for cooking meat, sh,
vegetables, focaccia, etc.
(Fig. B)
C. BAKING TRAY: for making bread and pastry products, but also roasts, sh
en papillotte, etc.
(Fig. C)
D. MEAT PROBE: for measuring the core temperature of food during
cooking.
(Fig. D)
E. DRYING TRAY: the drying tray is designed for drying fruit, mushrooms or
vegetables.
(Fig. E)
F. TURNSPIT: for uniform roasting of large pieces of meat and poultry.
(Fig.F)
G. SLIDING SHELVES: for easier handling of shelves and trays.
(Fig.G)
The number of accessories may vary according to the model purchased.
ACCESSORIES NOT SUPPLIED
Other accessories can be purchased separately from the After-Sales Service.
14
Instructions for using the oven
INSERTING WIRE SHELVES AND OTHER ACCESSORIES IN THE OVEN
1. Insert the wire shelf horizontally, with the raised part A upwards (Fig. 1).
2. The other accessories, like the drip tray and baking tray, are inserted in the same way as the wire shelf
(Fig. 2).
A
Fig. 1 Fig. 2
1. FUNCTIONS KNOB: On/o and function selector knob
2. BROWSE KNOB: for browsing the menu and adjusting pre-set values
3. BUTTON
: to return to the previous screen
4. BUTTON
: to select and conrm settings
CONTROL PANEL DESCRIPTION
DISPLAY
1 3 4 2
15
Instructions for using the oven
LIST OF FUNCTIONS
Turn the “Functions” knob to any position and the oven switches on: the display shows the functions or
the associated submenus.
A. Symbol for highlighted function
B. The highlighted function can be selected by pressing
C. Description of highlighted function
D. Other available and selectable functions
FUNCTION DETAILS
After selecting the desired function, the display will show further options and related details.
To move between the dierent zones, use the “Browse knob: the cursor moves to the adjustable values,
following the order described above.
Press the
button to select the value, change it by turning the “Browse” knob and conrm with the
button.
FIRST USE – SELECTING A LANGUAGE AND SETTING THE TIME
For correct use of the oven, you will have to select the desired language and set the correct time when it
is switched on for the rst time.
Proceed as follows:
1. Turn the “Functions” knob to any position: the display will show the list of the rst three available
languages.
2. Turn the “Browse knob to scroll through the list.
3. When the desired language is highlighted, press
to select it. After language selection, the display
will ash 12:00.
4. Set the time by turning the “Browse knob.
5. Conrm your setting by pressing
.
Traditional
Professional
Special functions
Traditional manual cooking functions
B
C
A
D
Start
Grill
Medium
GRILL POWER
NO
PREHEAT.
--:--
COOK TIME
--:--
END TIME
Zone 3
Zone 4
Zone 1
Zone 2
Zone 5
CURSOR
16
Instructions for using the oven
SELECTING COOKING FUNCTIONS
Grill
--:--
TEMPO COTTURA
Media
POTENZA GRILL
NO
PRERISC.
--:--
TEMPO FINE
Avvio
Grill
--:--
TEMPO COTTURA
Media
POTENZA GRILL
NO
PRERISC.
--:--
TEMPO FINE
Avvio
1. If the oven is o, turn the "Functions" knob; the display will show the cooking functions or associated
submenus.
N.B: for the list and description of functions, see the table on page 26.
2. Within the sub-menus, browse the various options available by turning the “Browse” knob: the
chosen function is highlighted in white in the centre of the screen. To select it, press
.
3. The cooking settings are shown on the display. If the pre-set values are those desired, turn the
“Browse knob to position the cursor at “Start and then press
; otherwise, proceed as indicated
above to change them.
SETTING THE TEMPERATURE/OUTPUT OF THE GRILL
To change the temperature or output of the grill, proceed as follows:
1. Check that the cursor is positioned next to the temperature value (zone 1); press button
to select
the parameter to be changed: the temperature values ash.
2. Set the desired value by turning the "Browse" knob and press
to conrm.
3. Turn the "Browse" knob to position the cursor
at "Start" and then press
.
4. The display indicates which shelf food should
be placed on. Do as instructed and press
to start cooking. The set temperature can also
be changed during cooking by following the
same procedure.
Start
Conventional
180°C
TEMPERATURE
NO
PREHEAT.
--:--
COOK TIME
--:--
END TIME
Start
Conventional
180°C
TEMPERATURE
NO
PREHEAT.
--:--
COOK TIME
--:--
END TIME
Start
Conventional
200°C
TEMPERATURE
NO
PREHEAT.
--:--
COOK TIME
--:--
END TIME
Start
Conventional
200°C
TEMPERATURE
NO
PREHEAT.
--:--
COOK TIME
--:--
END TIME
17
Instructions for using the oven
PREHEATING THE OVEN
If you do not wish to preheat the oven (for those functions which allow), simply change the oven's
default selection as follows:
1. Turn the “Browse knob to position the cursor
at preheating.
2. Press button
to select the setting: “Yes”
ashes on the display.
3. Change the setting by turning the “Browse”
knob: “No” appears on the display.
4. To conrm your choice, press button
.
FAST PREHEATING
If you wish to preheat the oven quickly before inserting food, proceed as follows:
1. Turn the “Functions” knob to select the fast
preheating function.
2. Conrm by pressing
: the settings are shown on
the display.
3. If the proposed temperature is that desired, turn the
"Browse" knob to position the cursor at "Start", and
then press
. To change the temperature, proceed
as described in previous paragraphs. An acoustic
signal will sound when the oven has reached the
set temperature. At the end of preheating, the oven
automatically selects the conventional function
.
At this point food can be placed in the oven for cooking.
4. If you wish to set a dierent cooking function, turn the “Functions” knob and select the desired
function.
Start
Conventional
200°C
TEMPERATURE
YES
PREHEAT.
--:--
COOK TIME
--:--
END TIME
Start
Conventional
200°C
TEMPERATURE
YES
PREHEAT.
--:--
COOK TIME
--:--
END TIME
Start
Conventional
200°C
TEMPERATURE
NO
PREHEAT.
--:--
COOK TIME
--:--
END TIME
Start
Conventional
200°C
TEMPERATURE
NO
PREHEAT.
--:--
COOK TIME
--:--
END TIME
Start
Press +/- to adjust ...
180°C
TEMPERATURE
18
Instructions for using the oven
SETTING COOKING TIME
This function can be used to cook food for a set length of time, from a minimum of 1 minute to the
maximum time allowed by the selected function, after which the oven switches o automatically.
1. To select the function, turn the “Browse” knob
to position the cursor at cook time.
2. Press button
to select the setting; “00:00”
ashes on the display.
3. Change the value by turning the “Browse
knob to display the desired cooking time.
4. Conrm the selected value by pressing button
.
BROWNING
At the end of cooking, with certain functions, the display indicates the possibility of browning the
surface of the item. This function can only be used when cooking time has been set.
At the end of the cooking time, the display shows
“+/- to prolong,
to brown.
Press button
. The oven starts a 5-minute
browning cycle. This function can only be used
once after cooking.
Start
Conventional
180°C
TEMPERATURE
NO
PREHEAT.
--:--
COOK TIME
--:--
END TIME
Start
Conventional
180°C
TEMPERATURE
NO
PREHEAT.
-00:30
COOK TIME
19:01
END TIME
Start
Conventional
180°C
TEMPERATURE
NO
PREHEAT.
00:01
COOK TIME
19:01
END TIME
Start
Conventional
180°C
TEMPERATURE
NO
PREHEAT.
-00:30
COOK TIME
19:20
END TIME
Cooking nished at 20:00
+/- to prolong,
to brown.
Browning
-00:05
COOK TIME
20:05
END TIME
Browning until 20:05
19
Instructions for using the oven
SETTING END OF COOKING TIME/DELAYED START
The end of cooking time can be set, delaying the
start of cooking by up to a maximum of 23 hours
and 59 minutes. This can only be done once the
cooking time has been set. This setting is only
possible when preheating is not required for
the selected function. After setting the cooking
time, the display shows the end of the cooking
time (for example 19:20).
To delay the end of the cooking time, and thus
also the cooking start time, proceed as follows:
1. Turn the “Browse knob to position the cursor
at the end of cooking time.
2. Press button
to select the setting: the end
of the cooking time ashes.
3. To delay the end of cooking time, turn the
“Browse knob to set the desired value.
4. Conrm the selected value by pressing button
.
5. Turn the “Browse knob to position the cursor
at START and then press
.
6. The display indicates which shelf food should
be placed on. Do as instructed and press
to start cooking. The oven will start cooking
after a period of time calculated so as to nish
cooking at the set time (for example, in the
case of a dish which requires a cooking time
of 20 minutes, if the end of the cooking time
is set to 20.10, the oven will begin cooking at
19.50).
N.B: during the interval before cooking starts,
the oven can in any case be switched on by
turning the “Browse” knob to position the
cursor at “Start” and then pressing button
.
At any time, set values (temperature, grill
setting, cooking time) can be changed as
described in previous paragraphs.
Start
Conventional
180°C
TEMPERATURE
NO
PREHEAT.
-00:30
COOK TIME
19:20
END TIME
Start
Conventional
180°C
TEMPERATURE
NO
PREHEAT.
-00:30
COOK TIME
19:20
END TIME
Start
Conventional
180°C
TEMPERATURE
NO
PREHEAT.
-00:30
COOK TIME
20:10
END TIME
Start
Conventional
180°C
TEMPERATURE
NO
PREHEAT.
-00:30
COOK TIME
20:10
END TIME
Start
Conventional
180°C
TEMPERATURE
NO
PREHEAT.
-00:30
COOK TIME
20:10
END TIME
Start
Conventional
180°C
TEMPERATURE
NO
PREHEAT.
-00:29
COOK TIME
20:10
END TIME
20
Instructions for using the oven
TIMER
This function can be used only with the oven switched o and is useful for monitoring the cooking time
of pasta, for example. The maximum time which can be set is 1 hour 30 minutes.
1. With the oven o, press button
: the
display will show “00:00:00”.
2. Turn the “Browse knob to select the desired
time.
3. Press button
to start the countdown.
When the set time has elapsed, the display
will show “00:00:00” and an acoustic signal
will sound. At this point, the time can be
prolonged, proceeding as described above, or
the timer can be deactivated by pressing the
button (the time of day will be shown on
the display).
PROFESSIONAL FUNCTIONS
Thanks to the professional functions, you can choose from 17 recipes. The oven oers a suitable function
for every type of recipe category and also advises the ideal temperature and shelf for cooking the
dish. For advice on use of these functions, refer to the Recipe Book, which contains a number of recipe
ideas that you can personalise to suit your own taste. The available functions are given below. The
time and temperature for each recipe are indicated on the oven display and/or in the Recipe Book. For
recipes listed in the "Professional Roasting Function", there is the option of using the meat probe (see
paragraph).
Professional bakery function
Traditional bread
Malt bread
Pan pizza
Thin pizza
Savoury pie
Baguette
Professional pastry function
Patè a Choux
Croissant/brioche
Sponge cake
Plum cake
Short pastry
Professional roasting function
Veal - Pork
Roast Beef Rare
Roast Beef Medium
Roast chicken
Roast turkey
Custom (customisable function for cooking meat).
Turn +/- to set the timer, to Start
00 : 00 : 00
(HH) (MM) (SS)
Turn +/- to set the timer, to Start
00 : 30 : 00
(HH) (MM) (SS)
Timer
01 : 09 : 00
  • Page 1 1
  • Page 2 2
  • Page 3 3
  • Page 4 4
  • Page 5 5
  • Page 6 6
  • Page 7 7
  • Page 8 8
  • Page 9 9
  • Page 10 10
  • Page 11 11
  • Page 12 12
  • Page 13 13
  • Page 14 14
  • Page 15 15
  • Page 16 16
  • Page 17 17
  • Page 18 18
  • Page 19 19
  • Page 20 20
  • Page 21 21
  • Page 22 22
  • Page 23 23
  • Page 24 24
  • Page 25 25
  • Page 26 26
  • Page 27 27
  • Page 28 28
  • Page 29 29
  • Page 30 30
  • Page 31 31
  • Page 32 32
  • Page 33 33
  • Page 34 34
  • Page 35 35
  • Page 36 36

KitchenAid KOTSP 60600 User manual

Category
Kitchen & houseware accessories
Type
User manual
This manual is also suitable for

Ask a question and I''ll find the answer in the document

Finding information in a document is now easier with AI